NEC D3 Quick Start Manual

NEC D3 Quick Start Manual

San storage

Advertisement

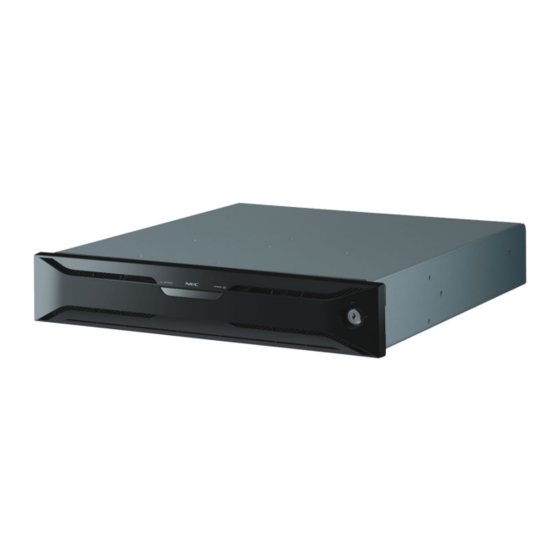
NEC D3/D4 SAN Storage

Quick Start Guide

For the latest information, please see http://support.necam.com/Storage/D-Series/
Please feel free to contact your NEC Corporation of America approved reseller or NEC Corporation of America Technical Support at any phase of
the integration for assistance. NEC Corporation of America Technical Support can be reached by the following methods:
Web: http://support.necam.com
Email: support@necam.com
Phone: +1-877-632-0064 (toll-free)
Support contact information for other regions of the world is available at http://www.nec.com/global/support/contact/index.html
456-01812-001

Advertisement

Table of Contents
loading

Summary of Contents for NEC D3

  • Page 1: Quick Start Guide

    For the latest information, please see http://support.necam.com/Storage/D-Series/ Please feel free to contact your NEC Corporation of America approved reseller or NEC Corporation of America Technical Support at any phase of the integration for assistance. NEC Corporation of America Technical Support can be reached by the following methods: Web: http://support.necam.com...
  • Page 2: Table Of Contents

    Contents   Introduction ................................1   Understanding D-Series Array Management..................... 2   Requirements..............................2   STEP 1: Planning and Preparation ........................3   Preparing For Installation........................... 3   Unpacking the Array ............................3   Hardware Component Features ........................4   Array Front View .............................
  • Page 3: Introduction

    Introduction Thank you for your purchase of the NEC D3-10/D4-30 SAN Storage array. This document provides instructions that are designed to help experienced IT professionals to install and configure the array as quickly as possible. Since this document is a Quick Start Guide, the following assumptions have been made: •...
  • Page 4: Understanding D-Series Array Management

    Model SATA SATA D3 Base Unit 620 W 550 W 2,117 1,878 D4 Base Unit 640 W 590 W 2,185 2,015 Disk Enclosure 430 W 370 W 1,468 1,263 Table 1. Storage unit power requirements NEC D3/D4 Quick Start Guide...
  • Page 5: Step 1: Planning And Preparation

    It is not recommended to lift or carry the unit by holding on to projecting surfaces such as the power supply units or plastic bezel mounts. • Please save all packing materials in case the unit needs to be returned for repairs or shipped to other locations. NEC D3/D4 Quick Start Guide...
  • Page 6: Hardware Component Features

    Active/Fault LED Status Green Steady ON Normal status (Ready) Green Blinking Normal status (Accessing) Green/Orange Alternating Performing RAID rebuild Orange Blinking HDD low power condition Orange Steady ON Abnormal status Table 2. Active/Fault LED Status Conditions NEC D3/D4 Quick Start Guide...
  • Page 7: Array Rear View

    There are two FC Ports standard on each controller. The number of FC ports can be expanded to four or six ports per controller on D3 base units with Host Port Expansion (HPE) options.
  • Page 8 Online/automatic download sequence in progress Synchronized Blinking In download mode Fault condition exists Blinking Waiting for disk enclosure power-on Blinking Disk interface is disabled Powered off Table 5. Controller Ready LED and Fault LED Status Conditions NEC D3/D4 Quick Start Guide...
  • Page 9: Step 2: Array Installation

    The array then slides into the rails from the front and is secured by two screws on each side of the plastic bezel mount, above and below the front rail mounting screws. NEC D3/D4 Quick Start Guide...
  • Page 10: Installing Disk Drives

    IN port on the disk enclosure to the DP0 or DP1 port on the base unit. To connect more than one disk enclosure, connect the DP-IN on the next disk enclosure to DP-OUT on a previously connected disk enclosure as shown in Figure 7 below. NEC D3/D4 Quick Start Guide...
  • Page 11: Array Connection Configurations

    • Either 1 or 2 ports per controller can be connected to hosts. With D3 and HPE option, from 4 to 6 ports can be attached to hosts per controller. Additionally, the array can be used in a LUN masking, multipathing, or zoning switch fabric configuration. While zoning is configured on an FC switch and not covered here*, LUN masking and multipathing are dependent on software installed in the array and application server.
  • Page 12: Ethernet Cable Connections

    However, the array can be managed by connecting just one controller to the network or directly to the management server with a crossover cable if necessary. Ethernet Management Port Maintenance Port Figure 9. Array Controller Management Port NEC D3/D4 Quick Start Guide...
  • Page 13: Power Cable Connections

    When the array is first powered on, it will perform a self-test as indicated by a flashing Service LED. After the array has successfully finished the self-test process, the Power LED should remain lit and the Service LED should turn off. Application servers can be connected to the array after the self-test is completed. NEC D3/D4 Quick Start Guide...
  • Page 14: Power-Off Procedure

    *Note: If the Power LED does not remain lit or if the Service LED does not turn off after the self-test a controller fault may have occurred. For information about identifying and troubleshooting fault conditions, please refer to the D3/D4 Disk Array Unit User Guide available on the Storage Manager CD or contact NEC technical support. Power-Off Procedure To prevent any data loss or corruption, the following process should be followed when an array is to be shut down.
  • Page 15: Step 3: Software Installation

    STEP 3: Software Installation The D3/D4 SAN Storage array comes standard with Storage Manager software that is required to use basic array features. To extend an array’s feature sets, additional software can be installed depending on which features would be best suited for any given environment.
  • Page 16 Java that comes with the installation software. Ensure that Java is installed during this step even if another version of Java has already been installed on this server to avoid any compatibility issues. NEC D3/D4 Quick Start Guide...
  • Page 17 Administrator (L3) – Authorized for any management tasks. To add users, click Add, create the username and password, select the access level, and then click OK. After all users have been created, click Next to continue. NEC D3/D4 Quick Start Guide...
  • Page 18: Application Server Installation

    The iSM Volume List installation (shown below) provides basic host server functionality. The Command Control installation provides advanced features that are necessary when using the advanced software functions of the array. For information about how to install Command Control, please refer to the NEC Storage Manager Manuals section on the Storage Manager CD.
  • Page 19: Ism Volume List Command Installation

    2. Insert the Storage Manager setup CD and run ISMSETUP.EXE from the Autorun prompt or from the <CD Drive>:\StorageManager\Install\Windows\ directory. From the Select Setup Method window, select Setup an application server under Quick Install, and then click Next. 4. From the License Agreement window, select Accept, and then click Next. NEC D3/D4 Quick Start Guide...
  • Page 20: Host Information Collection

    2. Open a command prompt on the application server. 3. At the command prompt, type the following command: iSMcc_hostinfo –export \ServerName Replace “ServerName” with the Windows computer name of the application server where the command is being run as shown below. NEC D3/D4 Quick Start Guide...
  • Page 21 You can then copy the generated file, named after the server name entered in Step 3, from the application server to the management server via a network share or portable storage media for use during the logical disk binding process. NEC D3/D4 Quick Start Guide...
  • Page 22: Storage Manager Client Installation

    Add. 4. Uncheck the Require server verification (https:) for all sites in this zone checkbox, and then click Close to continue, but do not close the original Internet Options window. NEC D3/D4 Quick Start Guide...
  • Page 23 Everything should be ready for the array to be initialized and configured at this point. However, if the Storage Manager fails to launch and prompt for a user name and password, go back through the configuration steps to ensure that everything is correct. NEC D3/D4 Quick Start Guide...
  • Page 24: Step 4: Array Initialization And Configuration

    UDP port 2730 traffic to pass through. 2. Log in to the Storage Manager client with a previously created user name that has administrative privileges. NEC D3/D4 Quick Start Guide...
  • Page 25 File from the top toolbar, then click Initialization Wizard from the drop-down menu. 4. At the Initialization Wizard start screen, ensure that the prerequisite steps have been performed as listed, and then click Next when everything is ready for initialization. NEC D3/D4 Quick Start Guide...
  • Page 26 Verify that the array is cabled correctly and click Next, or click Cancel if there is a problem with your array’s connections. Note: This screen shows a fully configured array only. It does not show your specific configuration. NEC D3/D4 Quick Start Guide...
  • Page 27 If the array is being installed in an environment other than Windows, please refer to the array user manual before continuing. Otherwise, click OK to continue. NEC D3/D4 Quick Start Guide...
  • Page 28 If any parameters need to be changed, highlight the port to be changed and click Edit on the right of the port list. After all ports are configured correctly, click Next to continue. NEC D3/D4 Quick Start Guide...
  • Page 29 When you are finished editing port ing port settings, click OK to return to the settings, click OK to return to the previous Set Host Connection Port previous Set Host Connection Port Parameters window. Parameters window. NEC D3/D4 Quick Start Guide...
  • Page 30 16. At the Enter License Keys window, type in the Base Product License key from the NEC Storage software license code provided on the Program Product License Sheet that was shipped with the array. Click Enter after the code has been typed in the License Key field.
  • Page 31 Storage Manager server or to update with information from a file. When all settings are correct, click Next to continue. Note: If you change the Number of LDs, the LD Capacity needs to be manually changed. NEC D3/D4 Quick Start Guide...
  • Page 32 When the initialization process is complete, an Initialization Complete window will appear. At this point, click Finish to complete the initialization, and then confirm that all configured logical drives and application servers are connected through the Storage Manager client. NEC D3/D4 Quick Start Guide...
  • Page 33: Confirming Connections

    3. Expand the menu under the array that needs to be confirmed, and then select Connected Host. 4. Right-click the application server you want to check, and then click Properties. NEC D3/D4 Quick Start Guide...
  • Page 34 At this point, the connections have been confirmed on the array and the application server’s connection to the array and any bound logical drives can be confirmed as shown below. NEC D3/D4 Quick Start Guide...
  • Page 35: Confirming Application Server Connections

    Windows Disk Initialization prompt will appear. If the Initialize Disk prompt does appear, select the disks to initialize, choose the partition style to be used for the new logical drives, and then click OK. NEC D3/D4 Quick Start Guide...
  • Page 36 If they still do not appear or were not created during the array initialization process, attempt to create and bind logical drives through the Storage Manager client as shown in the Configuring Logical Disks and Pools section below. NEC D3/D4 Quick Start Guide...
  • Page 37: Configuring Logical Disks And Pools

    To create an individual pool from the Configuration Setting menu, click Storage Configuration Setting. Note: For more information about the other configuration options available through the Configuration Settings menu, please refer to the documentation on the Storage Manager installation CD. NEC D3/D4 Quick Start Guide...
  • Page 38 5. At the LD Individual Bind/Unbind window, select Pool Binding under the Binding Wizard section at the bottom. 6. At the Welcome window for the Pool Binding Wizard, click Next. NEC D3/D4 Quick Start Guide...
  • Page 39 Next. 8. At the Select Pool Type window, select either a dynamic or basic pool type, and then click Next. NEC D3/D4 Quick Start Guide...
  • Page 40 10. At the Select Physical Drive window, select each physical drive to be added to the logical disk pool, and then click Add for each one highlighted until the requisite number of drives for that pool type have been added. NEC D3/D4 Quick Start Guide...
  • Page 41 Back to change the settings made in previous steps, or click Cancel to exit the pool binding wizard. 13. At the Pool Binding Wizard confirmation pop-up, click Yes to continue or No to quit. NEC D3/D4 Quick Start Guide...
  • Page 42 14. After the Pool Binding Complete window appears, click Finish to complete the new pool binding process. The pool is now ready for logical drives to be configured and bound to application servers. NEC D3/D4 Quick Start Guide...
  • Page 43 To create Logical Disks from the Configuration Setting menu, click Storage Configuration Setting. Note: For more information about the other configuration options available through the Configuration Settings menu, please refer to the documentation on the Storage Manager installation CD. NEC D3/D4 Quick Start Guide...
  • Page 44 5. At the LD Individual Bind/Unbind window, select LD Binding under the Binding Wizard section at the bottom. 6. At the LD Binding Wizard Welcome window, click Next to continue. NEC D3/D4 Quick Start Guide...
  • Page 45 To store application data, select “General usage.” Specify how the logical disks will be used, and then click Next to continue. NEC D3/D4 Quick Start Guide...
  • Page 46 After the appropriate values have been typed in, click Next to continue. NEC D3/D4 Quick Start Guide...
  • Page 47 Detailed Parameters for LD Binding Detailed Parameters for LD Binding window as displayed in the previous window as displayed in the previous step, and then click Next there to step, and then click Next there to continue. continue. NEC D3/D4 Quick Start Guide...
  • Page 48 15. After the logical disks have been bound, the LD Binding Complete message will appear. Click Finish to close the logical disk binding wizard and configure the application server to use the assigned logical disks. NEC D3/D4 Quick Start Guide...
  • Page 49 Your storage array is now ready for use. Thank you for selecting NEC. NEC D3/D4 Quick Start Guide...
  • Page 50: Appendix: Configuring Multipathing

    2. Start the installation process from the Storage Manager CD through the Web-based browser interface available by running Index.HTML from the root of the CD drive. Follow the links from there to the NEC Storage PathManager installation appropriate for your operating system.
  • Page 51 Choose the folder, which allows you to configure the installation path where all PathManager files will be installed. After selecting the appropriate option and configuring the installation path if needed, click Next to continue. NEC D3/D4 Quick Start Guide...
  • Page 52 The installation process may launch several different windows and command prompts during this process, so do not close any windows launched or interrupt the process until the InstallShield Wizard Complete message appears. NEC D3/D4 Quick Start Guide...
  • Page 53 To learn how to monitor PathManager functionality or perform any additional multipath configuration tasks, please refer to the Storage PathManager documentation contained on the Storage Manager CD.   © 2009 NEC Corporation of America. NEC is a registered trademark of NEC Corporation. All Rights Reserved.  ...

This manual is also suitable for:

D4D3-10D1-10

Table of Contents