Alcatel-Lucent 8212 User Manual
Hide thumbs
Also See for 8212:
- User manual (34 pages) ,
- Maintenance manual (17 pages) ,
- Quick manual (2 pages)

Related Manuals for Alcatel-Lucent 8212


Summary of Contents for Alcatel-Lucent 8212
- Page 1 8212 DECT Handset OmniPCX Office Rich Communication Edition User Manual 8AL90329ENAAed01 – 1617 R100...
-
Page 2: Table Of Contents
8212 DECT Handset 1 GETTING TO KNOW YOUR TELEPHONE ................ 5 1.1 P HONE DESCRIPTION 1.2 S TATUS ICONS 1.3 MENU ICONS 1.4 C ALL ICONS 1.5 A MENU CCESSING THE AND NAVIGATING 1 GETTING STARTED ....................9 1.1 I NSTALLING THE BATTERY IN THE TELEPHONE 1.2 C... - Page 3 8212 DECT Handset 6 ACCESSORIES ...................... 27 6.1 C HARGERS 6.2 C HARACTERISTICS OF THE MAINS POWER ADAPTER 6.3 P RESENTATION OF THE BATTERY PACK 6.4 H EADPHONE EXTERNAL MICROPHONE 6.5 C LEANING YOUR TELEPHONE 6.6 T RANSPORTING AND PROTECTING YOUR TELEPHONE 7 DECLARATION OF COMPLIANCE ................
- Page 4 'on/off' facility. Battery charge: Charge the battery for about 6 hours before initial use. Use only recommended charging unit: 8212 DECT Handset desktop charger (3BN67356AA) – delivered with the handset. With the following Power Supply Units: - 8232 DECT Handset Desktop charger PSU Europe (3BN67335AA) TenPao (Model S005AYV0500100) –...
-
Page 5: Getting To Know Your Telephone
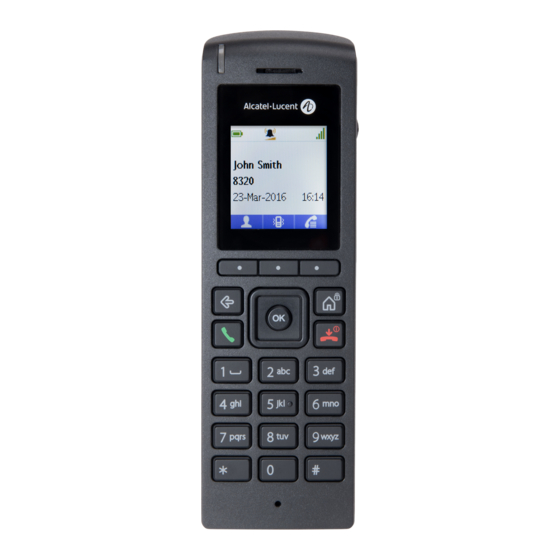
8212 DECT Handset 1 Getting to know your telephone 1.1 Phone description Answer the call. Long press (feature depending on the system): redial last number or access the redial list. Hang up. Long press: switch on the phone / switch off the phone. -
Page 6: Status Icons
8212 DECT Handset Green steady: the phone is on the charger and the battery is fully charged. Red steady: the phone is on the charger and the battery is charging. Slow orange flashing: telephonic event such as unread message, missed call, etc. -
Page 7: Menu Icons
8212 DECT Handset 1.3 MENU icons The MENU is accessible from the welcome screen by pressing the OK key. It provides access to all the functions available on your system. All icons are described in their unselected state. When selected, the icons are displayed in purple. -
Page 8: Accessing The Menu And Navigating
8212 DECT Handset 1.5 Accessing the MENU and navigating Access the menu. Press the Access menu key. Select a function in the MENU. Use the navigator keys and press the OK key to select a function. You can move vertically along the Navigating within a function. -
Page 9: Getting Started
8212 DECT Handset 1 Getting started In order to have a fully operational 8212 DECT Handset, make sure that you have the following items: 8212 DECT Handset. 2 rechargeable NiMH batteries AAA 600mAh 1,2V. A single charger. -
Page 10: Switching On Your Telephone
8212 DECT Handset 1.2.3 LED Green steady: the phone is on the charger and the battery is fully charged. Red steady: the phone is on the charger and the battery is charging. Recharge your telephone battery regularly. The telephone can be on or off when recharging the battery. If the telephone is to remain unused or out of its charger for several weeks, remove the battery and store it separately. -
Page 11: Using Your Telephone
8212 DECT Handset 2 Using your telephone 2.1 Making a call Dial. Send the call. You are in communication. Hang up. 2.2 Receiving a call You are receiving a call. Answer the call. Disabling the ringer. Press this key when your telephone rings. It is still possible to answer by pressing the off hook key. -
Page 12: Call Log
8212 DECT Handset 2.5 Call log Quick access: Access MENU. Call log All calls. Answered incoming calls. Outgoing calls. Missed calls. Manage the call log Select an entry. Call Call the contact. -
Page 13: Sending Dtmf Signals
8212 DECT Handset 2.6 Sending DTMF signals During a call, you sometimes have to send DTMF signals, for example, for a voice message service, an automatic switchboard or when remotely consulting an answering machine. To do this: Long press the star key. -
Page 14: Receiving A Second Call
8212 DECT Handset 2.9 Receiving a second call 2.9.1 IBS mode When you receive a second call during a conversation, the name or number of the incoming call is displayed. To take the second call, you have to end the first conversation. -
Page 15: Three - Way Conference With Internal And / Or External Callers ( Conference ) - Ibs Mode
8212 DECT Handset 2.12 Three-way conference with internal and/or external callers (conference) - IBS mode You are in communication with the first caller and the second is on hold. Enter the conference prefix (default 4). The prefix is defined by your administrator. -
Page 16: Keep In Touch
8212 DECT Handset 3 Keep in touch 3.1 Define the number of your voice mailbox Before starting initialization, make sure the administrator has created a voice mailbox. Access MENU. Messages Voicemail number Confirm. Enter the number of your voicemail. -
Page 17: Consulting Text Messages - Ip-Dect Mode
8212 DECT Handset 3.3 Consulting text messages - IP-Dect mode When you have received a message, the Message icon is displayed on the welcome screen. The yellow LED on your telephone flashes to indicate there is a message. Select the message icon in the notification area. -
Page 18: Send Predefined Text Messages - Ip-Dect Mode
8212 DECT Handset Complete the message. o Symbol: enter symbol. o Clear: delete the last entered character. Apply (or Send). Dial the number of your caller (dial, directories, last numbers dialed...). Confirm. When editing a message to be completed you can use the delete key to delete any entered characters. The browser lets you move the cursor in an input field. -
Page 19: Programming Your Telephone
8212 DECT Handset 4 Programming your telephone 4.1 Programming your personal directory Your directory can contain up to 50 numbers. Quick access: Access MENU. Contacts 4.1.1 Add new contact More Add contact Name: Enter the name of your contact (24 characters maximum). - Page 20 8212 DECT Handset 4.1.2 Modify a contact Select the record to be modified. Edit Select the record to be modified. Modify the name. Apply. Modify the number. Apply. Save Return to idle.
-
Page 21: Adjusting The Audio Functions
8212 DECT Handset 4.2 Adjusting the audio functions 4.2.1 Choosing your melody: Access MENU. Ring Off-site ringing / On-site ringing Apply. Select the melody of your choice (You can play/stop and select the ringtone). ... - Page 22 8212 DECT Handset Confirmat. sound Activate or deactivate a signal when you confirm an action. Coverage warning Activate or deactivate the coverage warning. Charger warning Activate or deactivate a warning when the phone is charging. Low bat. warning Activate or deactivate Bip emission when low battery level is reached.
-
Page 23: Selecting Language
8212 DECT Handset 4.4 Selecting language Access MENU. Settings Languages Select the language of your choice. Apply. Return to idle. 8AL90329ENAAed01 23 /... -
Page 24: Registering The Telephone
8212 DECT Handset 5 Registering the telephone Your phone can be connected to an IBS or an IP-Dect radio base station according the company telephone system. Some features are dependant on the type of radio base station with which you are connected. In this case, IBS mode or IP-Dect mode is indicated in the description of the feature. -
Page 25: Registering The Telephone On Other Systems
8212 DECT Handset If your system doesn't recognize the 8212 DECT Handset, you can switch to the compatibility mode Access MENU. Install MODIC setting 8212 MODIC Select this mode if your system recognizes the 8212 DECT Handset. - Page 26 8212 DECT Handset Launch subscription. Return to idle. If the registration operation runs correctly (Subscription accepted), the telephone is ready for use, and the radio coverage icon appears. If the registration operation has not been successful, the station proposes launching the subscription again.
-
Page 27: Accessories
8212 DECT Handset 6 Accessories 6.1 Chargers A desk support for docking your phone with integrated USB cable. An AC/DC adapter made of a body and a separate plug head that clips onto the AC/DC adapator body. (not supplied with the phone, please contact your installation technician). -
Page 28: Headphone / External Microphone
8212 DECT Handset 6.3.3 Battery charge level > 66% 33% 66% 10% 33% < 10% 6.4 Headphone / external microphone The side of the telephone features a 3.5 mm jack connector for headphone / external microphone. Contact your retailer for information on the various headphone models available. -
Page 29: Declaration Of Compliance
8212 DECT Handset 7 Declaration of compliance This equipment uses DECT frequency range that depends on country: 1880 - 1900 Mhz in Europe, 1920 - 1930 MHz in US/Canada, 1910 - 1930 MHz in LATAM, 1910 - 1920 MHz in Brazil. The equivalent isotropically radiated power at the antenna is less than 110 mW or 250 mW (it depends on the country). - Page 30 Phone description Long press: Access the DTMF feature during a conversation. Answer the call. Green steady: the phone is on the charger and the battery is fully Long press (feature depending on the system): redial charged. last number or access the redial list.
- Page 31 Call icons Status icons Making a call. The status icons are displayed on the welcome screen and indicate the status of the telephone. Receiving a call. Battery charge level ( > > > In charge (flashing icon). Features New events (voice massages, callback requests, unanswered calls). Answered incoming calls.
Need help?
Do you have a question about the 8212 and is the answer not in the manual?
Questions and answers