
Related Manuals for Spectrum DX6R


Summary of Contents for Spectrum DX6R
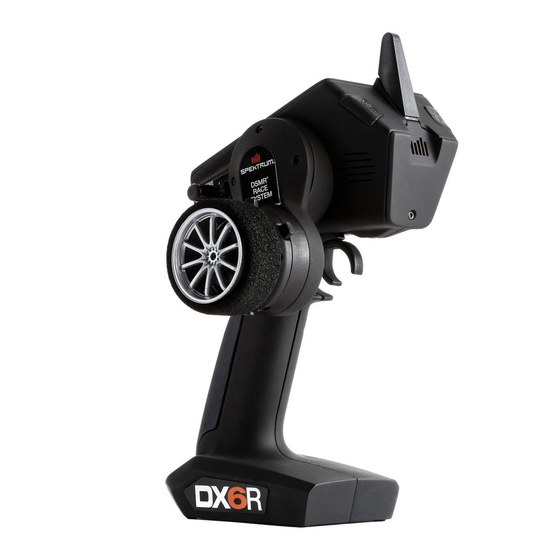
- Page 1 DX6R DX6R 6-Channel 2.4GHz DSMR 6-Channel 2.4GHz DSMR System System ® ® Instruction Manual Manuel d’utilisation Bedienungsanleitung Manuale di istruzioni...
- Page 2 NOTICE All instructions, warranties and other collateral documents are subject to change at the sole discretion of Horizon Hobby, LLC. For up-to-date product literature, visit horizonhobby.com and click on the support tab for this product. MEANING Of SpECIAl lANGuAGE The following terms are used throughout the product literature to indicate various levels of potential harm when operating this product: NOTICE: Procedures, which if not properly followed, create a possibility of...
- Page 3 SAfETY pRECAuTIONS • Always ensure all batteries have been properly charged prior to using the model. • Always check all servos and their connections prior to each run. • Never operate your model near spectators, parking areas or any other area that could result in injury to people or damage of property.
-
Page 4: Table Of Contents
Servo Speed ........25 RX output map ........12 Channel properties ....... 25 Binding ..........12 Travel ..........25 DX6R main screens ......14 Throttle Subtrim ........25 Dashboard ........... 14 Reverse ..........25 Telemetry ..........14 Alerts ............ 26 Monitor .......... -
Page 5: Box Contents
BOx CONTENTS The DX6R radio system is supplied with the following: • 4000mAh Li-Ion Transmitter Pack (Installed in transmitter) • Charging Base • SR2000 Race Receiver • SR6000T Telemetry Receiver • Bind Plug • Grip Set • Spacer set • Steering Wheel set • Power Supply... -
Page 6: Charging
Never leave a charging battery unattended. CAuTION: Never change the low voltage limit for Li-Ion batteries below 3.3V. Doing so could over-discharge the battery and damage both battery and transmitter. The DX6R can be charged through the Micro USB port as well. -
Page 7: Transmitter Functions
TRANSMITTER fuNCTIONS function function Button L Button F Roller Wheel Button G Button R Button H Color Touch Screen Trigger (throttle/brake) Steering Wheel Button A Power Button Button E Power LED Button D Memory Card/USB Port Button C Switch I Speaker Knob Antenna... -
Page 8: Android Operating System
ANDROID OpERATING SYSTEM The DX6R is built on top of the Android operating system and features a large color touch screen display. To navigate around the DX6R use your finger to tap, swipe and drag icons and menus found on the display. -
Page 9: Notification Screen
Monday 23 May 3. Screen brightness 4. Wi-fi 5. Bluetooth Wi-Fi Bluetooth 6. Notifications NOTIFICATIONS DX6R Manual DX6R Manual DX6R Manual DX6R Manual RACEWARE RACEWARE RACEWARE RACEWARE For more information on using the Android OS, tap on the Quick Start... -
Page 10: Raceware Operation
RACEWARE OpERATION Turn on the DX6R by pushing and holding the power button for several seconds. The DX6R will begin to boot up. Once the DX6R boots up, locate the RaceWare Application on the home ™ screen. Tap on the icon to launch RaceWare . -
Page 11: Model Setup
MODEl SETup The Model Setup will open at first start up to aid in creating a new model. Alternately, Model Setup can be accessed at any time by going to the setup page in the RaceWare app. To use Model Setup, simply select the options you wish to use on your model. Depending on options selected, the available options will change. -
Page 12: Throttle & Brake
MODEl SETup MODEl SETup • THROTTlE & BRAkE Select either a single channel or independent channels for the throttle and brake. • MOTORS Select either a single motor or front and rear motors (MOA). • STEERING Select either a single servo or dual servo setup. Depending on options se- lected, front and rear steering will be available. - Page 13 MODEl SETup User Name Only on first activation Model Name Receiver AVC OFF AVC ON Power System Power System Gas/Nitro Electric Electric Gas/Nitro Reverse Reverse Throttle/Brake Independant Channels Motors AUX 1 Bind Single Front/Rear Motors Steering Single Dual AUX 1 AUX 1 AUX 2...
-
Page 14: Dx6R Main Screens
TElEMETRY MONITOR SETup • Dashboard- The Dashboard is the Home screen for the DX6R. Timers, trims and rates are all visible at a glance. The Dashboard is the first of 4 main screens available to the DX6R user. • TElEMETRY- Telemetry can be found by swiping right from the Dashboard screen. -
Page 15: Models
MODElS The Model screen is accessed by tapping the model image in the top right corner of every main screen. uSE THE MODElS SCREEN TO: • Create New Models • Activate Models in List • Import Models • Sort Model List CREATE NEW MODEl- • Tap on Create New Model • MODEL SETUP will open, Follow the prompts to... -
Page 16: Model Properties
MODEl pROpERTIES From inside the MODELS screen, Tap on EDIT button within the model image to access MODEL PROPERTIES. uSE THE MODEl pROpERTIES TO: • Change Model Name • Export Models • Change Theme Color • Duplicate Models • Change Model Image • Delete Models MODEl NAME- • Tap in the model name box... -
Page 17: Setup Screen
SETup SCREEN The Setup Screen allows for quick and easy editing of all model settings. The Setup Screen is divided into 2 section. Channels- • Steering • Throttle &Brake/ • Aux Reverse Settings- • Alerts • Binding • Drive Modes • Mapping • Timers • AVC... -
Page 18: Steering
STEERING On-the-fly Button- Select a switch for instant adjustment of the expo curve while driving. Custom- Up to 7 selected points can be adjusted to custom tailor steering response throughout the range. • Tap on the line to add points. • Tap on a point to adjust its position using the sliders below. -
Page 19: Steering
STEERING STEERING RATE- Steering rate allows for on-the-fly adjustments of steering travel. Steering Rate is defaulted to Switch F but can be assigned to any trimmer/switch. CHANNEl pROpERTIES- Displays current position of the steering wheel. AWS MODE- AWS Mode supports 4 types of all wheel steering • Front Wheel Steering • Rear Wheel Steering • 4 Wheel Steering... -
Page 20: Throttle & Brake/Reverse
THROTTlE & BRAkE/REVERSE The Throttle & Reverse screen allows for programming of all throttle and brake functions. AVAIlABlE fuNCTIONS: • ABS • Throttle Curve • Servo Speed • Throttle Trim • Channel Properties • Throttle Rate • Travel • Reverse Rate • Subtrim • Traction Control • Reverse... -
Page 21: Brake Curve
THROTTlE & BRAkE/REVERSE BRAkE CuRVE- Brake response is adjustable using an EXPO or Custom Brake curves. Standard- Linear output (default) Exponential- Positive (+) EXPO values decrease brake sensitivity around neutral. On-the-fly Button- Select a switch for instant adjustment of the expo curve while driving. Custom- Up to 7 selected points can be adjusted to custom tailor brake response throughout the range. -
Page 22: Reverse Rate
THROTTlE & BRAkE/REVERSE REVERSE RATE- Reverse rate adjusts the percentage of throttle available for reverse. Reverse rate can be assigned to any trimmer/ switch BRAkE RATE- Brake rate adjusts the full brake position. Brake rate can be assigned to any trimmer/switch TRACTION CONTROl- Traction Control adjusts the acceleration (ramp) rate providing improved throttle control especially on... -
Page 23: Awd Mode- (Moa)
THROTTlE & BRAkE/REVERSE AWD MODE- (MOA)- Motor-On-Axle (MOA) programming allows on the fly power distribution from the front to rear wheels. Adjustable ranges from 100% rear 0% front to 0% rear 100% front. When activated the default setting is 50%/50% and this setting can be adjusted and stored using drive modes or assigned to a trimmer/ Switch. -
Page 24: Auxiliary (Aux) Channel Setup
AuxIlIARY (Aux) CHANNEl SETup The AUX setup screen allows for programming of all auxiliary channel functions. AVAIlABlE fuNCTIONS: • Channel Properties • Input Control • Travel • AUX Curve • Subtrim • AUX Speed • Reverse INpuT CONTROl- • Select button or switch for control • Select how many positions • Select how many steps for each button press Aux CuRVE-... -
Page 25: Servo Speed
AuxIlIARY (Aux) CHANNEl SETup SERVO SpEED- Reduces servo output transit time (slows down the servo). Servo Speed can be assigned to any trimmer/switch CHANNEl pROpERTIES- Displays current position of the AUX channel. TRAVEl- Allows independent precise adjustments of the end points. -
Page 26: Alerts
AlERTS The Alerts screen allows for assigning of Tone, Vibrate, Tone + Vibrate or Voice to system and Telemetry Alerts. AVAIlABlE AlERTS: System Telemetry • TX Battery • RPM • Timer 1 • Temperature • Timer 2 • RX Battery • Timer 3 • Inactive Alarm AVC (ACTIVE VEHIClE CONTROl) -
Page 27: Priority
AVC (ACTIVE VEHIClE CONTROl) priority- The default value is 0%, meaning AVC technology is active throughout the steering range. As you turn the steering wheel away from center (neutral), the transmitter controls have priority over the AVC system. Increasing the Priority value decreases how active AVC is as the steering wheel is turned left and right. -
Page 28: Drive Modes
DRIVE MODES The current drive mode is always displayed in the top left corner of the 4 main screens. Every model can have several drive modes programmed to a switch or button for on-the-fly adjustments. Once a drive mode is selected, Changes to model setup, trim and timers will only effect that drive mode. -
Page 29: Telemetry
• Select drive ratios and tire diameter to accurately display model speeds. TIMERS The DX6R offers 5 timers, all viewable from the Dashboard. Pause and Reset the timers directly on the dashboard or configure a Timer switch or button. AVAIlABlE TIMERS: • Total Time... -
Page 30: Up Timer
TIMERS Timers 1-3 can be configured to be either an Up, Down or Lap Timer. up Timer- The Up Timer counts up, functioning as a stopwatch when triggered via a selectable button/switch. It is useful for timing a fuel run to determine fuel mileage/pit stop strategy or, for electrics, to time the run time of a pack to determine gear ratio and setup information. -
Page 31: System Settings
Restore from Backup- Tap on the RESTORE FROM BACKUP button to restore the DX6R from a saved version. Recalibrate Dx6R- Tap on the RECALIBRATE DX6R button to enter into recalibration mode. Follow the on screen directions and save when finished. -
Page 32: Physical Transmitter Adjustments
TRANSMITTER ADJuSTMENTS The DX6R is designed to be extremely adjustable to suite a wide variety of driver needs. All control inputs can be configured for Left or Right handed driving and can be adjusted for angle and spring tension. - Page 33 • Keep the drop down in a safe place for future use. • Connect the 2 wiring harnesses to the board inside the DX6R. Note that one connector has 6 pins and the other has 7.
- Page 34 TRANSMITTER ADJuSTMENTS STEERING WHEEl WEDGES The DX6R comes with a 10º and 15º wedge to angle the steering wheel. The wedges can be used with the dropdown or standard configuration. 15º 10º • Refer to the DROpDOWN STEERING WHEEl OpTIONS section for directions on removing and installing the steering mechanism.
- Page 35 TRANSMITTER ADJuSTMENTS CHANGING fROM RIGHT HANDED TO lEfT HANDED The DX6R can be configured for either right or left handed drivers. STEERING MECHANISM: • Turn off the DX6R • Using a 2mm hex wrench, remove 3 screws. • Carefully remove the 2 wire connectors from the board inside the transmitter.
- Page 36 The knob/switch I assembly can also be switched with the headphone jack assembly on the back of the transmitter. REMOVING THE ASSEMBlIES • Turn off the DX6R • Using a small .050 screwdriver, remove 1 screw from each assembly • Lift up on each assembly.
-
Page 37: Included Sr2000/Sr6000T Receivers
INCluDED SR2000/SR6000T RECEIVERS SR2000 Micro Race receiver SR6000T Telemetry Receiver The Spektrum SR6000T Telemetry Re- The Spektrum™ SR2000 DSMR ® ceiver is compatible with all Spektrum Micro Race receiver is compatible with DSMR surface transmitters. Telemetry all Spektrum DSMR transmitters and functions require a Spektrum transmi- is also backwards compatible with tter capable of telemetry. -
Page 38: Warranty
1-YEAR lIMITED WARRANTY What this Warranty Covers - has no control over use, setup, final assembly, Horizon Hobby, modification or misuse, no liability shall be assumed LLC, (Horizon) warrants to the original purchaser nor accepted for any resulting damage or injury. By that the product purchased (the “Product”) will be the act of use, setup or assembly, the user accepts free from defects in materials and workmanship for... - Page 39 street address, email address and phone number retail purchase cost. By submitting the item for where you can be reached during business hours. service you are agreeing to payment of the service When sending product into Horizon, please include without notification. Service estimates are available your RMA number, a list of the included items, and upon request.
-
Page 40: Fcc / Ic Information
fCC INfORMATION This equipment has been tested and found to comply with the limits for a Class B digital device, pursuant to part 15 of the FCC Rules. These limits are designed to provide reasonable protection against harmful interference in a residential installation. -
Page 41: Compliance Information
COMplIANCE INfORMATION fOR THE EuROpEAN uNION Horizon Hobby, LLC hereby declares that this product is in compliance with the essential requirements and other relevant provisions of the RED Directive. A copy of the EU Declaration of Conformity is available online at: http://www.horizonhobby.com/content/support-render-compliance. - Page 42 53706 © 2016 Horizon Hobby, LLC. DSM, DSM2, DSMR and RaceWare are trademarks or registered trademarks of Horizon Hobby, LLC. The Spektrum trademark is used with permission of Bachmann Industries, Inc. Android is a trademark of Google Inc. The Bluetooth word mark and logos are registered trademarks owned ®...
Need help?
Do you have a question about the DX6R and is the answer not in the manual?
Questions and answers