Table of Contents

Related Manuals for Philips DTR2000


Summary of Contents for Philips DTR2000
- Page 2 WELCOME TO DIGITAL TELEVISION Congratulations on choosing the Philips DTR 2000 digital terrestrial receiver. The DTR 2000 will allow you: - To access to a wider variety of digital terrestrial television and radio channels, including Pay-TV(*). - To benefit from digital video and audio quality.
-
Page 3: Quick Installation
QUICK INSTALLATION QUICK START UP You already have an aerial. Your aerial is correctly pointed at the terrestrial transmitter corresponding to your area. Your digital receiver connection is according to the diagram depicted in chapter 5.1 or 5.2. Your digital receiver is ON and the “WELCOME” screen is displayed for a short time.Then the “First Installation”... - Page 4 SCANNING FAILURE Scanning failed. Before starting a new scanning, check: - the aerial cable, - the aerial cable connection to your digital receiver. Refer to the connection diagrams in chapter 5.1 or 5.2. - channel(s) availability in the region corresponding to your area.
-
Page 5: Table Of Contents
TABLE OF CONTENTS Safety instructions 6.3.1 Using number buttons 6.3.2 Using “P+”/“P-” buttons Unpacking / installing the receiver 6.3.3 Using the “BACK” button in your existing setup (last channel recall) 2.1 Unpacking 6.3.4 Using channel lists 2.2 Installing the receiver in your existing (Service selector) setup 6.4 Banner... - Page 6 7.2.2.3 TV audio signal Menu tree 7.2.2.4 VCR output signal 7.2.2.5 VCR recording control More about recording (VCR or DVD control) 7.2.3 Time Setting 9.1 Connection for Easy recording 7.2.4 Remote Control Setting 9.2 Digital receiver and VCR or 7.2.5 Reinstallation DVD settings 7.3 Favourites lists...
-
Page 7: Safety Instructions
Safety instructions All the safety and operating Instructions should Mains connection be read and understood before using the Before connecting the receiver to the mains, receiver. check that the mains supply voltage corresponds to the voltage printed on the rear For best results, position your receiver away of the receiver. -
Page 8: Unpacking / Installing The Receiver In Your Existing Setup
- Insert the stand lug in the slot located on The symbol on the packaging means that the front of the receiver, close to the Philips material is recyclable. badge. - Rock the receiver to insert the stand lug fully If the receiver will not be used for a long time, in the slot until it is locked by the click fit. -
Page 9: Product Description
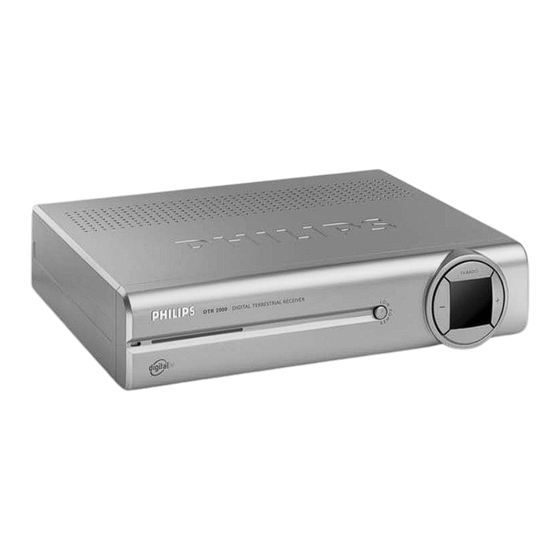
Product description Front view 1 LOW POWER button: Switch receiver ON or to “low power” mode... Reset the receiver after a 5 second key press. 2 TV/RADIO button Toggle between TV and Radio mode. . -
Page 10: Rear View
Rear view 1 VCR (*) SCART (1) socket to connect your video recorder ......or DVD player/recorder 2 Digital audio output (*) Coaxial Digital audio output to connect your HIFI / . -
Page 11: Preparing Your Remote Control
- Replace the cover. Your remote is now ready to control your digital terrestrial receiver. The Philips batteries supplied with your receiver's remote do not contain heavy metals such as Mercury or Lead Cadmium. Nevertheless, in many countries, exhausted batteries may not be disposed of with your household waste. -
Page 12: Using The Remote Control
Using the remote control Mute Standby - Audio mute - Standby / ON (blue) resp.V (white) - Scrolls one Page Up or one Page Down in guide or RED, GREEN,YELLOW, favourite lists BLUE - Active in Favourites list only GUIDE - Open Now &... -
Page 13: Connecting Your Digital Receiver
Connecting your digital receiver There are several ways you can connect and integrate your digital receiver into your existing audio / video equipment setup. Warning! Before starting: - Unplug all equipment (TV set as well as VCR and/or DVD if required) from the mains. Do not connect your digital receiver to mains supply now. -
Page 14: Connecting To A Tv And Vcr Both Fitted With Scart Sockets
- Plug all your equipment, excluding your digital receiver, into the mains. - Switch on your TV and select a channel. - Plug your digital receiver into the mains.Your digital receiver will display the “WELCOME” screen (the left-hand LED will be illuminated green). - Go to Quick installation to proceed with the channel scan of your digital receiver. -
Page 15: Connecting To Your Hifi / Audio Receiver Equipment (Analogue / Digital)
- Plug your digital receiver into the mains.Turn it on using any remote control number button.Your digital receiver will display the “WELCOME” screen (the left-hand LED will be illuminated green). - Go to Quick installation to proceed with the channel scan. Note: 1- This connection also applies if your VCR has two SCART sockets. -
Page 16: Day To Day Operation
Day to day operation Switch your receiver Select TV or Radio service ON/OFF (low power, in running mode standby) To switch your receiver from TV to RADIO The rigth-hand led is lit in red and RADIO to TV: Your receiver is in "Low power" mode. - Press the remote control or the front panel - Press the "LOW POWER"... -
Page 17: Using Channel Lists (Service Selector)
6.3.4 Using channel lists (Service selector) This feature is used to select channels from a list. To access the current channel list while watching digital TV or listening to digital radio: - Press the "OK" button to display the current channel list (either the list of available channels or favourite list previously selected). -
Page 18: Volume Control - Vol+ / Vol- / Mute
To display the banner: - Press the "INFO" button. For more info while the banner is on: - Press the "INFO" button a second time to get more info about the current programme. To close the banner: - Press the "OK" button. Note: Press the"... -
Page 19: Guide (Event Selector)
- Press to move to Audio mode and select from the audio modes available using the button. - Press OK to confirm and exit the screen. Guide (Event selector) While watching digital TV or listening to digital radio: - Press the "GUIDE" button to open the event selector. Current view is current channel list called. -
Page 20: Using The Tv/Stb Button
Delete a running timer while the receiver is in standby A timer is running and your receiver is in standby. Recording is signalled by two front LEDs, the right-hand one is red and the left hand one is orange. - Switch the receiver to running mode. - Press the key sequence "TIMER, 0"... -
Page 21: Changing The Settings Of Your Receiver
Changing the settings of your receiver You can change the receiver settings to adapt the receiver to your aerial conditions,Audio/Video setup or other preferences. Menus and settings Basics about menu navigation While watching digital TV or listening to the radio: - Press the "MENU"... -
Page 22: Channels Installation
7.2.1 Channels installation This feature is used to select the type of installation from the following options: 7.2.1.1 Update This option is used to automatically scan for new channels and add these to the channels already installed. To launch an update: - Select "Update"... -
Page 23: Tv/Vcr Configuration
7.2.2 TV/VCR configuration This feature is used to configure your STB outputs. Use the button to move from one item to another. Select a value for each using the button, then press "OK" to confirm or "BACK" to cancel. Note: These settings have been preset for your country. 7.2.2.1 TV Format This feature is used to select the viewing format that best suits your TV. -
Page 24: Vcr Recording Control
NO o PREPARE RECORD o RECORD LINK For more details, see chapter 10. Note: This setting is also applicable for Philips DVD recorders or other brand equipment that support one the two control systems. 7.2.3 Time Setting This screen is used to set the local time offset with respect to actual local time obtained from the network. -
Page 25: Reinstallation
7.2.5 Reinstallation This feature is used to reset the receiver, i.e. erase all services and user preferences. - Either press the "OK" button to erase all data and go to the "WELCOME" screen. - Or press the BACK button to go back to the previous screen. Favourites lists This menu is used to create, modify and delete favourites lists. -
Page 26: Lock/Unlock A Channel (Red Button)
7.3.2.2 Lock/unlock a channel (red button) - Select a channel belonging to the current list. - Press the red button to lock or unlock the selected channel. Locked channels are signalled with a lock icon. Note: The channel is not only locked or unlocked in the current list, but also in any list it belongs to. -
Page 27: Delete A Favourites List
7.3.3 Delete a Favourites list To delete a favourite list: - Select the favourites list you want to delete the button. - Press "OK". A popup screen is displayed, prompting for confirmation that you want to delete the list. - Press the "OK" button. A confirmation message is displayed. -
Page 28: Modify Timer
7.4.2 Modify timer When selecting the "Modify timer" item, the first screen displayed is the "Timer list" screen: - Select the existing timer you want to modify. - Press the "OK" button to confirm your choice.The "Modify timer" screen is displayed.This screen is identical to the "Add timer"... -
Page 29: Subscription Settings
Subscription Settings The information that can de accessed through this menu depend on the operator supplying the smart card. User preferences This menu is used to customize your receiver. Note: Access to this menu can be protected by PIN code. 7.7.1 Languages This screen is used to select a language for the menu items,... -
Page 30: Pin Code Change
7.7.3 Pin code change This screen is used to modify the 4-digit code you are prompted to enter to access locked channels or menus. When selecting the "PIN code change" item, the first screen displayed is the "PIN code" screen. Note: This screen is displayed each time you try to access a locked menu or channel. -
Page 31: Menu Tree
Menu tree Name Main menu Create a favourite list Channels Free2Air/scrambled Favourites lists Modify a favourite list Sort Delete a favourite list Skip/Add Lock Service Skip/Add all Choose List Month Add timer Repeat Modify timer from list Start time Timer list Timers Delete timer from list Stop time... -
Page 32: More About Recording (Vcr Or Dvd Control)
- Consult the user manual of your VCR or DVD recorder to check if and how this feature is supported. Most Philips VCR and DVD recorders support one of the two Easy-recording options. - Check that your TV and VCR or DVD both have two SCART sockets. -
Page 33: Digital Receiver And Vcr Or Dvd Settings
With this connection set up: Recording with the VCR - You can watch digital TV while you record control feature analogue TV. - You can watch analogue TV while you record - Your digital receiver,TV and VCR or DVD digital TV. are connected and set according to 10.1. -
Page 34: Troubleshooting Guide
10 Trouble shooting guide Experiencing difficulty operating your digital receiver? Check the following points first! Problem Possible cause Action No picture, no sound and no front Receiver is not plugged into the Check mains connection and press panel indication. mains. None of the front LED's are the "LOW POWER"... - Page 35 Problem Possible cause Action Your aerial may need adjusting or Call your local dealer. your local transmitter may not be working. You sometimes see a squared There could be a transmission This is normally only a temporary pattern on the screen, your picture problem.
-
Page 36: Technical Specifications
11 Technical specifications This product is in conformity with the requirements of the 95/47/EC and 2002/21/EC European directives. Audio CINCH Video decoding Application system resources Analogue audio output: - Pay-TV ready Processor clock speed 166 MHz L/R/Digital audio (Conax embedded) SDRAM-CPU/Video-Graphics 8 MB Digital audio output:...
Need help?
Do you have a question about the DTR2000 and is the answer not in the manual?
Questions and answers