Powerfix Profi PMDL 5 B1 Operating Instructions Manual
Multi-purpose detector
Hide thumbs
Also See for PMDL 5 B1:
- Operating instructions manual (76 pages) ,
- Operating instructions manual (52 pages) ,
- Operating instructions manual (40 pages)
Advertisement
Available languages
Available languages
Advertisement
Chapters

Related Manuals for Powerfix Profi PMDL 5 B1


Summary of Contents for Powerfix Profi PMDL 5 B1
- Page 1 DETECTOR MULTIFUNCIONAL RILEVATORE MULTIFUNZIONE PMDL 5 B1 DETECTOR RILEVATORE MULTIFUNCIONAL MULTIFUNZIONE Instrucciones de uso Istruzioni per l'uso DETETOR MULTIFUNÇÕES MULTI-PURPOSE DETECTOR Manual de instruções Operating instructions MULTIFUNKTIONS- DETEKTOR Bedienungsanleitung IAN 273624...
- Page 2 Antes de empezar a leer abra la página que contiene las imágenes y, en segui- da, familiarícese con todas las funciones del dispositivo. Prima di leggere aprire la pagina con le immagini e prendere confi denza con le diverse funzioni dell'apparecchio. Antes de começar a ler abra na página com as imagens e, de seguida, familia- rize-se com todas as funções do aparelho.
-
Page 4: Table Of Contents
ÍNDICE PÁGINA Uso conforme al previsto Indicaciones de seguridad Datos técnicos Descripción del aparato Volumen de suministro Desembalaje Colocación de la pila Medición de distancias Medición de superficies Medición de volumen Localizar objetos ocultos Señalización con láser Indicador de la carga de la pila Mantenimiento y limpieza Evacuación Garantía y servicio... -
Page 5: Uso Conforme Al Previsto
DETECTOR MULTIFUNCIONAL PMDL 5 B1 Uso conforme al previsto El detector multifuncional está diseñado para localizar cables eléctricos, objetos de metal y madera, para proyectar líneas con láser, calcular superficies y volúmenes, así como medir distancias. Este aparato está indicado exclusi- vamente para uso privado. - Page 6 LASER El aparato contiene un láser de la clase 2. Nunca dirija el láser a personas o animales. Nunca mire directamente al láser. Puede provocar lesiones oculares. • No dirija el rayo láser hacia materiales altamente reflectantes. Hay peli- gro de que se refleje la luz. •...
-
Page 7: Datos Técnicos
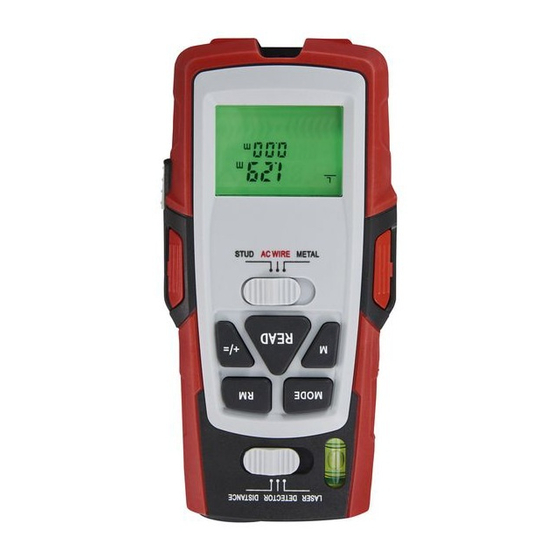
Datos técnicos Cuchilla de separación con ultrasonidos Localización de: cableado eléctrico, metal, madera Clase de láser: Potencia de salida máx (P.máx): < 1mW Longitud de onda (λ): 650 nm según EN60825-1:2014 Suministro de energía: pila monobloc de 9 V Descripción del aparato Punto de medición Pantalla Selector de material (STUD/AC WIRE/METAL) -
Page 8: Colocación De La Pila
Colocación de la pila Abra el compartimiento de la pila en la parte trasera del detector mul- tifuncional. Introduzca la pila monobloc de 9 V en el contacto. Tenga en cuenta la polaridad correcta. Coloque la cinta para extraer la pila bajo la pila mono-bloc de 9 V y presiónela sobre el compartimiento destinado a ésta. - Page 9 Observe las siguientes imágenes: Fig. 1 Fig. 2 Cuanto más alejado se encuentre de la pared, más amplia será la superficie (a) que el detector multifuncional medirá con el ultrasonido (fig. 2). Procure por lo tanto, dirigir siempre el detector multifuncional en ángulo recto hacia una superficie plana (fig.
-
Page 10: Medición De Superficies
Suma de distancias Puede sumar las distancias medidas: Mida la primera distancia como hemos descrito. Pulse la tecla +/= . En la pantalla aparecerá „+“ y la distancia me- dida se moverá a la línea inferior. Mida la siguiente distancia. La nueva distancia medida se mostrará en la línea superior. -
Page 11: Medición De Volumen
Medición de volumen Mueva el selector de función a „DISTANCE“. La pantalla se encen- derá. Pulse la tecla MODE dos veces. En la pantalla parpadeará la letra „L“ (Length = longitud). Pulse la tecla READ para medir la longitud. En la línea superior apare- cerá... - Page 12 La localización de objetos ocultos es igual en los tres modos (STUD = made- ra, AC WIRE = cableado eléctrico, METAL = metal). Mueva el selector de función a „DETECTOR“. Mueva el selector de material a STUD, AC WIRE o METAL. En primer lugar debe calibrar el detector multifuncional.
-
Page 13: Señalización Con Láser
Búsqueda de objetos de madera Proceda en la búsqueda de objetos de madera como se ha descrito en el capítulo „Localización de objetos ocultos“. Cuando el detector multifuncional haya localizado un objeto, márque- lo. Para asegurarse de que el objeto es de madera, cambie el selector de material a METAL. -
Page 14: Indicador De La Carga De La Pila
Líneas verticales con el láser Anude un hilo al agujero sobre el punto de medición Cuelgue el detector multifuncional de la pared donde quiera proyectar la línea vertical. El detector multifuncional cuelga en posición vertical como un plomo. El láser proyecta una línea vertical en la pared. Indicador de la carga de la pila En la pantalla aparece un símbolo de pila cuando ésta tiene poca carga. -
Page 15: Garantía Y Servicio
Garantía y servicio Con este aparato recibe usted 3 años de garantía desde la fecha de compra. El aparato ha sido fabricado cuidadosamente y ha sido probado antes de su entrega. Guarde el comprobante de caja como justificante de compra. Si necesitara hacer uso de la garantía, póngase en contacto por teléfono con su centro de servicio habitual. - Page 16 INDICE PAGINA Uso conforme Avvertenze di sicurezza Dati tecnici Descrizione dell’apparecchio Fornitura Disimballaggio Inserimento delle pile Misurazione di distanze Misurazione di superfici Misurazione di volumi Rilevamento di oggetti coperti Marcatura laser Indicatore livello pile Conservazione e pulizia Smaltimento Garanzia & assistenza Importatore Leggere attentamente le istruzioni per l'uso prima del primo utilizzo e conservarle per il successivo impiego.
-
Page 17: Uso Conforme
RILEVATORE MULTIFUNZIONE PMDL 5 B1 Uso conforme Il rilevatore multifunzione è stato progettato per la rilevazione di linee elettriche, oggetti in metallo e legno, per la proiezione di linee laser, per il calcolo di superfici e volumi e per la misurazione di distanze. Questo apparecchio è... - Page 18 LASER L’apparecchio contiene un laser di classe 2. Non dirigere mai il laser contro persone o animali. Non guardare direttamente nel laser. Il laser può provocare danni oculari. • Non dirigere il raggio laser su materiali molto riflettenti. Pericolo derivante dalla luce riflessa! •...
-
Page 19: Dati Tecnici
Dati tecnici Misurazione di distanze tramite ultrasuoni Rilevazione di: linee di corrente, metallo, legno Classe laser: Potenza max. in uscita (P.max): < 1mW Lunghezza d'onda (λ): 650 nm a norma EN60825-1:2014 Alimentazione di tensione: pila da 9V Descrizione dell’apparecchio Punto di misurazione Display Commutatore per i materiali (STUD/AC WIRE/METAL) Tasto M (Memory) -
Page 20: Inserimento Delle Pile
Inserimento delle pile Aprire il vano pile sul retro del rilevatore mutifunzione. Inserire la pila da 9 V sui contatti. Rispettare la polarità corretta. Inserire il nastro per l’estrazione della pila sotto la pila da 9 V e premerla nel vano pile Attenzione! Assicurarsi che il cavo non resti incastrato. - Page 21 Rispettare le seguenti illustrazioni: Ill. 1 Ill. 2 Più si è lontani dalla parete, maggiore è la superficie (a) che il rilevatore muti- funzione misura tramite gli ultrasuoni (ill. 2). Ricordare quindi che il rilevatore mutifunzione dev’essere sempre orientato su una superficie piana ad angolo retto (ill.
-
Page 22: Misurazione Di Superfici
Addizione di distanze Le distanze misurate possono essere addizionate: Misurare la prima distanza come descritto. Premere il tasto +/= . Nel display compare „+“ e la distanza misu- rata si riporta sulla riga inferiore. Misurare la distanza successiva. L’ultima distanza misurata viene visualizzata nella riga superiore. -
Page 23: Misurazione Di Volumi
Misurazione di volumi Spostare l’interruttore di funzione su „DISTANCE“. Il display si accende. Premere il tasto MODE due volte. Nel display lampeggia „L“ (Length = lunghezza). Premere il tasto READ , per misurare la lunghezza. Nella riga superio- re compare la lunghezza misurata e „W“ (Width = larghezza) comincia a lampeggiare. - Page 24 Il rilevamento di oggetti coperti è uguale in tutte le tre modalità (STUD = le- gno, AC WIRE = linee di corrente, METAL = metallo). Spostare l’interruttore di funzione su „DETECTOR“. Spostare il commutatore per i materiali su STUD, AC WIRE o METAL. Prima è...
-
Page 25: Marcatura Laser
Ricerca di oggetti in legno Nella ricerca degli oggetti in legno, procedere come descritto al capito- lo „Rilevazione di oggetti coperti“. Se il rilevatore mutifunzione ha trovato un oggetto, marcarlo. Per assi- curarsi che l’oggetto sia di legno, spostare il commutatore per i mate- riali su METAL. -
Page 26: Indicatore Livello Pile
Linea laser verticale Fissare un filo all’occhiello attraverso il punto di misurazione Appendere il rilevatore mutifunzione alla parete dove si desidera proiettare una linea verticale. Il rilevatore mutifunzione pende come un piombino in verticale verso il basso. Il laser proietta una linea verticale sulla parete. -
Page 27: Garanzia & Assistenza
Garanzia & assistenza Questo apparecchio è garantito per 3 anni a partire dalla data di acquisto. L'apparecchio è stato prodotto con cura e debitamente collaudato prima della consegna. Conservare lo scontrino come prova d'acquisto. In caso di interventi in garanzia, contattare telefonicamente il proprio centro di assistenza. Solo in questo modo è... - Page 28 INDICE PAGINA Utilização correcta Indicações de segurança Dados técnicos Descrição do aparelho Volume de fornecimento Desempacotar Colocar pilha Medições de distâncias Medições de superfícies Medição de volumes Detecção de objectos cobertos Marcação a laser Indicação de pilhas Armazenamento e limpeza Eliminar Garantia &...
-
Page 29: Utilização Correcta
DETECTOR MULTIFUNÇÕES PMDL 5 B1 Utilização correcta O detector multifunções foi concebido para detecção de tubos eléctricos, ob- jectos de metal e de madeira, para projecção de linhas laser, para calcular superfícies e volumes, bem como para medir distâncias. Este aparelho é... - Page 30 LASER O aparelho contém um laser de classe 2. Nunca direccione o laser para pes- soas ou animais. Nunca olhe directamente para o laser. O laser pode causar danos visuais. • Não direccione o raio laser para materiais muito reflectores. Perigo de- vido ao reflexo da luz.
-
Page 31: Dados Técnicos
Dados técnicos Medidor de distância através ultra-som Detecção de: condutas de corrente, metal, madeira Laser classe: Potência de saída máx. (P.máx): < 1mW Comprimento de onda (λ): 650 nm conforme EN60825-1:2014 Alimentação de tensão: pilhas de bloco de 9 V Descrição do aparelho Ponto de medição Visor... -
Page 32: Colocar Pilha
Colocar pilha Abra o compartimento das pilhas no verso do apare-lho do detector multifunções. Coloque a pilha de bloco de 9 V nos contactos. Certifique-se quanto à polaridade correcta. Coloque a tira para retirar as pilhas por debaixo da pilha de bloco de 9 V e pressione-a para dentro do compartimento das pilhas Atenção! Certifique-se que os cabos não fiquem presos. - Page 33 Considere as seguintes figuras: Fig. 1 Fig. 2 Quanto maior for a distância da parede, maior é a superfície (a) que o de- tector multifunções mede por meio do ultra-som (fig. 2). Certifique-se por isso, que o detector multifunções esteja sempre direccionado num ângulo recto para as superfícies (fig.
-
Page 34: Medições De Superfícies
Adiccionar distâncias Pode somar distâncias medidas: Meça a primeira distância como descrita. Prima o botão +/= . No visor aparece „+“ e a distância medida passa para a linha inferior. Meça a próxima distância. A distância novamente medida é indicada na linha superior. -
Page 35: Medição De Volumes
Medição de volumes Coloque o interruptor de função para „DISTANCE“. O visor liga. Prima o botão MODE duas vezes. No visor pisca „L“ (Length = Comprimento). Prima o botão READ para medir um comprimento. Na linha superior surge o comprimento medido e „W“ (Width = Largura) começa a pis- car. - Page 36 A detecção de objectos cobertos é igual em todos os três modos (STUD = madeira, AC WIRE = cabos condutores de corrente, METAL = Metal). Coloque interruptor de função para „DETECTOR“. Coloque o interruptor de material para STUD, AC WIRE ou METAL. Primeiro tem de calibrar o detector multifunções.
-
Page 37: Marcação A Laser
Procura de objectos de madeira Proceda, na localização de objectos de madeira, como descrito no ca- pítulo „Detecção de objectos cobertos“. Se um detector multifunções detectar um objecto, marque-o. Para ter a cer- teza de que o objecto é de madeira, coloque o interruptor de material para METAL. -
Page 38: Indicação De Pilhas
Linha laser vertical Fixe um fio no olhal acima do ponto de medição Pendure o detector multifunções na parede onde pretende projectar a linha vertical. O detector multifunções está pendurado como um prumo verticalmente para baixo. O laser projecta uma linha na parede. Indicação de pilhas No visor aparece o símbolo da pilha se a pilha ficar fraca. -
Page 39: Garantia & Assistência Técnica
Garantia & Assistência Técnica Este aparelho tem 3 anos de garantia a partir da data de compra. Este apa- relho foi fabricado com o máximo cuidado e escrupulosamente testado an- tes da sua distribuição. Guarde o talão de compra como comprovativo da compra. - Page 40 CONTENT PAGE Intended use Safety instructions Technical data Description of the appliance Items supplied Unpacking Inserting the battery Measuring distances Measuring areas Measuring volumes Locating concealed objects Laser marking Battery display Cleaning and storage Disposal Warranty & Service Importer Read the operating instructions carefully before using the device for the first time and preserve this booklet for later reference.
-
Page 41: Intended Use
MULTI-PURPOSE DETECTOR PMDL 5 B1 Intended use The Multi-Purpose Detector is designed for the locating of electrical cables, of wood and metal objects, for the projecting of laser lines, for the measuring of areas and volumes as well as for the measuring of distances. The appliance is intended for domestic use only. - Page 42 LASER This appliance contains a Class 2 laser. NEVER direct the laser beam at people or animals. NEVER look directly into the laser. The laser can cause serious eye damage. • Do NOT direct the laser beam at strongly reflective material. Reflected laser beams are also dangerous.
-
Page 43: Technical Data
Technical data Distance measurement by means of Ultrasound Locating of: power cables, metal, wood Laser class: Max. output power (P.max): < 1 mW Wave length (λ): 650 nm according EN60825-1:2014 Power supply: 9 V block battery Description of the appliance Measurement point Display Material switch (STUD/AC WIRE/METAL) -
Page 44: Inserting The Battery
Inserting the battery Open the battery compartment on the rear side of the Multi-Purpose Detector. Place the 9 V block battery onto the contacts. Pay heed to the correct polarity. Lay the tape for removal of the battery underneath the 9 V block battery and press it into the battery compartment Important! Ensure that the wires are not trapped in any way. - Page 45 Take note of the following illustrations: Fig. 1 Fig. 2 The further you are from the wall, the wider is the area (a) that the Multi-Purpose Detector must measure by ultrasound (Fig. 2). Therefore take care that the Multi-Purpose Detector is always directed at a right angle towards a level surface (Fig.
-
Page 46: Measuring Areas
Adding distances together You can add the measured distances together: Measure the first distance as described. Press the button +/= . In the display , „+“ appears and the distance measured carries itself over to the lower line. Measure the next distance. The newly measured distance is shown in the upper line. -
Page 47: Measuring Volumes
Measuring volumes Slide the function switch to „DISTANCE“. The display switches itself on. Press the button MODE twice. In the display flashes „L“ (Length). Press the button READ , to measure the length. In the upper line the measured length appears and „W“ (Width) starts to flash. Press the button READ to measure the width. - Page 48 The locating of concealed objects is the same in all three modes (STUD = wood, AC WIRE = live electric power cables, METAL = metal). Slide the function switch to „DETECTOR“. Slide the material switch to STUD, AC WIRE or METAL. First of all, the appliance must be calibrated.
-
Page 49: Laser Marking
Locating wood objects Proceed with the search for wood objects as described in the section „Locating concealed objects“. When the Multi-Purpose Detector has found an object, mark it. To be sure that the object is wood, slide the material switch to METAL. -
Page 50: Battery Display
Vertical laser line Secure a strong thread in the eyelet above the measurement point Hang the Multi-Purpose Detector on the wall at the position where you want to project the vertical line. The Multi-Purpose Detector hangs like a plumbline, perpendicularly downwards. The laser throws a vertical line onto the wall. -
Page 51: Warranty & Service
Warranty & Service The warranty for this appliance is for 3 years from the date of purchase. The appliance has been manufactured with care and meticulously examined be- fore delivery. Please retain your receipt as proof of purchase. In the event of a warranty claim, please make contact by telephone with our Service Depart- ment. - Page 52 INHALTSVERZEICHNIS SEITE Bestimmungsgemäßer Gebrauch Sicherheitshinweise Technische Daten Gerätebeschreibung Lieferumfang Auspacken Batterie einlegen Messen von Entfernungen Messen von Flächen Messen von Volumen Aufspüren von verdeckten Objekten Lasermarkierung Batterieanzeige Aufbewahrung und Reinigung Entsorgen Garantie und Service Importeur Lesen Sie die Bedienungsanleitung vor der ersten Verwendung aufmerksam durch und heben Sie diese für den späteren Gebrauch auf.
-
Page 53: Bestimmungsgemäßer Gebrauch
MULTIFUNKTIONSDETEKTOR PMDL 5 B1 Bestimmungsgemäßer Gebrauch Der Multifunktionsdetektor ist zur Ortung von elektrischen Leitungen, von Me- tall- und Holzobjekten, zum Projizieren von Laserlinien, zum Berechnen von Flächen und Volumina, sowie zum Messen von Entfernungen konzipiert. Dieses Gerät ist nur für private Zwecke bestimmt. Gebrauchen Sie es nicht gewerblich. - Page 54 LASER Das Gerät enthält einen Klasse-2-Laser. Richten Sie den Laser nie auf Personen oder Tiere. Blicken Sie nie direkt in den Strahl. Der Laser kann Augenschäden hervorrufen. • Richten Sie den Strahl nicht auf stark reflektierende Materialien. Gefahr durch reflektierendes Licht. •...
-
Page 55: Technische Daten
Technische Daten Entfernungsmesser mittels Ultraschall Aufspüren von: Stromleitungen, Metall, Holz Laserklasse: Ausgangsleistung (P.max): < 1mW Wellenlänge (λ): 650 nm gemäß EN60825-1:2014 Spannungsversorgung: 9 V-Blockbatterie Gerätebeschreibung Messpunkt Display Materialschalter (STUD/AC WIRE/METAL) Taste M (Memory) Taste Haltenadel Taste READ Taste MODE Libelle Laser-Austrittsöffnung Ultraschallsender/-empfänger Funktionsschalter (LASER/DETECTOR/DISTANCE) -
Page 56: Batterie Einlegen
Batterie einlegen Öffnen Sie das Batteriefach auf der Rückseite des Multifunktionsde- tektors. Stecken Sie die 9 V-Blockbatterie auf die Kontakte. Achten Sie auf die richtige Polung. Legen Sie das Band zum Herausholen der Batterie unter die 9 V-Block- batterie und drücken Sie sie in das Batteriefach Achtung! Achten Sie darauf, dass die Kabel nicht eingeklemmt werden. - Page 57 Beachten Sie folgende Abbildungen: Abb. 1 Abb. 2 Je weiter Sie von der Wand entfernt stehen, umso breiter ist die Fläche (a), die der Multifunktionsdetektor mittels Ultraschall misst (Abb. 2). Beachten Sie daher, dass der Multifunktionsdetektor immer auf eine ebene Fläche im rechten Winkel gerichtet ist (Abb.
-
Page 58: Messen Von Flächen
Addieren von Entfernungen Sie können gemessene Entfernungen addieren: Messen Sie die erste Entfernung wie beschrieben. Drücken Sie die Taste +/= . Im Display erscheint „+“ und die gemessene Entfernung überträgt sich auf die untere Zeile. Messen Sie die nächste Entfernung. Die neu gemessene Entfernung wird in der oberen Zeile angezeigt. -
Page 59: Messen Von Volumen
Messen von Volumen Schieben Sie den Funktionsschalter auf „DISTANCE“. Das Display schaltet sich ein. Drücken Sie die Taste MODE zweimal. Im Display blinkt „L“ (Length = Länge). Drücken Sie die Taste READ , um die Länge zu Messen. In der oberen Zeile erscheint die gemessene Länge und „W“... - Page 60 Das Aufspüren von verdeckten Objekten ist in allen drei Modi (STUD = Holz, AC WIRE = Stromführende Leitungen, METAL = Metall) gleich. Schieben Sie den Funktionsschalter auf „DETECTOR“. Schieben Sie den Materialschalter auf STUD, AC WIRE oder METAL. Zuerst müssen Sie den Multifunktionsdetektor kalibrieren. Setzen Sie ihn flach auf die Wand, wo Sie nach verdeckten Objekten suchen möchten.
-
Page 61: Lasermarkierung
Suche nach Holzobjekten Verfahren Sie bei der Suche nach Holzobjekten, wie im Kapitel „Aufspü- ren von verdeckten Objekten“ beschrieben. Wenn der Multifunktionsdetektor ein Objekt gefunden hat, markieren Sie es. Um sicher zu gehen, dass das Objekt aus Holz besteht, schieben Sie den Materialschalter auf METAL. -
Page 62: Batterieanzeige
Senkrechte Laserlinie Befestigen Sie einen Faden an der Öse am Messpunkt Hängen Sie den Multifunktionsdetektor an die Wand, wo Sie die senk- rechte Linie projizieren wollen. Der Multifunktionsdetektor hängt wie ein Lot senkrecht nach unten. Der Laser wirft eine senkrechte Linie an die Wand. -
Page 63: Garantie Und Service
Garantie und Service Sie erhalten auf dieses Gerät 3 Jahre Garantie ab Kaufdatum. Das Gerät wurde sorgfältig produziert und vor Auslieferung gewissenhaft geprüft. Bitte bewahren Sie den Kassenbon als Nachweis für den Kauf auf. Bitte setzen Sie sich im Garantiefall mit Ihrer Servicestelle telefonisch in Verbindung. Nur so kann eine kostenlose Einsendung Ihrer Ware gewährleistet werden. - Page 64 KOMPERNASS HANDELS GMBH BURGSTRASSE 21 44867 BOCHUM DEUTSCHLAND / GERMANY www.kompernass.com Estado de las informaciones · Versione delle informazioni · Estado das informações · Last Information Update · Stand der Informationen: 03 / 2016 · Ident.-No.: PMDL5B1-022016-2 IAN 273624...
Need help?
Do you have a question about the PMDL 5 B1 and is the answer not in the manual?
Questions and answers