Advertisement
Portable Thermometers
Models TM20, TM25, and TM26
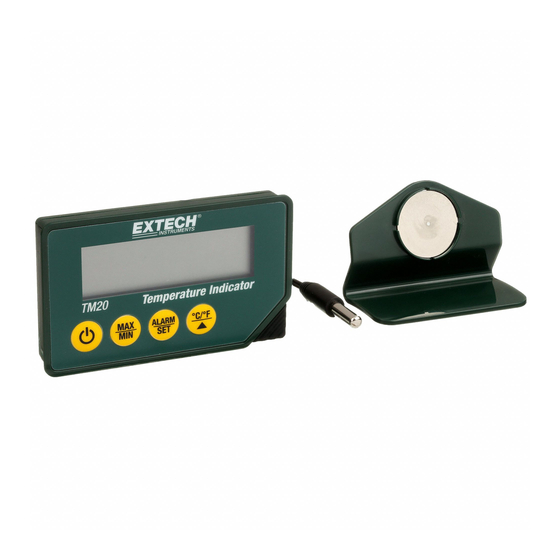
TM20 Thermometer
Standard Probe
TM25 Thermometer
Penetration Probe
TM26 Thermometer
Penetration Probe
NSF Certified
Sound Reflector
USER GUIDE
99 Washington Street
Melrose, MA 02176
Phone 781-665-1400
Toll Free 1-800-517-8431
Visit us at www.TestEquipmentDepot.com
Advertisement
Table of Contents

Related Manuals for Extech Instruments TM20


Summary of Contents for Extech Instruments TM20
- Page 1 USER GUIDE 99 Washington Street Melrose, MA 02176 Phone 781-665-1400 Toll Free 1-800-517-8431 Visit us at www.TestEquipmentDepot.com Portable Thermometers Models TM20, TM25, and TM26 TM20 Thermometer Standard Probe TM25 Thermometer Penetration Probe TM26 Thermometer Penetration Probe NSF Certified Sound Reflector...
-
Page 2: Specifications
Thank you for selecting the Extech Portable Thermometer. The TM series thermometers are ideal for home use. Measure the temperature of air, liquid, paste, or semi‐solid materials. The TM20 uses a standard temperature probe while the TM25 and TM26 are equipped with a penetration probe for insertion into materials under test. The TM26 functions the same as the TM25 but the TM26 includes a sound reflector for amplifying its beeper and is NSF certified, ... -
Page 3: International Safety Symbols
Batteries can be fatal if swallowed. Contact medical emergency personnel if batteries are swallowed. Batteries contain harmful acids. Low batteries should be changed as soon as possible to prevent damage caused by leaking batteries. Product Safety! Do not place these products near extreme temperatures, vibration, or shock Only the probes are heat resistant to 392 F (200 C) for the TM25/TM26 probe and to 158 C) for the TM20 probe, not the meters themselves Never hold a probe directly in or over fire Do not immerse the meters in any liquid 3 TM2x‐en‐GB_V2.1 5/15 ... -
Page 4: Meter Description
Description Meter Description Meter LCD display Power ON/OFF button MAX/MIN button ALARM/SET button Temperature units/up arrow button Meter stand/base Sensor cabling Sensor tips 10. Probe mounting bracket Note: Wall mount access hole, magnet, and sound reflector (TM26 only) on rear of instrument, not pictured. Display Symbols Battery power status Measurement reading Alarm armed symbol Temperature Degrees symbol High Alarm symbol Low Alarm symbol C or F unit of measure Data (Display) Hold MAX reading display 10. MIN reading display 11. ERROR (Battery voltage too low to display accurate readings) 4 TM2x‐en‐GB_V2.1 5/15 ... -
Page 5: Operation
Operation Display Protective Foil The meter’s display is shipped with a protective foil covering. Please remove carefully before use. Powering the meter Open the battery compartment by loosening the two screws located on the back of the meter (on either side of the magnet). Insert a new CR2032 3V lithium button battery and close the cover. If a battery is already installed, remove the insulation strip so that the battery can make proper circuit contact. The instrument is now ready for use. Press the ON/OFF key once to power the meter. The meter’s previous settings will be preserved. ... - Page 6 Temperature Alarms Set high/low alarm limits as described below. The meter will then audibly and visually alert the user if either limit is exceeded: 1. Press the ALARM/SET button once from the normal operating mode; the upper limit value and its symbol (up arrow) will flash. 2. Set the temperature limit by pressing the ▲ button (press and hold for fast scrolling). 3. Now use the MAX/MIN button to activate/deactivate the alarm (alarm symbol will appear in the upper right hand corner of the LCD when activated). 4. Verify the setting by pressing ALARM/SET. 5. Perform the same steps for the low alarm limit. After setting the alarms, the upper and lower limit symbols (▲▼) will be displayed on the LCD indicating that an upper and a lower alert value has been set. If the measured temperature exceeds either limit, the alarm beeper will sound for 1 minute. The alarm beeper icon and the corresponding arrow will flash. Pressing any button will switch off the alarm. When the temperature returns to the desired range the audible alarm will stop sounding. The arrow will remain flashing however to show that the temperature was higher or lower than a set ...
Need help?
Do you have a question about the TM20 and is the answer not in the manual?
Questions and answers