Table of Contents
Advertisement
Quick Links
Advertisement
Table of Contents

Subscribe to Our Youtube Channel
Related Manuals for Extech Instruments HD200


Summary of Contents for Extech Instruments HD200
- Page 1 USER GUIDE Differential Thermometer Datalogger Model HD200...
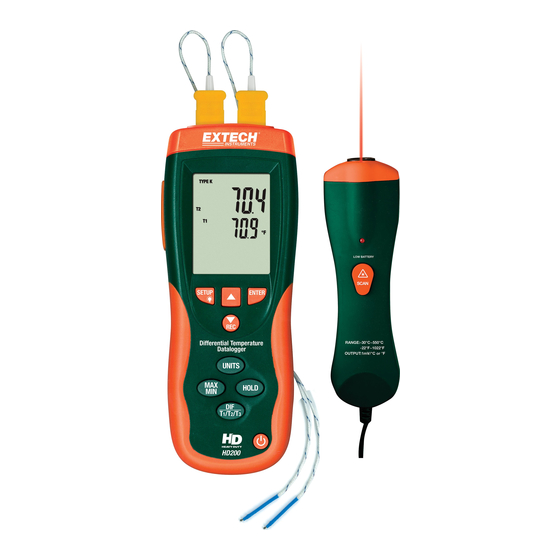
- Page 2 The HD200 can also make non-contact temperature measurements with the supplied IR thermometer probe. The HD200 datalogger can store 18,000 measurement readings (for each channel) in the meter’s internal memory. Stored readings can later be transferred to a PC using the supplied PC USB interface kit.
- Page 3 Primary Display: T1, T2, T3 , T1-T2,T1-T3,or T2-T3 reading. Secondary Display: MAX, MIN, AVG, offset,T1, T2 , or T3 reading. Temperature unit of measure Third display. Elapsed timer or T1, T2, T3 reading Low battery icon 10. Timer 11. MAX, MIN, AVG display mode icons HD200-en-GB_V2.3 4/15...
-
Page 4: Operation
Use the laser pointer to improve target aim. While the SCAN button is held down, the readings change as the user scans various surfaces. When the button is released the display is held for approx. 7 seconds and the meter then returns to normal operation. HD200-en-GB_V2.3 4/15... - Page 5 Note that measurements should normally be made less than 2 feet from the target. The meter can measure from further distances but the measurement may be affected by external sources of light. In addition, the spot size may be so large that it encompasses surface areas not intended to be measured. HD200-en-GB_V2.3 4/15...
- Page 6 Press ENTER to store the new setting in memory. Erase the Datalogger Memory (CLR) ▲ ▼ To clear the memory, enter the CLR setup mode, press until the display shows the confirmation screen “SURE YES” and press ENTER to clear the memory. HD200-en-GB_V2.3 4/15...
-
Page 7: Holding The Displayed Readings
Plug the thermocouple into the input connector. Place the thermocouple in a known, stable temperature environment such as an ice bath or dry well calibrator. Allow the readings to stabilize. In Setup change the offset until the primary reading matches the calibration temperature. HD200-en-GB_V2.3 4/15... -
Page 8: Battery Replacement
Never mix battery types. Always install new batteries of the same type. USB PC Software and Interface The HD200 is equipped with a communication jack on its upper left side. The supplied communications cable connects to this jack and to a USB port on a PC. The supplied software allows the user to view and save readings to the PC. -
Page 9: Specifications
-100°C to 1372°C ± (0.15%rgd+1 C/1.8 (Type K) -148°F to 2501°F <1000°; 0.1°C/F >1000°; 1°C/F -200°C to -100°C ± (0. 5%rgd+2 C/3.6 -328°F to -148°F -30°C to 550°C 1°C/F ± (2%rgd+2 C/3.6 (IR) -22°F to 1022°F Copyright © 2013‐2015 FLIR Systems, Inc. All rights reserved including the right of reproduction in whole or in part in any form ISO‐9001 Certified www.extech.com HD200-en-GB_V2.3 4/15...
Need help?
Do you have a question about the HD200 and is the answer not in the manual?
Questions and answers