
Subscribe to Our Youtube Channel
Related Manuals for Bosch DIVAR IP 7000 2U


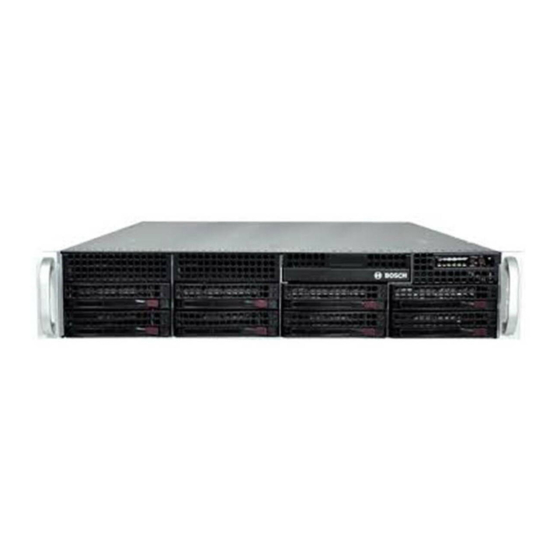
Summary of Contents for Bosch DIVAR IP 7000 2U
- Page 1 DIVAR IP 7000 2U DIP-7080-00N, DIP-7082-8HD, DIP-7083-8HD Quick Installation Guide...
-
Page 3: Table Of Contents
DIVAR IP 7000 2U Table of Contents | en Table of contents Safety precautions General safety precautions Electrical safety precautions ESD precautions Operating precautions Important notices FCC and ICES compliance System overview System setup - hardware Introduction Unpacking the system Preparing for setup 3.3.1... -
Page 4: Safety Precautions
| Safety precautions DIVAR IP 7000 2U Safety precautions Observe the safety precautions in this chapter. General safety precautions Follow these rules to ensure general safety: – Keep the area around the system clean and free of clutter. –... -
Page 5: Electrical Safety Precautions
Installation should only be carried out by qualified customer service personnel in accordance with the applicable electrical regulations. Disposal Your Bosch product has been developed and manufactured using high- quality materials and components that can be reused. This symbol means that electronic and electrical devices that have reached the end of their working life must be disposed of separately from household waste. -
Page 6: Esd Precautions
| Safety precautions DIVAR IP 7000 2U – Use only one hand when working with powered-on electrical equipment. This is to avoid making a complete circuit, which will cause electrical shock. Use extreme caution when using metal tools, which can easily damage any electrical components or circuit boards they come into contact with. -
Page 7: Important Notices
DIVAR IP 7000 2U Safety precautions | en Note: Please handle used batteries carefully. Do not damage the battery in any way. A damaged battery may release hazardous materials into the environment. Do not discard a used battery in the garbage or a public landfill. Please comply with the regulations set up by your local hazardous waste management agency to dispose of your used battery properly. -
Page 8: System Overview
DIVAR IP 7000 2U features wizard based set-up and centralized configuration to reduce installation times. All components are pre-installed and pre-configured. Simply connect to the network and turn on the unit — DIVAR IP 7000 2U starts recording straight out of the box. - Page 9 DIVAR IP 7000 2U System overview | en Rear view: 2x mains connection 100 – 240 VAC, Monitor (VGA) 50 - 60 Hz Note: Do not use! 2x PS/2 (mouse and keyboard) 2x NIC 2x USB Slots for: – 1x graphic card (1x Display Port, Serial interface COM1 1x DVI) –...
-
Page 10: System Setup - Hardware
You should inspect the box the chassis was shipped in and note if it was damaged in any way. If the chassis itself shows damage, file a damage claim with the carrier who delivered it and notify the respective Bosch RMA desk. You will also need it placed near at least one grounded power outlet. -
Page 11: Rack Precautions
DIVAR IP 7000 2U System setup - hardware | en 3.3.2 Rack precautions Warning! To prevent bodily injury when mounting or servicing this unit in a rack, you must take special precautions to ensure that the system remains stable. The following guidelines are provided to ensure your safety: –... -
Page 12: Rack Mounting Instructions
| System setup - hardware DIVAR IP 7000 2U Circuit overloading Consideration should be given to the connection of the equipment to the power supply circuitry and the effect that any possible overloading of circuits might have on overcurrent protection and power supply wiring. -
Page 13: Installing The Inner Rails
DIVAR IP 7000 2U System setup - hardware | en Press the quick-release tab. Separate the inner rail extension from the outer rail assembly. 3.4.2 Installing the inner rails The chassis includes a set of inner rails in two sections: inner rails and inner rail extensions. -
Page 14: Installing The Outer Rails To The Rack
| System setup - hardware DIVAR IP 7000 2U 3.4.3 Installing the outer rails to the rack Outer rails attach to the rack and hold the chassis in place. The outer rails extend between 30 inches and 33 inches. -
Page 15: Installing The Chassis Into A Telco Rack
DIVAR IP 7000 2U System setup - hardware | en Warning! Do not pick up the unit with the front handles. The handles are designed to pull the system from a rack only. Warning! Stability hazard Before sliding the unit out for servicing make sure that the rack stabilizing mechanism is in place, or the rack is bolted to the floor. -
Page 16: System Setup - First Steps
IP addresses to the video devices. Consult the local IT administrator to obtain a valid IP address range to be used with DIVAR IP and associated devices. – The default iSCSI settings are optimized for use with Bosch VMS/VRM. User with administrator rights: –... -
Page 17: Using Bosch Vms Config Wizard
System setup - first steps | en Accept the license terms, then click Start. Windows restarts. After restart is finished, different Bosch VMS versions are displayed on the screen. Click the Bosch VMS version you want to install. Note: We recommend that you install the latest version. -
Page 18: Adding Additional Licenses
On a computer with Internet access, enter the following URL into your browser: https://activation.boschsecurity.com If you do not have an account to access the Bosch License Activation Center, either create a new account (recommended) or click the link to activate a new license without logging on. - Page 19 Cameras in the Logical Tree with a red dot in the camera’s icon are recording. To verify playback functionality in the Operator Client The time line moves if the a camera is viewed in playback mode. To perform further functionalities refer to the Bosch VMS manual. Performance overview live 4CIF 2.5 Mbit...
-
Page 20: Additional Documentation And Client Software
DIVAR IP 7000 2U Additional documentation and client software Documentation for Bosch Security Systems products can be found as follows: Open any browser > enter www.boschsecurity.com > select your region and your country > start a search for your product > select the product in the search results to show the existing documents. - Page 24 Bosch Sicherheitssysteme GmbH Robert-Bosch-Ring 5 85630 Grasbrunn Germany www.boschsecurity.com © Bosch Sicherheitssysteme GmbH, 2014...
Need help?
Do you have a question about the DIVAR IP 7000 2U and is the answer not in the manual?
Questions and answers