
Related Manuals for Gree GDN12AJ-K4EBC1A


Summary of Contents for Gree GDN12AJ-K4EBC1A
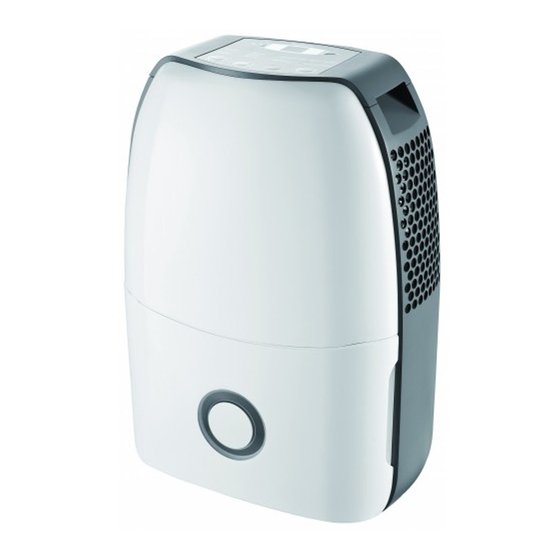
- Page 1 Service Manual Change for Life Service Manual Models: GDN12AJ-K4EBC1A GDN12AJ-K4EBC1B GDN16AJ-K4EBC1A (Refrigerant R134a) GREE ELECTRIC APPLIANCES,INC.OF ZHUHAI...
-
Page 2: Table Of Contents
Service Manual Table of Contents Part Ⅰ : Technical Information ............1 1. Summary ....................1 2. Specifications ..................2 3. Outline Dimension Diagram ............. 3 4. Refrigerant System Diagram ............4 5. Electrical Part ................... 5 5.1 Wiring Diagram ................... 5 5.2 PCB Printed Diagram .................. -
Page 3: Part Ⅰ : Technical Information
Service Manual Part Ⅰ : Technical Information 1.Summary Models: GDN12AJ-K4EBC1A GDN16AJ-K4EBC1A GDN12AJ-K4EBC1B Technical Information... -
Page 4: Specifications
Service Manual 2.Specifications 1.GDN12AJ-K4EBC1A Model GDN16AJ-K4EBC1A 2.GDN12AJ-K4EBC1B 1.CK051012901/CK051012902 CK051013001 Product Code 2.CK051019102 CK051013003 Rated Voltage 220-240 220-240 Power Supply Rated Frequency Phases Rated Dehumidifying Volume 0.23 Power Input Power Current Set Humidity Range 35~80 35~80 Air Flow Volume(H/M/L) 115/-/100 115/-/100... -
Page 5: Outline Dimension Diagram
Service Manual 3.Outline Dimension Diagram Unit:mm Technical Information... -
Page 6: Refrigerant System Diagram
Service Manual 4.Refrigerant System Diagram evaporator air in capillary air out condenser fan motor compressor Dehumidifying principle of dehumidifier: When temperature is decreased to the temperature point of dew, water vapor in humid air will condensate. Dehumidifier is dehumidifying the air by using this principle. During operation of the system, air will pass through evaporator and condenser in turn and then be discharged due to centrifugal blade. -
Page 7: Electrical Part
Service Manual 5.Electrical Part 5.1 Wiring Diagram ●Instruction Symbol Symbol Color Symbol Symbol Color Symbol Name White Green COMP Compressor Yellow Brown Grounding wire Blue YEGN Yellow/Green Black Violet Orange TUBE TEMP.SENSOR FAN MOTOR TUBE YEGN BN(BK) AC-L BU(WH) POWER COMP YEGN(GN) HUMIDITY... -
Page 8: Pcb Printed Diagram
Service Manual 5.2 PCB Printed Diagram Silk Screen on Main Board ● Top view No. Name Description Name Description Needle stand of board Connect to neutral wire Connect to display board Interface of neutral wire connection wire of commercial wire Needle stand of fan Connect to fan Interface of compressor Connect to compressor... - Page 9 Service Manual Silk Screen on Display Board ● Top view 1 Timer button 8 Indicator of dehumidifying continuously 15 Indicator of high fan speed Connection between humidity sensor 2 Buzzer 16 Button for setting humidity (+) (needle stand) 3 Fan speed button 10 Power indicator Indicator of mid fan speed Needle stand for tube...
-
Page 10: Function And Control
Service Manual 6.Function and Control 6.1 Control Panel Instruction High and Low fan indicator lights Bucket full light indicates bucket needs to be emptied or it is not in the proper place 4 hour or 2 hour Continuous operation on delay on/off indicator light indicator lights... -
Page 11: Introduction Of Basic Mode Function
Service Manual 6.2 Introduction of Basic Mode Function 1. Basic functions of system (1) Drying mode ① Dry conditions and process: under operation status a. When set humifity≤ambient humidity-5%, compressor and fan will operate. b. When set humidity≥ambient humidity+5%, compressor stop operation and fan will stop operation after 3min. c. - Page 12 Service Manual FILTER button and then this indicator is off. BUCKET FULL indicator: the indicator blinks if bucket full protection is occurred or the water tank hasn’t been installed well. (3) Timer OFF control 2h or 4h timer OFF can be set. Timer off can be set under on status. Timer setting is recorded every 30min by memory function. (4) Display of nixie tube (green) Under on status, the nixie tube displays current humidity.
-
Page 13: Part Ⅱ : Maintenance
Service Manual Part Ⅱ : Maintenance Refrigerant Safety Precautions: 1. Avoid contact between refrigerant and fire as it generates 7.Notes Maintenance poisonous gas. Recycle the refrigerant inside the unit completely before welding pipes. Safety Precautions: 2. Apply specified refrigerant only. Never have it mixed with any other refrigerant. -
Page 14: Maintenance
Service Manual 8.Maintenance 8.1 Error Code Malfunction Nixie tube display Unit status Possible Causes Name 1. The wiring terminal between ambient temperature sensor and main board is loosened or poorly contacted; 2. There’s short circuit due to trip-over of the parts on Malfunction of controller;... -
Page 15: Malfunction Detection Flowchart
Service Manual 8.2 Malfunction Detection Flowchart Malfunction of temperature sensor F1, F2 9.3.1 F1/F2 Malfunction Start Is the wiring terminal between temperature sensor and the controller loosened or poor ly contacted? Insert the temperature sensor tightly M alfunction is eliminated. Is there short circuit due to trip over of the par ts? Make the parts upright... -
Page 16: Maintenance Method For Common Malfunction
Service Manual 8.3 Maintenance Method for Common Malfunction 1.The Unit Can’t Start Up Possible causes Discriminating method (dehumidifier status) Troubleshooting Confirm whether it's due to power failure. If yes, No power supply, or poor After energization, operation indicator isn’t bright wait for power recovery. - Page 17 Service Manual 4. Compressor Can't Operate Possible causes Discriminating method (dehumidifier status) Troubleshooting Connect wires according to wiring diagram to Wrong wire connection, or poor Check the wiring status according to circuit make sure all wiring terminals are connected connection diagram firmly Compressor relay on the...
-
Page 18: Exploded View And Parts List
Service Manual 9.Exploded View and Parts List Technical Information... - Page 19 Service Manual Part Code Description GDN12AJ-K4EBC1A Product code CK051012901 CK051012902 Front Panel 20006221 20006221 Centrifugal Fan sub-assy 00001100035 00001100035 Propeller Housing 22206232 22206232 Centrifugal Fan 10316065 10316065 Fan Motor 1501651506 1501651506 Diversion Circle 10376045 10376045 Heat-exchange Equipment 01100400036 01100400036 Capillary Sub-assy...
- Page 20 Service Manual Part Code Description GDN12AJ-K4EBC1B Product code CK051019102 Front Panel 20006221 Centrifugal Fan sub-assy 00001100035 Propeller Housing 22206232 Centrifugal Fan 10316065 Fan Motor 1501651506 Diversion Circle 10376045 Heat-exchange Equipment 01100400036 Capillary Sub-assy 03000600363 Connecting Pipe(Evaporator) 05016155 Connecting Pipe(Condenser) 05016154 Condenser Sub-Assy 01136220 Evaporator Sub-Assy...
- Page 21 Service Manual Part Code Description GDN16AJ-K4EBC1A Product code CK051013001 CK051013003 Front Panel 20006221 20006221 Centrifugal Fan sub-assy 00001100035 00001100035 Propeller Housing 22206232 22206232 Centrifugal Fan 10316065 10316065 Fan Motor 1501651506 1501651506 Diversion Circle 10376045 10376045 Heat-exchange Equipment 01100400037 01100400037 Capillary Sub-assy 03000600364 03000600364 Connecting Pipe(Evaporator)
-
Page 22: Removal Procedure
Service Manual Warning: disconnect power supply before 10.Removal Procedure removal; discharge the refrigerant completely before unsoldering the pipes. GDN12AJ-K4EBC1A GDN16AJ-K4EBC1A GDN12AJ-K4EBC1B Take GDN12AJ-K4EBC1A GDN16AJ-K4EBC1A for example. Steps Procedure Before disassembly Remove tank Draw the tank outwards to remove the tank. - Page 23 Service Manual Steps Procedure rear case Remove rear case Loosen 2 clasps on the filter and then remove filter the filter. Remove 6 connection screws fixing rear case. Remove 2 wire clamps and then remove rear case. wire clamps screws top cover Remove top cover Remove connection screws fixing top cover...
- Page 24 Service Manual Steps Procedure Remove air duct Remove 2 connection screws between air duct and water tray. Lift the air duct up to remove it. a. Remove cover plate ( air duct) Remove 2 connection screws and then remove the cover plate. b.
- Page 25 Service Manual Steps Procedure evaporator condenser Remove condenser and evaporator Unsolder pipe connecting to aspiration/ discharge pipe. Then remove condenser and evaporator. (Note: before unsoldering, discharge refrigerant completely. Remove electric box cover and electric box Loosen 5 clasps between electric box cover electric box cover and electric box.
- Page 26 Service Manual Steps Procedure discharge pipe Remove aspiration and discharge pipes Unsolder pipe connecting to compressor. aspiration pipe Then remove aspiration and discharge pipes. compressor Remove compressor Remove 3 hold-down nuts of compressor nuts and then remove compressor. Remove power cord Remove 2 screws showing in the picture then remove wire clamp.
-
Page 27: Appendix
Service Manual Appendix: Appendix 1: Reference Sheet of Celsius and Fahrenheit Conversion formula for Fahrenheit degree and Celsius degree: Tf=Tcx1.8+32 Set temperature Fahrenheit Fahrenheit Fahrenheit display Fahrenheit display Fahrenheit display Fahrenheit Celsius (℃) Celsius (℃) Celsius (℃) temperature temperature temperature (℉)... -
Page 28: Appendix 2: Resistance Table Of Temperature Sensor
Service Manual Appendix 2: Resistance Table of Temperature Sensor Resistance Table of Ambient Temperature Sensor (15K) Temp( C) Resistance(kΩ) Temp( C) Resistance(kΩ) Temp( Resistance(kΩ) Temp( Resistance(kΩ) 138.1 18.75 3.848 1.071 128.6 17.93 3.711 1.039 121.6 17.14 3.579 1.009 16.39 3.454 0.98 108.7 15.68... - Page 29 Service Manual Resistance Table of Tube Temperature Sensors (20K) Temp( C) Resistance(kΩ) Temp( C) Resistance(kΩ) Temp( Resistance(kΩ) Temp( Resistance(kΩ) 181.4 25.01 5.13 1.427 171.4 23.9 4.948 1.386 162.1 22.85 4.773 1.346 153.3 21.85 4.605 1.307 20.9 4.443 1.269 137.2 4.289 1.233 129.9 19.14...
- Page 30 Service Manual Resistance Table of Discharge Temperature Sensor (50K) Temp( C) Resistance(kΩ) Temp( Resistance(kΩ) Temp( C) Resistance(kΩ) Temp( Resistance(kΩ) 853.5 18.34 4.75 799.8 93.42 17.65 4.61 89.07 16.99 4.47 703.8 84.95 16.36 4.33 660.8 81.05 15.75 4.20 620.8 77.35 15.17 4.08 580.6 73.83...
-
Page 31: Appendix 3: Resistance Value Table Of Humidity Sensor
Service Manual Appendix 3: Resistance Value Table of Humidity Sensor HIS-06 temperature and humidity characteristic5℃~ 14℃ Unit:KΩ Relative Temperature(℃) humidity 5℃ 6℃ 7℃ 8℃ 9℃ 10℃ 11℃ 12℃ 13℃ 14℃ 5.35 4.92 4.55 4.23 3.95 3.70 3.47 3.25 3.05 2.87 5.80 5.33 4.93... - Page 32 Service Manual 1128.50 1033.61 953.39 883.90 822.61 767.78 704.83 647.37 594.51 545.56 1325.87 1213.40 1118.31 1035.94 963.29 898.30 823.48 755.17 692.34 634.16 1563.51 1430.14 1317.38 1219.71 1133.55 1056.48 967.04 885.39 810.28 740.74 1855.67 1695.83 1560.69 1443.63 1340.37 1248.00 1140.34 1042.06 951.64 867.93 2213.60...
- Page 33 Service Manual 50.20 46.55 43.12 39.89 36.83 33.93 31.76 29.69 27.71 25.82 56.00 51.92 48.08 44.47 41.05 37.80 35.35 33.02 30.79 28.65 62.80 58.20 53.88 49.80 45.95 42.29 39.51 36.87 34.34 31.92 70.00 64.95 60.21 55.74 51.51 47.50 44.33 41.31 38.42 35.65 78.80...
- Page 34 Service Manual 5.49 5.21 4.94 4.68 4.43 4.19 3.97 3.75 3.54 3.34 5.93 5.62 5.33 5.04 4.77 4.50 4.26 4.02 3.80 3.57 6.49 6.13 5.79 5.46 5.14 4.84 4.57 4.32 4.07 3.83 7.00 6.61 6.24 5.88 5.53 5.20 4.91 4.63 4.35 4.09 7.59...
- Page 35 Service Manual HIS-06 Characteristic of temperature and humidity 35℃ ~ 45℃ Unit:KΩ Relative Temperature(℃) humidity 35℃ 36℃ 37℃ 38℃ 39℃ 40℃ 41℃ 42℃ 43℃ 44℃ 45℃ 1.20 1.17 1.14 1.11 1.08 1.05 1.02 1.00 0.98 0.95 0.93 1.27 1.23 1.20 1.16 1.13 1.10...
- Page 36 Service Manual 43.60 40.77 38.02 35.35 32.74 30.20 28.45 26.73 25.06 23.43 21.83 48.20 45.06 42.00 39.02 36.13 33.30 31.40 29.55 27.74 25.97 24.25 54.00 50.43 46.97 43.59 40.30 37.10 34.98 32.92 30.90 28.93 27.00 60.60 56.63 52.78 49.02 45.36 41.80 39.36 36.98...
- Page 37 GREE ELECTRIC APPLIANCES,INC.OF ZHUHAI Add: West Jinji Rd, Qianshan, Zhuhai, Guangdong, China 519070 Tel: (+86-756) 8522218 Fax: (+86-756) 8669426 Email: gree@gree.com.cn Http://www.gree.com HONG KONG GREE ELECTRIC APPLIANCES SALES LIMITED Add: Unit 2612,26/F.,Miramar Tower 132 Nathan Road,TST,Kowloon,HK Tel: (852) 31658898 Fax: (852) 31651029...
Need help?
Do you have a question about the GDN12AJ-K4EBC1A and is the answer not in the manual?
Questions and answers