Table of Contents
Advertisement
Advertisement
Table of Contents

Subscribe to Our Youtube Channel
Related Manuals for AEE lyfe titan


Summary of Contents for AEE lyfe titan
- Page 1 LYFE TITAN USER MANUAL ENGLISH...
-
Page 2: Table Of Contents
Viewing Photos and Video on TVs . . . . . . 19 Connecting to the AEE APP . . . . . . . . . . . 20... - Page 3 Disclaimer Please use common sense and caution when operating camera(s) . Keep the camera out of high temperatures and/or direct sunlight . Keep the memory card away from any object with a strong magnetic field (i .e . TV, loud speaker, magnetic iron) and any place that has static electricity to prevent lost data storage .
-
Page 4: Box Content
Box Content LYFE TITAN CAMERA Quick Release Lithium Battery Waterproof Housing Frame Quick Release Buckle Curved Adhesive Mount Flat Adhesive Mount... - Page 5 Box Content Anti-Fog Inserts Quick Start Guide USB Cable Stickers Lens Cleaning Cloth Back Panel Cover...
-
Page 6: Camera Basics
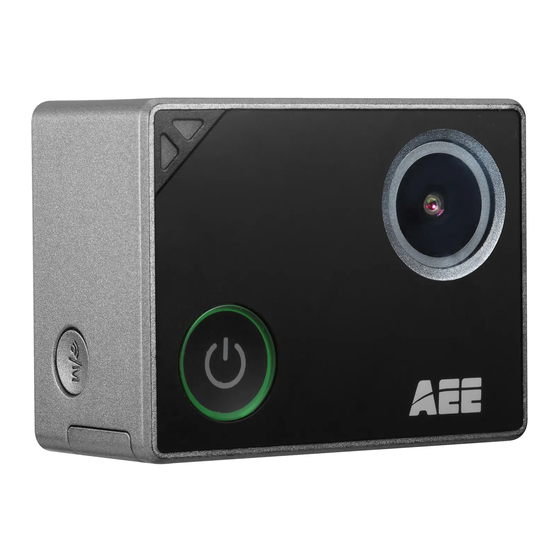
Camera Basics Stop Recording Battery Cover 14 . Micro HDMI Port Button 15 . microSD Card Slot Shutter Button Wide Angle Lens 16 . Micro USB Port Green Indicator Light 10 . Green Indicator Light [L1] [L1] Blue WiFi Indicator 11 . -
Page 7: Indicator Light Statuses
Indicator Lights Camera Status Green Light [L1] Camera Status Red Light [L3] Recording Video Flashing Charging Battery Flashing Recording Audio Flashing Power On Solid Taking Photos Single Flash Recording Video Solid Card Full Solid Recording Audio Solid Taking Photos Solid Card Full Solid Charged Battery... -
Page 8: Getting Started
Getting Started Battery Installation Slide the battery cover in the direction of the arrow, then place the battery into the battery compartment and close the cover . microSD Card Insertion When powered off, slide the microSD card into the microSD card slot with the label facing the front of the camera . -
Page 9: Charging The Battery
Getting Started Charging the Battery Connect the Micro USB cord to the camera and connect the other end to a computer or 5V/2A AC power adapter or portable power source . *The red indicator light (L3) will flash when charging the battery. When it is fully charged, the light will remain solid. -
Page 10: Power On/Off
Getting Started Power On/Off Press and hold the Power/Record button for approximately 3 seconds to turn the camera on or off . *When powered on, the red indicator light (L3) will turn on and the camera will be in standby mode. -
Page 11: Touch Screen Operation
TOUCH SCREEN OPERATION... -
Page 12: Default View
Default View 1 . Indicates Modes Selected 2 . Record Time 3 . Battery Level 4 . Video Resolution 5 . Tap on Menu Button to enter Main Menu 6 . Remaining Record Time... -
Page 13: Main Menu
Main Menu icon Description Tap the Video Icon to enter Video Mode Tap the Camera Icon to enter Photo Mode Tap the Burst Icon to enter Burst Photo Mode Tap the Interval Shooting Icon to enter Interval Shooting Mode Tap the Library Icon to view photos and videos Tap the Setting Icon to change settings *Tap the “x”... -
Page 14: Video Mode
Video Mode Function Description Record Select to record video with audio Video Only Select to record video only Audio Only Select to record audio only Auto Set time for Auto Record: 5s/10s/20s Record Set time to take photo(s) during video recording: Video + Photo Manual/5s/10s/30s/60s Set time for Interval Record: 1s/2s/5s/10s/30s... - Page 15 Video Mode Function Description In this mode, press the Record Button to prerecord the video without Pre-Video saving it; press the Record Button again to record video using the last 10 seconds of prerecording as the starting part . Select Video Resolution: 4k@30fps, 1440P@60fps/30fps, Resolution 1080P@100fps/60fps/30fps, 960P@60fps, 720P@200fps/120fps/60fps...
-
Page 16: Video Mode
Video Mode Video Resolution Viewing Angle (FOV)* Ultra Wide, Wide, Medium, Narrow 1440P Ultra Wide, Wide, Medium, Narrow 1080P Ultra Wide, Wide, Medium, Narrow 960P Ultra Wide, Wide, Medium, Narrow 720P Ultra Wide, Wide, Medium, Narrow *FOV: Field of View... -
Page 17: Photo Mode
Photo Mode Function Description Tap Shutter If turned on, tap screen to take a picture Burst Select Burst Mode: 3 photos/1s, 6 photos/1s, 8 photos/1s Interval Sets Frequency for pics to be taken: Shooting 1s, 2s, 3s, 5s, 10s, 20s Pics will be taken automatically after setting time: Self Timer 3s, 5, 10s... -
Page 18: Setting Mode
G-Sensor camera moves . Camera will stop recording when moving stops after 3 minutes Turn WiFi on to connect to APP ZONE on the Lyfe Titan WiFi Mode network, select AP Mode for smartphone devices, select STA for remote controls... -
Page 19: Setting Mode
Settings Mode Function Description Function Description Camera will enter power-saving Select Date & Time format: state when no user activity has Sleep Mode Date/Time M/D/Y H:M, D/M/Y H:M, been sensed for a certain time: Y/M/D H:M Off, 2min, 5min, 10min Display will be automatically Display turned off when no user activity... -
Page 20: Library
Library Function Description Displays all video & audio files Video Files Displays all photo files Photo Files Displays all video, audio & photo files All Files... -
Page 21: Library
Library Tap on thumbnail to open any file Click on the square on the top left-hand corner of the thumbnail to select each file After selecting 1 or more files, three yellow option squares ( ) appear in the top right- hand corner . -
Page 22: Data Transfer
Data Transfer Transferring Data to Computer Connect the Micro USB cord to the camera and connect the other end to a computer . Turn the camera on . If using Windows, go to “My Computer” and search for “Removable Disc . ” Double click on “Removable Disc . -
Page 23: Connecting To The Aee App
Go to WiFi settings on your mobile device, find and select the Lyfe Titan network, and enter the password: AEE12345 . Launch the AEE ZONE and click on the Camera button in the APP . Use your camera with the AEE ZONE . -
Page 24: Accessory Application
Accessory Application Accessory Application The Lyfe Cams are suitable for handheld use or hands-free use by using appropriate accessories . The Lyfe Cams come with waterproof housing that is used to record vid- eos and take photos underwater . Waterproof Case: Quick Release Buckle + Thumb Screw+ Housing = Complete Unit Quick Release Frame:... -
Page 25: Specifications
Specifications Photo Resolution 16MP, 12MP, 8MP Video Resolution (MP4) 4K@30fps, 1440p@60fps/30fps, 1080p@100fps/60fps/30fps, 960p@60fps, 720p@200fps/120fps/60fps Lens Angle: 140° Screen 1.8“ Touchscreen integrated Aperture: 2.7f Photo Mode Tap Shutter, Burst, Self Video Mode Record, Video Only, Audio Only, Interval Record, Auto Record, Video + Photo Timer, Interval Shooting Burst Mode 3 photos/1s, 6 photos/1s,... -
Page 26: Troubleshooting
Troubleshooting If you don’t use your camera for a long period of time, please charge it every 6 months to maintain the battery life . Using the digital zoom feature will slightly reduce the image quality . Please be aware of this and use at your discretion . It is suggested to upload and view large video/photo/audio files on your computer to ensure quality viewing . -
Page 27: Fcc Notification
FCC Notification FCC Compliance Statement This device complies with part 15 of the FCC Rules . Operation is subject to the following two conditions: • This device may not cause harmful interference . • This device must accept any interference received, including interference that may cause undesired operation .
Need help?
Do you have a question about the lyfe titan and is the answer not in the manual?
Questions and answers