
Subscribe to Our Youtube Channel
Related Manuals for Miller ENPAK


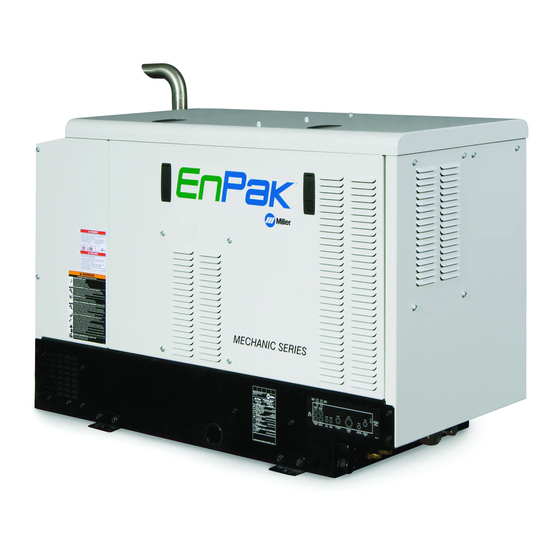
Summary of Contents for Miller ENPAK
- Page 1 OM-240 113S 2012−10 Description Mobile Utility Unit With Air Compressor, Hydraulic Pump, And Auxiliary Power Capability EnPak File: Mobile Utility Visit our website at www.EnPak.com...
- Page 2 We know you don’t have time to do it any other way. That’s why when Niels Miller first started building arc welders in 1929, he made sure his products offered long-lasting value and superior quality.
-
Page 3: Table Of Contents
TABLE OF CONTENTS SECTION 1 − SAFETY PRECAUTIONS − READ BEFORE USING ....... . 1-1. - Page 4 TABLE OF CONTENTS 8-5. Changing Engine Oil, Oil Filter, And Fuel Filters ......... . . 8-6.
-
Page 5: Section 1 − Safety Precautions − Read Before Using
SECTION 1 − SAFETY PRECAUTIONS − READ BEFORE USING Enpak_2011−10 Protect yourself and others from injury — read, follow, and save these important safety precautions and operating instructions. 1-1. Symbol Usage DANGER! − Indicates a hazardous situation which, if Indicates special instructions. not avoided, will result in death or serious injury. -
Page 6: Hydraulic Hazards
Using a generator indoors CAN KILL STEAM AND HOT COOLANT can burn. YOU IN MINUTES. D If possible, check coolant level when engine is cold to avoid scalding. D Generator exhaust contains carbon monoxide. This is a poison you cannot see or smell. D Always check coolant level at overflow tank, if present on unit, instead of radiator (unless told D NEVER use inside a home or garage, EVEN IF... -
Page 7: Compressed Air Hazards
1-4. Compressed Air Hazards BREATHING COMPRESSED AIR can in- COMPRESSED AIR EQUIPMENT can jure or kill. injure or kill. D Do not use compressed air for breathing. D Incorrect installation or operation of this unit could result in equipment failure and personal D Use only for cutting, gouging, and tools. -
Page 8: Additional Symbols For Installation, Operation, And Maintenance
1-5. Additional Symbols For Installation, Operation, And Maintenance ELECTRIC SHOCK can kill. FLYING SPARKS can injure. Touching live electrical parts can cause fatal shocks or D Wear a face shield to protect eyes and face. severe burns. Machine internal circuits are live when D Shape tungsten electrode only on grinder with power is on. -
Page 9: California Proposition 65 Warnings
1-6. California Proposition 65 Warnings For Gasoline Engines: Welding or cutting equipment produces fumes or gases which contain chemicals known to the State of California to Engine exhaust contains chemicals known to the State of cause birth defects and, in some cases, cancer. (California California to cause cancer, birth defects, or other reproduc- Health &... -
Page 10: Section 2 − Consignes De Sécurité − Lire Avant Utilisation
SECTION 2 CONSIGNES DE SÉCURITÉ − LIRE AVANT − UTILISATION Enpak_2011−10_fre Pour écarter les risques de blessure pour vous−même et pour autrui — lire, appliquer et ranger en lieu sûr ces consignes relatives aux précautions de sécurité et au mode opératoire. 2-1. -
Page 11: Dangers Liés À L'hydraulique
D Mettre des lunettes de sécurité et des gants, placer un torchon sur LES ÉTINCELLES À L’ÉCHAPPEMENT le bouchon du radiateur. peuvent provoquer un incendie. D Dévisser le bouchon légèrement et laisser la vapeur s’échapper avant d’enlever le bouchon. D Empêcher les étincelles d’échappement du moteur de provoquer un incendie. -
Page 12: Dangers Liés À L'air Comprimé
D En cas de pénétration d’un QUELCONQUE liquide dans la peau, Le LIQUIDE HYDRAULIQUE risque de celui−ci doit être retiré chirurgicalement sous quelques heures par provoquer des blessures ou même la mort. un médecin familiarisé avec ce type de blessure, faute de quoi la gangrène pourrait apparaître. -
Page 13: Dangers Supplémentaires En Relation Avec L'installation, Le Fonctionnement Et La Maintenance
D Remettre les portes, panneaux, recouvrements ou dispositifs D Avant d’intervenir sur le circuit d’air comprimé, couper de protection quand l’entretien est terminé et avant de mettre l’alimentation électrique, verrouiller et étiqueter l’appareil, en marche l’appareil. détendre la pression et s’assurer que le circuit d’air ne peut être mis sous pression par inadvertance. -
Page 14: Proposition Californienne 65 Avertissements
LA CHUTE DE L’ÉQUIPEMENT Les PIÈCES MOBILES peuvent peut provoquer des blessures. causer des blessures. D Utiliser l’anneau de levage pour lever l’appareil D Ne pas s’approcher des organes mobiles. et les accessoires correctement installées D Ne pas s’approcher des points de coincement seuls, PAS les bouteilles de gaz. - Page 15 Road, Suite 211, Milwaukee, WI 53222-3219 (phone: (414) 778-3344, U.S. Consumer Product Safety Commission (CPSC), 4330 East West website: www.nfpa.com). Highway, Bethesda, MD 20814 (phone: 301-504-7923, website: www.cpsc.gov). OSHA, Occupational Safety and Health Standards for General Indus- Applications Manual for the Revised NIOSH Lifting Equation, The Na- try, Title 29, Code of Federal Regulations (CFR), Part 1910, Subpart Q, tional Institute for Occupational Safety and Health (NIOSH), 1600 and Part 1926, Subpart J, from U.S.
-
Page 16: Section 3 − Definitions
SECTION 3 − DEFINITIONS 3-1. Symbol Definitions Protective Earth Engine Cooling Engine Air Filter Glow Plugs (Ground) Check Valve Engine Oil Fuel Battery (Engine) Clearance Read Operator’s Alternating Current Direct Current Engine Manual (AC) (DC) Air Compressor Air Pressure Engine Belt Hydraulic Pump Crank Engine SECTION 4 −... -
Page 17: Dimensions, Weights, And Operating Angles
4-5. Dimensions, Weights, and Operating Angles Do not exceed tilt angles or engine could be damaged or unit could tip. Do not move or operate unit where it could tip. Do not operate suspended from lifting eye. Weight: 870 lb (390 kg) 767 lb (348 kg) Without Hydraulic Power Source 925 lb (419 kg) Fully Equipped... -
Page 18: Fuel Consumption Curves
4-6. Fuel Consumption Curves Compressor 1.80 1.60 1.40 1.20 1.00 0.80 0.60 0.40 0.20 0.00 CUBIC FEET PER MINUTE (CFM) Auxiliary Power 1.80 1.60 1.40 1.20 1.00 0.80 0.60 0.40 0.20 0.00 AUXILIARY POWER IN KILOWATTS Standard Auxiliary Power Optional EnVertert Auxiliary Power Combined maximum auxiliary power output (standard generator and EnVerter) is 6kVA/kW. -
Page 19: Auxiliary Power Curves
EnPak, and does not turn on, place the EnPak in high speed. This will bring the output of the generator up to the normal 120 VAC or 240... -
Page 20: Air Compressor Curves
4-9. Air Compressor Curves CFM VS ENGINE RPM 1800 2600 3200 3600 ENGINE SPEED (RPM) CFM VS PSI PRESSURE (PSI) Ref. 220 807−A OM-240 113 Page 16... -
Page 21: Hydraulic Pressure Curves (Models With Hydraulic Power Source)
4-10. Hydraulic Pressure Curves (Models With Hydraulic Power Source) Curves are typical. Output will vary depending on system pressure losses to load sense pressure location. Fluid: ISO 32 Hydraulic Oil Fluid Temperature: 49° C (120° F) Load Sense Pressure: Closed Center − 400 PSID (27.6 bar) Open Center −... -
Page 22: Section 5 − Prestart Checks
SECTION 5 − PRESTART CHECKS 5-1. Hydraulic System Prestart Checks (Models With Hydraulic Power Source) NOTICE − Ensure hydraulic system is properly connected with valves open before starting unit. Damage will result if unit is run before hydraulic system is complete. Hydraulic pump does not disengage via clutch. 5-2. -
Page 23: Compressor Prestart Checks
5-3. Compressor Prestart Checks NOTICE − Do not mix oil types. Do not The unit is shipped with oil in the com- The compressor is equipped with high overfill. pressor reservoir. Minimum oil level is half oil temperature shutdown. High oil way up the sight hole. -
Page 24: Section 6 − Operation
SECTION 6 − OPERATION 6-1. Remote Panel (Use With Section 6-2) 248 998 OM-240 113 Page 20... -
Page 25: Remote Panel Operation (Use With Section 6-1)
(P−PRV). See Section 7-1. 6-3. Safety Interlock Models With Hydraulic Power Source: The safety interlock system must be engaged before the EnPak engine can be started Contact dealer for detailed description of supplied system. Models Without Hydraulic Power Source: The safety interlock system requires 12 volts DC be supplied from the accessory position of the truck ignition switch to pin 5 of RC13. -
Page 26: Operation And Error Messages
6-4. Operation And Error Messages 248 998 Alpha−Numeric Display OVErPRES HiVOLTiN The following operational messages Indicates the compressor has an over pres- Indicates high input voltage from the bat- may appear: sure error. tery. CHNG OIL OVErSPEEd LoVOLTiN Indicates an oil change is needed. This light Indicates an engine over speed error. -
Page 27: Auto Start/Stop Operation
Panel, or with one press and release of the and hold the Auto Start/Stop button, and the Engine Start switch on the Crane pendant. If the EnPak engine is turned off using the time to shut down will display. Continue to Remote Panel Engine Off push button or... -
Page 28: Cold Weather Starting And Operation
See chart below for minimum heater times. Turn unit on and initiate the engine glow plugs. See chart below when manually starting the unit from the EnPak service panel. All external loads on the engine should be off when starting the engine. The air compressor should be off until the engine has been started and warmed up. - Page 29 OM-240 113 Page 25...
-
Page 30: Service Panel
6-7. Service Panel 239 667-1-A Manual/Remote Switch Low position is 2600 RPM and is used Compressor Pressure LED when light loads are present. When working on unit, always Indicates the compressor pressure is too Fuel Pump Switch move Manual/Remote switch to high. -
Page 31: Hydraulic Pump Operation (Models With Hydraulic Power Source)
EnPak will stay at 1800 RPM and deliver up to 5 GPM of flow from the hydraulic pump. For medium trigger pulls, the EnPak will go to 2600 RPM and deliver up to 6 GPM. For higher trigger commands from the crane pendant, the EnPak will go to 3200 RPM and deliver up to 10 GPM. -
Page 32: Section 7 − Compressor Operation
SECTION 7 − COMPRESSOR OPERATION 7-1. Air Compressor Controls 805 444 / 805 451-A If pressure reaches 200 psi, the com- The air pressure gauge reads the air Pressure is factory set for 120 psi. Do pressor clutch will disengage and shut compressor case pressure. -
Page 33: Compressor Blow Down
7-2. Compressor Blow Down To prevent foaming or sudden release of pressure, allow 10 minutes after shutdown before opening the compressor oil fill cap or performing other compressor maintenance. To control the release of air in the compressor, the compressor goes through a blow down cycle. Blow down depressurizes the compressor case when not running;... -
Page 34: Section 8 − Maintenance
SECTION 8 − MAINTENANCE 8-1. Maintenance Label When working on unit, always move Manual Remote switch on Service Panel to Manual position to prevent remote starting. OM-240 113 Page 30... -
Page 35: Routine Maintenance
8-2. Routine Maintenance Use information displayed on the Alpha−Numeric display to assist in scheduling maintenance (see Section 6-1). Engine speed is regulated by an electronic governor. Engine speed adjustments may only be performed by the engine manufacturer’s Factory Authorized Service Agent. Follow the storage procedure in the engine owner’s manual if the unit will not be used for an extended period. - Page 36 n = Check Z = Change ~ = Clean Reference * If unit is so equipped Every Engine Manual Hours n Valve Clearance Every Section 8-7 1000 Hours Yearly Z Air/Oil Separator Z Hydraulic Fluid* Z Air Cleaner Element Yearly Or After 6 Cleanings Every Section 8-7 2000...
-
Page 37: Servicing Engine Air Cleaner
Check with dealer for detailed descrip- Restore +12 volts DC power to the crane tion of system supplied. Try to start the EnPak engine from the system. The EnPak should start and func- Power to the crane system will be sup- crane remote pendant or the EnPak re- tion properly. -
Page 38: Changing Engine Oil, Oil Filter, And Fuel Filters
8-5. Changing Engine Oil, Oil Filter, And Fuel Filters Stop engine and let cool. Oil Drain Valve Oil Filter Change engine oil and filter accord- Tools Needed: ing to engine manual. Close valve and valve cap before adding oil and run- ning engine. -
Page 39: Engine Sensors And Governor Locations
8-6. Engine Sensors And Governor Locations Coolant Temperature Sensor Actuator/Governor Engine Speed Sensor Coolant Temperature Shutdown Switch Oil Pressure Sensor Alternator 805 452-B / 805 444-A OM-240 113 Page 35... -
Page 40: Changing Compressor Oil, Air Cleaner, And Air/Oil Separator
8-7. Changing Compressor Oil, Air Cleaner, And Air/Oil Separator Stop engine. Wait 10 minutes for compressor blow down cycle to complete be- fore performing maintenance. Check compressor gauge before performing maintenance. Do not run air compressor without Tools Needed: air cleaner or with dirty element. Compressor damage caused by using a damaged element is not 1/4 in. -
Page 41: Section 9 − Troubleshooting
Parts List). Machine plugged into regular generator Engine speed too low and load is not recognized. Using crane remote or EnPak remote panel, manu- auxiliary power does not work. ally place engine in high speed (see Section 6-1 item 7 for EnPak remote panel). -
Page 42: Compressor Troubleshooting
Check remote panel and crane pendant to see if system is locked in high speed. Have Factory Authorized Service Agent check circuit board PC2 and current transformer CT1. Engine speed does not remain con- GFCI receptacle is not proper type for application. Replace with Miller approved GFCI device (see stant. Parts List). -
Page 43: Hydraulic Troubleshooting (Models With Hydraulic Power Source)
Trouble Remedy Oil in compressor air cleaner. Have Factory Authorized Service Agent check for blocked separator scavenge check valve/filter orifice. Have Factory Authorized Service Agent verify compressor intake valve P-IC is operating properly. Water in compressor oil. Have Factory Authorized Service Agent check thermostat operation. 9-4. - Page 44 Trouble Remedy Flow control valve H−FC1 not functioning. Check to make sure solenoid is plugged in. Check wiring No outrigger operation (Continued). harness to solenoid coil. Have Factory Authorized Service Agent check solenoid coil integrity. Flow control valve H−FC1 plugged with contaminants. Replace valve and flush system. Belt to pump failed.
-
Page 45: Section 10 − Authorized Dealer Installation Information
See Section 4-5 for dimensions. Hydraulic Reservoir (Models With Hydraulic Power Source) EnPak Location/Airflow Clearance Typical hydraulic reservoir place- ment in relation to EnPak. See Sec- tion 11-1 for complete reservoir re- quirements. 18 in. 7 in. (178 mm) Mainten- (460 mm) ance 4 in. -
Page 46: Mounting Unit
10-3. Mounting Unit NOTICE − Do not mount unit by supporting the base only at the four mounting brackets. Use cross-sup- ports to adequately support unit and prevent damage to base. Supporting The Unit See Section 4-5 for dimen- sions. Mounting Surface: Cross-Supports Mounting Brackets (Supplied) -
Page 47: Section 11 − Hydraulic System Preparation (Models With Hydraulic Power Source)
SECTION 11 − HYDRAULIC SYSTEM PREPARATION (MODELS WITH HYDRAULIC POWER SOURCE) 11-1. Hydraulic System Integration A. General Information − Minimum Requirements The system recommendations are intended for operating a crane of a low duty cycle, such as used on a mechanics truck. The system recommenda- tions are based on intermittent use. - Page 48 Obtain hoses of the proper length and type with appropriate fittings for the installation according to Table 11-1. Table 11-1. Hydraulic Hoses Specifications Hydraulic Hoses System Flow Rate Hose ID Minimum Minimum Vacuum Service Operating Working Burst Temperature Pressure Pressure in.
-
Page 49: Hydraulic Hose Connections
11-2. Hydraulic Hose Connections Hydraulic fluid is flammable. Do not work on hydraulics near sparks or flames; do not smoke near hydraulic fluid. Route all hoses away from hot, sharp or moving parts. Check all connections and hoses for damage, leaks, and wear. -
Page 50: Priming Hydraulic Pump
11-3. Priming Hydraulic Pump 243 965-A / 805 444 / 239 667-1-A Fill hydraulic pump case with oil at its Screw the manual override screw fully When working on unit, always highest point. counterclockwise. move Manual/Remote switch to Manual position to prevent remote Place the Service Panel Manual/Remote Fully open suction line valve at the reser- starting. -
Page 51: Load Sense Line Bleeding (Closed Center Systems Only)
11-4. Load Sense Line Bleeding (Closed Center Systems Only) Load Sense Line Bleeding Valve For systems utilizing closed−center valving and load sensing, the load sense line must be bled of air near the pump. This is accomplished us- ing the push−activated valve on the load sense line. -
Page 52: Section 12 − Engine Preparation
Connect negative (−) cable last. Battery Cable Strain Relief EnPak Engine Block Starter Route cables from vehicle bat- tery through strain relief. Connect positive (+) cable to engine starter. Connect negat- ive (−) cable to unit engine block. -
Page 53: Installing Exhaust Pipe
12-2. Installing Exhaust Pipe Engine backfire can cause se- vere burns or other injuries. Keep away from exhaust out- let. Do not point exhaust pipe to- ward any compressed gas tank. Point exhaust pipe in desired di- rection but always away from di- rection of travel. -
Page 54: Fuel Connections
12-3. Fuel Connections Route all hoses away from hot, sharp or moving parts. Check all connections and hoses for damage, leaks, and wear. Fuel Pickup Connection Fuel Return Connection Select hose rated to SAE 30R7, and certified to section 2754 (a)(1)(C) of the California Air Re- sources Board 2006 Emission Regulations. -
Page 55: Section 13 − Air Compressor System Preparation
SECTION 13 − AIR COMPRESSOR SYSTEM PREPARATION 13-1. Air Compressor System Integration A. General Information − Minimum Requirements For use with a mechanics truck crane, the system should at a minimum include the following items: Reservoir of 20 gal (76 L) or more capacity Safety relief valve Properly sized hoses and fittings, restrained and protected Depending on the desired compressed air quality, air conditioning components such as separators, filters or dryers may be required. -
Page 56: Compressor Connections
13-2. Compressor Connections Stop engine and release air pressure before servicing compressor. Air Compressor Connection Connect and secure hose. After hand-tightening connections, tight- en 2 to 3 full turns. Tools Needed: 1-1/6 in. (27 mm) 805 443-B / 287 097 OM-240 113 Page 52... -
Page 57: Compressor Safety Valve Testing
13-3. Compressor Safety Valve Testing Safety Valve (P−SV) The safety valve is factory set for 200 psi maximum. Do not al- ter. The safety valve is mounted on the separator receiver in front of the air/ oil separator filter. The safety valve should be tested frequently at regu- lar intervals to ensure it is in good working order. -
Page 58: Section 14 − Remote Devices Connections
RC12. Crane Remote Connection Receptacle RC13 NOTICE − Connect to this recept- acle only when EnPak is equipped with hydraulic power source used to power a hydraulic crane apparat- Crane remote control provided by crane manufacturer. Connect ap-... -
Page 59: Section 15 − Auxiliary Power System Connections
Also see AWS Safety & Health Fact Sheet No. 29, Grounding of Portable And Vehicle Mounted Welding Generators. Auxiliary Power System Ground (EnPak Base) Grounding Cable (Not Supplied) Metal Vehicle Frame Auxiliary Power Box Connect grounding cable to auxiliary power system ground (ground screw on frame where existing green lead is attached). -
Page 60: Auxiliary Power System Connections And Overload Protection
If the electric machine that you are using is not recognized as a load by the EnPak, and does not turn on, place the EnPak in high speed. This will bring the output of the generator up to the nor-... - Page 61 Notes MATERIAL THICKNESS REFERENCE CHART 24 Gauge (.025 in) 22 Gauge (.031 in) 20 Gauge (.037 in) 18 Gauge (.050 in) 16 Gauge (.063 in) 14 Gauge (.078 in) 1/8 in (.125 in) 3/16 in (.188 in) 1/4 in (.25 in) 5/16 in (.313 in) 3/8 in (.375 in) 1/2 in (.5 in)
-
Page 62: Section 16 − Diagrams
SECTION 16 − DIAGRAMS Figure 16-1. EnPak Circuit Diagram OM-240 113 Page 58... - Page 63 251 180-B OM-240 113 Page 59...
- Page 64 OM-240 113 Page 60...
- Page 65 238 945-B1 Figure 16-3. Hydraulic Circuit Diagram Page 1 (Models With Hydraulic Power Source) OM-240 113 Page 61...
- Page 66 238 945-B2 Figure 16-4. Hydraulic Circuit Diagram Page 2: Typical Open−Center Configuration (Models With Hydraulic Power Source) OM-240 113 Page 62...
- Page 67 238 945-B3 Figure 16-5. Hydraulic Circuit Diagram Page 3: Typical Closed−Center With Load Sense Configuration (Models With Hydraulic Power Source) OM-240 113 Page 63...
- Page 68 Ref. 242 500-F Figure 16-6. EnPak Truck Wiring Diagram OM-240 113 Page 64...
-
Page 69: Section 17 − Generator Power Guidelines
SECTION 17 − GENERATOR POWER GUIDELINES The views in this section are intended to be representative of all engine-driven welding generators. Your unit may differ from those shown. 17-1. Selecting Equipment Generator Power Receptacles − Neutral Bonded To Frame 3-Prong Plug From Case Grounded Equipment 2-Prong Plug From Double Insulated Equipment... - Page 70 17-3. Grounding When Supplying Building Systems Equipment Grounding Terminal Grounding Cable Use #8 AWG or larger insulated copper wire. GND/PE Ground Device Use ground device as stated in electrical codes. Ground generator to system earth ground if supplying power to a premises (home, shop, farm) wiring system.
- Page 71 17-5. Approximate Power Requirements For Industrial Motors Industrial Motors Rating Starting Watts Running Watts Split Phase 1/8 HP 1/6 HP 1225 1/4 HP 1600 1/3 HP 2100 1/2 HP 3175 Capacitor Start-Induction Run 1/3 HP 2020 1/2 HP 3075 3/4 HP 4500 1400 1 HP...
- Page 72 17-7. Approximate Power Requirements For Contractor Equipment Contractor Rating Starting Watts Running Watts Hand Drill 1/4 in 3/8 in 1/2 in Circular Saw 6-1/2 in 7-1/4 in 8-1/4 in 1400 1400 Table Saw 9 in 4500 1500 10 in 6300 1800 Band Saw 14 in...
- Page 73 17-8. Power Required To Start Motor Single-Phase Induction Motor Starting Requirements Motor Start Code KVA/HP 10.0 11.2 12.5 14.0 Motor Start Code Running Amperage Motor HP Motor Voltage To find starting amperage: Step 1: Find code and use table to find kVA/HP.
- Page 74 17-10. Typical Connections To Supply Standby Power Have only qualified persons perform these connections according to all applicable codes and safety practices. Properly install, ground, and operate this equipment ac- cording to its Owner’s Manu- Fused al and national, state, and lo- Welding Utility Disconnect...
- Page 75 17-11. Selecting Extension Cord (Use Shortest Cord Possible) Cord Lengths for 120 Volt Loads Use GFCI protection when operating auxiliary equipment. Do not use GFCI receptacles to power life support equipment. Maximum Allowable Cord Length in ft (m) for Conductor Size (AWG)* Current Load (Watts) (Amperes)
-
Page 76: Section 18 − Parts List
SECTION 18 − PARTS LIST Hardware is common and not available unless listed. Unit shown is fully equipped. Some parts may not be applicable on units without hydraulic power source. Figure 18-1. Main Assembly OM-240 113 Page 72... - Page 77 18 19 242 707-B OM-240 113 Page 73...
- Page 78 Item Dia. Part Mkgs. Description Quantity Figure 18-1. Main Assembly ... . . 251884 Panel, End Exit ............
- Page 79 287097 Label, Connections EnPak ......... . .
- Page 80 Hardware is common and not available unless listed. 242 678-D Figure 18-2. Controls/Remote Assemblies OM-240 113 Page 76...
- Page 81 . . . Nameplate, Enpak Service Panel ....... . .
- Page 82 Hardware is common and not available unless listed. Ref: 805 456-H Figure 18-3. Air Compressor OM-240 113 Page 78...
- Page 83 Item Dia. Part Mkgs. Description Quantity Figure 18-3. Air Compressor ....248641 Assembly, Compressor AP40 (Includes) . . . P−AC 238869 . . . Compressor, Ap 40 (includes) .
- Page 84 Item Dia. Part Mkgs. Description Quantity Figure 18-3. Air Compressor (Continued) ......O-Ring, 132 70 Durometer (3/32 in. Dia, 1-3/4 in. ID) .
- Page 85 Hardware is common and not available unless listed. 805 457-A Figure 18-4. Hydraulic System Open Center (If Equipped) Item Dia. Part Mkgs. Description Quantity Figure 18-4. Hydraulic System Open Center (If Equipped) . . . H−P1 239014 Pump, Hyd Piston W/Load Sense Eaton 420 .
- Page 86 Hardware is common and not available unless listed. 243 166-A Figure 18-5. Hydraulic System Closed Center (If Equipped) Item Dia. Part Mkgs. Description Quantity Figure 18-5. Hydraulic System Closed Center (If Equipped) . . . H−P1 239014 Pump, Hyd Piston W/Load Sense Eaton 420 .
- Page 87 Notes OM-240 113 Page 83...
- Page 88 Hardware is common and not available unless listed. 805 458-D Figure 18-6. Engine Item Dia. Part Mkgs. Description Quantity Figure 18-6. Engine ... . . 239329 Assy, Radiator And Shroud .
- Page 89 Item Dia. Part Mkgs. Description Quantity Figure 18-6. Engine ....*197197 Belt, Engine ............
- Page 90 Hardware is common and not available unless listed. 242 679-C Figure 18-7. Generator Assembly Item Dia. Part Mkgs. Description Quantity Figure 18-7. Generator Assembly ... . . 208497 Nut, M08−1.2 13mmhex 8.3mm T Stl Pld Sem Con Washer .
- Page 91 ........*Recommended Spare Parts. ◊ Use Loctite® 242 (MILLER Part No. 009 425) to secure when replacing these parts. } Models without hydraulic power source.
- Page 92 Some wiring harness components (switches, relays, supplementary protectors) are also referenced elsewhere in this parts list. Purchase components separately or as part of the associated wiring harness. Item Dia. Part Mkgs. Description Quantity Wiring Harnesses ....237885 Harness, Wrg Unit (Includes) .
-
Page 93: Limited Warranty
Effective January 1, 2012 (Equipment with a serial number preface of MC or newer) This limited warranty supersedes all previous EnPak warranties and is exclusive with no other guarantees or warranties expressed or implied. LIMITED WARRANTY − Subject to the express terms sole discretion: (i) repair;... - Page 94 Purchase Date (Date which equipment was delivered to original customer.) Distributor Address City State Visit www.EnPak.com to locate an EnPak supplier. Contact your Truck Equipment Distributor for: Options and Accessories Service and Repair Replacement Parts Training (Schools, Videos, Books) Technical Manuals (Servicing Information and Parts) Circuit Diagrams Always provide Model Name and Serial/Style Number.
Need help?
Do you have a question about the ENPAK and is the answer not in the manual?
Questions and answers
is the Enpak A60 UL and CSA approved
“Boost sensor 1 “ error