Table of Contents
Advertisement
USER MANUAL
Elo Touch Solutions
ESY15i2 15.6" Windows I-Series AiO Interactive Signage
ESY22i2 21.5" Windows I-Series AiO Interactive Signage
ESY15i5 15.6" Windows I-Series AiO Interactive Signage
ESY22i5 21.5" Windows I-Series AiO Interactive Signage
UM600086 Rev. A
User Manual: Windows I-Series AiO Interactive Signage
UM600086 Rev A, Page 1 of 45
Advertisement
Table of Contents

Related Manuals for Elo Touch Solutions ESY15i2


Summary of Contents for Elo Touch Solutions ESY15i2
- Page 1 USER MANUAL Elo Touch Solutions ESY15i2 15.6” Windows I-Series AiO Interactive Signage ESY22i2 21.5” Windows I-Series AiO Interactive Signage ESY15i5 15.6” Windows I-Series AiO Interactive Signage ESY22i5 21.5” Windows I-Series AiO Interactive Signage UM600086 Rev. A User Manual: Windows I-Series AiO Interactive Signage...
- Page 2 Elo to notify any person of such revisions or changes. Trademark Acknowledgments Elo, Elo (logo), Elo Touch, Elo Touch Solutions, and TouchPro are trademarks of Elo and its Affiliates. Windows is a trademark of Microsoft Corporation...
-
Page 3: Table Of Contents
Table of Contents Read this first ......................5 Product Description ................7 Precautions ..................7 I-Series Layout ..................8 Elo Expansion Module (optional for POS capability) Layout ....9 Chapter 2: Getting Started ..................11 Unpacking the Windows I-Series AiO Interactive Signage ....11 General Mounting Information ............ - Page 4 Chapter 8: Warranty Information ................. 44 User Manual: Windows I-Series Interactive Signage UM600086 Rev A, Page 4 of 45...
-
Page 5: Read This First
Read this first Before using the I-Series for Windows, read the important safety and handling information (this section), Safety & Maintenance (Chapter 6), Regulatory Notice (Chapter 7), and the Warranty Information (Chapter 8) chapters in this user manual. This section provides guidance on the safe handling and use of your I-Series for Windows. Please read to understand all of the details. - Page 6 Do not delete or change the name of files or directories that were not created by you; as this may prevent the I-Series software from operating properly. Be aware that accessing network resources can render your I-Series vulnerable to computer viruses, hackers, spyware, and other malicious activities that might damage your I-Series, software, or data.
-
Page 7: Product Description
Chapter 1: Product Overview This chapter provides an overview of the new Elo I-Series for Windows, including the locations of the connectors and controls, I-Series features, accessories, specifications, and operating environment. Product Description The new Elo I-Series for Windows combines Elo reliable performance with the latest developments in touchscreen technology and display design. -
Page 8: I-Series Layout
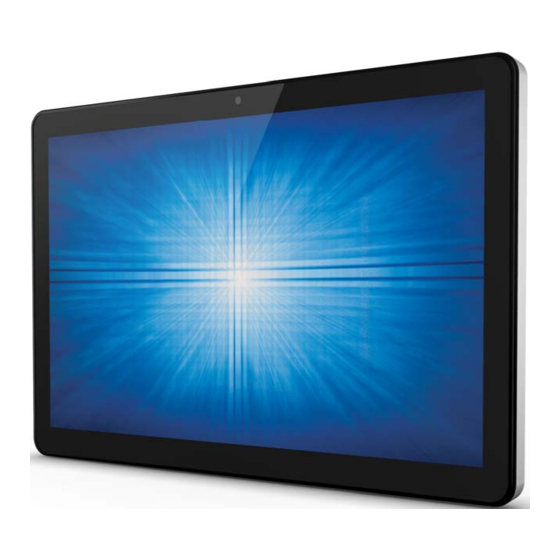
I-Series Layout ESY I-Series 15.6”/21.5” Models (i2 product shown) I-Series 15.6”/21.5” front view (left) and clerk right side view (right) I-Series 15.6”/21.5” back view (top) and rear IO view (bottom) User Manual: Windows I-Series Interactive Signage UM600086 Rev A, Page 8 of 45... -
Page 9: Elo Expansion Module (Optional For Pos Capability) Layout
Camera Power Connector (19V DC-IN) Peripheral Micro USB Ports Ethernet LAN Port OSD Control Buttons Micro HDMI Power indicator LED (top) 10 Elo GPIO Connector Wireless indicator LED (bottom) Kensington Lock Audio Port (Line-out) Loops for Cable Ties 12 USB 3.0 Ports Elo Expansion Module (optional for POS capability) Layout Elo expansion module front side view (Top), rear view (bottom). - Page 10 12V/24V Cash Drawer Power Switch The user can switch the input power to the cash drawer with either 12V or 24V input. RJ11 Cash Drawer Port The cash drawer port is a RJ-11 connector and the default setting is set to +24V. The pinouts is defined by the table below.
-
Page 11: Chapter 2: Getting Started
Chapter 2: Getting Started Unpacking the Windows I-Series AiO Interactive Signage To unpack the I-Series: 1. Open the box. 2. Check that the following items are present and in good condition: I-Series system unit. Quick Install Guide AC/DC Power adapter. ... -
Page 12: General Mounting Information
General Mounting Information The system following the VESA pattern described in the following section. The following three mounting orientations are supported: Landscape, portrait and table top (except i2 models) mode. For optimal touch performance, ensure that the system is supported fully and is as flat as possible. -
Page 13: Rear Vesa Mount
Landscape Table Top Rear VESA Mount A four-hole 75x75mm and 100x100mm mounting pattern for M4 screws is provided on the rear of the system. The VESA FDMI-compliant counting is coded: VESA MIS-B, 75, C. User Manual: Windows I-Series Interactive Signage UM600086 Rev A, Page 13 of 45... -
Page 14: Chapter 3: Operation
Chapter 3: Operation General Information This chapter describes how to utilize the front OSD control buttons, I/O panel, and other unique features that I-Series for Windows provide. All adjustments made to the brightness and volume controls are automatically saved. User settings remain unchanged after powering off/on or in the case of a power failure. -
Page 15: L.e.d. Functionality - Power Led
L.E.D. Functionality – POWER LED The I-Series has a Power LED indicating the state of the touchcomputer. The table below shows LED state and corresponding color. LED Color to Observer State No input power — Off mode Input power present — Off mode or hibernation Orange Input power present —... -
Page 16: Functionality - Ethernet Led (I2 Product Shown)
L.E.D. Functionality – Ethernet LED (i2 product shown) LAN Speed State LAN LED Status 10Mbps No Color 100Mbps Orange Color 1Gbps Green Color Activity State ACT LED Status No Link No Color Linked Solid (Green Color) Data Activity Blinking (Green Color) Using the Input/output Panel (i2 product shown) To access the input/output (I/O) ports, remove the cable cover at the bottom of the unit. - Page 17 touchcomputer by pressing the power button, and then follow the on-screen instructions. Injecting a new language Windows 7 only allows the use of only one language at one time. So you have to use the Elo language injection feature to modify your language preference. English is set as the default language, but you can change the language to suit your preferences.
- Page 18 5. The following User Interface (UI) will be presented: 6. Select Inject Language and the following UI will be presented. User Manual: Windows I-Series Interactive Signage UM600086 Rev A, Page 18 of 45...
-
Page 19: Creating The Recovery Flash Drive
7. Click the drop-down list and select the preference language. 8. Click Inject Selected Language 9. While the injecting process is performing, DO NOT use your keyboard or mouse during this time. It may cause an error in the language injection process. 10. - Page 20 2. Click “Start” button to begin the process. 3. Once completed, you shall see a pop-up window to ask to insert a blank flash drive to any of available USB ports on your system. 4. After the flash drive is inserted, you shall see a window as shown below. Click “Format Drive”...
- Page 21 5. Click “Create Restore Media” to proceed. This step will take 10-20 minutes depending on your system configurations and flash drive performance. 6. Once the message shows “Creation Restore Media success…”, please remove the flash drive and click “Exit” to exit the program. 7.
- Page 22 Note: All data is deleted during the recovery process. The user must back up files when necessary. Elo Touch Solutions does not accept liability for lost data or software. Note: The end user must adhere to Microsoft's Licensing Agreement...
-
Page 23: Recovering The Operating System
Recovering the Operating System If for any reason the touchcomputer’s operating system needs to be recovered TO FACTORY SETTINGS, you can recover your system by following procedures below. PLEASE NOTE THAT ALL CUSTOMER SETTINGS AND DATA WILL BE LOST DURING THIS PROCESS. Please be sure to completely backup all of your data, settings, and customer-installed software before proceeding. - Page 24 5. The following User Interface (UI) will be presented: Select Restore OS. System will test your hardware automatically. Once the process completes, click Start button to perform the system recovery function. User Manual: Windows I-Series Interactive Signage UM600086 Rev A, Page 24 of 45...
- Page 25 Elo Recovery Solution. Then click the Exit button to restart your system. NOTE: All data is deleted during the recovery process. The user must back up files when necessary. Elo Touch Solutions does not accept liability for lost data or software. NOTE: The end user must adhere to Microsoft's Licensing Agreement.
-
Page 26: Chapter 4: Options And Upgrades
Chapter 4: Options and Upgrades Optional Peripherals Kits The following optional accessories have been qualified with this system and are available for purchase from Elo. Shown in parenthesis are the Elo orderable part number. Magnetic Stripe Reader Kit (E001002) -MSR with USB interface for all I-Series configurations. - Page 27 Feature Spec Description Swipe Speed 4~60 ips (10.1~152.4 cm/sec), Bi-direction Card Width 0.025 ~0.035 inches Number of Tracks 3 Tracks Triple DES encryption Device & Host Encryption Authentication Tokenization Power supply 5.0VDC +/- 0.25V Power consumption < 2.0 W Current draw <...
-
Page 28: Near Field Communication Kit (E001004)
Testing the MSR Testing in USB MSR Keyboard (KB) Emulation Mode 1. Open the Notepad application (click Start > Accessories > Notepad). 2. Slide the card through the MSR and verify that the data is displayed in the application window. Near Field Communication Kit (E001004) You can add a NFC Kit to the I-Series in any of the three mounting locations located on the display head bottom, left, and right of the touchcomputer... - Page 29 Feature Spec Description Contactless communication at 13.56MHz Contact smart card Supports 2-SAM or 4-SAM board (optional) Build-in direct matching antenna Antennas Remote 50 ohm matching antenna (optional) USB2.0 compliant / HID support Interface type Standard RS-232 signal level Power supply 5.0VDC +/- 0.25V <...
-
Page 30: Barcode Reader Kit (E093433)
Barcode Reader Kit (E093433) You can optionally add a barcode reader (BCR) Kit to the I-Series in any of the three mounting locations located on the display head bottom, left, and right of the touchcomputer The barcode reader peripheral shall consist of a mechanical housing, which encloses a barcode reader electrical module. - Page 31 User Manual: Windows I-Series Interactive Signage UM600086 Rev A, Page 31 of 45...
-
Page 32: I-Series 15.6" Stand Kit (E044162)
I-Series 15.6” Stand Kit (E044162) You can add a 15.6” Stand Kit to the I-Series to turn the device into a desktop setup. The maximum tilt angle is 70° from vertical position. User Manual: Windows I-Series Interactive Signage UM600086 Rev A, Page 32 of 45... -
Page 33: I-Series 21.5" Stand Kit (E044356)
I-Series 21.5” Stand Kit (E044356) You can add a 21.5” Stand Kit to the I-Series device to turn the system into a desktop setup. The maximum tilt angle is 70° from vertical position. User Manual: Windows I-Series Interactive Signage UM600086 Rev A, Page 33 of 45... -
Page 34: I-Series Wall Mount Kit (E143088)
I-Series Wall Mount Kit (E143088) You can add a Wall Mount Kit to the I-Series device onto the wall. Basic installation steps show as below. User Manual: Windows I-Series Interactive Signage UM600086 Rev A, Page 34 of 45... -
Page 35: Chapter 5: Technical Support
Chapter 5: Technical Support If you are experiencing trouble with your I-Series, refer to the following suggestions. If the problem persists, please contact your local dealer or contact Elo Customer Service. Trouble Shooting for Common Problems Problem Troubleshooting 1. Check that the AC/DC power adapter is properly No Power connected. -
Page 36: Chapter 6: Safety & Maintenance
Chapter 6: Safety & Maintenance Safety To avoid risk of electric shock, follow all safety notices and do not disassemble the Elo I-Series. The Elo I-Series is not user-serviceable. Do not block or insert anything into any of the ventilation slots. The Elo I-Series is equipped with an AC/DC power adapter. -
Page 37: I-Series Care And Handling
I-Series Care and Handling The following tips will help maintain optimal performance of your Elo I-Series: Disconnect the power cable before cleaning. To clean the I-Series (except touchscreen), use soft cotton or microfiber cloth lightly dampened with a mild detergent. ... -
Page 38: Waste Electrical & Electronic Equipment
Waste Electrical & Electronic Equipment This product should not be disposed of with household waste. It should be deposited at a facility that enables recovery and recycling. Ensure that product is disposed at the end of its useful life according to local laws and regulations. Elo has put in place recycling arrangements in certain parts of the world. -
Page 39: Chapter 7: Regulatory Information
Chapter 7: Regulatory Information I. Electrical Safety Information Compliance is required with respect to the voltage, frequency, and current requirements indicated on the manufacturer label. Connection to a different power source than those specified herein will likely result in improper operation, damage to the equipment or pose a fire hazard if the limitations are not followed. - Page 40 compliance to this equipment would void the user’s authority to operate this device. Canada Compliance Statement: This Class A/Class B digital apparatus complies with Canadian ICES-003. Cet appareil numérique de la classe B est conforme à la norme NMB-003 du Canada. This device complies with Industry Canada license-exempt RSS standard(s).
- Page 41 b. To ensure compliance, use only the provided manufacturers approved line cord. c. The user is cautioned that changes or modifications to the equipment not expressly approved by the party responsible for compliance could void the user’s authority to operate the equipment. 2.
- Page 42 The relevant technical documentation is held at: Elo Touch Solutions, Inc. IV. Agency Certifications The following certifications and marks have been issued or declared for the I-Series: Europe Union CE United States FCC United States and Canada UL Japan VCCI ®...
- Page 43 Explanation of Markings (1). In accordance with the SJ/T11364-2006 requirement, the electronic information products are marked with the following pollution control logo. The Environment-Friendly Use Period for this product is 10 years. The product will not leak or mutate under normal operating conditions listed below, so that the use of this electronic information product will not result in any severe environmental pollution, any bodily injury, or damage to any assets.
- Page 44 Chapter 8: Warranty Information For warranty information, go to http://www.elotouch.com/Support/warranty.asp User Manual: Windows I-Series Interactive Signage UM600086 Rev A, Page 44 of 45...
-
Page 45: Product Information
Specifications Upcoming Events Press Releases Software Drivers Touch Display Newsletter To find out more about the extensive range of Elo touch solutions, go to www.elotouch.com, or call the office nearest you. North America Europe Asia-Pacific...
Need help?
Do you have a question about the ESY15i2 and is the answer not in the manual?
Questions and answers