Table of Contents
Advertisement
Advertisement
Chapters
Table of Contents

Subscribe to Our Youtube Channel
Related Manuals for Sunbeam PU8000


Summary of Contents for Sunbeam PU8000
- Page 1 Waiting on Front Cover from Energi E S P R E S S O M A C H I N E USER GUIDE...
- Page 2 Heading Sub Heading Body copy with not indent applied. • Bullet copy Bullet copy Bullet copy Bullet copy Bullet copy Bullet copy Bullet copy Bullet copy...
-
Page 3: Table Of Contents
Contents Sunbeam's Safety Precautions Features of your Café Series ® Espresso Machine Using your espresso machine EM8000 Panel Operation Instruction Advanced Programming Guide to coffee making Guide to milk texturing Espresso recipes Care and cleaning Coffee Thermoblock Cleaning Cycle Descaling Cycle for both the Coffee... -
Page 4: Sunbeam's Safety Precautions
Sunbeam’s Safety Precautions SAFETY PRECAUTIONS FOR YOUR SUNBEAM • Appliance can be used by persons with reduced ESPRESSO MACHINE physical, sensory or mental capabilities or lack of experience and knowledge if they have been given • Always place the unit on a flat, level surface. - Page 5 Appointed Service Centre for examination, repair or adjustment. maybe high when the appliance is operating. If you have any concerns regarding the performance and use of your appliance, please visit www.sunbeam.com.au or contact the Sunbeam Consumer Service Line. Ensure the above safety precautions are understood.
-
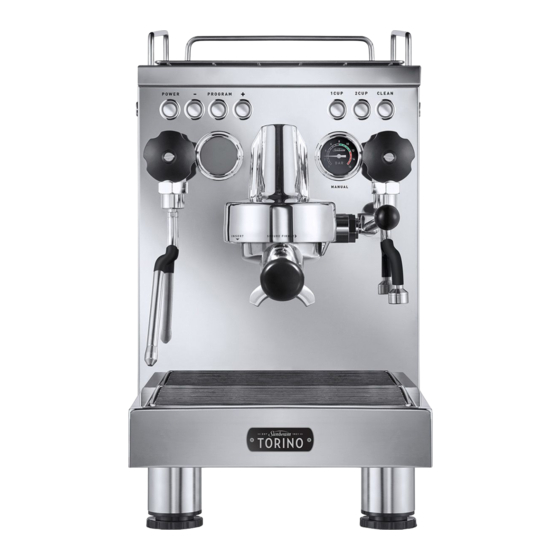
Page 6: Espresso Machine
Features of your Sunbeam Espresso Machine Warming plate The large warming plate effectively pre-warms cups helping to retain the essential characteristics true of espresso - sweet, rich tasting and aroma. Steam control dial Used to open and close the steam. - Page 7 Tank cover 2.5 litre water reservoir Removable 2.5 litre water reservoir is fitted with an anti-calc filter and can be filled from the top or is removable from behind. Programmable control panel An easy to use control panel provides the choice of manual operation or utilising the programmed 1 and 2 cup espresso serve pours.
- Page 8 Features of your Espresso Machine continued Required Espresso Pressure Should the needle fail to reach the target area this is an indication that the serve of The 15 BAR Italian pump produces the espresso is ‘under-extracted’. This occurs required pressure for brewing espresso when water passes too quickly through the consistently.
- Page 9 Note: For the optimum results Sunbeam hole. These pre-ground coffee types are recommends that you use standard filters often vacuum packaged into a brick shape with this espresso machine.
-
Page 10: Using Your Espresso Machine
Using your espresso machine When using the machine for the first time, you 4. Carefully rinse the supplied water filters must carry out these steps: and filter holders. See figure 4. 1. Rinse components. See figure 1. Figure 4 Figure 1 5. -
Page 11: Using Your Espresso Machine
Using your espresso machine continued Beverage preparation 7. Reposition the lid and the water tank panel. See figure 7. 1. Coffee dispensing. Use the provided filter basket for 2 cups of coffee. See figure 8. Figure 8 Figure 7 Necessary condition: There must be enough water in the tank - and 8.Plug into 230-240V AC Powerpoint and the machine must be at the correct... - Page 12 Using your espresso machine continued Steam dispensing - Important advice: Do not remove Frothing milk for cappuccinos the coffee filter before the coffee dispensing has completed. 1. Half fill milk jug. See figure 14. 4. Insert and lock filter into place. See figure 11a &...
- Page 13 Using your espresso machine continued 5. Note: After using Hot water dispensing - the steam nozzle, Scalding hazard! Warning: Do these clean the inside of steps very carefully. Use the special the wand as follows: insulated devices to move the water turn the steam and steam wands.
-
Page 14: Em8000 Panel Operation Instruction
EM8000 Panel Operation Instruction Display modes 3. Coffee mode: Counting the 1. Pre-heat mode: brewing time. display nothing See figure 24. (the power button flashing) See figure 22. Figure 22 Figure 24 2. Ready mode: 4.Fill tank: display "READY". remind user to fill See figure 23. -
Page 15: Advanced Programming
Advanced Programming 4. Cleaning reminder: In standby mode press "PROGRAM" button set the water usage and get in to the limit for cleaning program mode. reminder (range: 50L / 100L / (sequence: 180L); press "-" or showerhead outlet "+" to change the water temperature, setting and press steam flow rate, hot... - Page 16 Advanced Programming continued Cleaning mode: Pressing "CLEAN" button to choose coffee (CO CLEAN), steam (ST CLEAN) piping cleaning process. During cleaning function, press and hold "CLEAN" button for 3 seconds to stop and back to standby mode. Figure 33...
-
Page 17: Guide To Coffee Making
Guide to coffee making PRE-HEATING DOSING and TAMPING • Dry wipe the basket. Glasses • Grind evenly and directly into the centre of Pre-heat glasses and cups by filling them the filter basket. with hot water as this will assist to preserve •... - Page 18 Guide to making coffee continued The Espresso Pour 3. Resistance; looking for a thickness, or a nice ooziness like dripping honey, with Great coffees start with freshly roasted beans resistance at about 2/3 from the spouts to that will deliver a sweet espresso that will be the bottom of the cup.
-
Page 19: Guide To Milk Texturing
Guide to milk texturing What you want to achieve is silky thick 12. Remember this process is about keeping rich milk that has been heated to between the milk spinning and maintaining the 60-65°C. same position from where you started. The steam coming out of the machine will 13. -
Page 20: Espresso Recipes
Espresso recipes ESPRESSO (SHORT BLACK) MACCHIATO Espresso is a concentrated, full bodied coffee Macchiato, Italian for ‘to stain or mark’. with a stable layer of cream on top – known Traditionally served as a standard espresso as ‘crema’. An espresso is the foundation of with a dash of milk and a small dollop of all café... - Page 21 Espresso recipes continued CAFFE LATTE CAFFE MOCHA An espresso with steamed milk, typically Made in a similar way to a cappuccino but served in a glass. The layer of frothed milk on with the addition of drinking chocolate. top should be 10mm to seal the coffee. Simply stir the chocolate into the espresso prior to adding the steamed milk and froth.
-
Page 22: Care And Cleaning
Drip tray and grill Note: Contact Sunbeam on 1300 881 861 should you think that the group head seal Remove the grill and drip tray at regular needs replacing. Please do not attempt to intervals to empty. - Page 23 Care and cleaning continued Steam wand Important: Never clean the steam wand with an abrasive pad as this will damage the Keeping the steam arm clean is essential steam wand. to ensure maximum efficiency of the steam function. A build up of caramelised/dried milk on the steam wand will impair the steaming and texturing ability of the espresso machine.
-
Page 24: Coffee Thermoblock Cleaning Cycle
3. Fit the group handle with the double filter basket. 4. Position the cleaning disc into the double filter basket. 5. Place a Sunbeam Espresso Machine Cleaning Tablet (EM0020) into the filter basket that is now also fitted with the cleaning disc and secure the group handle to the group head. -
Page 25: Descaling Cycle For Both The Coffee And Steam Thermoblocks
6. Pull out the water reservoir, add 4-6 months; this will vary depending on the Sunbeam descaling tablets. Once tablet frequency of use and water hardness. dissolves replace reservoir into position. 1. Remove the water reservoir and rinse 7. -
Page 26: Troubleshooting Guide
Troubleshooting Guide Problem Possible Cause Solution Coffee does not • No water in reservoir. • Add water. come out. • Coffee grind is too fine. • Grind medium ground coffee. • Too much coffee in the filter. • Fill filter with less coffee. •... - Page 27 This Sunbeam product is covered by a 24 month repair warranty, which is in addition to your rights under the Australian Consumer Law (if your product was Repair purchased in Australia) or New Zealand Guarantee Consumer Guarantees Act (if your product was purchased in New Zealand).
- Page 28 Level 6, Building 5, Central Park, 660–670 Great South Road, Greenlane, Auckland. Sunbeam Corporation Limited | ABN 45 000 006 771 Sunbeam Corporation is a division of GUD Holdings Limited. Sunbeam is a registered trade mark. Made in China to Sunbeam’s specification.
- Page 29 P R E C I S I O N G R I N D E R USER GUIDE...
- Page 30 Heading...
- Page 31 Contents Sunbeam’s Safety Precautions Congratulations Features of your Torino Precision Grinder Functions of your Torino Precision Grinder Operating your Torino Precision Grinder Adjusting the Grind Setting Care and Cleaning Advanced Settings for Recalibration Important instructions – retain for future use.
-
Page 32: Sunbeam's Safety Precautions
• Never leave an appliance unattended while in use. If you have any concerns regarding the performance and use of your appliance, please visit www.sunbeam.com.au or contact the Sunbeam Consumer Service Line on 1300 881 861. Ensure the above safety precautions are understood. -
Page 33: Congratulations
Inspired by heavy- duty equipment found in restaurants, cafes The Sunbeam Torino Precision Grinder is and bars, the Sunbeam Torino is built to constructed with quality die-cast metal last. It brings together a range of appliances components and includes many features that designed to expertly create authentic café... -
Page 34: Features Of Your Torino Precision Grinder
Features of your Torino Precision Grinder 450g Bean hopper The 450g capacity bean hopper has a closure arm for easy removal. This allows the user to remove the hopper without taking out the beans. Grind adjustment collar Large and easy to use, the collar has a range of 30 grind settings. - Page 35 Burr shield Conical burrs The hardened steel conical burrs achieve excellent grind consistency and minimises heat transfer to the coffee due to their slow rotation. Hopper closure arm Stainless steel housing Built to last, the heavy-duty Stainless Steel body encases a powerful belt driven motor and provides a stable base foundation for the grinder.
-
Page 36: Functions Of Your Torino Precision Grinder
Functions of your Torino Precision Grinder Tap & Go technology ™ The new patent pending Tap & Go function ™ allows an easy one touch grind directly into the group handle. Simply set the operation dial to auto and place the handle into the group handle cradle then gently depress the handle downward to fill the basket with freshly ground coffee on demand. - Page 37 Functions of your Torino Precision Grinder (continued) LED Lit Grind Area Seamless grind delivery is assisted by LED illumination that engages when grinding begins. An auto dimming feature then dims the light when grinding is complete. Easy clean without recalibration The patent pending grind cartridge enables easy access to the lower burr chamber without altering your grind settings.
-
Page 38: Operating Your Torino Precision Grinder
Operating your Torino Precision Grinder 5. Ensure operation dial is off, plug the power Before using the coffee grinder, wipe the base exterior with a damp cloth. Wash the cord into a 230-240V AC power outlet and switch the power on. bean hopper and hopper lid in warm soapy water, then rinse and dry thoroughly. -
Page 39: Figure
Operating your Torino Precision Grinder (continued) For grinding into the group handle Note: With the dial at ‘Auto’ you have the option to leave the group handle in the group 7. Insert the group handle into the group handle cradle without grinding coffee. handle cradle at an inclined angle placing the front edge under the lip of the group handle cradle. -
Page 40: Figure
Operating your Torino Precision Grinder (continued) For hands free grinding 10. Insert the group handle into the group handle cradle at an inclined angle placing the front edge under the lip of the group handle cradle. See figure 3. 11. To continuously grind coffee, turn the dial to the ‘On’... -
Page 41: Adjusting The Grind Setting
Adjusting the Grind Setting Grind setting table 2. Coffee that is ground too fine for a particular brewing process will result in SETTING BREWING METHOD over-extraction and the coffee will taste 0 - 7 Turkish bitter. On the other hand, coffee that is too coarse for a particular brewing method will 7 - 15 Espresso for Cafe Series... -
Page 42: Care And Cleaning
Care and Cleaning Important Notes: Cleaning the burrs • Spots and marks on the surface of the If the coffee grinder is used frequently (every burrs are part of the hardening process. day), the burrs need to be cleaned every These marks do not affect the performance three weeks to ensure best performance of of the grinder or the taste of the coffee. -
Page 43: Figure
Care and Cleaning (continued) 5. Lift the grind cartridge away from the grinder base, see figure 10. Figure 10 6. Clean the grind cartridge and bottom burr using the burr cleaning brush (located under the grind spill tray), see figure 11. Figure 11 7. -
Page 44: Figure
Advanced Settings Recalibration of the EM0800 Note: Recalibration will change all previous settings on the grinder 1. Close hopper closure arm. 2. Purge beans through the grinder. 3. Turn the operation dial to the ‘off’ position. 4. Disconnect the plug from the power socket. 5. - Page 45 Advanced Settings (continued) Figure 12 Figure 13 Figure 14...
- Page 46 Sunbeam at the address listed below. cannot be excluded under the Australian for five (5) years against faulty materials On receipt of your claim, Sunbeam will Consumer Law and under the New Zealand or manufacture. This guarantee is just advise you on how to obtain a replacement Consumer Guarantees Act.
- Page 47 Australia www.sunbeam.com.au 1300 881 861 Units 5 & 6, 13 Lord Street, Botany NSW 2019 Australia New Zealand www.sunbeam.co.nz 0800 786 232 Level 6, Building 5, Central Park, 660-670 Great South Road, Greenlane, Auckland New Zealand...
- Page 48 Level 6, Building 5, Central Park, 660–670 Great South Road, Greenlane, Auckland. Sunbeam Corporation Limited | ABN 45 000 006 771 Sunbeam Corporation is a division of GUD Holdings Limited. Sunbeam is a registered trade mark. Made in China to Sunbeam’s specification.
Need help?
Do you have a question about the PU8000 and is the answer not in the manual?
Questions and answers