Table of Contents
Advertisement
Available languages
Available languages
Quick Links
Advertisement
Table of Contents

Related Manuals for PSSO PRIME-208


Summary of Contents for PSSO PRIME-208
- Page 1 U S E R M A N U A L U S E R M A N U A L U S E R M A N U A L U S E R M A N U A L B E D I E N U N G S A N L E I T U N G B E D I E N U N G S A N L E I T U N G B E D I E N U N G S A N L E I T U N G...
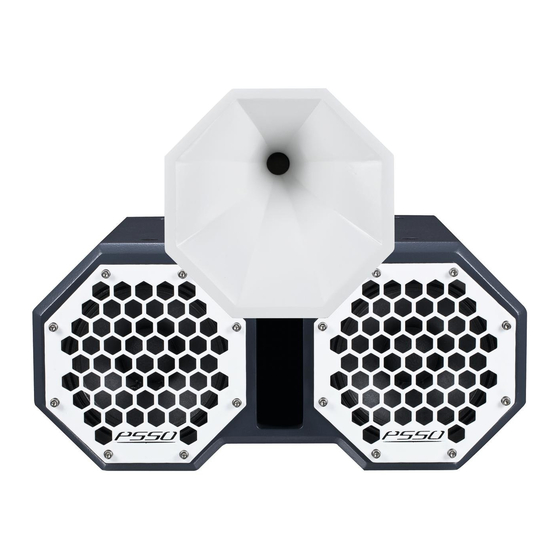
- Page 2 The complete PRIME series at a glance: For the playback of mids and highs, three main systems are available: a double 8“ with 1“ horn (PRIME-208), a double 12“ with 1.4“ horn (PRIME-212), and a 3-way system with a double 15“ with 6.5“...
-
Page 3: Table Of Contents
Inhaltsverzeichnis Einführung ................................ 4 Sicherheitshinweise ............................4 Bestimmungsgemäße Verwendung ....................... 5 Anschlüsse ............................... 7 Installation ................................ 8 Bedienung ..............................12 Reinigung und Wartung ..........................12 Technische Daten ............................13 ....................................Table of Contents Introduction ..............................16 Safety Instructions ............................16 Operating Determinations.......................... -
Page 4: Einführung
EINFÜHRUNG Wir freuen uns, dass Sie sich für ein Lautsprechersystem von PSSO entschieden haben. Wenn Sie nachfolgende Hinweise beachten, sind wir sicher, dass Sie lange Zeit Freude an Ihrem Kauf haben werden. Bitte bewahren Sie diese Bedienungsanleitung für weiteren Gebrauch auf. -
Page 5: Bestimmungsgemäße Verwendung
Inbetriebnahme Vor dem Einschalten Bitte überprüfen Sie vor der ersten Inbetriebnahme, ob Bevor die Endstufe eingeschaltet wird, müssen alle kein offensichtlicher Transportschaden vorliegt. Sollten Fader und Lautstärkeregler auf Null bzw. auf Minimum Sie Schäden an dem Anschlusspanel oder am gestellt werden. Endstufen immer zuletzt einschalten Gehäuse entdecken, nehmen Sie die Lautsprecherbox und zuerst ausschalten! nicht in Betrieb und setzen sich bitte mit Ihrem... -
Page 6: Rechtliche Hinweise
Gehörschutzmittel bereitzustellen. Die Arbeitnehmer VDI-Richtlinie: VDI 2058 Blatt 2: www.vdi.de haben diese zu benutzen. Durch hohe Lautstärken hervorgerufene Bitte beachten Sie: PSSO haftet nicht für Schäden, Gehörschädigungen können den Tatbestand der die durch unsachgemäße Installation und Körperverletzung erfüllen und strafrechtlich verfolgt übermäßige Lautstärken verursacht werden! -
Page 7: Anschlüsse
Diese Lautsprecher dürfen nur an eine ausreichend dimensionierte Endstufe angeschlossen werden. Die Verstärkerleistung muss der Leistung der Boxen angepasst sein. Eine im Überlastbereich arbeitende zu kleine Endstufe kann auch eine höher dimensionierte Lautsprecherbox zerstören....................................Belegung der Anschlussbuchsen PRIME-208 PRIME-10CX PRIME-212 PRIME-12CX PRIME-315*... -
Page 8: Installation
Punktbelastung)....................................Montage PRIME-208, PRIME-212 Die Modelle PRIME-208 und PRIME-212 werden in zwei separaten Kartons ausgeliefert. Im Karton des Horns befinden sich Zubehörteile zur Montage der Komponenten sowie vier Ringösen für die fliegende Installation. W W W . P S S O . D E... - Page 9 Setzen Sie das Horn auf der Oberseite des Subwoofers auf und verschrauben Sie beide Komponenten anhand der beiliegenden Schrauben....................................Aufstellen und Ausrichten der Boxen Vermeidung von Rückkopplungen Stellen Sie die Boxen immer so auf, dass ein Besondere Belastungsspitzen wie Feedback Mindestabstand von drei Metern zum Publikum (Mikrofonrückkopplung), ein starkes Bass-Brummen eingehalten werden kann.
- Page 10 Boxengewicht entsprechen! Hängen Sie die Schnellverschlussglieder der Sicherungsseile in den dafür vorgesehenen Ringösen Die Modelle PRIME-208 und PRIME-212 an der Lautsprecherbox ein. Führen Sie das werden mit vier Ösen ausgeliefert. Sicherungsseil über einen sicheren Befestigungspunkt. Hängen Sie das Ende in dem Schnellverschlussglied Es dürfen nur Sicherungsseile gemäß...
- Page 11 Bitte beachten Sie: Bei Überkopfmontage in öffentlichen Der Hersteller haftet nicht für Schäden, die durch bzw. gewerblichen Bereichen ist eine Fülle von unsachgemäße Installation und unzureichende Vorschriften zu beachten, die hier nur auszugsweise Sicherheitsvorkehrungen verursacht werden! wiedergegeben werden können. Der Betreiber muss sich selbständig um die Beschaffung der geltenden Sicherheitsvorschriften bemühen und diese einhalten! ....................................
-
Page 12: Bedienung
BEDIENUNG Nach dem Anschluss des Verstärkers, drehen Sie alle Lautstärkeregler bis zum Anschlag zurück. Schalten Sie erst alle Vorstufen und dann die Endstufe ein. Stellen Sie nun die gewünschte Lautstärke ein. Achten Sie darauf, dass das Ausgangssignal nicht verzerrt, Ihre Lautsprecher können dadurch beschädigt werden. -
Page 13: Technische Daten
TECHNISCHE DATEN PRIME PRIME PRIME PRIME- - - - 208 PRIME PRIME PRIME PRIME- - - - 212 Belastbarkeit nominal: 400 W RMS 1000 W RMS LF 100 W RMS HF CELTO ACOUSTIQUE CELTO ACOUSTIQUE Durchmesser: 25 cm (10") 2 x 30 cm (12") Schwingspulendurchmesser: 51 mm (2") 75 mm (3") - Page 14 PRIME PRIME- - - - 10CX PRIME PRIME 10CX 10CX 10CX PRIME PRIME- - - - 12CX PRIME PRIME 12CX 12CX 12CX Belastbarkeit nominal: 300 W RMS 400 W RMS CELTO ACOUSTIQUE CELTO ACOUSTIQUE Durchmesser: 25 cm (10") 30 cm (12") Schwingspulendurchmesser: 65 mm (2,5") 75 mm (3")
- Page 15 PRIME PRIME PRIME PRIME- - - - 315 PRIME PRIME- - - - 152 PRIME PRIME PRIME PRIME- - - - 182 PRIME PRIME Belastbarkeit nom.: 1800 W RMS LF 1400 W RMS LF 3000 W RMS LF 300 W RMS MHF CELTO ACOUSTIQUE CELTO ACOUSTIQUE CELTO ACOUSTIQUE...
-
Page 16: Introduction
INTRODUCTION Thank you for having chosen a PSSO speaker system. If you follow the instructions given in this manual, we are sure that you will enjoy this device for a long period of time. Please keep this manual for future needs. -
Page 17: Operating Determinations
Unpacking Prior to Switching on Please make sure that there are no obvious transport Before the speaker system is switched on all faders and damages. Should you notice any damages on the volume controls have to be set to zero or minimum connection panel or on the casing, do not take the position. -
Page 18: Legal Instructions
The staff DIN 15905-5: www.din.de has to use these. Arbeitsstättenverordnung § 15: www.lgl.bayern.de/arbeitsschutz PSSO cannot be made liable for damages caused Berufsgenossenschaftliche Vorschrift BGV B3: www.pr- by incorrect installations and excessive noise o.info levels! VDI-Richtlinie: VDI 2058 Blatt 2: www.vdi.de... -
Page 19: Connections
[LINK], to feed this signal into the next speaker system. PRIME-208, PRIME-212 Plug the horn’s speaker cable to the subwoofer’s output [HF OUTPUT]. Connect your PA amplifier to the [INPUT] jack;... -
Page 20: Installation
....................................Mounting PRIME-208, PRIME-212 Models PRIME-208 and PRIME-212 are supplied in two separate cartons. In the horn’s carton, you will find accessory parts for mounting the components as well as four eye bolts for suspending the speaker. Place the horn on top of the subwoofer and screw both components together using the included screws. - Page 21 Installing and Orienting the Speaker Systems Avoiding Feedback Always install the speaker systems in a way that a Extreme levels like feedback, bass hum or the beats of minimum distance of three meters to the audience is a dropping microphone can destroy the loudspeakers kept.
- Page 22 Install the eye bolts in the threaded holes of the speaker Models PRIME-208, PRIME-212 are supplied system. The eye bolts must be tightened until stop with four eye bolts.
-
Page 23: Operation
OPERATION After having connected your amplifier to the mains, turn all level controls to the minimum position. The last device to be switched on is the amplifier. Now adjust the volume with the level controls. Always make sure that the output signal is not distorted and that your speakers will not get damaged. During operation, please make sure the speaker always sounds well. -
Page 24: Technical Specifications
TECHNICAL SPECIFICATIONS PRIME PRIME PRIME PRIME- - - - 208 PRIME PRIME PRIME PRIME- - - - 212 Rated power: 400 W RMS 1000 W RMS LF 100 W RMS HF CELTO ACOUSTIQUE CELTO ACOUSTIQUE Nominal diameter: 25 cm (10") 2 x 30 cm (12") Voice coil diameter: 51 mm (2") - Page 25 PRIME PRIME- - - - 10CX PRIME PRIME 10CX 10CX 10CX PRIME PRIME- - - - 12CX PRIME PRIME 12CX 12CX 12CX Rated power: 300 W RMS 400 W RMS CELTO ACOUSTIQUE CELTO ACOUSTIQUE Nominal diameter: 25 cm (10") 30 cm (12") Voice coil diameter: 65 mm (2.5") 75 mm (3")
- Page 26 PRIME PRIME PRIME PRIME- - - - 315 PRIME PRIME PRIME PRIME- - - - 152 PRIME PRIME- - - - 182 PRIME PRIME Rated power: 1800 W RMS LF 1400 W RMS LF 3000 W RMS LF 300 W RMS MHF CELTO ACOUSTIQUE CELTO ACOUSTIQUE CELTO ACOUSTIQUE...
- Page 27 PRESETS PRIME-212, PRIME-152, PRIME-182 Relative Relative Recommended Recommended Relative Relative Recommended Recommended Section Section Section Section Polarity Polarity Polarity Polarity Delay Delay Delay Delay High High High High- - - - pass pass pass pass Low- - - - pass pass pass pass...
- Page 28 © © © © PSSO 201 PSSO 2014 4 4 4 PSSO 201 PSSO 201 Technische Änderungen ohne vorherige Ankündigung und Irrtum vorbehalten. Every information is subject to change without prior notice. 00077727.DOCX Version 1.3...
Need help?
Do you have a question about the PRIME-208 and is the answer not in the manual?
Questions and answers