Table of Contents
Advertisement
Advertisement
Table of Contents

Related Manuals for NetCommWireless NF10WV


Summary of Contents for NetCommWireless NF10WV
-
Page 1: Vdsl/Adsl N300 Wifi Modem Router With Voip
VDSL/ADSL N300 WiFi Modem Router with VoIP NF10WV USER GUIDE... - Page 2 Instead, ask for disposal instructions from your municipal government. Please be responsible and protect our environment. This manual covers the following products: NetComm Wireless VDSL/ADSL N300 WiFi Modem Router (NF10WV) DOCUMENT VERSION DATE 1.0 Initial document release...
-
Page 3: Table Of Contents
Rear ..........................................10 Left Side ........................................11 Safety and product care ................................12 Transport and handling ................................12 Installation and configuration of the NF10WV ..........................13 Placement of your NF10WV ..................................13 Avoiding obstacles and interference ..............................13 Cordless phones ....................................13 Choosing the “quietest”... - Page 4 Limiting the downstream rate ................................81 Legal & Regulatory Information..............................82 Intellectual Property Rights ................................... 82 Customer Information ....................................82 Consumer Protection Laws ..................................82 Product Warranty ......................................83 Limitation of Liability ..................................... 83 Contact......................................84 www.netcommwireless.com NetComm Wireless NF10WV User Guide v1.1...
-
Page 5: Overview
The individual reading this manual is presumed to have a basic understanding of telecommunications terminology and concepts. Prerequisites Before continuing with the installation of your NF10WV, please confirm that you meet the minimum system requirements below. An activated ADSL/VDSL or pre-configured WAN connection. -
Page 6: Welcome
WPS button for simple setup of your wireless network Package contents The NF10WV package consists of: 1 x NetComm Wireless VDSL/ADSL N300 WiFi Modem Router with VoIP (NF10WV) 1 x Quick Start Guide 1 x 1.5m RJ45 Ethernet cable 1 x RJ11 Telephone cable... -
Page 7: Product Features
Note: Maximum wireless signal rate and coverage values are derived from IEEE Standard 802.11g, and 802.11n specifications. Actual wireless speed and coverage are dependent on network and environmental conditions included but not limited to volume of network traffic, building materials and construction/layout. NetComm Wireless NF10WV User Guide v1.1 www.netcommwireless.com... -
Page 8: Physical Dimensions And Indicators
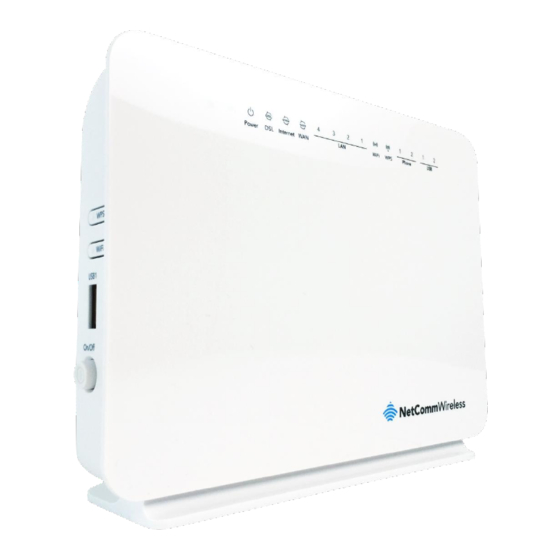
LED indicators The NF10WV has been designed to be placed on a desktop. All of the cables exit from the rear for easy organization. The display is visible on the front of the NF10WV to provide you with information about network activity and the device status. See below for an explanation of each of the indicator lights. -
Page 9: Physical Dimensions And Weight
Physical Dimensions and Weight The table below lists the physical dimensions and weight of the NF10WV. DIMENSIONS Width 190 mm Height 146 mm Depth 54 mm Weight 326 grams NF10WV Default Settings The following tables list the default settings for the NF10WV. -
Page 10: Interfaces
Connection point for the included power adapter. Connect the power supply here. USB 2 Connect an external USB hard drive here to use the NAS feature of the NF10WV. Reset unit to the default factory configuration by holding the Reset button down for 7 seconds or Reset button until all the LEDs turn off. -
Page 11: Left Side
Press the WiFi button to turn the WiFi radio on or off. When the WiFi radio is off, the WiFi LED on WiFi button the front panel turns off. USB 1 Connect an external USB hard drive here to use the NAS feature of the NF10WV. Power button Toggles the power on and off. NetComm Wireless NF10WV User Guide v1.1... -
Page 12: Safety And Product Care
Do not place the device in direct sunlight or in hot areas. Transport and handling When transporting the NF10WV, it is recommended to return the product in the original packaging. This ensures that the product will not be damaged. Note: In the event the product needs to be returned, ensure it is securely packaged with appropriate padding to prevent damage during courier transport. -
Page 13: Installation And Configuration Of The Nf10Wv
The wireless connection between your NF10WV and your WiFi devices will be strong when they are in close proximity and have direct line of sight. As your client device moves further away from the NF10WV or solid objects block direct line of sight to the router, your wireless connection and performance may degrade. -
Page 14: Choosing The "Quietest" Channel For Your Wireless Network
Wait approximately 60 seconds for the NF10WV to power up. Connecting a client via Ethernet cable Connect the yellow Ethernet cable provided to one of the ports marked ‘LAN’ at the back of the NF10WV. Connect the other end of the yellow Ethernet cable to your computer. -
Page 15: Web Based Configuration Interface
Web based configuration interface First-time setup wizard Please follow the steps below to configure your NF10WV Wireless router via the web based configuration wizard. Open a web browser and type http://192.168.20.1/ into the address bar at the top of the window. -
Page 16: Vdsl
Click the Finish button when you have entered the required details. Ethernet WAN Connect an RJ45 Ethernet cable to the WAN port on the NF10WV. Connect the other end of the cable to your WAN service. Select Ethernet WAN then click the Next button. - Page 17 If your ISP has supplied a static IP address, select Use the following Static IP address and enter the details, otherwise select Obtain an IP address automatically. Click the Next button. The settings are displayed in a summary. Click Apply/Save to save them. NetComm Wireless NF10WV User Guide v1.1 www.netcommwireless.com...
-
Page 18: Device Info
LAN IPv6 ULA Address The current IPv6 LAN IP address in use if assigned. Default IPv6 Gateway The current IPv6 default gateway if assigned. Date/Time The current date and time set on the router. www.netcommwireless.com NetComm Wireless NF10WV User Guide v1.1... -
Page 19: Wan
Rx/Tx (receive/transmit) packets with drops. Statistics – WAN Service The Statistics – WAN Service page shows detailed information about the number of bytes, packets, errors and dropped packets on the WAN interface in both directions of communication. NetComm Wireless NF10WV User Guide v1.1 www.netcommwireless.com... - Page 20 The number of Any Source Multicast (ASM) cells transmitted over the interface. In Packets Errors The number of packets with errors detected over the xTM interface. In Cell Errors The number of cells with errors detected over the xTM interface. www.netcommwireless.com NetComm Wireless NF10WV User Guide v1.1...
- Page 21 Statistics – xDSL The Statistics – xDSL page shows details related to the DSL interface of the router. NetComm Wireless NF10WV User Guide v1.1 www.netcommwireless.com...
-
Page 22: Route
URL filtering, Time of Day filtering or Static DHCP addressing. DHCP Click DHCP to display the DHCP lease information. You can use this to determine when a specific DHCP lease will expire, or to assist you with setting up Static DHCP addressing. www.netcommwireless.com NetComm Wireless NF10WV User Guide v1.1... -
Page 23: Advanced Setup
Remove Select this field to remove the ATM configuration. To add an ATM interface, click the Add button. Enter the details as required by your Internet Service Provider and click the Apply/Save button. NetComm Wireless NF10WV User Guide v1.1 www.netcommwireless.com... - Page 24 Click the Add button to create a new PTM interface. Enter the details as required by your Internet Service Provider and click the Apply/Save button. ETH Interface The ETH interface page allows you to add or remove ETH WAN interfaces. www.netcommwireless.com NetComm Wireless NF10WV User Guide v1.1...
-
Page 25: Wan Service
Select a WAN service type, enter a Service Description, enter the 802.1P Priority and 802.1 VLAN ID then click the Next button. To disable VLAN tagging, place input value of -1. Refer to your ISP for VLAN information as required by your Internet Service Provider. NetComm Wireless NF10WV User Guide v1.1 www.netcommwireless.com... - Page 26 Enter the details as required by your Internet Service Provider and click the Next button. IP over Ethernet Enter the details as required by your Internet Service Provider and click the Next button. www.netcommwireless.com NetComm Wireless NF10WV User Guide v1.1...
- Page 27 When you select bridging mode, a summary of the settings is displayed. Click Apply/Save to commit the settings. Use the arrow buttons to move the interfaces required to the list on the left. Click Next. NetComm Wireless NF10WV User Guide v1.1...
- Page 28 Use the arrow buttons to move the interfaces required as DNS Server interfaces to the left. The interface highest on the list has the highest priority as a DNS server. Click Next to continue. A summary of your settings is displayed. Click Apply/Save to commit your settings to the router. www.netcommwireless.com NetComm Wireless NF10WV User Guide v1.1...
-
Page 29: Lan
Disabled DHCP server, and relay all request to external server specified by the IP address. Configure the second IP Address This option enables you to set a secondary IP Address for the NF10WV You can also reserve DHCP Addresses for specific hosts as shown below: NetComm Wireless NF10WV User Guide v1.1... -
Page 30: Ipv6 Autoconfig
To set a DHCP reservation, enter the MAC Address of the chosen host and IP to use and then click Apply/Save. The NF10WV enables you to set the DHCP options which are provided to hosts attempting to connect to the DHCP server. -
Page 31: Nat
A virtual server allows you to direct incoming traffic from the WAN side to the Internal server with a private IP address on the LAN side. Click the Add button to add a virtual server. NetComm Wireless NF10WV User Guide v1.1 www.netcommwireless.com... - Page 32 The Router allows the remote party from the WAN side to establish new connections back to the application on the LAN side using the ‘Open Ports’. A maximum 32 entries can be configured. To add a Trigger Port, press the Add button. www.netcommwireless.com NetComm Wireless NF10WV User Guide v1.1...
- Page 33 Options include TCP, UDP or TCP/UDP. DMZ Host The NF10WV will forward IP packets from the Wide Area Network (WAN) that do not belong to any of the applications configured in the Virtual Servers table to the DMZ host computer.
-
Page 34: Security
Destination Port Enter the destination port number used by the application to block Click Apply/Save to take effect the settings. The new rule will then be displayed in the Outgoing IP Filtering table list. www.netcommwireless.com NetComm Wireless NF10WV User Guide v1.1... - Page 35 Enter the destination port number used by the application to allow WAN Interface Select the WAN Interface to apply the filter to Click Save/Apply to take effect the settings. The new rule will then be displayed in the Incoming IP Filtering table list. NetComm Wireless NF10WV User Guide v1.1 www.netcommwireless.com...
- Page 36 MAC Filtering The NF10WV offers the ability to use MAC Address filtering on ATM PVCs. You can elect to block or allow connections based on MAC Address criteria. The default policy is to allow connections which match the criteria. Click Add to enter a new MAC Address filter.
-
Page 37: Parental Control
Start Blocking Time The time of day when the restriction starts. End blocking time The time of day when the restriction ends. Table 2: Advanced - Parental Control - Add Time Restriction Settings NetComm Wireless NF10WV User Guide v1.1 www.netcommwireless.com... - Page 38 With the URL filter, you are able to add certain websites or URLs to a safe or blocked list. This will provide you added security to ensure any website you deem unsuitable will not be able to be seen by anyone who is accessing the Internet via the NF10WV.
-
Page 39: Quality Of Service
The queue entry configured here will be used by the classifier to place ingress packets appropriately. NOTE: Precedence level 1 relates to higher priority while precedence level 3 relates to lower priority. NetComm Wireless NF10WV User Guide v1.1 www.netcommwireless.com... - Page 40 TOS (type of service) byte. A rule consists of a class name and at least one condition. All of the specified conditions in this classification rule must be satisfied for the rule to take effect. Click the Apply/Save button to save and activate the rule. www.netcommwireless.com NetComm Wireless NF10WV User Guide v1.1...
-
Page 41: Routing
To add a static route rule click the Add button. The following screen is displayed. Enter the Destination Network Address, Subnet Mask, Gateway IP Address and/or WAN Interface. Then click Apply/Save to add the entry to the routing table. NetComm Wireless NF10WV User Guide v1.1 www.netcommwireless.com... - Page 42 To activate this option, select the Enabled checkbox. To configure an individual interface, select the desired RIP version and operation, and select the Enabled checkbox for that interface. Click Apply/Save to save the configuration. www.netcommwireless.com NetComm Wireless NF10WV User Guide v1.1...
-
Page 43: Dns
Note: The Add/Remove buttons will be displayed only if the router has been assigned an IP address from the remote server. To add a dynamic DNS service, click the Add button and the following screen will display. NetComm Wireless NF10WV User Guide v1.1 www.netcommwireless.com... -
Page 44: Dsl
This page allows the user to modify the DSL modulation settings on the unit. By changing the settings, you can specify which DSL modulation that the modem will use. For advanced DSL options press the Advanced Settings button. The DSL advanced settings relate to test mode settings. The default selection is ‘Normal’. www.netcommwireless.com NetComm Wireless NF10WV User Guide v1.1... -
Page 45: Upnp
The Host name and Domain name are combined to form a unique label that is mapped to the router IP address. This can be used to access the user interface of the router with a local name rather than by using the router IP address. Eg. You can access your router by entering http://NF10WV into your web browser. NetComm Wireless NF10WV User Guide v1.1... -
Page 46: Dlna
The DLNA page allows you to enable or disable and configure the digital media server. This means you can have digital media stored on an external USB hard drive connected to the NF10WV and the router will make it accessible to other devices on your network. -
Page 47: Interface Grouping
Click Add to create an Interface group. Enter a group name and then use the arrow buttons to select which interfaces you wish to group. Click Apply/Save to save the Interface grouping configuration settings. NetComm Wireless NF10WV User Guide v1.1 www.netcommwireless.com... -
Page 48: Ip Tunnel
The IP Tunnelling feature allows you to configure tunnelling of traffic between IPv6 and IPv4 networks. IPv6inIPv4 Click the Add button to add a new tunnel. IPv4inIPv6 Click the Add button to add a new tunnel. www.netcommwireless.com NetComm Wireless NF10WV User Guide v1.1... -
Page 49: Ipsec
IPSec The NF10WV offers IPSec VPN tunnel functionality. To delete an IPSec entry, click the Remove checkbox next to the selected IPSec tunnel entry and click Remove. Click Add to create a new IPSec tunnel connection. Figure 9: Advanced - IPSec... -
Page 50: Multicast (Igmp Configuration)
The maximum number of hosts a multicast group can have. Members With IGMP fast-leave processing, which means that the router immediately removes the interface attached to a Fast Leave Enable receiver upon receiving a Leave Group message from a IGMP host. www.netcommwireless.com NetComm Wireless NF10WV User Guide v1.1... -
Page 51: Wireless
Select to prevent clients on the wireless network being able to access each other Disable WMM Advertise Select to prevent the NF10WV advertising its WMM function Enable Multicast Forwarding (WMF) Select to enable Wireless Multicast Forwarding. This can reduce latency and improve throughput for wireless clients... - Page 52 Security The NF10WV supports all encryptions within the 802.11 standard. The factory default is WPA2-PSK. The NF10WV also supports WPA, WPA-PSK, WPA2, WPA2-PSK. You can also select to enable WPS mode. The following parameters are available: PARAMETER DEFINITION Enable WPS Select to enable or disable the WPS function of the NF10WV.
- Page 53 Wireless Bridge allows you to configure the router’s access point as a Wireless Distribution Service. Select the mode for the Wireless Access Point built into the NF10WV. You can specify which wireless networks will be allowed to connect to the NF10WV by using the ‘Bridge Restrict’ option and then entering the applicable MAC Addresses of the other wireless access points.
- Page 54 Advanced Wireless allows you to configure detailed wireless network settings such as the band, channel, bandwidth, transmit power and preamble settings. Click Apply/Save to save any changes to the wireless network settings configuration. www.netcommwireless.com NetComm Wireless NF10WV User Guide v1.1...
-
Page 55: Station Info
Save is an improvement to the 802.11e amendment adding advanced power management functionality to WMM. Station Info This page shows the MAC address of authenticated wireless stations that are connected to the NF10WV and their status NetComm Wireless NF10WV User Guide v1.1... -
Page 56: Voice
Voice This section explains how to configure the VoIP settings of the NF10WV. VoIP Status The Voice Status page displays the registration status of your SIP accounts and the total call time of each account. SIP Basic Setting The SIP Settings page is where you enter your VOIP service settings as supplied by your VOIP service provider (VSP). If you are unsure about a specific setting or have not been supplied information for a particular field, please contact your VOIP service provider to verify if this setting is needed or not. - Page 57 After entering your VoIP settings press the Apply button. Select Management > Save/Reboot and press the Reboot button. Once the router restarts if there is a valid internet connection and the VoIP account settings are valid the VoIP service will start. NetComm Wireless NF10WV User Guide v1.1...
-
Page 58: Sip Advanced
The SIP Advanced page allows you to configure settings that your VoIP service provider has enabled on your SIP account and if you have the appropriate call features and other functionality on your cordless or corded phone handsets. Figure 10: VoIP - Advanced - Service Provider www.netcommwireless.com NetComm Wireless NF10WV User Guide v1.1... - Page 59 Select the checkbox to enable the supplementary service settings by the telephone set. If you deselect the Service checkbox, the supplementary service can not be set by the telephone set. Table 4: VoIP - Advanced - Service Provider NetComm Wireless NF10WV User Guide v1.1 www.netcommwireless.com...
-
Page 60: Sip Extra Setting
SIP Star Code Setting The SIP Star Code Setting page provides you with the ability to configure the codes used to active and deactivate call features such as call forwarding and call waiting. www.netcommwireless.com NetComm Wireless NF10WV User Guide v1.1... -
Page 61: Sip Debug Setting
The outgoing signal amplitude can be controlled with this field. Combined with the Ingress gain a ratio can be expressed of input to output. The Egress Gain setting can help improve the quality of the VoIP line, and can Egress Gain influence call volumes and help eliminate echoes. NetComm Wireless NF10WV User Guide v1.1 www.netcommwireless.com... -
Page 62: Voip Functionality
Call hold enable you to put a call to a pending state, and pick it up in future. Assuming you are in a voice connection, you can press FLASH to hold current call. Now you can call another party, or press FLASH again to return to first call. Call Waiting www.netcommwireless.com NetComm Wireless NF10WV User Guide v1.1... -
Page 63: Blind Transfer
Assume you are in connection with a first party. Press FLASH to put the first party on-hold. Dial a third party. After the third party answers the call, press FLASH again to invite the first party. NetComm Wireless NF10WV User Guide v1.1 www.netcommwireless.com... -
Page 64: T38 Faxing
In the initial setup, faxing behaves like a normal call. After the DSL router detects the fax tone, it switch to T38 mode, and use it as the transmit approach. Pass-Through Faxing If T38 support is disabled, faxing uses normal voice codec as its coding approach. Therefore, this mode is more like normal phone calls. www.netcommwireless.com NetComm Wireless NF10WV User Guide v1.1... -
Page 65: Diagnostics
Fail: Indicates that the router does not detect the Ethernet interface of your computer. Pass: Indicates that the wireless card is switched ON. Test your Wireless Connection Fail: Indicates that the wireless card is switched OFF. NetComm Wireless NF10WV User Guide v1.1 www.netcommwireless.com... -
Page 66: Ethernet Oam
Ethernet OAM The Ethernet OAM page provides administrators with operation, administration and management features. www.netcommwireless.com NetComm Wireless NF10WV User Guide v1.1... -
Page 67: Diagnostics
The following screen appears when Backup is selected. Click the Backup Settings button to save the current configuration settings. You will be prompted for the location to save the backup file to on your PC. NetComm Wireless NF10WV User Guide v1.1... -
Page 68: System Log
The System log page allows you to view the log of the modem and configure the logging level also. To view the system log, click the View System Log button. To configure the system log, click the Configure System Log button. You can sent system log to remote server via selecting both, or remote under “Mode” option. www.netcommwireless.com NetComm Wireless NF10WV User Guide v1.1... -
Page 69: Snmp Agent
The user name to access the ACS server. ACS Password The password to access the ACS server. WAN Interface used by TR-069 The connection used to send and receive data to the ACS server. Client NetComm Wireless NF10WV User Guide v1.1 www.netcommwireless.com... -
Page 70: Internet Time
Internet Time The Internet Time page allows you to configure NTP time servers that the NF10WV router synchronises with in order to keep accurate time. Access Control The Access Control option found in the Management drop down menu configures access related parameters in the following three... -
Page 71: Update Firmware
Click the Update Software button once to upload and install the file. Reboot This option reboots the NF10WV. NOTE 1: It may be necessary to reconfigure your TCP/IP settings to adjust for the new configuration. For example, if you disable the Dynamic Host Configuration Protocol (DHCP) server you will need to apply Static IP settings. -
Page 72: Additional Product Information
You may then see a window prompting you to setup a "HomeGroup". Click "Cancel" on this. You can verify your wireless connection by clicking the "Wireless Signal" indicator in your system tray. After clicking on this, you should see an entry matching the SSID of your NF10WV with "Connected" next to it. Windows 8/8.1/10 Open the Network and Sharing Centre (Click on Start, Type “Network and Sharing Centre”) -
Page 73: Troubleshooting
STEP CORRECTIVE ACTION Hold the Reset button down for 7 seconds or until all the LEDs turn off. The NF10WV restarts with factory default settings. You can now login with the factory default username and password “admin” (without the quotes) It is highly recommended to change the default username and password. -
Page 74: Appendix: Quality Of Service Setup Example
IP address for each device, identified by their unique MAC addresses. Reserving IP addresses It is necessary to reserve an IP address for each of the devices connecting to the NF10WV router so that QoS settings can be managed for each device. -
Page 75: Qos Configuration Settings
Enter the IP address of the computer/device. This is the local address in the range of 192.168.20.x where x = a number between 2 and 254. Click the Apply/Save button. Complete steps d) through g) for each device connected to the NF10WV router. Each entry will be listed in the Static IP Lease List as shown below. QoS Configuration Settings Select Advanced Setup >... -
Page 76: High Priority Qos Queue Configuration
Set the Interface (Australian customers use atm0(0_8_35), NZ customers use atm0(0)0)100)). Enter a Precedence. For the highest priority, set it to 1. For the lowest priority use 3. Set the DSL Latency as Path0. Click the Save/Apply button. www.netcommwireless.com NetComm Wireless NF10WV User Guide v1.1... -
Page 77: Low Priority Qos Queue Configuration
Enter a Precedence. For the lowest priority, set it to 3. For the highest priority use 1. Set the DSL Latency as Path0. Click the Save/Apply button. High Priority QoS Classification Select Advanced > Quality of Service > QoS Classification. NetComm Wireless NF10WV User Guide v1.1 www.netcommwireless.com... - Page 78 Set Mark 802.1p Priority as 5. In the scale 0-7, 0 is best effort, 6 and 7 are reserved for networking performance so set 5 as the highest priority. Click the Apply/Save button. www.netcommwireless.com NetComm Wireless NF10WV User Guide v1.1...
-
Page 79: Low Priority Qos Classification
Set Mark 802.1p Priority as 0. In the scale 0-7, 0 is best effort, 6 and 7 are reserved for networking performance so set 0 as the lowest priority. Click the Apply/Save button. NetComm Wireless NF10WV User Guide v1.1 www.netcommwireless.com... -
Page 80: Limiting The Upstream Rate
You now have 2 Quality of Service rules implemented for 2 devices connecting to the NF10WV router. Select Management > Reboot. Click the Reboot button to restart the router and save the new settings. To test your Quality of Service settings try running speed-tests (http://speedtest.net) on both PCs/devices simultaneously. -
Page 81: Limiting The Downstream Rate
Class Interface: the appropriate WAN interface Classification Results: Class Queue: the queue that was created on Step 1 Set rate-limit: set according to your preference Click Apply/ Save The QoS Classification table looks like this: NetComm Wireless NF10WV User Guide v1.1 www.netcommwireless.com... -
Page 82: Legal & Regulatory Information
If you purchased our goods in New Zealand and are a consumer you will also be entitled to similar statutory guarantees. www.netcommwireless.com NetComm Wireless NF10WV User Guide v1.1... -
Page 83: Product Warranty
NetComm Wireless Limited within 30 days of the original purchase date by registering online via the NetComm Wireless web site at www.netcommwireless.com. For all Product Warranty claims you will require proof of purchase. All Product Warranties are in addition to your rights and remedies under applicable Consumer Protection Laws which cannot be excluded (see Consumer Protection Laws Section above). -
Page 84: Contact
Contact Address: NETCOMM WIRELESS LIMITED Head Office PO Box 1200, Lane Cove NSW 2066 Australia Phone: +61(0)2 9424 2070 Fax: +61(0)2 9424 2010 Email: sales@netcommwireless.com techsupport@netcommwireless.com www.netcommwireless.com NetComm Wireless NF10WV User Guide v1.1...
Need help?
Do you have a question about the NF10WV and is the answer not in the manual?
Questions and answers