Table of Contents
Advertisement
Quick Links
Advertisement
Table of Contents

Related Manuals for NetCommWireless NTC-400 Series


Summary of Contents for NetCommWireless NTC-400 Series
- Page 1 User Guide NTC-400 Series...
- Page 2 NetComm Wireless accepts no responsibility for any loss or damage resulting from errors or delays in transmission or reception, or the failure of the NetComm Wireless NTC-400 Series Router to transmit or receive such data.
- Page 3 Document history This guide covers the following products: NetComm Wireless NTC-400 Series Router Ver. Document description Date v1.0 Initial document release 1 November 2017 v1.1 Correction to paragraph numbering 16 January 2018 v1.2 Miscellaneous changes, additions, corrections, etc. 13 March 2018 Table i.
-
Page 4: Table Of Contents
Contents Overview ......................................12 Introduction ............................................ 12 Target audience ..........................................12 Prerequisites ........................................... 12 Notation ............................................12 Product introduction ................................13 Package contents ......................................13 Device overview ........................................ 13 1.2.1 Interfaces ......................................13 1.2.2 LED indicators ......................................15 Installation ........................................16 1.3.1 System requirements .................................... - Page 5 Wireless Client List ....................................101 3.3.2.1 Select Target WiFi ......................................... 101 3.3.2.2 Show Client List..........................................101 3.3.3 Advanced Configuration ..................................102 3.3.3.1 Select Target WiFi ......................................... 102 3.3.3.2 Setup Advanced Configuration ..................................... 103 NTC-400 Series 5 of 361 © NetComm Wireless 2018...
- Page 6 3.3.4 Uplink Profile ....................................... 104 3.3.4.1 Uplink Profile Setting ........................................104 3.3.4.2 Create/Edit Uplink Profile ......................................105 IPv6 ..........................................108 3.4.1 IPv6 Configuration ....................................108 3.4.1.1 IPv6 WAN Connection Types ......................................109 3.4.1.2 IPv6 Configuration Setting ......................................113 3.4.1.3 Static IPv6 WAN Type Configuration ..................................... 113 3.4.1.4 LAN Configuration.........................................
- Page 7 Field Communication ................................188 Bus & Protocol ........................................ 188 5.1.1 Port Configuration ....................................188 5.1.1.1 Port Configuration Setting ......................................188 5.1.2 Virtual COM ......................................189 5.1.2.1 Operation Mode – TCP Client ....................................... 190 NTC-400 Series 7 of 361 © NetComm Wireless 2018...
- Page 8 5.1.2.2 Specify Remote TCP Server ......................................191 5.1.2.3 Operation Mode – TCP Server ...................................... 192 5.1.2.4 Specify TCP Clients for TCP Server Access ..................................193 5.1.2.5 Operation Mode – UDP ......................................... 194 5.1.2.6 Specify Remote UDP ........................................195 5.1.2.7 Operation Mode – RFC-2217 ......................................196 5.1.2.8 Specify Remote Host for Access ....................................
- Page 9 7.2.4 System Log ......................................294 7.2.4.1 View & Email buttons ........................................295 7.2.4.2 Web Log List window ........................................295 7.2.4.3 Web Log Type Category ........................................ 296 7.2.4.4 Email Alert ............................................ 297 NTC-400 Series 9 of 361 © NetComm Wireless 2018...
- Page 10 7.2.4.5 Syslogd ............................................298 7.2.4.6 Log to Storage ..........................................298 7.2.5 Backup & Restore ....................................299 7.2.5.1 FW Backup & Restore ........................................299 7.2.5.2 MCU Firmware Info ........................................300 7.2.6 Reboot & Reset ....................................301 FTP ..........................................302 7.3.1 FTP Server Configuration ..................................303 7.3.1.1 Enable SFTP Server ........................................
- Page 11 Appendix B – Table of Tables ......................................352 Appendix C – WiFi Performance Measurement Results..............................357 Appendix D – Open Source Software Disclaimer ................................358 Appendix E – Safety and product care ..................................358 NTC-400 Series 11 of 361 © NetComm Wireless 2018...
-
Page 12: Overview
Overview Introduction This document provides you all the information you need to set up, configure and use the NetComm Wireless NTC-400 Series Router. Target audience This document is intended for system integrators or experienced hardware installers who understand telecommunications terminology and concepts. -
Page 13: Product Introduction
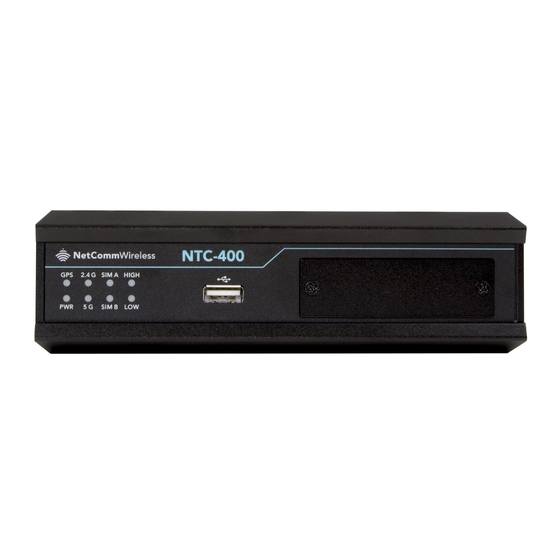
Product introduction Package contents 1 x NTC-400 Series Router 2 x 2.4GHz/5GHz WiFi antennas 1 x 8-way terminal connector 2 x Mounting brackets 4 x Mounting bracket screws 1 x Quick start guide Device overview 1.2.1 Interfaces Figure 1 – Interfaces (Front) - Page 14 Figure 2 – Interfaces (Rear) Description Notes CELL1 Main Socket Connect one of the 3G/LTE Antennas here. If only using a single antenna, ensure that it is connected to this port. Power Terminal Block The Power Terminal Block provides the following ports: •...
-
Page 15: Led Indicators
3G/4G signal strength is at a low level. WAN/LAN1-3 On Ethernet connection established on the corresponding LAN/WAN port. Flashing Data is being transmitted or received on the port. Table 2 – LED indicators NTC-400 Series 15 of 361 © NetComm Wireless 2018... -
Page 16: Installation
Important notes on installation Warning: • The NTC-400 Series Router may be powered by a DC12V or DC24V car system. If the router is not installed in a vehicle, we recommend using a DC12V/2A power adapter to power the unit. •... -
Page 17: Connecting Power
1.3.2.4 Connecting power The NTC-400 Series Router accepts DC power in the range of 9 V to 36 V. Follow the picture below to ensure that the power source is connected with the correct polarity. Figure 3 – Power pins on terminal block 1.3.2.5... -
Page 18: Connecting Serial Devices
1.3.2.7 Connecting serial devices The NTC-400 Series Router features one RS-232 serial port with RX and TX signals located on the terminal block as shown below. Figure 5 – Serial pins on terminal block 1.3.2.8 Connecting to the network via Ethernet The NTC-400 Series Router provides three RJ-45 10/100/1000 Mbps Ethernet ports with auto-MDIX. -
Page 19: Status
The System Information screen shows the device Up-time and the resource utilization for the CPU, Memory, and Connection Sessions. Figure 7 – System Information System Information History The System Information History screen shows the statistic graphs for the CPU and memory. Figure 8 – System Information History displays NTC-400 Series 19 of 361 © NetComm Wireless 2018... -
Page 20: Basic Network
Network Interface Status The Network Interface Status screen shows the statistic information for each network interface of the gateway. The statistic information includes the Interface Type, Upload Traffic, Download Traffic, and Current Upload / Download Traffic. Figure 9 – Network Interface Status Basic Network Figure 10 –... - Page 21 Connect button – Allows user to manually connect the device to the Internet. Note: Connect button is available when Connection Control in WAN Type setting is set to NTC-400 Series 21 of 361 © NetComm Wireless 2018...
- Page 22 Item Value setting Description Connect Manually (Refer to Edit button in Basic Network > WAN & Uplink > Internet Setup) and WAN connection status is disconnected. Disconnect button – Allows user to manually disconnect the device from the Internet. Note: Connect button is available when Connection Control in WAN Type setting is set to Connect Manually (Refer to Edit button in Basic Network >...
- Page 23 Displays the 3G/4G connection status. The status can be Connecting, Connected, Disconnecting, and Disconnected. Signal System data. Displays the 3G/4G wireless signal level. Strength Network System data. Displays the name of the service network carrier. Name NTC-400 Series 23 of 361 © NetComm Wireless 2018...
-
Page 24: Lan & Vlan Status
Item Value setting Description Refresh Button Click the Refresh button to renew the information. Action Button This area provides functional buttons. Detail Button when press, windows of detail information will appear. They are the Modem Information, SIM Status, and Service Information. Refer to next page for more. Table 7 –... -
Page 25: Wifi Status
The Wi-Fi Operation Mode of VAP. Depends of device model, modes are AP Router, WDS Only and WDS Hybrid, Universal Repeater and Client. SSID System data. Displays the network ID of VAP. Channel System data. Displays the wireless channel used. NTC-400 Series 25 of 361 © NetComm Wireless 2018... - Page 26 Item Value setting Description WiFi System System data. The WiFi System of VAP. Auth. & Security System data. Displays the authentication and encryption type used. MAC Address System data. Displays MAC Address of VAP. Action Button Click the Edit button to make a quick access to the WiFi configuration page.
- Page 27 Displays the Wi-Fi Operation Band (2.4G or 5G) of VAP. System data. Displays the VAP ID. Received Packets System data. Displays the number of received packets. Transmitted Packet System data. Displays the number of transmitted packets. NTC-400 Series 27 of 361 © NetComm Wireless 2018...
-
Page 28: Ddns Status
Item Value setting Description Action Button Click the Reset button to clear individual VAP statistics. Refresh Button Button Click the Refresh button to update the entire VAP Traffic Statistic instantly. Table 13 – WiFi Traffic Statistic 2.2.4 DDNS Status Navigate to the Status > Basic Network > DDNS tab. The DDNS Status window shows the current DDNS service in use, the last update status, and the last update time to the DDNS service server. -
Page 29: Security
Click on Edit Button to change IPSec setting, the web-based utility will take you to the IPSec configuration page. (Security > VPN > IPSec tab) Table 15 – IPSec Tunnel Status NTC-400 Series 29 of 361 © NetComm Wireless 2018... - Page 30 OpenVPN Server Status According to OpenVPN configuration, the OpenVPN Server/Client Status shows the status and statistics for the OpenVPN connection from the server side or client side. Figure 24 – OpenVPN Server Status Item Value setting Description User Name System data. Displays the Client name you have entered for identification.
- Page 31 Displays the WAN interface with which the gateway will use to request PPTP tunnelling connection to the PPTP server. Virtual IP System data. Displays the IP address assigned by Virtual IP server of L2TP server. NTC-400 Series 31 of 361 © NetComm Wireless 2018...
- Page 32 Item Value setting Description Remote IP/FQDN System data. Displays the L2TP Server’s Public IP address (the WAN IP address) or FQDN. Default System data. Displays the specified IP address of the gateway device used to Gateway/Remote connect to the internet to connect to the L2TP server –the Subnet default gateway.
-
Page 33: Firewall Status
This is the Packet Filter Rule name. Rule Detected System data. This is the logged packet information, including the source IP, Contents destination IP, protocol, and destination port –the TCP or UDP. NTC-400 Series 33 of 361 © NetComm Wireless 2018... - Page 34 Item Value setting Description String format: Source IP to Destination IP : Destination Protocol (TCP or UDP) System data. The Source IP (IPv4) of the logged packet. Time System data. The Date and Time stamp of the logged packet. Date & time format. ("Month"...
- Page 35 The Source IP (IPv4) of the logged packet. Time System data. The Date and Time stamp of the logged packet. Date & time format. ("Month" "Day" "Hours":"Minutes":"Seconds") Table 26 – Application Filters Status NTC-400 Series 35 of 361 © NetComm Wireless 2018...
- Page 36 Note – Ensure Application Filter Log Alert is enabled. Refer to Security > Firewall > Application Filter tab. Check Log Alert and save the setting. IPS Status Figure 35 – IPS Status Item Value setting Description Detected System data. This is the intrusion type of the packets being blocked.
-
Page 37: Administration
SNMP version 3. IP Address System data. Displays the IP address of SNMP manager. Port System data. Displays the port number used to maintain connection with the SNMP manager. NTC-400 Series 37 of 361 © NetComm Wireless 2018... -
Page 38: Log Storage Status
Item Value setting Description Community System data. Displays the community for SNMP version 1 or version 2c only. Auth. Mode System data. Displays the authentication method for SNMP version 3 only. Privacy Mode System data. Displays the privacy mode for version 3 only. SNMP Version System data. -
Page 39: Gnss Status
The available GNSS information includes GNSS Condition, No. of Satellites, Satellites ID / Signal Strength, Position (Lat., Long.), Altitude (meters), True Course, and the equivalent Ground Speed (km/h). Figure 42 – GNSS Status NTC-400 Series 39 of 361 © NetComm Wireless 2018... -
Page 40: Statistics & Report
Statistics & Report Figure 43 – Status > Statistics & Report menu item 2.5.1 Connection Session Navigate to the Status > Statistics & Reports > Connection Session tab. Internet Surfing Statistic shows the connection tracks on this router. Figure 44 – Internet Surfing list Item Value setting Description... -
Page 41: Network Traffic
Export (.xml) Button Click the Export (.xml) button to export the login statistics to xml file. Export (.csv) Click the Export (.csv) button to export the login statistics to Button csv file. NTC-400 Series 41 of 361 © NetComm Wireless 2018... -
Page 42: Portal Usage
Item Value setting Description Refresh Button Click the Refresh button to refresh the login statistics. Table 33 – Device Administration controls 2.5.4 Portal Usage Navigate to the Status > Statistics & Reports > Portal Usage tab. Portal Usage shows the information about internal Captive Portal user login statistics. Figure 47 –... - Page 43 Click the Last button; you will see the last page of login Button statistics Refresh Click the Refresh button to refresh the login statistics Button Table 34 – Captive Portal User Login Statistics NTC-400 Series 43 of 361 © NetComm Wireless 2018...
-
Page 44: Cellular Usage
2.5.5 Cellular Usage Navigate to the Status > Statistics & Reports > Cellular Usage tab. Cellular Usage screen shows data usage statistics for the selected cellular interface. The cellular data usage can be accumulated per hour or per day. Figure 48 – Data Usage Record 44 of 361 User Guide ©... -
Page 45: Basic Network
WAN & Uplink The NTC-400 Series Router provides multiple WAN interfaces to let all client hosts behind the router to access the Internet. The WAN Connection lets you specify the WAN Physical Interface, WAN Internet Setup and WAN Load Balance for computers behind the router to access the Internet. - Page 46 Figure 49 – Failover diagram Seamless Failover – In addition, there is a "Seamless" option for Failover operation mode. When seamless option is activated by checking on the "Seamless" box in configuration window, both the primary connection and the failover connection are started up after the system reboots.
-
Page 47: Configuring A Physical Interface
SIP/mobile carrier, so that all client hosts on the Intranet of the router can access the Internet. On the "Internet Setup" page, there are three configuration windows: "Internet Connection List", "Internet Connection NTC-400 Series 47 of 361... -
Page 48: Wan Type
Configuration", "WAN Type Configuration" and related configuration windows for each WAN type. For the Internet setup of each WAN interface, you must specify its WAN type of physical interface first and then its related parameter configuration for that WAN type. After clicking on the "Edit" button of a physical interface on the "Internet Setup List" window, the "Internet Connection Configuration"... - Page 49 Optional setting. Enter the service name if your ISP requires it Assigned IP Address Optional setting. Enter the IP address assigned by your Service Provider. Table 38 – PPPoE WAN Type Configuration NTC-400 Series 49 of 361 © NetComm Wireless 2018...
- Page 50 PPTP When WAN Type is set to PPTP, the following options are displayed: Figure 56 – PPTP WAN Type Configuration Item Notes Description IP Mode Mandatory Select either Static or Dynamic IP address for PPTP Internet connection. field. When Static IP Address is selected, you will need to enter the WAN IP Address, WAN Subnet Mask, and WAN Gateway.
-
Page 51: Ethernet Connection Common Configuration
Select Enable to enable MPPE (Microsoft Point-to-Point Encryption) security for setting PPTP connection. Table 40 – L2TP WAN Type Configuration 3.1.2.2 Ethernet Connection Common Configuration There are some important parameters to be configured, regardless of the selected WAN type. NTC-400 Series 51 of 361 © NetComm Wireless 2018... -
Page 52: Connection Control
3.1.2.3 Connection Control Auto-reconnect – The router will establish an Internet connection automatically when it has booted up and try to reconnect when the connection is down. We recommend that you choose this scheme for mission critical applications to ensure the Internet connection is always on. -
Page 53: Network Monitoring
Checking Timeout period, the "Fail" count register will be increased. If there are repeated failures and the Fail count exceeds the Fail Threshold, the router performs the exception handling process and re-initializes the connection. If there are no repeated failures, the network monitoring process will be start again. NTC-400 Series 53 of 361 © NetComm Wireless 2018... - Page 54 Set up “Ethernet Common Configuration” Item Notes Description Connection Mandatory field. There are three connection modes. Control Auto-reconnect (Always on) enables the router to always keep the Internet connection on. Connect-on-demand enables the router to automatically re-establish Internet connection as soon as user attempts to access the Internet. Internet connection will be disconnected when it has been inactive for a specified idle time.
-
Page 55: Preferred Sim Card - Dual Sim Fail Over
Preferred SIM Card – Dual SIM Fail Over With a single module, the router can create only one cellular WAN interface at any time. However, the NTC-400 Series Router accepts two SIM cards and allows you to switch between them so that one SIM card is available at all times as a backup or failover. - Page 56 SIM-A/SIM-B only – When “SIM-A Only” or “SIM-B Only” is used, the specified SIM slot card is the only one to be used for negotiation parameters between the router and cellular ISP. SIM-A / SIM-B first without enable Failback – By default, the router is configured to use “SIM-A First”. When “SIM-A First” or “SIM-B First”...
-
Page 57: Configure 3G/4G Wan Setting
SIM, the router will failback to the main SIM and try to establish the connection periodically. Note – Failback is available only when SIM-A First or SIM-B First is selected. Table 42 – 3G/4G WAN Type Configuration NTC-400 Series 57 of 361 © NetComm Wireless 2018... -
Page 58: Configure Sim-A / Sim-B Card
Description Network Type Mandatory field. Select Auto to register on a network automatically, regardless of the network type. The NTC-400 Series Router will give preference to high-speed networks. Default setting: Auto Select 2G Only to register the 2G network only. -
Page 59: Create/Edit Sim-A / Sim-B Apn Profile List
Table 44 – SIM-A / SIM-B APN Profile List The SIM-A APN Profile List displays all the APN profiles you have created. It is available only when you select Dial-Up Profile as APN Profile List. NTC-400 Series 59 of 361 © NetComm Wireless 2018... - Page 60 When Add button is applied, an APN Profile Configuration screen will appear. Figure 65 – SIM-A / SIM-B APN Profile Configuration Item Notes Description Profile Name By default Profile-x is listed. Enter the profile name you want to describe for this profile. String format: any text String format: integer Enter the MCC (Mobile Country Code) you want to use for this profile.
-
Page 61: Setup 3G/4G Connection Common Configuration
Choose either DNS Query or ICMP Checking to detect a WAN link. With DNS Query, the system checks the connection by sending DNS Query packets to the destination specified in Target 1 and Target 2. NTC-400 Series 61 of 361 © NetComm Wireless 2018... - Page 62 Item Notes Description With ICMP Checking, the system will check the connection by sending ICMP request packets to the specified destination. Loading Check Enable Loading Check allows the router to ignore unreturned DNS Queries or ICMP requests when WAN bandwidth is fully occupied. This is to prevent false link-down status. Check Interval defines the transmitting interval between two DNS Query or ICMP checking packets.
-
Page 63: Wifi Uplink Setup
WiFi connection. If you have access permission to a certain wireless network, you can setup a WiFi Uplink connection using the NTC-400 Series Router. The router can support 802.11ac/n/g/b data connections and can connect to a wireless network (access point) under the regular infrastructure mode. -
Page 64: Wifi Uplink
3.1.3.2 WiFi Uplink Figure 69 – WiFi Uplink WAN Type Configuration Item Notes Description Connect to Display the information of AP for connecting. You can click the Scan button and select an AP for the uplink network. You can also create uplink profile(s) for ease of connecting to an available Uplink network. Refer to the Basic Network >... - Page 65 DNS2: set the secondary DNS to be the target. Gateway: set the Current gateway to be the target. Other Host: enter an IP address to be the target. Save Click Save to save the settings. Button NTC-400 Series 65 of 361 © NetComm Wireless 2018...
-
Page 66: Load Balance
Item Notes Description Undo Button Click Undo to cancel the settings. Table 48 – WiFi Uplink WAN Type Configuration 3.1.4 Load Balance When there are multiple WAN interfaces, and when the bandwidth of one WAN connection is not enough for the traffic loads from the Intranet to the Internet, the WAN load balance function can be considered to enlarge the total WAN bandwidth. -
Page 67: By Specific Weight
The "By User Policy" load balance strategy allows you to map Source IP, Destination IP, or Destination Port to an assigned WAN interface. You can select a subnet or IP range instead of just a single source or destination. Figure 72 – Load Balance Strategy - By User Policy 1 NTC-400 Series 67 of 361 © NetComm Wireless 2018... -
Page 68: Load Balance Setting
Figure 73 – Load Balance Strategy - By User Policy 2 The diagrams shown above are examples of user policy. The first diagram illustrates an example of mapping various source IP subnets to different WAN interfaces. All packets from different subnets will be routed to the assigned WAN interface. The administrator can manage and balance the loading among available WAN interfaces accordingly. -
Page 69: User Policy List
When By User Policy is selected, a User Policy List screen will appear. With properly configured policy rules, the system will route traffic through an available WAN interface based on user defined rules. 3.1.4.7 User Policy List Figure 76 – User Policy List NTC-400 Series 69 of 361 © NetComm Wireless 2018... -
Page 70: Create User Policy
3.1.4.8 Create User Policy When Add button is applied, User Policy Configuration screen will appear. Figure 77 – User Policy Configuration Item Notes Description Source IP Address Mandatory field. There are four options that can be selected: Default setting: Any – No specific Source IP is provided. The traffic may come from any source Subnet –... - Page 71 Click the Save button to save the configuration Button Undo Button Click the Undo button to restore what you just configured back to the previous setting. Table 51 – User Policy Configuration NTC-400 Series 71 of 361 © NetComm Wireless 2018...
-
Page 72: Lan & Vlan
LAN & VLAN This section provides details on the configuration of LANs and VLANs. 3.2.1 Ethernet LAN The Local Area Network (LAN) can be used to share data or files among computers attached to a network. The following diagram illustrates the wired network. Figure 78 –... - Page 73 253 clients allowed on the LAN. Value Range: 255.0.0.0 (/8) - 255.255.255.255 (/32). Save Click the Save button to save the configuration Table 53 – Additional IP Configuration NTC-400 Series 73 of 361 © NetComm Wireless 2018...
-
Page 74: Vlan
VLAN (Virtual LAN) is a logical network under a certain switch or router device to group client hosts with a specific VLAN ID. The NTC-400 Series Router supports both Port-based VLAN and Tag-based VLAN. These functions allow you to divide the local network into different “virtual LANs”. -
Page 75: Tag-Based Vlan
Ethernet port for the Intranet. These flows can be directed to different destinations because they have different tags. This approach is very useful to group hosts in different geographic locations to be in the same workgroup. NTC-400 Series 75 of 361... - Page 76 Figure 84 – Tag-based VLAN For example, in a company where the administrator has created 3 network segments; Lab, Meeting Rooms, and Office the administrator can configure the Office segment with VLAN ID 12. The VLAN group is equipped with DHCP-3 server to construct a 192.168.12.x subnet.
-
Page 77: Vlan Groups Access Control
Internet but the computers/servers in the data centre cannot access the Internet due to security considerations. Servers in the data centre are only for trusted staff or are accessed via secure tunnels. Figure 86 – VLAN Group Internet Access example NTC-400 Series 77 of 361 © NetComm Wireless 2018... -
Page 78: Inter Vlan Group Routing
3.2.2.5 Inter VLAN Group Routing In Port-based tagging, the administrator can specify member hosts of one VLAN group to be able to communicate with the ones in another VLAN group or not. This is a communication pair and one VLAN group can join many communication pairs. However, A can communicate with B, and B can communicate with C, but that doesn’t mean that A can communicate with C. -
Page 79: Port-Based Vlan - Create/Edit Vlan Rules
Figure 90 – Port-based VLAN Configuration Item Notes Description Name Mandatory field. Define the Name of this rule. This field is pre-defined and is not customisable. String format: Pre-defined, not customisable. NTC-400 Series 79 of 361 © NetComm Wireless 2018... - Page 80 Item Notes Description VLAN ID Mandatory field. Define the VLAN ID number. The range is 1 to 4094. VLAN Tagging Default setting: Disable The rule is activated according to VLAN ID and Port Members configuration when Enable is selected. The rule is activated according to Port Members configuration when Disable is selected.
- Page 81 Disabled by default. Click Enable to activate this rule. Save Button Click the Save button to save the configuration Table 56 – IP Fixed Mapping Rule List Figure 92 – Port-based VLAN List NTC-400 Series 81 of 361 © NetComm Wireless 2018...
-
Page 82: Port-Based Vlan - Inter Vlan Group Routing
3.2.2.9 Port-based VLAN – Inter VLAN Group Routing Click the VLAN Group Routing button. The VLAN Group Internet Access Definition and Inter VLAN Group Routing are displayed. Figure 93 – VLAN Group Internet Access Definition When the Edit button is applied, the following screen is displayed: Figure 94 –... -
Page 83: Dhcp Server
List”, or clicking on the “Edit” button at the end of each DHCP Server on the list to edit its settings. You can select a DHCP Server and delete it by clicking on the “Select” check-box and then the “Delete” button. NTC-400 Series 83 of 361... -
Page 84: Fixed Mapping
Figure 97 – DHCP Server 3.2.3.2 Fixed Mapping When there are entries in the DHCP Client List, you can assign a fixed IP address to map the specific MAC addresses by selecting them and then selecting “Copy”. You can also do this manually if you know the MAC address of the devices. Figure 98 –... -
Page 85: Create / Edit Dhcp Server Policy
IPv4 format. Lease Time Mandatory field. The Lease Time of this DHCP Server. Integer format. Value Range: 300 - 604800 seconds Domain Name String format. The Domain Name of this DHCP Server. NTC-400 Series 85 of 361 © NetComm Wireless 2018... -
Page 86: Create / Edit Mapping Rule List On Dhcp Server
Item Notes Description Primary DNS IPv4 format The Primary DNS of this DHCP Server. Secondary DNS IPv4 format The Secondary DNS of this DHCP Server. Primary WINS IPv4 format The Primary WINS of this DHCP Server. Secondary IPv4 format The Secondary WINS of this DHCP Server. WINS Gateway IPv4 format... -
Page 87: View / Copy Dhcp Client List
The router supports up to a maximum of 99 option settings. Figure 105 – Create / Edit DHCP Server Options When the Add/Edit button is applied, the DHCP Server Option Configuration screen will appear. Figure 106 – DHCP Server Option Configuration NTC-400 Series 87 of 361 © NetComm Wireless 2018... - Page 88 Item Notes Description Option Name Mandatory field. String format. Enter a DHCP Server Option name that is meaningful to you. DHCP Server Dropdown list of all available DHCP servers. Choose the DHCP server this option should apply to. Select Option Select Mandatory field.
-
Page 89: Wifi
WiFi clients can connect to it and access the Internet through it without the need to obtain a public IP address from the ISP. Figure 107 – WiFi Configuration - AP Router Mode NTC-400 Series 89 of 361 © NetComm Wireless 2018... -
Page 90: Wds Only Mode
3.3.1.2 WDS Only Mode WDS (Wireless Distributed System) Only mode configures the router to act as a bridge for its wired Intranet and a repeater to extend wireless reach. You can use multiple WiFi routers as WiFi repeaters in a chain setup in "WDS Only" mode. All gateways can communicate with each other through WiFi. -
Page 91: Wds Hybrid Mode
WiFi client access. Gateway 1 has a DHCP server to assign IP addresses to each of the client hosts. All gateways and AP are running in WDS hybrid mode. To setup WDS hybrid mode, you must fill all configuration items similar to that of AP-router and WDS modes. NTC-400 Series 91 of 361 © NetComm Wireless 2018... -
Page 92: Multiple Vaps
Figure 110 – WiFi Configuration - Multiple VAPs 3.3.1.4 Multiple VAPs VAP (Virtual Access Point) is a function that allows the partitioning of a wireless network into multiple broadcast domains. It can simulate multiple APs on one physical AP. The wireless router supports up to 8 VAPs. For each VAP, you need to setup an SSID, authentication and encryption to control WiFi client access. -
Page 93: Wifi Security - Authentication & Encryption
The Wi-Fi configuration allows you to configure 2.4GHz and 5GHz WiFi settings. Navigate to the Basic Network > WiFi > WiFi Module One Tab. 3.3.1.7 Basic Configuration Figure 112 – WiFi Configuration Setting - Basic Configuration NTC-400 Series 93 of 361 © NetComm Wireless 2018... -
Page 94: Configure Wifi Setting
Item Notes Description Operation A mandatory setting Specifies the intended operation band for the WiFi module. Band Pressing the 2.4G or 5G button directs you to the WiFi Protected Setup page. Table 63 – WiFi Configuration Setting - Basic Configuration 3.3.1.8 Configure WiFi Setting Figure 113 –... - Page 95 RADIUS Server IP (The default IP is 0.0.0.0) RADIUS Server Port (The default value is 1812) RADIUS Shared Key When Shared is selected, the pre-shared WEP key should be set for authenticating. NTC-400 Series 95 of 361 © NetComm Wireless 2018...
- Page 96 Item Notes Description When Auto is selected, the device will select Open or Shared by requesting the client automatically. The check box named 802.1x shows up next to the dropdown list. 802.1x (Disabled by default.) - When 802.1x is enabled, the client stations will be authenticated by RADIUS server.
-
Page 97: 3.3.1.10 Wds Only Mode
The check box named 802.1x shows up next to the dropdown list. 802.1x (Disabled by default.) - When 802.1x is enabled, the client stations will be authenticated by RADIUS server. RADIUS Server IP (The default IP is 0.0.0.0) NTC-400 Series 97 of 361 © NetComm Wireless 2018... -
Page 98: 3.3.1.11 Wds Hybrid Mode
Item Notes Description RADIUS Server Port (The default value is 1812) RADIUS Shared Key When WPA-PSK is selected, the authentication uses pre-shared key instead of RADIUS server. When WPA2-PSK is selected, the authentication uses pre-shared key instead of RADIUS server. Encryption Mandatory field. - Page 99 Select a radio channel for the VAP. Each channel corresponds to a different radio band. The Default setting: permissible channels depend on the Regulatory Domain. Auto There are two available options when Auto is selected: NTC-400 Series 99 of 361 © NetComm Wireless 2018...
- Page 100 Item Notes Description By AP Numbers - The channel will be selected according to AP numbers (lower channels are better). By Interference - The channel will be selected according to interference. (lower interference is better). WiFi System Mandatory field. Specify the preferred WiFi System. The dropdown list of the WiFi system is based on IEEE 802.11 standard.
-
Page 101: Wireless Client List
Dynamic means the IP address is derived from a DHCP server. Static means the IP address is a fixed one that is self-filled by the client. Host Name Displays the host name of the client. NTC-400 Series 101 of 361 © NetComm Wireless 2018... -
Page 102: Advanced Configuration
Item Description MAC Address Displays the MAC address of the client. Mode Displays what kind of WiFi system the client used to associate with this device. Rate Displays the data rate between client and this device. RSSI0, RSSI1 Displays the RX sensitivity (RSSI) value for each radio path. Signal The signal strength between the client and this device. -
Page 103: Setup Advanced Configuration
Disabled by default. When a wireless client connects to the 2.4G WiFi network, the router will send the client Steering to the 5GHz network automatically if the client is capable of accessing it. NTC-400 Series 103 of 361 © NetComm Wireless 2018... -
Page 104: Uplink Profile
Item Notes Description WIDS Disabled by default. The WIDS (Wireless Intrusion Detection System) will analyse all packets and log statistics in a table on the WiFi status page. Navigate to the Status > Basic Network > WiFi tab for detailed WIDS status. Save Button Click the Save button to save the current configuration. -
Page 105: Create/Edit Uplink Profile
When Open is selected, the preshared WEP key can be set for authentication; When Shared is selected, the preshared WEP key should be set for authentication; When WPA-PSK or WPA2-PSK is selected, the TKIP or AES preshared key should be set for authentication; NTC-400 Series 105 of 361 © NetComm Wireless 2018... - Page 106 Item Notes Description Encryption Mandatory field. Select the desired encryption method and enter the required key(s). The available method Default setting: in the dropdown list depends on the Authentication you selected. None None – the device is open with no encryption. WEP –...
- Page 107 When you have selected an AP from the AP list, the Channel, SSID, Authentication, Encryption, and MAC address will be automatically completed in the profile. If required, you must enter a key for the uplink connection. NTC-400 Series 107 of 361...
-
Page 108: Ipv6
IPv6 The growth of the Internet has created a need for more addresses than are possible with IPv4. IPv6 (Internet Protocol version 6) is a version of the Internet Protocol (IP) intended to succeed IPv4, which is the protocol currently used to direct most Internet traffic. -
Page 109: Ipv6 Wan Connection Types
DHCP client to configure it automatically. The server also sends a lease time of the address and time to re-contact the server for IPv6 address renewal. The client must then resend a request to renew the IPv6 address. Figure 127 – IPv6 WAN Connection Types - DHCPv6 NTC-400 Series 109 of 361 © NetComm Wireless 2018... - Page 110 PPPoEv6 PPPoEv6 in IPv6 does the same function as PPPoE in IPv4. The PPPoEv6 server provides configuration parameters based on the PPPoEv6 client request. When the PPPoEv6 server gets a client request and successfully authenticates it, the server sends the IP address, DNS server addresses and other required parameters to automatically configure the client. Figure 128 –...
- Page 111 In the diagram above, the 6to4 means there is no need to set a gateway address "automatic" tunnelling solution. The relay server, as defined in RFC 3068, has included segments drawing on 192.88.99.0/24 used as 6to4 relay of any-cast address to complete the 6in4 setting. NTC-400 Series 111 of 361 © NetComm Wireless 2018...
- Page 112 6in4 6in4 is an Internet transition mechanism for Internet IPv4 to IPv6 migration. 6in4 uses tunnelling to encapsulate IPv6 traffic over explicitly-configured IPv4 links. As defined in RFC 4213, the 6in4 traffic is sent over the IPv4 Internet inside IPv4 packets whose IP headers have the IP protocol number set to 41.
-
Page 113: Ipv6 Configuration Setting
Enter the WAN primary DNS Server. Secondary DNS An optional field. Enter the WAN secondary DNS Server. MLD Snooping Disabled by default. Enable/Disable the MLD Snooping function. Table 75 – Static IPv6 WAN Type Configuration NTC-400 Series 113 of 361 © NetComm Wireless 2018... -
Page 114: Lan Configuration
3.4.1.4 LAN Configuration Figure 133 – LAN Configuration Item Notes Description Global Address Mandatory field. Enter the LAN IPv6 Address for the router. Link-local Address Value auto-created Show the link-local address for LAN interface of router. Table 76 – LAN Configuration Navigate to Address Auto-configuration (summary) for setting LAN environment. -
Page 115: Lan Configuration
Enter the MTU to set up a PPPoEv6 connection. If you want more information, please contact field. your ISP. Value Range: 1280 - 1492. MLD Snooping Disabled by Enable/Disable the MLD Snooping function default. Table 79 – PPPoEv6 WAN Type Configuration NTC-400 Series 115 of 361 © NetComm Wireless 2018... -
Page 116: Lan Configuration
3.4.1.8 LAN Configuration Figure 137 – LAN Configuration Item Notes Description Global Address Value auto-created The LAN IPv6 Address for the router. Link-local Address Value auto-created Show the link-local address for LAN interface of router. Table 80 – LAN Configuration Navigate to Address Auto-configuration (summary) to set up the LAN environment. -
Page 117: 3.4.1.11 6In4 Wan Type Configuration
Enter the WAN primary DNS Server. Secondary DNS Optional field. Enter the WAN secondary DNS Server. Disabled by default. Enable/Disable the MLD Snooping function Table 83 – 6in4 WAN Type Configuration NTC-400 Series 117 of 361 © NetComm Wireless 2018... -
Page 118: 3.4.1.12 Lan Configuration
3.4.1.12 LAN Configuration Figure 141 – 6in4 WAN Type Configuration Item Notes Description Global Address Mandatory field. Filled Routed /64 gotten from tunnel broker in this field. Link-local Address Auto-created value Show the link-local address for LAN interface of router. Table 84 –... - Page 119 Value Range: 0001 - FFFF. IPv6 Address Lifetime (mandatory field) – Enter the DHCPv6 lifetime for your local computers. Default setting: 36000 Value Range: 0 - 65535. Table 85 – Address Auto-configuration NTC-400 Series 119 of 361 © NetComm Wireless 2018...
-
Page 120: Port Forwarding
(external network), by remapping the destination IP address and port number. There are several optional Port Forwarding related functions on the NTC-400 Series Router. They are Virtual Server, Virtual Computer, IP Translation, Special AP & ALG, DMZ, Pass Through, etc. -
Page 121: Enable Nat Loopback
"Virtual Server" allows you to access servers with the global IP address or FQDN of the router as if they are servers that exist on the Internet. In fact, these servers are located on the Intranet and are physically behind the router. The router serves the NTC-400 Series 121 of 361... - Page 122 requests by port forwarding the requests to the LAN servers and transfers the replies from LAN servers to the requester on the WAN side. Figure 146 – Virtual Server & NAT Loopback As shown in the above example, an e-mail virtual server is defined to be located on a server with IP address 10.0.75.101 in the Intranet of Network-A, including the SMTP service port 25 and POP3 service port 110.
-
Page 123: Virtual Computer
Check Enable to activate this port forwarding function. Save Click the Save button to save the settings. Button Undo Button Click the Undo button to cancel the settings. Table 87 – Enable Virtual Server and Virtual Computer NTC-400 Series 123 of 361 © NetComm Wireless 2018... -
Page 124: Create / Edit Virtual Server
3.5.2.5 Create / Edit Virtual Server The router allows you to custom your Virtual Server rules. It supports up to a maximum of 20 rule-based Virtual Server sets. Figure 149 – Create / Edit Virtual Server Click the Add button to display the Virtual Server Rule Configuration screen. Table 88 –... - Page 125 Click the Save button to save the settings. Button Undo Button Click the Undo button to cancel the settings. Back Button When the Back button is clicked the screen will return to previous page. NTC-400 Series 125 of 361 © NetComm Wireless 2018...
-
Page 126: Create / Edit Virtual Computer
3.5.2.6 Create / Edit Virtual Computer The router allows you to customise your Virtual Computer rules. It supports up to a maximum of 20 rule-based Virtual Computer sets. Figure 150 – Create / Edit Virtual Computer Click the Add button to display the Virtual Computer Rule Configuration screen. Figure 151 –... -
Page 127: Special Ap & Alg
SIP ALG The NTC-400 Series Router supports the SIP ALG feature to allow one SIP phone behind the NAT router to call another SIP phone in the Internet, even if the router executes its NAT mechanism between the Intranet and the Internet. The NAT router... -
Page 128: Special Ap & Alg Setting
number combination that allows incoming packets, so it will support address and port translation for SIP application layer protocols as shown in following diagram. Figure 154 – SIP ALG The NAT router enables the SIP ALG feature, so it will monitor the actions of SIP Phone #1, open up the required ports and make the address and port translation in a SIP voice communication. -
Page 129: Enable Special Ap & Alg
Mandatory field. All is Check the interface box(es) to apply the Special AP rule. checked by default. By default, All is checked, and the Special AP rule will be applied to all WAN interfaces. NTC-400 Series 129 of 361 © NetComm Wireless 2018... -
Page 130: Dmz & Pass Through
Item Value setting Description Trigger Port Mandatory field. User- Enter the expected trigger port (or port range) if User- defined is selected in the dropdown list. defined is selected by default. If you select another popular application from the dropdown list, the corresponding trigger port(s) and incoming ports will be defined automatically. -
Page 131: Vpn Pass Through Scenario
VPN servers. Save Click the Save button to save the settings. Button Undo Button Click the Undo button to cancel the settings Table 92 – Enable DMZ and Pass-through NTC-400 Series 131 of 361 © NetComm Wireless 2018... -
Page 132: Routing
Routing Figure 159 – Routing If you have more than one router and subnet, you will need to enable the routing function to allow packets to find the proper routing path and allow different subnets to communicate with each other. Routing is the process of selecting the best path through a network. -
Page 133: Static Routing Setting
When the "Add" or "Edit" buttons are applied, the Static Routing Rule Configuration window appears to let you define a static routing rule. 3.6.1.2 Enable Static Routing Check Enable to activate the "Static Routing" feature. Figure 162 – Enable Static Routing NTC-400 Series 133 of 361 © NetComm Wireless 2018... -
Page 134: Create / Edit Static Routing Rules
Item Notes Description Static Routing Disabled by default. Check the Enable box to activate this function Table 93 – Enable Static Routing 3.6.1.3 Create / Edit Static Routing Rules The Static Routing Rule List shows the setup parameters of all static routing rule entries. To configure a static routing rule, you must specify related parameters including the destination IP address and subnet mask of the dedicated host/server or subnet, the IP address of a peer gateway, the metric and the rule activation. -
Page 135: Dynamic Routing
The NTC-400 Series Router supports dynamic routing protocols, including RIPv1/RIPv2 (Routing Information Protocol), OSPF (Open Shortest Path First), and BGP (Border Gateway Protocol), for you to establish the routing table automatically. The feature of dynamic routing will be very useful when there are lots of subnets in your network. -
Page 136: Rip Scenario
3.6.2.1 RIP Scenario The Routing Information Protocol (RIP) is one of the oldest distance-vector routing protocols, which employs the hop count as a routing metric. RIP prevents routing loops by implementing a limit on the number of hops allowed in a path from the source to a destination. -
Page 137: Bgp Scenario
3.6.2.4 Advanced Configurable Routing The NTC-400 Series Router features configurable routing software called Quagga. It is a routing software package that provides TCP/IP based routing services with routing protocols support such as OSPF and BGP. Quagga is made from a collection of several daemons that work together to build the routing table, so it provides an interactive user interface for each routing protocol and supports common client commands. -
Page 138: Dynamic Routing Setting
3.6.2.5 Dynamic Routing Setting Navigate to the Basic Network > Routing > Dynamic Routing tab. The dynamic routing setting allows user to customize RIP, OSPF, and BGP protocol through the router based on their office setting. On the "Dynamic Routing" page, there are seven configuration windows for the dynamic routing feature. They are the "RIP Configuration"... -
Page 139: Ospf Configuration
The router allows you to custom your OSPF Area List rules. It supports up to a maximum of 32 rule sets. Figure 172 – Create / Edit OSPF Area Rules Click the Add button to display the OSPF Area Rule Configuration screen. NTC-400 Series 139 of 361 © NetComm Wireless 2018... -
Page 140: 3.6.2.10 Bgp Configuration
Figure 173 – OSPF Area Configuration Item Notes Description Area Subnet Mandatory field. Classless The Area Subnet of this router on the OSPF Area List. Inter Domain Routing (CIDR) Subnet Mask Notation. (Ex: 192.168.1.0/24) Area ID Mandatory field. IPv4 format. The Area ID of this router on the OSPF Area List. -
Page 141: 3.6.2.12 Create / Edit Bgp Neighbour Rules
Value Range: 1 - 4294967295. Neighbor Disabled by default. Click the Enable box to activate this rule. Save Button Click the Save button to save the configuration Table 101 – BGP Neighbor Configuration NTC-400 Series 141 of 361 © NetComm Wireless 2018... -
Page 142: Routing Information
3.6.3 Routing Information Routing information allows you to view the routing table and policy routing information. Policy Routing Information is only available when the Load Balance function is enabled and the Load Balance Strategy is By User Policy Navigate to the Basic Network > Routing > Routing Information tab. Figure 179 –... -
Page 143: Dns & Ddns
3.7.1.1 The NTC-400 Series Router can operate as a DNS server for the connected local clients which get their LAN IPs from the dynamic IP scheme. You can create a private host list for easy access to the hosts / servers in your intranet with corresponding domain names. -
Page 144: Dns & Ddns Setting
The DNS & DDNS setting allows you to create/modify a pre-defined domain name list and setup the Dynamic DNS feature. 3.7.1.4 Create / Edit Pre-defined Domain Name List The NTC-400 Series Router allows you to customise your pre-defined domain name list. It supports up to a maximum of 128 sets. Figure 182 – Pre-defined Domain Name List Click the Add button to display the Pre-defined Domain Name Configuration screen. - Page 145 Enter your Password or Key of Dynamic DNS. String format. Save Button Click Save to save the settings Undo Button Click Undo to cancel the settings Figure 185 – Dynamic DNS NTC-400 Series 145 of 361 © NetComm Wireless 2018...
-
Page 146: Qos
QoS Configuration The NTC-400 Series Router provides lots of flexible rules for you to set QoS policies. You need to know who needs to be managed, what kind of service needs to be managed and how should traffic be prioritized before you create your own policies. - Page 147 There are 4 resources can be applied in a QoS rule: bandwidth, connection sessions, priority queues and DiffServ Code Point (DSCP). Control function that acts on target objects for specific services of packet flow is based on these resources. NTC-400 Series 147 of 361 © NetComm Wireless 2018...
- Page 148 For bandwidth resource, control functions include guaranteeing bandwidth and limiting bandwidth. For priority queue resource, control function is setting priority. For DSCP resource, control function is DSCP marking. The last resource is Connection Sessions; the related control function is limiting connection sessions. Individual / Group Control One QoS rule can be applied to an individual member or a whole group in the target group.
-
Page 149: Qos Rule Example #1 - Connection Sessions
WAN interfaces to LAN IP address 10.0.75.196 - 10.0.75.199 which have DiffServ code points with the “IP Precedence 4(CS4)” value will be modified by the “DSCP Marking” control function with “AF Class 2(High Drop)” value at any time. NTC-400 Series 149 of 361... -
Page 150: Qos Configuration Setting
3.8.1.4 QoS Configuration Setting Navigate to the Basic Network > QoS > Configuration tab. The "Configuration" window allows you to activate the Rule-based QoS function. In addition, you can also enable the "Flexible Bandwidth Management" (FBM) feature for better utilization of system bandwidth. On the “System Configuration” window, you can configure the total bandwidth and session of each WAN. -
Page 151: Setup System Resource
Click the Save button to save the settings. Table 106 – System Resource Configuration Each WAN interface should be configured carefully for its upstream bandwidth, downstream bandwidth and maximum number of connection sessions. NTC-400 Series 151 of 361 © NetComm Wireless 2018... -
Page 152: Create / Edit Qos Rules
3.8.1.7 Create / Edit QoS Rules After enabling the QoS function and configured the system resources, you have to further specify some QoS rules for provide better service on the interested traffics. The gateway supports up to a maximum of 128 rule-based QoS rule sets. Figure 191 –... - Page 153 • Group Control – If Group Control is selected, all the group hosts share the same QoS service resource. Time Apply a Time Schedule to this rule; otherwise leave it as (0) Always. (refer to Object Definition > Mandatory field. Schedule Scheduling > Configuration settings) NTC-400 Series 153 of 361 © NetComm Wireless 2018...
- Page 154 Item Notes Description Default setting: (0) Always Rule Enable Disabled by Click Enable to activate this QoS rule. default. Save Button Click the Save button to save the settings. Table 107 – QoS Rule Configuration 154 of 361 User Guide ©...
-
Page 155: Object Definition
Object Definition Scheduling Scheduling allows you to create time schedule rules which can be consistently applied to a range of NTC-400 Series Router functionality. For example, you may want a schedule rule for Office Hours and one for Closing Hours. -
Page 156: Create A Time Schedule
Enter string: any text, spaces Enter a meaningful name. allowed This Rule Name will be included in the drop down lists throughout the NTC-400 Series Router that reference Scheduling Rules. Rule Policy Default setting: Inactive Inactivate/activate the function during the time periods defined below. -
Page 157: Edit An Existing Time Schedule
The User List & Status section shows all user accounts and their on-line or offline status. To view the User List & Status page from the Object Definition submenu select User then click its User List tab: NTC-400 Series 157 of 361... - Page 158 Notes Description User Name Uneditable in This User Name will be included in drop down lists throughout the NTC-400 Series the list or details Router that reference individual users. section. The User Name is entered in User Profile Configuration section, see next.
-
Page 159: Create/Edit User Profile
Checkbox When enabled, the user will be globally included in User Name drop down lists throughout NTC-400 Series Router functionality. If disabled it will not be available for selection, but its details will be retained in the system. Click the Disable button in a user’s Action column to disable the user. -
Page 160: User Profile Configuration
In the User List & Status section find the User Name record in the list and click the Edit button in the Actions column of the list The User Profile Configuration section will open. Make the necessary corrections or changes to the existing user’s details and click Save. 4.2.2.1 User Profile Configuration The User Profile Configuration section is used to create new, or edit existing, User Profiles:... -
Page 161: User Group
Enable Checkbox. Check Enable to activate the user group for use in other applications throughout the NTC-400 Series Router interface. Cannot be changed from this When Enable is unchecked, it is not available for use in other NTC- list. -
Page 162: Create/Edit User Group
Item Notes Description To change this setting, click this group’s Edit button in the Actions column and make the changes in the User Group Configuration section, see next. Actions Select checkbox Redundant or obsolete groups can be permanently removed by checking ... - Page 163 Check Enable to activate the user group. Enabled by default. Save Button Click the Save button to save the settings Undo Button Click the Undo button to cancel the settings Table 114 – User Group Configuration NTC-400 Series 163 of 361 © NetComm Wireless 2018...
-
Page 164: Grouping
Configuration section, see next. Enable Checkbox. Check Enable to activate the Host Group for use in other applications throughout the NTC-400 Series Router interface. Cannot be When Enable is unchecked, it is not available for use in other NTC- changed from this list. -
Page 165: Create/Edit Host Group
The Host Group Configuration section will open. Make the necessary corrections or changes to the existing Host Group’s details and click Save. Figure 200 – Host Group Configuration section NTC-400 Series 165 of 361 © NetComm Wireless 2018... -
Page 166: External Server
Table 116 – Host Group Configuration External Server External Servers allow you to define a range of different types of servers that are external to the NTC-400 Series Router and which then may be referenced by the NTC-400 Series Router during its operations. -
Page 167: Create/Edit External Server
Server Enable Checkbox. Check Enable to activate the External Server for use in other applications throughout the NTC-400 Series Router interface. Cannot be changed from this When Enable is unchecked, it is not available for use in other NTC-400 list. - Page 168 Enter the new External Server’s details here and click Save. To edit an existing External Server: From the Object Definition submenu select External Server and then click its External Server tab. In the External Server List section find the User Profile record in the list and click its corresponding Edit button in the Actions column of the list.
- Page 169 Path (String format: any text, By default cgi-bin is filled) Application (String format: any text, By default pkiclient.exe is filled) FTP(SFTP) Server When FTP(SFTP) Server is selected, the following settings are also required: NTC-400 Series 169 of 361 © NetComm Wireless 2018...
-
Page 170: Certificate
Item Notes Description User Name (String format: any text) Password (String format: any text) Protocol (Select FTP or SFTP) Encryption (Select Plain, Explicit FTPS or Implicit FTPS) Transfer mode (Select Passive or Active) Server Mandatory field. Specify the IP address or FQDN used for the external server. IP/FQDN Server Port Specify the Port used for the external server. -
Page 171: Configuration
Configuration NTC-400 Series Router allows users to create a Root Certificate Authority (CA) certificate and enable the use of SCEP. A Root CA is the primary certificate of the tree, the private key of which is used to "sign" other certificates. Only one Root CA can be set for the router at a time. -
Page 172: Setup Scep
Item Notes Description Email - The email of your organisation. Must be in the email address style, e.g. john.doe@gmail.com Validity Mandatory field. Select the validity period of certificate from the drop down list. Period Table 119 – Root CA Certificate Configuration 4.5.1.2 Setup SCEP If you want to use a SCEP server to obtain a copy of a Certificate Authority (CA) certificate and validate it, you must first... -
Page 173: Self-Signed Certificate Usage Scenario
IPSec VPN tunnel establishing, as shown in the diagram above. The configuration example must be combined with the ones in the following two sections to complete the whole user scenario. Use default value for those parameters that are not mentioned in the tables. NTC-400 Series 173 of 361 © NetComm Wireless 2018... - Page 174 [My Certificate]-[Root CA Certificate Configuration] Configuration Path Name NTCRootCA Key Type: RSA Key Length: 1024-bits Subject Name Country(C): AU State(ST): NSW Location(L): Sydney Organization(O): NetCommWireless Organization Unit(OU): NTC Common Name(CN): NTCRootCA E-mail: ntcrootca@netcommwireless.com [My Certificate]-[Local Certificate Configuration] Configuration Path Name NTCCRT Self-signed: ■...
- Page 175 [My Certificate]-[Local Certificate Configuration] Name BranchCRT Self-signed: □ Key Type: RSA Key Length: 1024-bits Subject Name Country(C): AU State(ST): NSW Location(L): Sydney Organization(O): NetCommWireless Organization Unit(OU): NTC Common Name(CN): NTCCRT E-mail: ntccrt@netcommwireless.com Configuration Path [IPSec]-[Configuration] IPSec ■ Enable [IPSec]-[Tunnel Configuration]...
-
Page 176: Local Certificate
[IPSec]-[Local & Remote Configuration] Configuration Path Local Subnet 10.0.75.0 Local Netmask 255.255.255.0 Full Tunnel Disable Remote Subnet 10.0.76.0 Remote Netmask 255.255.255.0 Remote Gateway 203.95.80.22 [IPSec]-[Authentication] Configuration Path Key Management IKE+X.509 Local Certificate: BranchCRT Remote Certificate: NTCCRT Local ID User Name Network-B Remote ID User Name Network-A Configuration Path... -
Page 177: Create Local Certificate
Specify the following details for the certificate. Name Country (C) – The two-letter ISO code for the country where your organisation is located. State (ST) – The state where your organisation is located. NTC-400 Series 177 of 361 © NetComm Wireless 2018... - Page 178 Item Notes Description Location (L) – The location where your organisation is located. Organization (O) –The name of your organisation. Organization Unit (OU) – The name of your organisation unit. Common Name (CN) – The name of your organization. Email - The email of your organisation. Must be in the email address style, e.g.
-
Page 179: Import Existing Certificates
Trusted CA Certificate List displays details of external CA certificates that you can readily use. The Trusted Client Certificate List third party certificates that you trust and the Trusted Client Key List details the third party keys that you trust. NTC-400 Series 179 of 361 © NetComm Wireless 2018... -
Page 180: Self-Signed Certificate Usage Scenario
4.5.4.1 Self-signed Certificate Usage Scenario Figure 209 – Self-signed Certificate Usage Scenario Scenario Application Timing (same as the one described in "My Certificate" section) When the enterprise gateway owns the root CA and VPN tunnelling function, it can generate its own local certificates by self- signing it. - Page 181 "Trusted Client Certificate List" of the Router 1 and the "Local Certificate List" of the Router 2. For more details, refer to the Network-B operation procedure in the "My Certificate" section of this manual. NTC-400 Series 181 of 361 © NetComm Wireless 2018...
-
Page 182: Trusted Ca Certificate List
Router 2 can establish an IPSec VPN tunnel with "Site to Site" scenario and IKE and X.509 protocols to Router 1. The client hosts in two subnets of 10.0.75.0/24 and 10.0.76.0/24 can communicate with each other. 4.5.4.2 Trusted CA Certificate List To view the Trusted CA Certificate List open the Object Definition submenu, select Certificate and then click its Trusted Certificate tab, the Trusted CA Certificate List will appear in its own section: Figure 210 –... -
Page 183: Trusted Client Certificate
Notes Description Import from a File Mandatory field. Select a trusted client Certificate file from a directory, and click the Apply button to import the specified file in to the router. NTC-400 Series 183 of 361 © NetComm Wireless 2018... -
Page 184: Trusted Client Key
Item Notes Description Import from a Enter text string. Alternatively, copy (Ctrl+C) and paste (Ctrl+V) the PEM trusted client certificate code string into the text entry field, Mandatory field. and click the Apply button to create the trusted client certificate in the router. Apply Button Click the Apply button to import or create the trusted client... -
Page 185: Issue Certificate
Router 1 generates the root CA and a local certificate (HQCRT) signed by itself. It also imports a trusted certificate (BranchCRT) –a BranchCSR certificate of Router 2 signed by root CA of Router 1. NTC-400 Series 185 of 361 © NetComm Wireless 2018... - Page 186 Router 2 creates a CSR (BranchCSR) to let the root CA of Router 1 sign it to be the BranchCRT certificate. Import the certificate into Router 2 as a local certificate. It also imports the certificates of the root CA of the Router 1 into the Router 2 as the trusted ones.
-
Page 187: Import And Sign Certificate
Providing that a root CA exists, click the Sign button to sign and issue the imported certificate by the root CA. Table 127 – Certificate Signing Request (CSR) - From File & From a PEM NTC-400 Series 187 of 361 © NetComm Wireless 2018... -
Page 188: Field Communication
Bus & Protocol The NTC-400 Series Router router can use a DB-9 male port or other type of serial port to connect via an RS-232 serial device to an IP-based Ethernet LAN. These communication protocols give users access to serial devices anywhere over a local LAN or the Internet. -
Page 189: Virtual Com
Virtual COM setting screen enables user to connect a Virtual COM port based device to the Internet using one of four modes: TCP Client, TCP Server, UDP, and RFC-2217 Figure 221 – Virtual COM Serial Port Operation Mode Selector NTC-400 Series 189 of 361 © NetComm Wireless 2018... -
Page 190: Operation Mode - Tcp Client
The exact parameters and definitions available for your Virtual COM port will depend on your selection in the Operation Mode drop down list. Each operation modes will be explained in the following sections. 5.1.2.1 Operation Mode – TCP Client Figure 222 – TCP Client Mode When the administrator expects the router to actively establish a TCP connection to a pre-defined host computer when serial data arrives, the operation mode for the "Virtual COM"... -
Page 191: Specify Remote Tcp Server
Serial Port Default setting: SPort-0 Apply the TCP server connection for a selected serial port. Up to four (4) TCP servers can be configured at the same time for each serial port. NTC-400 Series 191 of 361 © NetComm Wireless 2018... -
Page 192: Operation Mode - Tcp Server
Item Notes Description Definition Enable Disabled by default Check Enable to enable the TCP server configuration. Save Button Click the Save button to save the configuration. Undo Click Undo to cancel the changes to settings. Button Table 130 – Operation Mode Definition for each Serial Port – TCP Client 5.1.2.3 Operation Mode –... -
Page 193: Specify Tcp Clients For Tcp Server Access
TCP Server and RFC-2217 modes. Figure 226 – Trusted IP Definition - TCP Server Item Notes Description Host Mandatory field. Select from the two options in the drop down list: NTC-400 Series 193 of 361 © NetComm Wireless 2018... -
Page 194: Operation Mode - Udp
Item Notes Description Specific IP address –Enter the IP address of the trusted host. IP Range – Enter the beginning and end IP addresses of the range of trusted TCP clients. Serial Port Disabled by default. Check the box to apply the rule to this Serial Port. Definition Enable Disabled by default. -
Page 195: Specify Remote Udp
Up to four (4) UDP servers can be configured at the same time for each serial port. Definition Disabled by default. Check Enable to enable the access to this host. NTC-400 Series 195 of 361 © NetComm Wireless 2018... -
Page 196: Operation Mode - Rfc-2217
Item Notes Description Enable Edit Button Click Edit to add or change a Legal Host IP address. Save Button Click Save to save the settings Undo Click Undo to cancel the settings Table 134 – Legal Host IP Definition - UDP operation mode 5.1.2.7 Operation Mode –... -
Page 197: Specify Remote Host For Access
If you selected Specific IPs as the Trust Type, the Trusted IP Definition section appears. The settings are valid for both TCP Server and RFC-2217 modes. Figure 230 – Trusted IP Definition - TCP Server NTC-400 Series 197 of 361 © NetComm Wireless 2018... - Page 198 Item Notes Description Host Mandatory field. Enter the IP address range of allowed TCP clients. Serial Port Disabled by default. Check the box to specify the rule for selected Serial Port. Definition Enable Disabled by default. Check Enable box to enable the rule. Edit Button Click Edit to add or change a Trusted IP address.
-
Page 199: Security
Figure 231 – VPN The NTC-400 Series Router supports different tunnelling technologies such as IPSec, OpenVPN, L2TP (over IPSec), PPTP and GRE to establish secure tunnels between multiple sites for data transfer. More advanced functions such as Full Tunnel, Tunnel Failover, Tunnel Load Balance, NetBIOS over IPSec, NAT Traversal and Dynamic VPN are also supported. -
Page 200: Ipsec Tunnel Scenarios
6.1.1.1 IPSec Tunnel Scenarios Figure 232 – IPSec Tunnel Scenarios To build an IPSec tunnel, you must fill in the remote gateway global IP and optional subnet if the hosts behind IPSec peer can access to remote site or hosts. Under such configuration, there are four scenarios: Site to Site: You need to setup a remote gateway IP and the subnet of both gateways. -
Page 201: Site To Site With "Full Tunnel" Enabled
Internet or the HQ server, all traffic is routed through the secure IPSec tunnel and routed by the Security Gateway in the control centre. 6.1.1.3 Site to Site with "Hub and Spoke" mechanism Figure 234 – Site to Site with Hub and Spoke mechanism NTC-400 Series 201 of 361 © NetComm Wireless 2018... -
Page 202: Dynamic Vpn Server Scenario
Dynamic VPN server is not allowed. You can configure one Dynamic VPN server for each WAN interface of the NTC-400 Series Router. To create and configure IPSec tunnels, go to the Security menu, select VPN from the submenu and click its IPSec tab. - Page 203 If the LAN interface is selected (see previous setting, above), only Host-to-Host scenario is available. With Site-to-Site, Site-to-Host or Host-to-Site, IPSec operates in tunnel mode. The difference among them is the number of subnets. With Host-to-Host, IPSec operates in transport mode. NTC-400 Series 203 of 361 © NetComm Wireless 2018...
-
Page 204: Authentication
Item Notes Description Operation Mode Mandatory field. Set the operation mode for the IPSec Tunnel: Always On, Failover or Load Balance Default setting: Always on If this tunnel is set as a failover tunnel, you need to further select a primary tunnel from which to failover to. -
Page 205: Ike Phase
Choose Main Mode or Aggressive Mode Mode Mode Specify the X-Auth role for this IPSec tunnel: Select Server, Client, or X-Auth Default setting: None None None – No X-Auth authentication is required. NTC-400 Series 205 of 361 © NetComm Wireless 2018... -
Page 206: Ike Proposal Definition
Item Notes Description Selected Server – This router will be an X-Auth server. Click on the X- Auth Account button to create remote X-Auth client account. Selected Client –This router will be an X-Auth client. Enter User name and Password to be authenticated by the X-Auth server router. Note –... -
Page 207: Ipsec Phase
Figure 243 – IPSec Proposal Definition Item Notes Description Static integer System generated IKE Proposal Definition reference number. Encryption Drop-down list Choose from the following encryption methods from the drop down list: 3DES AES-auto NTC-400 Series 207 of 361 © NetComm Wireless 2018... -
Page 208: 6.1.1.10 Manual Key Management
Item Notes Description AES-128 AES-192 AES-256 Authentication Drop-down list Choose from the following authentication methods from the drop down list: None SHA1 SHA2-256 PF $ Group Drop-down list Select the PF$ Group to be applied to all IPSec Proposal Definitions from the drop down list, it can be: None Group1 Group2... - Page 209 Save Button Click to save the settings Save Undo Button Click to cancel the settings Undo Back Button Click to return to the previous page. Back Table 146 – Manual Proposal NTC-400 Series 209 of 361 © NetComm Wireless 2018...
-
Page 210: 6.1.1.11 Create/Edit Dynamic Vpn Server List
6.1.1.11 Create/Edit Dynamic VPN Server List Figure 246 – Dynamic VPN List Similar to creating an IPSec VPN Tunnel for site/host to site/host scenario, when Edit button is applied a series of configuration screen will appear. They are Tunnel Configuration, Local & Remote Configuration, Authentication, IKE Phase, IKE Proposal Definition, IPSec Phase, and IPSec Proposal Definition. - Page 211 FQDN – Enter the FQDN. User@FQDN – Enter the User@FQDN. Key ID – The Key ID can be letters and/or numbers. Remote ID Optional field. Specify the Remote ID for this IPSec tunnel to authenticate. NTC-400 Series 211 of 361 © NetComm Wireless 2018...
-
Page 212: Openvpn
Item Notes Description User Name – The username may include letters and numbers, but cannot be all numbers. FQDN – Enter the FQDN. User@FQDN – Enter the User@FQDN. Key ID – The Key ID can be letters and/or numbers. Note – Remote ID will be not available when Dynamic VPN option in Tunnel Scenario is selected. -
Page 213: Openvpn Tun Scenario
OpenVPN TUN mode is the simplest solution. As shown in the diagram, the NTC-400 Series Router is configured as an OpenVPN TUN Client and connects to an OpenVPN TUN Server. Once the OpenVPN TUN connection is established, the connected TUN client will be assigned a virtual IP (10.8.0.2) which belongs to a virtual subnet that is different to the local subnet in the Control Centre. -
Page 214: Openvpn Tap Scenario
OpenVPN in “TAP” bridge mode. As shown in the diagram above, the NTC-400 Series Router is configured as an OpenVPN TAP Client, and connects to an OpenVPN TAP Server. Once the OpenVPN TAP connection is established, the connected TAP client will be assigned a virtual IP (192.168.100.210) which is the same subnet as that of local subnet in the Control Centre. -
Page 215: Openvpn Server
IP address of OpenVPN server, when remote OpenVPN clients can dial in, the authentication protocol, etc. The OpenVPN Server supports up to 4 TUN/TAP tunnels at the same time. Figure 253 – OpenVPN Server Configuration NTC-400 Series 215 of 361 © NetComm Wireless 2018... - Page 216 Item Notes Description OpenVPN Disabled by default. Click Enable to activate OpenVPN Server functions. Server Protocol Mandatory field. Select the Protocol for connecting to the OpenVPN Server: TCP or UDP Default setting: TCP TCP – The TCP protocol will be used to access the OpenVPN Server, and Port will be automatically set at 4430.
- Page 217 OpenVPN server. See next section below. Save Button Click Save to save the settings. Undo Button Click Undo to cancel the changes. Table 151 – OpenVPN Server Configuration NTC-400 Series 217 of 361 © NetComm Wireless 2018...
-
Page 218: Advanced Configuration
6.1.2.5 Advanced Configuration When Advanced Configuration is selected, the OpenVPN Server Advanced Configuration screen will appear: Figure 254 – OpenVPN Server Advanced Configuration Item Notes Description TLS Cipher Mandatory field. Specify the TLS Cipher from the drop-down list. Default setting: It can be: None, TLS-RSA-WITH-RC4-MD5, TLS-RSA-WITH- TLS-RSA-WITH- AES128-SHA... -
Page 219: Openvpn Client
Figure 255 – OpenVPN Client List Click the Add to open the OpenVPN Client Configuration screen where you enter the parameters for the new OpenVPN VPN client. Figure 256 – OpenVPN Client Configuration NTC-400 Series 219 of 361 © NetComm Wireless 2018... - Page 220 Item Notes Description OpenVPN Client Mandatory field. The OpenVPN Client Name will be used to identify the client in the Name tunnel list. Value Range: 1 - 32 characters. Interface Mandatory field. Define the physical interface to be used for this OpenVPN Client tunnel.
- Page 221 Click Undo to cancel the changes. Back Button Click Back to return to last page. Table 153 – OpenVPN Client Configuration When Advanced Configuration is selected, the OpenVPN Client Advanced Configuration section is displayed. NTC-400 Series 221 of 361 © NetComm Wireless 2018...
- Page 222 Figure 257 – OpenVPN Client Advanced Configuration Item Notes Description TLS Cipher Mandatory field. Specify the TLS Cipher from the dropdown list. The default setting It can be None / TLS-RSA-WITH-RC4-MD5 / TLS-RSA-WITH-AES128-SHA / is: TLS-RSA-WITH- TLS- RSA-WITH-AES256-SHA / TLS-DHE-DSS-AES128-SHA / TLS-DHE-DSS- AES128-SHA AES256- SHA.
-
Page 223: L2Tp
“user name” and “password” and global IP address of the server. In addition, you must identify the operation mode for each tunnel as the main connection, failover for another tunnel, or load balance tunnel to increase NTC-400 Series 223 of 361... -
Page 224: L2Tp Tunnel
overall bandwidth. It needs to decide the “Default Router” or “Remote Subnet” for packet flow. You can also define what kind of traffic will pass through the L2TP tunnel in the “Default Router / Remote Subnet” parameter. Figure 258 – L2TP There are two options, "Default Gateway"... -
Page 225: L2Tp Setting
Description L2TP Server Disabled by default. Click Enable to activate L2TP Server functions. L2TP over IPSec Disabled by default. Click Enable Preshared Key to enable L2TP over IPSec functionality. NTC-400 Series 225 of 361 © NetComm Wireless 2018... -
Page 226: L2Tp Server Status List
Item Notes Description This will require a preshared key to be entered. 8 (min) - 32 (max) characters Server Virtual IP Mandatory field. Enter the L2TP server Virtual IP Address to set this L2TP server as the local virtual IP. IP Pool Starting Mandatory field. -
Page 227: L2Tp As A Client
When Client is selected in the Configuration section the L2TP Client Configuration screen will appear. Create clients for the L2TP server here. 6.1.3.8 Enable L2TP Figure 263 – L2TP Client Configuration Item Notes Description L2TP Checkbox Click Enable to activate the L2TG functionality NTC-400 Series 227 of 361 © NetComm Wireless 2018... -
Page 228: Create/Edit L2Tp Client
Item Notes Description Client Server Drop-down list Select Client from the drop-down list to create an L2TP Client. Save Button Click Save to create the user account. Table 158 – L2TP Client Configuration When Client is selected the L2TP Client Configuration and the L2TP Client List & Status sections display below the Configuration window. - Page 229 IPSec tunnel from which to failover to. Load Balance – Define whether the PPTP tunnel connection will take part in load balance function of the gateway. You will not need to select which NTC-400 Series 229 of 361 © NetComm Wireless 2018...
- Page 230 Item Notes Description WAN interface as the system will automatically utilize the available WAN interfaces to balance traffic loads. For more details on WAN Load Balance, refer to Basic Network > WAN & Uplink > Load Balance tab. Note – Load Balance function is not available for the gateway with single WAN.
-
Page 231: Pptp
“password” and server’s global IP. In addition, it is required to identify the operation mode for each tunnel as main connection, failover for another tunnel, or load balance tunnel to increase overall bandwidth. It needs to decide “Default NTC-400 Series 231 of 361... -
Page 232: Pptp Setting
Router” or “Remote Subnet” for packet flow. You can also define what kind of traffic will pass through the PPTP tunnel in the “Default Router / Remote Subnet” parameter. Figure 267 – PPTP There are two options, "Default Gateway" and "Remote Subnet" for the "Default Gateway / Remote Subnet" configuration item. - Page 233 Mandatory field. Enter the PPTP server’s Virtual IP DHCP server. Address Default setting: 17 Specify the last IP address for the subnet from which the PPTP client’s IP address will be assigned NTC-400 Series 233 of 361 © NetComm Wireless 2018...
-
Page 234: Pptp Server Status List
Item Notes Description Value Range: >= Starting Address, and < (Starting Address + 8) or 254 Authentication Mandatory field. Select single or multiple Authentication Protocols for the PPTP server Protocol with which to authenticate PPTP clients. Disabled by default. Available authentication protocols include: PAP, CHAP, MS-CHAP or MS-CHAP v2 MPPE Encryption Mandatory field. - Page 235 Table 164 – PPTP Client List & Status When Add or Edit button is applied, the PPTP Client Configuration window will appear: Figure 273 – PPTP Client Configuration NTC-400 Series 235 of 361 © NetComm Wireless 2018...
- Page 236 Item Notes Description Tunnel Name Mandatory field. Add a meaningful name. 1 - 32 characters Interface Mandatory field. WAN-1 is available only when WAN-1 interface is enabled). The same applies to other WAN interfaces (i.e. WAN-2). Operation Mandatory field. There are three available operation modes: Always on, Failover, Load mode Balance Failover/ Always on: Define whether the PPTP client is a failover tunnel...
-
Page 237: Gre
Internet Protocol internetwork. Deploy an NTC-400 Series Router router at a remote site and establish a virtual private network with the control centre using GRE tunnelling. All client hosts behind the router can make data communication with server hosts behind control centre router. -
Page 238: Enable Gre
Figure 274 – GRE Tunnel Scenario To setup a GRE tunnel, each peer needs to setup its global IP as the tunnel IP and fill in the other's global IP as remote IP. Each peer must further specify the Remote Subnet item. This is for the Intranet of GRE server peer. At the GRE client peer, the packets whose destination is in the dedicated subnet will be transferred via the GRE tunnel. -
Page 239: Create/Edit Gre Tunnel
Click the Edit button to select Tunnel Enable in the GRE Rule Configuration window. Note that you can uncheck Enable rather than permanently Delete, this will allow you to retain the user details while disabling its access to the PPTP client. NTC-400 Series 239 of 361 © NetComm Wireless 2018... - Page 240 Item Notes Description Edit Button Click the Edit button to make changes to the client in the GRE Rule Configuration window. Select Checkbox Click Select on one or more tunnel rules and then click the Delete button to permanently remove them from the list. Table 167 –...
- Page 241 Click Save to create the GRE Tunnel Rule. Undo Button Click Undo button to cancel the settings. Back Button Click Back button to return to the previous page. Table 168 – GRE Rule Configuration NTC-400 Series 241 of 361 © NetComm Wireless 2018...
-
Page 242: Firewall
Firewall The firewall functions include Packet Filter, URL Blocking, Content Filter, MAC Control, Application Filter, IPS and some firewall options. Figure 278 – Firewall 6.2.1 Packet filters The Packet Filter function allows you to define filtering rules for incoming and outgoing packets effectively controlling which packets are allowed or blocked from passing through it. -
Page 243: Packet Filter Settings
Table 169 – Enable Packet Filters 6.2.1.3 Create/Edit Packet Filter Rules When Enable is selected, the buttons on the Packet Filter List section become active. Figure 281 – Packet Filter Rule Configuration NTC-400 Series 243 of 361 © NetComm Wireless 2018... - Page 244 Click on the Add button to create a new client in the list. You can create up to the maximum number of concurrent GRE tunnels that you had set previously in the Packet Filter Rule Configuration section, see above. Figure 282 – Packet Filter Rule Configuration Item Notes Description...
- Page 245 If the Protocol selection is GRE the packet filter will only apply to GRE packets. If the Protocol selection is ESP the packet filter will only apply to ESP packets. NTC-400 Series 245 of 361 © NetComm Wireless 2018...
-
Page 246: Url Blocking
Item Notes Description If the Protocol selection is SCTP the packet filter will only apply to SCTP packets. If the Protocol selection is User-defined then only packets with a protocol number specified by you in the Protocol Number box will be filtered. -
Page 247: Url Blocking Settings
Check Log Alert to activate event logging for the selected rules. Save Button Click Save to save the setting. Undo Button Click Undo to cancel the changes to settings. Table 171 – Enable URL Blocking NTC-400 Series 247 of 361 © NetComm Wireless 2018... -
Page 248: Create/Edit Packet Filter Rules
6.2.2.3 Create/Edit Packet Filter Rules When Enable is selected, the buttons on the Packet Filter List section become active. Figure 285 – URL Blocking Rule List Click on the Add button to create a new rule in the list. You can add up to twenty (20) URL Blocking rules. Figure 286 –... -
Page 249: Content Filter
(applications), "mpeg” (video), and so on. It can also block HTML requests containing certain script types, like Java Applets, Java Script code, cookies and Active X. In addition, Content Filter blocking activity can be logged, monitored and reported. NTC-400 Series 249 of 361 © NetComm Wireless 2018... -
Page 250: Content Filter Scenario
Figure 287 – Content filter 6.2.3.1 Content Filter Scenario When the administrator of the gateway wants to block Web requests for dedicated contents or objects, they can use the "Web Content Filters" function. As shown in the diagram above, enable the Web content filters function to check and filter out Web requests on Cookies, Java and ActiveX objects then define further objects in the “Web Content Filter List”... -
Page 251: Create/Edit Content Filter Rules
Select Specific IP Address to filter packets coming from an IP address entered in this field. Select IP Range to filter packets coming from a specified range of IP address entered in this field. NTC-400 Series 251 of 361 © NetComm Wireless 2018... -
Page 252: Mac Control
Item Notes Description Select IP Address-based Group from the drop down list to filter packets coming from the selected group. Note – Groups must be pre-defined before this selection become available in the drop down list. Refer to Object Definition > Grouping > Host grouping. Alternatively, click the Add Rule button that displays when this drop down list is empty to create a new group. -
Page 253: Mac Control With Black List Scenario
– “black listed”– and any other packets will be allowed following rules is the to pass. default setting. In contrast, Allow those matching the following rules will allow those packets that meet the criteria of the NTC-400 Series 253 of 361 © NetComm Wireless 2018... -
Page 254: Create/Edit Mac Control Rules
Item Notes Description rule to pass, i.e. those that are part of the “White List”, and the rest will be blocked. Log Alert Check Log Alert Enable to activate event logging Disabled by default for the selected rules. Known MAC from Text Entry box and Select a MAC Address from LAN Client List and paste it LAN PC List... -
Page 255: Application Filter
Select Firewall from the Security submenu on the left and then open the Application Filter tab. Go to the Configuration section of the Application Filter page: Figure 295 – Enable Application Filter NTC-400 Series 255 of 361 © NetComm Wireless 2018... -
Page 256: Create/Edit Application Filter Rules
Click Application Filter Enable and set the following parameters: Item Notes Description Application Filter Checkbox, disabled by Check Enable to activate the Application Filter default. functionality. Log Alert Disabled by default Check Log Alert to activate event logging for the selected rules. - Page 257 Always (i.e. without a time parameter). If the drop down list is empty you will need to define a Time Schedule using the Object Definition > Scheduling > Configuration tab. NTC-400 Series 257 of 361 © NetComm Wireless 2018...
-
Page 258: Ips
IPS are network security appliances that monitor network and/or system activities for malicious activity, log information about this activity, attempt to block/stop it and report it. Enable the NTC-400 Series Router’s IPS function to periodically check some or all of the intrusion activities that it safeguards against. You can also enable the logging feature to record intrusion events as they are detected. -
Page 259: Ips Settings
Figure 300 – Intrusion Prevention Parameters Item Notes Description SYN Flood Defense Mandatory field. Click Enable to activate this intrusion prevention rule and enter the traffic threshold in this field. Disabled by default. NTC-400 Series 259 of 361 © NetComm Wireless 2018... - Page 260 Item Notes Description Default setting: 300 Value Range: 10 - 10000 UDP Flood Defense Mandatory field. Click Enable to activate this intrusion prevention rule and enter the traffic threshold in this field. Disabled by default. Value Range: 10 - 10000 Default setting: 300 ICMP Flood Defense Mandatory field.
-
Page 261: Options
By default Allow Ping from WAN is disabled, this setting prevents security leaks when local users access the internet. Selecting Allow Ping from WAN specifically allows any host on the WAN side to be able to receive a reply to any ICMP (ping) packets. NTC-400 Series 261 of 361 © NetComm Wireless 2018... -
Page 262: Firewall Options
The Remote administrator knows the gateway’s global IP, and he can access the Gateway GUI via TCP port 8080. 6.2.7.3 Firewall options To enable the Intrusion Prevention System functionality: Select Firewall from the Security submenu on the left and then open the Options tab. Go to the Firewall Options section of the Options page: Figure 303 –... -
Page 263: Edit Access Rules
Definition in that row. Make the required changes and click Save to apply them. Save Click Save to save the settings. Button Undo Button Click Undo to cancel the settings. Table 183 – Remote Administrator Host Definition NTC-400 Series 263 of 361 © NetComm Wireless 2018... -
Page 264: Authentication
Authentication Use either the Captive Portal or MAC Authentication tools to set up a WiFi Hotspot using the NTC-400 Series Router router. 6.3.1 Captive Portal A captive portal, also known as a gateway, is a portal web page that is displayed before a user can browse Internet through your router. - Page 265 Internet. However, there is a timeout setting for each account. When the client host with that account has been idle the timeout setting, the router will re-authenticate the client host for further Internet connections. NTC-400 Series 265 of 361 © NetComm Wireless 2018...
- Page 266 6.3.1.1 Captive Portal settings To set up a Captive Portal, select Authentication from the Security submenu on the left and then open the Captive Portal tab. The options available in the Captive Portal Configuration page depend on whether Internal or External Web Portal is selected: Figure 306 –...
- Page 267 2. Be defined by pressing AddObject button, entering its details in the External Server Configuration dialog and checking Server Enabled. UAM Server Mandatory field UAM Server is available only when External Web Portal is selected. NTC-400 Series 267 of 361 © NetComm Wireless 2018...
-
Page 268: Mac Authentication
Item Notes Description Click Enable and specify an external UAM server from the external server list. The UAM Server can: 1. Have been previously created at Object Definition > External Server > External Server tab and selected from the drop down list, or 2. -
Page 269: Create/Edit User List
Navigation button of authentication list Next Button Navigation button of authentication list Table 186 – User List When Add button is applied, User Configuration screen will appear. Figure 309 – User Configuration NTC-400 Series 269 of 361 © NetComm Wireless 2018... - Page 270 Item Notes Description Nickname Mandatory field. Enter a nickname for the user that is easy for you to understand. String format can be Value Range: 1 - 64 characters. any text (max. 64 characters). User Name Mandatory field. Enter the MAC address for the user. MAC address format.
-
Page 271: Administration
Configure & Manage Figure 310 – Configure & Manage The NTC-400 Series Router allows for enterprise-wide administration of distributed systems. The Configure & Manage tool group supports a range of system management protocols including Command Script, TR-069, SNMP, and Telnet with CLI. -
Page 272: Supported Configuration Content
Type in the configuration settings one line at a time and click Save to apply the settings. To save a copy of the settings, click the Via Web UI button next to Backup Script and save the .txt file to a known location. -
Page 273: Configuration Via Linux
For the settings that can be executed with standard Linux commands, you can put them in a script file, and apply to the system configuration with STARTUP command. For those configurations without a corresponding Linux command set to configure, you can configure them with proprietary command set. NTC-400 Series 273 of 361 © NetComm Wireless 2018... -
Page 274: Plain Text System Configuration With Telnet
NTC-400 Series Router. As a bi-directional SOAP/HTTP-based protocol, it supports communication between customer- premises equipment (CPE) and Auto Configuration Servers (ACS). The NTC-400 Series Router is such a CPE. TR-069 is a customised feature for ISPs. We do not recommend that you change the configuration unless instructed by your ISP. -
Page 275: Scenario - Managing Deployed Gateways Through An Acs Server
Scenario Operation Procedure In the diagram above, the ACS server can manage multiple gateways on the Internet. “Router 1" is one of them and has 118.18.81.33 IP address for its WAN-1 interface. NTC-400 Series 275 of 361 © NetComm Wireless 2018... -
Page 276: Tr-069 Settings
7.1.2.2 TR-069 settings To configure TR-069 for NTC-400 Series Router: Select Configure and Manage from the Administration submenu and click the TR-069 tab: Figure 313 – Enable TR-069 In the Configuration table check the Enable box to activate the TR-069 functionality. -
Page 277: Snmp
Click Save to save the STUN settings Table 191 – STUN Settings When you have set the ACS URL, Username and Password, your NTC-400 Series Router can periodically send an inform message to the ACS Server at the inform interval. -
Page 278: Snmp Management Scenario
A typical example of SNMP in use is when one or more administrative computers, called managers, have the task of monitoring or managing a group of hosts or devices on a computer network. Each managed system executes, at all times, a software component called an agent which reports information via SNMP to the manager. - Page 279 In the diagram above, the NMS server can manage multiple devices on the Intranet or a UDP-reachable network. "Router 1" is one of the managed devices, and it has the IP address of 10.0.75.2 for the LAN interface and 118.18.81.33 for the WAN-1 interface. It serves as a NAT router. NTC-400 Series 279 of 361 © NetComm Wireless 2018...
-
Page 280: Snmp Settings
To configure SNMP for NTC-400 Series Router it must be enabled: Select Configure and Manage from the Administration submenu and click the SNMP tab: Figure 315 – Enable SNMP The following configurations settings are available to enable SNMP on the NTC-400 Series Router: Item Notes... -
Page 281: Create/Edit Multiple Communities
Figure 316 – Multiple Community List When Add button is applied, Multiple Community Rule Configuration page will display: Figure 317 – Multiple Community Rule Configuration The following settings are available to configure Multiple Community Rules: NTC-400 Series 281 of 361 © NetComm Wireless 2018... -
Page 282: Create/Edit User Privacy
Item Notes Description Community Mandatory field. Specify this version 1 or version v2c user’s community that will be allowed Read Only (GET and GETNEXT) or String format: any text Read-Write (GET, GETNEXT and SET) access respectively. Default setting: Read Only The maximum length of the community is 32. - Page 283 Undo Button Click the Undo button to cancel the settings. Back Click the Back button to return to SNMP configuration page. Button Table 194 – User Privacy Rule Configuration NTC-400 Series 283 of 361 © NetComm Wireless 2018...
-
Page 284: Create/Edit Trap Event Receiver
Figure 322 – Trap Event Receiver Rule Configuration Item Notes Description Server IP Mandatory field. Specifies the trap Server IP. The NTC-400 Series Router sends trap to the server IP. String format: any IPv4 address. Server Port Mandatory field. Specify the trap Server Port. - Page 285 String format: any text Enable Click Enable to enable this trap receiver. Enabled by default Save Button The Save button saves the configuration settings, but it does not apply them to SNMP functions. NTC-400 Series 285 of 361 © NetComm Wireless 2018...
-
Page 286: Edit Snmp Options
Item Notes Description When you return to the SNMP main page the “Click on save button to apply your changes” reminder appears, this reminds the user to click main page Save button at which point the settings will be applied. Undo Click the Undo button to cancel the settings. - Page 287 Admin" on the Internet uses an "SSH" utility with a privileged account to login the router. The administrator of the router can control the device as if they are in front of it. NTC-400 Series 287 of 361 © NetComm Wireless 2018...
-
Page 288: Enable Telnet With Cli
7.1.4.1 Enable Telnet with CLI To use the Telnet with CLI tool: Select Configure and Manage from the Administration submenu and click the Telnet with CLI tab. Figure 325 – Telnet with CLI Settings The Telnet with CLI setting allows a user with administrator privileges to access this device through the traditional Telnet program. -
Page 289: System Operation
Enter new password again to confirm. character Confirmation Save Button Click Save button to save the settings. Undo Button Click Undo button to cancel the settings. Table 200 – Password setting NTC-400 Series 289 of 361 © NetComm Wireless 2018... -
Page 290: Manage Access Settings
Value Range: 30 - 65535. If there has been no activity on the NTC-400 Series Router web interface for the designated time, the interface will automatically log out and you will have to enter your password to log in. -
Page 291: System Time
The settings vary depending on the synchronization method chosen in the first drop down list. 7.2.3.1 Time Server method When the Time Server Synchronization method is chosen the following configuration settings are available: NTC-400 Series 291 of 361 © NetComm Wireless 2018... -
Page 292: Manual Method
Figure 331 – System Time Configuration - Time Server Synchronization Item Notes Description Synchronization Time Server This setting determines the configuration settings method available. Time Zone This item is Optional field. Select a time zone, normally where the router is located, from the drop down list. -
Page 293: Time Server Method
Click the Active button the system will be set to the local PC’s Immediately system date and time. Sync Result System When the Active button is clicked, the Time Synchronization generated and Results panel will display the time the synchronisation button occurred. NTC-400 Series 293 of 361 © NetComm Wireless 2018... -
Page 294: Cellular Module Method
Item Notes Description Click the Close button to hide the panel. Save Button Click the Save button to save the settings. Table 205 – System Time Configuration - Local PC 7.2.3.4 Cellular Module method When the Cellular Module Synchronization method is chosen the following configuration settings are available: Figure 334 –... -
Page 295: View & Email Buttons
Refer to Email Alert settings below for details on configuring the email addresses and content. Table 207 – System Log 7.2.4.2 Web Log List window When the System Log View button is clicked, the Web Log List window is displayed. NTC-400 Series 295 of 361 © NetComm Wireless 2018... -
Page 296: Web Log Type Category
Figure 336 – Web Log List The following items appear on the Web Log List window: Item Notes Description Time Column Heading Displays event time stamps. Column Heading Displays Log messages. Previous Button Move to the previous page. Next Button Move to the next page. -
Page 297: Email Alert
Select the type of events to log and be sent to the category designated Email account. Available events are: System, Attacks, Drop, Login message and Debug Table 210 – Email Alert NTC-400 Series 297 of 361 © NetComm Wireless 2018... -
Page 298: Syslogd
7.2.4.5 Syslogd The Syslogd section allows the network administrator to select the type of event to log and to be sent to the designated Syslog server. The following settings are available: Figure 339 – Syslogd settings Item Notes Description Enable Disabled by default. -
Page 299: Backup & Restore
Download – Use this setting to back up the device configuration to a config.bin file. Upload – Use this setting to restore a designated configuration file previously downloaded from the device. NTC-400 Series 299 of 361 © NetComm Wireless 2018... -
Page 300: Mcu Firmware Info
Item Notes Description Via Web UI – to retrieve a configuration file via Web GUI, for example from the manufacturer’s website. Auto Restore Disabled by default. Check the Enable button to activate the customized default Configuration setting function. Once the function is activated, click the Save Conf. button to save the current settings as a configuration file. -
Page 301: Reboot & Reset
Note – This Reset to Default function has the same effect as pressing the reset button on the device panel. Table 214 – System Operation NTC-400 Series 301 of 361 © NetComm Wireless 2018... -
Page 302: Ftp
SSL/TLS (FTPS). SSH File Transfer Protocol (SFTP) is sometimes also used instead, but is technologically different. The NTC-400 Series Router includes an embedded FTP / SFTP server for administrator to download the log files to his computer or database. In the following two sections, you can configure the FTP server and create the user accounts that can log in to the server. -
Page 303: Ftp Server Configuration
2 Clients are the default Specify the maximum number of clients from the same IP per IP setting. address for the FTP connection. Up to 5 clients from the same IP address are supported. NTC-400 Series 303 of 361 © NetComm Wireless 2018... -
Page 304: Enable Sftp Server
Item Notes Description Max. FTP Clients 5 Clients are the default Specify the maximum number of clients for the FTP setting. connection. Up to 32 clients are supported. PASV Mode Optional setting Check Enable to activate the support of PASV mode for a FTP connection from FTP clients. -
Page 305: User Account
Value Range = 1 - 15 characters. Password Alphanumeric string with Enter the user password for login to the FTP server. no blank spaces Directory Select a root directory after user login. NTC-400 Series 305 of 361 © NetComm Wireless 2018... -
Page 306: Diagnostic
Table 217 – User Account Configuration Diagnostic The NTC-400 Series Router router include a set of simple network diagnosis tools for the administrator to troubleshoot abnormal behaviour or monitor traffic passing through the router. The Packet Analyzer records packets for a designated interface or specific source/destination host. - Page 307 When WiFi and VAP are enabled it can be selected here. Save Button Click the Save button to save the configuration. Undo Button Click the Undo button to restore to the previous setting. Table 218 – Enable Packet Analyzer NTC-400 Series 307 of 361 © NetComm Wireless 2018...
-
Page 308: Packet Capture Filters
7.4.1.2 Packet Capture Filters Once the Packet Analyzer function is enabled on specific Interface(s), you can specify filter rules to restrict the capture to packets which match the filter parameters. Figure 351 – Packet Capture Filters Item Notes Description Filter Check ... -
Page 309: Diagnostic Tools
To access the Diagnostic Tools: Select Diagnostic from the Administration submenu and click the Diagnostic Tools tab. The Diagnostic Tools screen will display: Figure 352 – Diagnostic Tools NTC-400 Series 309 of 361 © NetComm Wireless 2018... - Page 310 Item Notes Description Ping Test Host IP Specify an IP / FQDN that the system can ‘ping’ to test whether the connection is functioning. Interface Select Auto, WAN-1 or LAN from the drop-down list. Auto is the default setting. Ping button Click the Ping button and the Ping Test Results window will appear beneath the tools section.
-
Page 311: Service
In order to set the Data Usage parameters, you need to know your billing start date, billing period, and data quota. This information is normally available from your carrier or ISP. NTC-400 Series 311 of 361 © NetComm Wireless 2018... -
Page 312: 4G Data Usage Profile List
3G/4G Data Usage Figure 354 – 3G/4G Data Usage The Data Usage feature enables the router to continuously monitor cellular data usage. In the diagram above, the quota of SIM A is 1Gb per month and the bill start date is the 20 of every month. -
Page 313: Create / Edit 3G/4G Data Usage Profile
Enable Un-Checked by Check Enable to activate the data usage profile. default. Table 221 – 3G/4G Data Usage Profile Configuration NTC-400 Series 313 of 361 © NetComm Wireless 2018... -
Page 314: Sms
The NTC-400 Series Router router can send SMS text messages or browse received SMS messages. Select Cellular Toolkit from the Service submenu and click the SMS tab. -
Page 315: New Sms
Otherwise Send Failed will be displayed. Table 224 – New SMS 8.1.2.4 SMS Inbox List You can read or delete SMS, reply SMS or forward SMS from this screen. Figure 360 – SMS Inbox List NTC-400 Series 315 of 361 © NetComm Wireless 2018... -
Page 316: Sim Pin
Activate PIN code on SIM card Figure 361 – Activate PIN code on SIM card The NTC-400 Series Router allows you to activate a PIN code on the SIM card. This example shows a PIN code on SIM-A for 3G/4G-1 with default PIN code “0000”. -
Page 317: Sim Pin Configuration
The NTC-400 Series Router allows you to change the PIN code on the SIM card. In the example above, you need to type original PIN code “0000” and then type the new PIN code ‘1234’, if you want to set the new PIN code as ‘1234’. To confirm the new PIN code, re-type the new PIN code in the Verified New PIN Code field again. -
Page 318: Unlock With A Puk Code
Item Notes Description Press the Switch button to have the router switch from one SIM card to another. After that, you can configure the SIM card. Table 226 – SIM PIN Configuration 8.1.3.2 Unlock with a PUK Code The PUK Function window is only available if the SIM card is locked by its PUK (PIN Unblocking Key) lock. Usually this happens after too many entries of an incorrect PIN code (normally three attempts) and the SIM card becomes locked. -
Page 319: Enable / Change Pin Code
Notes Description Current PIN Code Required field. Enter the current (old) PIN code of the SIM card. New PIN Code Required field. Enter the new PIN Code you want to change. NTC-400 Series 319 of 361 © NetComm Wireless 2018... -
Page 320: Ussd
Item Notes Description Verified New Required field. Re-enter the new PIN Code to confirm the new PIN Code. PIN Code Apply Button Click the Apply button to change the old PIN code to the new PIN code. Cancel Button Click the Cancel button to cancel the changes and keep current PIN code. -
Page 321: Ussd Configuration
The NTC-400 Series Router allows you to activate and manage USSD services via a SIM card through its web GUI. Select Cellular Toolkit from the Service submenu and click the USSD tab. The USSD screen will open. It contains up to four sections: Configuration, USSD Profile List, USSD Profile Configuration and USSD Request Figure 369 –... -
Page 322: Create / Edit Ussd Profile
8.1.4.2 Create / Edit USSD Profile The USSD Profile List section shows all your defined USSD profiles that store pre-commands for activating USSD sessions. Figure 371 – USSD Profile List You can add a maximum of 35 custom USSD profiles. When Add button is applied, USSD Profile Configuration screen displays. -
Page 323: Network Scan
SIM_B) associated with the selected cellular service. Network Type Default setting: Specify the network type for the network scan function. Auto Auto – When Auto is selected, the network will be register automatically; NTC-400 Series 323 of 361 © NetComm Wireless 2018... - Page 324 Item Notes Description 2G prefer or 3G prefer – If the ‘prefer’ option is selected, network will be registered for your chosen option first; 2G Only, 3G Only or 4G Only – If an ‘only’ option is selected, network will be register for your chosen option only. Scan Approach Default setting: When Auto is selected, the cellular module registers...
-
Page 325: Event Handling
Managed Event response or a Notifying Event response on their respective tabbed pages. Figure 377 – Event Handling tabs 8.2.1 Configuration Event handling is the service that allows administrator to setup the pre-defined events, handlers, or response behaviour with individual profiles. NTC-400 Series 325 of 361 © NetComm Wireless 2018... -
Page 326: Enable Event Management
8.2.1.1 Enable Event Management Figure 378 – Enable Event Management Item Notes Description Event Management Disabled by default. Check the Enable box to activate the Event Management function. Table 235 – Enable Event Management 8.2.1.2 Enable SMS Management To use the SMS management function, you must nominate an SMS message prefix that triggers the Event Handler to treat the message in a specific way. -
Page 327: Create / Edit Sms Account
Create / Edit Email Service Account You can create up to five Email Service Accounts for event notification. Figure 382 – Email Service List Click the Add / Edit button to configure the Email account. NTC-400 Series 327 of 361 © NetComm Wireless 2018... -
Page 328: Create / Edit Digital Input (Di) Profile Rule
Figure 383 – Email Service Configuration Item Notes Description Email Server --- Option --- Select an Email Server profile from External Server setting for the email account setting. Email Internet E-mail address Specify the Destination Email Addresses. Addresses format Mandatory field. Enable Click ... -
Page 329: Create / Edit Digital Output (Do) Profile Rule
String format. Value Range: -1 - 32 characters. Description Optional field. Write a brief, meaningful description of the profile. Any text. DO Source Default setting: ID1 Specify the DO Source as ID1. NTC-400 Series 329 of 361 © NetComm Wireless 2018... -
Page 330: Managing Events
Item Notes Description Normal Level Default setting: Low Specify the Normal Level: Low or High Total Signal Period Mandatory field. Specify the Total Signal Period. Numeric String format Value Range: 10 - 10000 ms. Repeat & Counter Click Enable to activate the repeated Digital Output, and Disabled by default. - Page 331 DMZ to be turned on or off; Firewall – Allows the event to trigger five Remote Administrator Host IDs to be turned on or off, and to turn WAN Discard Ping on or off; NTC-400 Series 331 of 361 © NetComm Wireless 2018...
-
Page 332: Notifying Events
Item Notes Description VPN – Allows the event to trigger a number of IPSec, PPTP Client, L2TP Client and Open VPN Client settings; GRE – Allows the event to trigger on or off a number of GRE (Generic Routing Encapsulation) connections; System Manage –... - Page 333 (Cellular Service) and then set a percentage of Data Usage (1% - 100%) as the trigger condition; Note – Available Event Types can differ between products. Description Any text. Write a brief, meaningful description of the event rule. NTC-400 Series 333 of 361 © NetComm Wireless 2018...
-
Page 334: Location Tracking
Table 244 – Notifying Event Configuration Location Tracking Global Navigation Satellite System (GNSS) infrastructure allows the NTC-400 Series Router to determine its position, velocity, and time by processing signals received from satellites orbiting Earth. GNSS can access a variety of satellite systems and Satellite-Based Augmentation Systems (SBAS). -
Page 335: Gnss
Activate GNSS feature in gateway and finish settings of cellular WAN. Support NMEA 0183 (compatible to 3.0) protocol, and allow customized prefix and suffix. Configurable GPS data logging on local microSD card storage for route record tracking. NTC-400 Series 335 of 361 © NetComm Wireless 2018... - Page 336 Assisted GPS (as known as A-GPS) is used for speeding up location fixing, especially when the satellite signal is weak. If activating this option, the NTC-400 Series Router will download almanac data from an A-GPS server through the IP network instead of from the satellite.
- Page 337 Configuration Path [GNSS]-[Remote Host Configuration] Host Name Truck-1 Host IP 100.100.100.1 Protocol Type Port Number Interval(s) Prefix Message 123456789012345 Suffix Message [blank] Enable Checkbox [Checked] Table 250 – Settings for Remote Host NTC-400 Series 337 of 361 © NetComm Wireless 2018...
-
Page 338: Enable Location Tracking
8.3.1.1 Enable Location Tracking Location Tracking functionality is disabled by default, to enable this tool select Location Tracking from the Service submenu and click on the GNSS tab. The location tracking Configuration section will be displayed. Figure 395 – Enable Location Tracking Item Notes Description... -
Page 339: Create / Edit Remote Host
Specify the Protocol (TCP or UDP) to use for sending NMEA packets. TCP is the default. Port Number Mandatory field. Specify a Port Number as destination port for sending NMEA packets. Value Range: 1 - 65535. NTC-400 Series 339 of 361 © NetComm Wireless 2018... -
Page 340: Track Viewer
Item Notes Description Interval(s) Mandatory field. Specify the time interval (seconds) between two NMEA packets. Value Range: 1 - 255 seconds. Prefix Message Optional field. Specify optional prefix string with specific information if your backend server can recognize. Any text. For example, you can input the IMEI code of this device here, and then String format. - Page 341 When the Google Maps API key has been downloaded and saved, the Track Viewer / Map screen will be activated. Figure 399 – Track Viewer screen shot NTC-400 Series 341 of 361 © NetComm Wireless 2018...
-
Page 342: Power Control
The NTC-400 Series Router can continue to operate when car engine is shut down. The NTC-400 Series Router will enter standby mode automatically when a pre-set timer is due. If in standby mode, the NTC-400 Series Router will stop consuming battery power to prevent draining power out. - Page 343 Disabled by default. Click Enable to activate the Ignition Sense function. By default, the function is disabled, and the router will be always ON when the power source is attached. NTC-400 Series 343 of 361 © NetComm Wireless 2018...
- Page 344 Item Notes Description Shutdown Timer Number format: any Enter a shutdown timer period (0 - 240 minutes) to power off number between 0 and the router after the engine has been stopped for the specified 240. time. 0 is the default setting. ‘0’...
-
Page 345: Appendices
Figure 4 – Digital input, digital output and ignition pins on terminal block ..........................17 Figure 5 – Serial pins on terminal block ....................................... 18 Figure 6 – NTC-400 Series Router Login screen ................................... 18 Figure 7 – System Information ........................................19 Figure 8 –... - Page 346 Figure 53 – Dynamic IP WAN Type Configuration ..................................48 Figure 54 – Static IP WAN Type Configuration ..................................... 49 Figure 55 – PPPoE WAN Type Configuration ....................................49 Figure 56 – PPTP WAN Type Configuration ....................................50 Figure 57 – L2TP WAN Type Configuration ....................................51 Figure 58 –...
- Page 347 Figure 165 – Dynamic Routing ........................................135 Figure 166 – RIP Scenario .......................................... 136 Figure 167 – OSPF Scenario ........................................137 Figure 168 – BGP Scenario ......................................... 137 Figure 169 – Dynamic Routing Configuration .................................... 138 NTC-400 Series 347 of 361 © NetComm Wireless 2018...
- Page 348 Figure 170 – RIP Configuration ........................................138 Figure 171 – OSPF Configuration ....................................... 139 Figure 172 – Create / Edit OSPF Area Rules ....................................139 Figure 173 – OSPF Area Configuration ....................................... 140 Figure 174 – BGP Configuration ......................................... 140 Figure 175 –...
- Page 349 Figure 283 – Enable URL Blocking ......................................247 Figure 284 – URL Blocking Rule List ......................................248 Figure 285 – URL Blocking Rule Configuration ................................... 248 Figure 286 – Content filter ......................................... 250 NTC-400 Series 349 of 361 © NetComm Wireless 2018...
- Page 350 Figure 287 – Enable Web content Filters ....................................250 Figure 288 – Web Content Filter List ......................................251 Figure 289 – MAC Control with Black List Scenario ..................................253 Figure 290 – Enable MAC Control ......................................253 Figure 291 – MAC Control List ........................................254 Figure 292 –...
- Page 351 Figure 399 – Ignition Sense ........................................342 Figure 400 – Ignition Sense configuration ....................................343 Figure 401 – Ignition Sense Example ......................................343 Figure 402 – Ignition Sense configuration ....................................343 NTC-400 Series 351 of 361 © NetComm Wireless 2018...
-
Page 352: Appendix B - Table Of Tables
Appendix B – Table of Tables Table 1 – Interfaces (Rear) ........................................... 15 Table 2 – LED indicators ..........................................15 Table 3 – I/O specifications .......................................... 17 Table 4 – WAN interface IPv4 Network Status ..................................... 22 Table 5 – WAN interface IPv6 Network Status ..................................... 22 Table 6 –... - Page 353 Table 112 – User Profile Configuration ...................................... 161 Table 113 – User Group List ........................................162 Table 114 – User Group Configuration ...................................... 163 Table 115 – Host Group List ........................................165 NTC-400 Series 353 of 361 © NetComm Wireless 2018...
- Page 354 Table 116 – Host Group Configuration ...................................... 166 Table 117 – External Server List ......................................... 167 Table 118 – External Server Configuration ....................................170 Table 119 – Root CA Certificate Configuration ..................................172 Table 120 – SCEP Configuration details ..................................... 172 Table 121 –...
- Page 355 Table 228 – Change PIN Code ........................................320 Table 229 – USSD Configuration ........................................ 321 Table 230 – USSD Profile Configuration ..................................... 322 Table 231 – USSD Profile Configuration ..................................... 323 Table 232 – USSD Request ......................................... 324 NTC-400 Series 355 of 361 © NetComm Wireless 2018...
- Page 356 Table 233 – Network Provider List ......................................324 Table 234 – Enable Event Management ....................................326 Table 235 – Enable SMS Management ...................................... 326 Table 236 – MS Account Configuration...................................... 327 Table 237 – Email Service Configuration ....................................328 Table 238 – Digital Input (DI) Profile Configuration ................................... 329 Table 239 –...
-
Page 357: Appendix C - Wifi Performance Measurement Results
Table 254 –WiFi Performance Test Results – 2.4GHZ, Channel:6,HT40 5GHz Wireless Coverage Distance and Throughput Channel:44,HT80 Distance(m) LAN->WLAN WLAN->LAN WLAN<->LAN RSSI Average (Mbps) Average (Mbps) Average (Mbps) Table 255 –WiFi Performance Test Results – 5GHZ, Channel:44,HT80 NTC-400 Series 357 of 361 © NetComm Wireless 2018... -
Page 358: Appendix D - Open Source Software Disclaimer
Appendix D – Open Source Software Disclaimer This product contains Open Source software that has been released by the developers of that software under specific licensing requirements such as the “General Public License“ (GPL) Version 2 or 3, the “Lesser General Public License“ (LGPL), the “Apache License“... - Page 359 Air Bags Do not place the device in the area near or over an air bag or in the air bag deployment area Mount the device safely before driving your vehicle. NTC-400 Series 359 of 361 © NetComm Wireless 2018...
- Page 360 Emergency & other situations requiring continuous connectivity This device, like any wireless device, operates using radio signals, which cannot guarantee connection in all conditions. Therefore, you must never rely solely on any wireless device for emergency communications or otherwise use the device in situations where the interruption of data connectivity could lead to death, personal injury, property damage, data loss, or other loss.
- Page 361 Blasting caps and areas Turn off your device or wireless device when in a blasting area or in areas posted turn off “two-way radios” or “electronic devices” to avoid interfering with blasting operations. NTC-400 Series 361 of 361 © NetComm Wireless 2018...
Need help?
Do you have a question about the NTC-400 Series and is the answer not in the manual?
Questions and answers