Table of Contents
Advertisement
Available languages
Available languages
CONTENTS
CONTENTS................................................................................................................. 1
IMPORTANT SAFETY INSTRUCTIONS .............................................................. 1
INTRODUCTION...................................................................................................... 2
REAR PANEL CONNECTIONS .............................................................................. 2
GETTING STARTED ................................................................................................. 3
TIPS FOR OBTAINING A GOOD QUALITY VOCAL SOUND ......................... 3
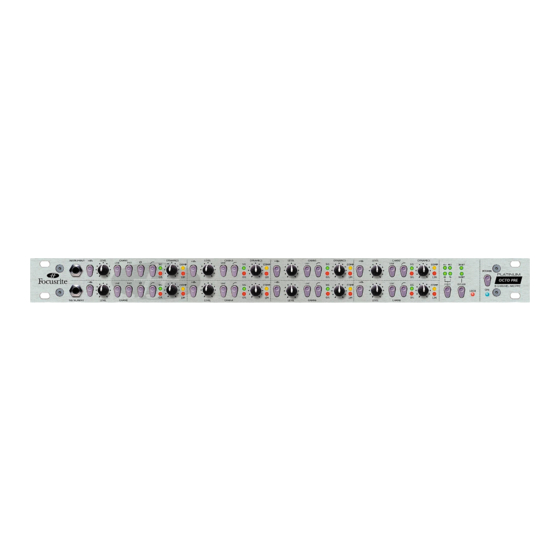
FACILITIES AND CONTROLS ................................................................................ 4
DIGITAL OUTPUT OPTIONS ................................................................................. 6
DIGITAL OUTPUT FRONT PANEL CONTROLS ............................................... 6
DIGITAL OUTPUT REAR PANEL CONNECTIONS AND SWITCHES........... 7
A BEGINNER'S GUIDE TO COMPRESSION ....................................................... 8
FREQUENTLY ASKED QUESTIONS ..................................................................... 9
TROUBLESHOOTING............................................................................................ 10
CONTACTING US ................................................................................................... 10
SPECIFICATIONS..................................................................................................... 11
DISTRIBUTOR LIST................................................................................................ 60
IMPORTANT SAFETY INSTRUCTIONS
Please read all of these instructions and save them for future reference. Follow all warnings and
instructions marked on the unit.
•
Do not obstruct air vents in the rear panel. Do not insert objects through any apertures.
•
Do not use a damaged or frayed power cord.
•
Unplug the unit before cleaning. Clean with a damp cloth only. Do not spill liquid on the
unit.
•
Ensure adequate airflow around the unit to prevent overheating. We recommend
leaving a blank 1U panel above the unit to aid ventilation.
•
Unplug the unit and refer servicing to qualified service personnel under the following
conditions: If the power cord or plug is damaged; if liquid has entered the unit; if the unit
has been dropped or the case damaged; if the unit does not operate normally or exhibits a
distinct change in performance. Adjust only those controls that are covered by the
operating instructions.
•
Do not defeat the safety purpose of the polarised or grounding-type plug. A polarised plug
has two blades with one wider than the other. A grounding type plug has two blades and a
third grounding prong. The wider blade or the third prong is provided for your safety.
When the plug provided does not fit into your outlet, consult an electrician for
replacement of the obsolete outlet.
WARNING: THIS UNIT MUST BE EARTHED BY THE POWER CORD.
UNDER NO CIRCUMSTANCES SHOULD THE MAINS EARTH BE
DISCONNECTED FROM THE MAINS LEAD.
This unit is supplied pre-configured to operate only at the voltage indicated on the rear panel.
Ensure correct mains voltage is available and the correct fuse value is fitted before connecting to
the mains supply. To avoid the risk of fire, replace the mains fuse only with the correct value
fuse, as marked on the rear panel. The internal power supply unit contains no user serviceable
parts. Refer all servicing to a qualified service engineer, through the appropriate Focusrite dealer.
RACK VENTILATION: PLEASE ENSURE THE OCTOPRE IS PLACED
TOWARDS THE BOTTOM OF YOUR EQUIPMENT RACK, WITH
SUFFICIENT SPACE ABOVE AND BELOW FOR VENTILATION.
ENGLISH
1
Advertisement
Chapters
Table of Contents
Troubleshooting

Related Manuals for Focusrite OctoPre


Summary of Contents for Focusrite OctoPre
-
Page 1: Table Of Contents
DISTRIBUTOR LIST....................60 fuse, as marked on the rear panel. The internal power supply unit contains no user serviceable parts. Refer all servicing to a qualified service engineer, through the appropriate Focusrite dealer. RACK VENTILATION: PLEASE ENSURE THE OCTOPRE IS PLACED TOWARDS THE BOTTOM OF YOUR EQUIPMENT RACK, WITH SUFFICIENT SPACE ABOVE AND BELOW FOR VENTILATION. -
Page 2: Introduction
These D-type connectors may be routed to 8 XLRs by means of an 8-way 25-pin D- The mic pres featured in the OctoPre are similar to those featured elsewhere in the type to 8 XLR breakout cable, available from your local dealer, or in the UK from award winning Focusrite Platinum range. -
Page 3: Getting Started
INSTRUMENT INPUTS on channels 1 and 2 via the unbalanced 1/4” jack the mic. It may also be necessary to use the OctoPre’s High Pass Filter to remove inputs on the front fascia. -
Page 4: Tips For Obtaining A Good Quality Electric Guitar Sound
OctoPre. The output (whether analogue or digital) from the OctoPre should be clicks or thumps which may harm output devices. It is also a good idea to allow the connected directly to your recorder. - Page 5 ENGLISH O/L (Overload) LED may light occasionally, but only if the input signal gets particularly loud. If the O/L LED stays on continuously for any period, or you hear the unit distort during loud peaks, you should reduce the LEVEL. With the MIC INPUT selected, the LEVEL control provides 0dB (fully anti- clockwise) to +60dB (fully clockwise) of gain.
-
Page 6: Digital Output Options
DIGITAL OUTPUT OPTIONS AES cable: 9-pin D-type to 4 male XLR connectors. In addition to the analogue outputs, the OctoPre can be fitted with one of two digital SPDIF cable: 9-pin D-type to 4 male RCA (phono) connectors. output options. These are described below. -
Page 7: Digital Output Rear Panel Connections And Switches
(using the CLOCK SELECT switch on the OctoPre front panel) to ensure correct synchronisation. If for example the OctoPre is set to 48 kHz and the external word clock is 44.1 kHz the unit will not lock, and the front panel LOCK LED will not be lit. -
Page 8: A Beginner's Guide To Compression
A reduction in variation of volume level is still required (for the reasons mentioned above), but not to the same extent. Visit www.focusrite.com for further information and a comprehensive ‘Guide to Compression’. -
Page 9: Frequently Asked Questions
No, because all the processing in the OctoPre is entirely analogue - so even if there Yes, the OctoPre is a Class A device. Why? Well, Class A is a type of amplifier design were a digital input, the digital signal would have to be immediately pass through a... -
Page 10: Troubleshooting
ENGLISH TROUBLESHOOTING CONTACTING US No LEDs illuminate If have any questions about your OctoPre, or are continuing to have difficulty, you • can email us for help at tech@focusrite.com. Alternatively, telephone us on +44 Is the POWER switched on? •... -
Page 11: Specifications
ENGLISH SPECIFICATIONS Metering Inputs Signal Present: -20dBFS (green LED) Electronically balanced 20kΩ. Overload: +22dBu (red LED) Nominal level +4dBu / -10dBV Compressor mode: Yellow LED intensity increases with compression Hard Limit mode: Red LED on when limiting (threshold = +20 dBu) Input Connectors 1/4”... - Page 12 ENGLISH...
-
Page 13: Inhalt
Sie die Sicherung ausschliesslich durch ein Modell mit denselben Werten. Das interne Netzteil enthält nur Teile, die ausschliesslich von einem geschulten Service-Techniker ausgetauscht werden dürfen. RACK-BELÜFTUNG: BITTE STELLEN SIE SICHER, DASS DER OCTOPRE SO WEIT UNTEN WIE MÖGLICH IM RACK MOTNIERT WIRD, MIT AUSREICHEND PLATZ ÜBER UND UNTER DEM GERÄT. -
Page 14: Einleitung
Diese Kabel erhalten Sie z.B. vom Hersteller HOSA unter folgender Typenbezeichnung: Die Mic Preamps des OctoPre sind ähnlich denen, die in den anderen Geräten der vielfach ausgezeichneten Platinum Serie eingesetzt werden. Es handelt sich um auf Line Ausgang (Sub-D25 auf 8xXLR male) – DTM804 (4m) oder DTM807 (7m) Transistoren basierende Class A Versionen, die unter der gleichen Philosophie Line Eingang (Sub-D25 auf 8xXLR female) –... -
Page 15: Einführung
Signal. Die gelbe COMP LED leuchtet, sobald der Kompressor in Funktion tritt, während ein Aufleuchten der roten LTM LED ein Ansprechen des Limiters Stellen Sie sicher, dass nur das Netzkabel mit Ihrem OctoPre verbunden ist, dann anzeigt. Weitere Informationen über die DYNAMICS Regelung finden Sie auf schalten Sie das Gerät mit dem POWER Schalter auf der rechten Seite ein. -
Page 16: Tips Für Einen Guten E-Gitarren Sound
POWER Sie können jedes Effekt Pedal zwischen das Instrument und dem OctoPre anschliessen. Der Ausgang des OctoPre (sowohl analog als auch digital) sollte direkt in den Schaltet das Gerät ein (blaue LED unter dem Schalter leuchtet). Empfohlen wird das Recorder gehen. - Page 17 LEVEL (Regler) Dieser Regler bestimmt den Signalpegel des Kanals. Verbinden Sie ein Eingangssignal mit dem OctoPre und stellen Sie dabei sicher, dass der LEVEL Regler auf der “0” Stellung steht. Anschliessend erhöhen Sie langsam den Pegel, so dass die grüne SIG LED ständig leuchtet, die rote O/L LED aber möglichst nie.
-
Page 18: Digital Ausgangs Optionen
Studioausstatter. 24-bit/96 kHz ADAT™ Interface Karte Diese Karte bietet digitale Ausgänge für alle acht Kanäle des OctoPre, die über die Sowohl die 8 AES- als auch die 8 SPDIF-Ausgänge können simultan mit den gesamte Samplefrequenzbreite arbeiten (44.1, 48, 88.2 und 96 kHz) und ein Dithering ADAT™- und/oder analogen Ausgängen des OctoPre genutzt werden... -
Page 19: Digital Ausgang, Schalter Und Anschlüsse Auf Der Rückseite
Dieser Anschluss führt die AES- or SPDIF-Ausgangssignale aus. Hierzu muss ein WC-Signal synchronisiert sind. Diese LED ist nur in Funktion, wenn der EXT SYNC entsprechendes Adapterkabel genutzt werden (siehe oben) Schalter auf der Rückseite des OctoPre gedrückt ist (siehe unten). DIGITAL AUSGANG, SCHALTER UND ANSCHLÜSSE AUF DER RÜCKSEITE EXT SYNC (Schalter) Mit diesem Schalter ermöglichen Sie eine Synchronisation der Digital Ausgänge des... -
Page 20: Eine Kleine Einführung Zum Thema Kompression
Dynamik weitestgehend zu erhalten, um so einen grösseren Ausdruck zu erreichen. Aus den o.g. Gründen soll natürlich auch hier das Signal “vergrleichmässigt” werden, jedoch in einem geringeren Masse. Besuchen Sie www.focusrite.com für weitere allgemeine Informationen und einen umfassenden “Guide to Compression”... -
Page 21: Häufige Fragen
Warum ist die Spezifikation 24 bit / 96kHz wichtig? überhaupt wichtig? Ja, der OctoPre ist ein Class A Gerät. Warum? Nun, Class A beschreibt einen Ein A/D Wandler funktioniert, indem er ein Audiosignal in bestimmten Zeitabständen bestimmten Typ von Verstärker, in dem ständig ein Spannung anliegt. Wenn nun ein abtastet und anschliessend diese Werte in binäre Zahlenkombinationen quantisiert,... -
Page 22: Troubleshooting
DEUTSCH TROUBLESHOOTING KONTAKT Keine LED leuchtet Wenn Sie irgendwelche Fragen zu Ihrem OctoPre haben oder Schwierigkeiten, die • mittels dieser Anleitung nicht gelöst werden können, senden Sie einfach eine email an Ist das Gerät eingeschaltet? • tech@focusrite.com. Ist der Spannungswählschalter auf der Rückseite korrekt eingestellt? Falls nicht, Gerne können Sie sich auch an den deutschen Vertrieb wenden:... -
Page 23: Technische Daten
DEUTSCH TECHNISCHE DATEN Anzeigen / Meter Eingänge Signal: -20 dBFS (Green LED) Elektronisch symmetriert, 20kΩ Overload: +22 dBu (Rote LED) Nominal Pegel +4dBu / -10dBV Kompressor Modus: Leuchtintensität der yellow LED steigt mit Kompression Hard Limit Modus: Rote LED leuchtet bei Einsatz (Threshold = +20 dBu) 6.35mm Klinke (nur Kanäle 1 und 2) 25-Pin Sub-D (8 analoge Eingänge für Line-Pegel Kanäle) Analoge Ausgänge... - Page 24 DEUTSCH...
- Page 25 Confiez les opérations de maintenance à un technicien qualifié après avoir consulté votre revendeur Focusrite. VENTILATION DU RACK : VEILLEZ À PLACER L'OCTOPRE À LA BASE DE VOTRE RACK, EN LAISSANT UN ESPACE SUFFISANT AU-DESSUS ET AU-...
-
Page 26: Introduction
Les préamplificateurs micro de l'OctoPre sont identiques à ceux des processeurs de la série Focusrite Platinum. Ils font appel à des circuits à transistor de Classe A et ils ont Les références Hosa pour ce type de câble sont : été... -
Page 27: Mise En Œuvre
écran anti-pop connecter une guitare ou une basse électrique aux entrées Jack 6,35 mm devant le micro. Il peut également être utile d'utiliser le filtre passe-haut de l'OctoPre INSTRUMENT des canaux 1 et 2 situées en façade. -
Page 28: Conseils Pour Obtenir Un Bon Son De Guitare
Vous pouvez utiliser n'importe quelle pédale d'effets entre la guitare et l'entrée INST placer le préamplificateur sous tension avant les appareils qui sont placés en aval de la de l'OctoPre. La sortie (analogique ou numérique) de l'OctoPre doit être connectée chaîne audio, afin d'éviter tout bruit de transitoires risquant d'endommager les directement à... - Page 29 FRANÇAIS ø (touche d'inversion de phase) [CANAUX 1 ET 2 LEVEL (potentiomètre) UNIQUEMENT] Ce potentiomètre atténue le niveau du signal du canal. Connectez un signal en entrée, Cette touche permet d'inverser la phase du signal d'entrée et de corriger ainsi les en vous assurant que le potentiomètre LEVEL est réglé...
-
Page 30: Options De Sortie Numérique
8 sorties ADAT™ et les sorties analogiques de l'OctoPre. Cette carte permet la sortie au format numérique des huit sorties de l'OctoPre, aux fréquences de 44,1, 48, 88,2 et 96 kHz avec Dither à 16, 20, ou 24 bits. Le connecteur BNC permet la synchronisation à... -
Page 31: Connexions Numériques Et Sélecteurs (Face Arrière)
CLOCK SELECT située en façade de l'OctoPre) afin d'assurer une bonne synchronisation. Si, par exemple, l'OctoPre est réglé sur 48 kHz et que la fréquence de l'horloge externe est de 44,1 kHz, la synchronisation ne se fait pas et la led LOCK ne s'allume pas. -
Page 32: Guide D'utilisation De La Compression
Ces cas nécessitent une certaine conservation de la dynamique pour conserver de l'expression au jeu. Il reste alors nécessaire de contenir les fortes variations de volume, mais à moindre échelle. Consultez notre site Internet www.focusrite.com pour obtenir de plus amples informations sur la compression. -
Page 33: Questions Courantes
Puis installer plus tard une carte numérique sur mon OctoPre ? Oui. La bande passante de l'OctoPre est linéaire de 10 Hz à 200 kHz ! Oui, et vous pouvez aisément le faire vous-même, sans soudure, etc. Vous avez juste besoin d'utiliser un tournevis et de brancher un connecteur situé... -
Page 34: Assistance
Aucune led ne s'allume Si vous avez la moindre question, ou si vous souhaitez obtenir une assistance technique • sur ce produit, vous pouvez nous envoyer un e-mail à : tech@focusrite.com. Vous L'interrupteur secteur est-il réglé sur On ? •... -
Page 35: Caractéristiques Techniques
FRANÇAIS CARACTÉRISTIQUES TECHNIQUES Témoins Entrées Présence signal : -20 dBFS (LED green) Symétrie électronique, 20 kΩ Surcharge : +22 dBu (LED rouge) Niveau nominal de +4 dBu/-10 dBV Mode compresseur : Intensité variable de la LED yellow en fonction de la compression Mode limiteur infranchissable : LED rouge allumée lors de la limitation (seuil =... - Page 36 FRANÇAIS...
-
Page 37: Contenuti
In caso di manutenzione, fare riferimento a personale qualificato, tramite il distributore locale Focusrite. VENTILAZIONE: SI PREGA DI ASSICURARSI CHE L’OCTOPRE SIA POSIZIONATO VERSO IL FONDO DEL VOSTRO RACK DI OUTBOARDS, CON SUFFICIENTE SPAZIO SOPRA E SOTTO DI... -
Page 38: Introduzione
Sul pannello posteriore, OctoPre offre 8 ingressi microfonici su connettori XRL. I OctoPre è un preamplificatore microfonico ad 8 canali in Classe A, dotato di un canali 1 e 2 offrono ognuno un ingresso strumento sbilanciato su jack _”, presente sul classico pre microfonico Focusrite e di un rivoluzionario circuito di pannello frontale. -
Page 39: Per Cominciare
Potrebbe una chitarra elettrica o un basso agli ingressi strumento dei canali 1 e 2 tramite i anche essere necessario usare il filtro passa alto dell’OctoPre per togliere i bassi eccessivi jack _” sbilanciati presenti sul pannello frontale. -
Page 40: Suggerimenti Per Ottenere Un Suono Di Chitarra Elettrica Di Alta Qualità
UTILIZZO DI PEDALI PER GLI EFFETTI Raccomandiamo di assicurarsi che l'unità venga accesa prima di connettere o Connettere tutti i pedali tra la chitarra e l’ingresso strumento dell’OctoPre. L’uscita alimentare apparecchi collegati all'uscita , per evitare possibili scrocchi o sovraccarichi. - Page 41 ITALIANO presenta alcuni picchi di livello. Se dovesse rimanere acceso per un certo periodo di tempo, o se si dovessero sentire distorsioni durante i picchi di maggior livello, sarà necessario ridurre il valore di LEVEL. Con la selezione MIC INPUT, il controllo di LEVEL offre un guadagno tra 0dB (completamente girato in senso antiorario) e +60dB (ruotato completamente in senso orario).
-
Page 42: Uscite Digitali Opzionali
A/D deve essere acquistata con un cavo AES o SPDIF, D-type che permetta USCITE DIGITALI OPZIONALI i seguenti adattamenti: In aggiunta alle uscite analogiche, l’OctoPre può essere dotato di una delle due schede Cavo AES: da 9-pin D-type a 4 connettori maschi XRL di conversione A/D opzionali. Queste vengono descritte di seguito. -
Page 43: Connessioni Ed Interruttori Del Pannello Posteriore Per L'uscita Digitale
(utilizzando l’interruttore CLOCK SELECT sul pannello frontale dell’OctoPre). Se, per esempio, l’OctoPre è impostato su 48 Khz ed il worclock esterno è a 44.1 KHz, l’unità non si sincronizzerà, ed il LOCK LED non s’illuminerà. -
Page 44: Guida Alla Compressione
In questo caso si cerca di preservare la dinamica della performance originale, per mantenerne l’espressione. Una riduzione della variazione del livello di volume è comunque richiesta (per i motivi menzionati sopra), ma non dello stesso livello. Visita www.focusrite.com per maggiori informazioni ed una Guida alla Compressione più completa. -
Page 45: Faqs
Per esempio, se viaggi dagli USA al Regno Unito, NON PUOI usare il tuo modello americano di OctoPre. Ma se il voltaggio di alimentazione del Paese in cui ti rechi è L’OctoPre è un apparecchiatura in Classe A? Perchè è... -
Page 46: Risoluzione Di Alcuni Problemi
ITALIANO RISOLUZIONE DI ALCUNI PROBLEMI COME CONTATTARCI Nessun LED si illumina Se avete delle domande riguardo il vostro OctoPre, oppure avete delle difficoltà, • L’alimentazione è attivata (pulsante POWER)? contattateci per l’assistenza via e-mail: tech@focusrite.com . Per telefono: +44 1494 •... -
Page 47: Specifiche Tecniche
ITALIANO SPECIFICHE TECNICHE METERING INGRESSI Presenza del segnale: -20 dBFS (LED green) Overload: +22 dBu (LED rosso) Elettronicamente bilanciati 20KΩ. Modalità del Compressore: LED Giallo: l’intensità aumenta con la Livello nominale +4dBu / -10 dBV compressione Modalità Hard Limit: il LED rosso s’illumina quando sta limitand (soglia = +20 dBu) CONNETTORI PER GLI INGRESSI 1/4”... - Page 48 ITALIANO...
-
Page 49: Contenido
Dirigirse a un servicio técnico cualificado, a través del distribuidor de Focusrite del país. VENTILACION DEL RACK: ASEGURARSE DE QUE EL OCTOPRE ESTA SITUADO EN LA PARTE MAS BAJA DEL RACK, CON SUFICIENTE ESPACIO POR ENCIMA Y DEBAJO PARA SU... -
Page 50: Introduccion
El OctoPre es una unidad con ocho preamplificadores de micrófono clase A, que El OctoPre dispone de ocho entradas de micrófono con XLR en el panel trasero. Los dispone de un previo de micro clásico de Focusrite y un circuito revolucionario de canales 1 y 2 disponen de una entrada no balanceada jack _”... -
Page 51: Puesta En Marcha
Si esto afectara a la ejecución (o la voz no sonara adecuadamente), de nivel línea (al utilizar el OctoPre en la mezcla, por ejemplo) conectar las señales permitiremos que el vocalista se acerque al micrófono, pero utilizando un antipop para a las LINE INPUT mediante el conector Sub-D 25 de la trasera. -
Page 52: Consejos Para Obtener Una Buena Calidad Con Guitarra Electrica
Pone la unidad en funcionamiento e ilumina el LED azul situado justo debajo. Conectar cualquier pedal de efectos entre la guitarra y la entrada INST del OctoPre. La Recomendamos poner en marcha la unidad antes de conectarla a cualquier equipo al salida (tanto analógica como digital) desde el OctoPre deberá... - Page 53 ESPAÑOL Ø (Pulsador del Inversor de Fase) (CANALES 1 & 2 LEVEL (Potenciómetro) SOLO) Determina el nivel de la señal para dicha entrada. Conectar una señal de entrada a la Permite invertir la fase de la señal de entrada, para corregir los posible problemas de unidad, asegurándose que el control LEVEL esta en sentido antihorario totalmente, e fase que se puedan dar al utilizar varios micrófonos, o cuando la polaridad del cable sea incrementar en el control LEVEL hasta que el SIG LED verde esté...
-
Page 54: Opciones De Salida Digital
Cada conector lleva dos canales de audio digital – p. ej. el conector 1 porta la señal de En adición a las salidas analógicas, es posible dotar al OctoPre con una de las dos los canales 1 y 2, el conector 2 la de los canales 3 y 4, etc. -
Page 55: Conexiones Y Pulsadores De La Salida Digital En El Panel Trasero
(mediante el pulsador CLOCK SELECT del panel frontal del OctoPre) para asegurarse una sincronización correcta. Si por ejemplo el OctoPre estuviera en 48 kHz y el reloj externo en 44.1 kHz la unidad no se sincronizaría, y el LED LOCK no... -
Page 56: Guia De Compresion Para Principiantes
Una reducción en la variación del nivel de volumen siempre se necesita (por las razones antes mencionadas), pero no del mismo tamaño. Visitar www.focusrite.com para mayor información y una completa “Guía de Compresión”... -
Page 57: Preguntas Mas Frecuentes (Faq's)
España utilizarlo en Alemania, etc. Si, el OctoPre es una unidad Clase A. ¿Porqué? Bien, Clase A es un tipo de diseño de amplificador en el que se encuentra una corriente DC permanente circulando a través de los circuitos del amplificador todo el tiempo. Tal como la señal llega se varía que es ¿Está... -
Page 58: Problemas
ESPAÑOL PROBLEMAS CONTACTE CON NOSOTROS Si tuviera cualquier pregunta acerca de su OctoPre, o sigue teniendo dificultades, No se iluminan los LED’s puede enviarnos un e-mail para poder ayudarle a tech@focusrite.com. • Alternativamente, puede llamarnos al +44 (0) 1494 462246, o contactar con su ¿Está... -
Page 59: Especificaciones
ESPAÑOL ESPECIFICACIONES Medidores Entradas Presencia de señal: -20dBFS (LED green) Sobrecarga: +22dBu (LED rojo) Balanceadas electrónicamente Compressor mode: LED yellow aumenta en intensidad con la Nivel nominal +4dBu/-10dBv compresión Hard Limit mode: LED rojo se enciende cuando limita (umbral a +20dBu) Conectores de entrada Jack _”... -
Page 60: Distributor List
United Kingdom & Ireland Phone: +960 32 0032 Phone: +1 650 731 6300 Phone: +30 1 3809605-8 Phone: +421 264 780767 Focusrite Audio Engineering Ltd Fax: +960 31 8624 Fax: +1 650 731 6399 Fax: +30 1 3827868 Fax: +421 264 780042 Phone: +44 (0) 1494 462246 Email: islmusic@dhivehinet.net.mv...