Table of Contents
Advertisement
Advertisement
Table of Contents

Related Manuals for QUORION QTouch2


Summary of Contents for QUORION QTouch2
- Page 1 User Manual POS Systems QTouch 2 / Concerto...
- Page 2 Dear valued customer! On behalf of our proud company we wish to welcome you to the QUORION family of fine business machines. We sincerely hope you will appreciate the many benefits of being associated with a distinguished product name that represents both quality and commitment to customer satisfaction.
-
Page 3: Table Of Contents
2. General information ................. 6 2.1 Technical data ........................6 2.2 Components .......................... 7 2.2.1 POS Concerto ........................7 2.2.2 POS QTouch2 ........................8 2.3 Operating modes ........................8 2.4 Interfaces ..........................9 2.4.1 Pin Assignment ......................10 2.4.2 Adapter Cable for RS232....................10 2.5 Names of Keys and Their Function .................. - Page 4 12.3 Power Supply and Interfaces ................... 38 12.4 Cleaning ..........................38 12.5 Service and Maintenance ....................39 12.6 Assembling of the Stand of POS QTouch2 ..............39 13. Error Messages ..................40 14. Information on the Electromagnetic Compatibility and Safety ..41...
-
Page 5: Safety Precautions
1. Safety Precautions This section presents important information intended to ensure safe and effective use of the POS Concerto and QTouch . Please read this section carefully and store it in an accessible location. • Be sure the voltage of your main power net corresponds to the input voltage printed on the rating plate of the system. -
Page 6: General Information
1 x Smart Card, 1 x SIM Card (optional) Clerk Key Lock Magnetic Dallas i-Button Operating System Embedded Linux Application QMP – Quorion Multi Purpose Max. Number of PLU’s 50,000 Max. Number of Departments Software Max. Number of Clerks Max. Number of Sales Persons Max. -
Page 7: Components
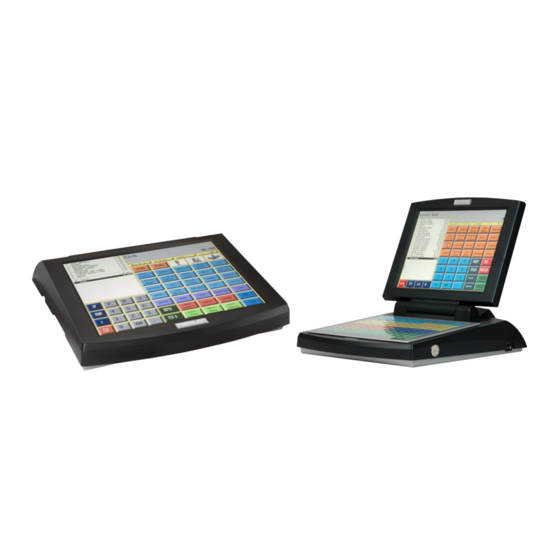
2.2 Components 2.2.1 POS Concerto Power-LED Touch screen Swivel joint Keyboard Main switch Clerk key lock Screen Customer display Card reader USB interface Interfaces... -
Page 8: Pos Qtouch2
2.2.2 POS QTouch2 Main switch Touch screen Clerk key lock Power-LED Customer display Card reader USB interface Interfaces 2.3 Operating modes The operating modes control the operation of your POS system. There are 5 different modes for various functions. You switch between corresponding modes with the touch key at the upper right side of the touch screen, alternating R –... -
Page 9: Interfaces
Please note that all interfaces have to be programmed before connecting any external devices. If you have any questions about the programming, please ask your local QUORION dealer. Power supply Cash drawer 1 and 2... -
Page 10: Pin Assignment
D-SUB connector of the adapter and put the other end of the adapter in the interface socket of the Concerto / QTouch You can order the special adapter cable from your local QUORION dealer. If you want to make the connection yourself, please note the following specifications:... - Page 11 Adapter cable, type DTR/DSR (grey) CON-M 08Pin/RJ45 CON-M 09Pin/DSUB Pin 1 Pin 1 Pin 2 Pin 2 Pin 3 Pin 3 Pin 4 Pin 4 Pin 5 Pin 5 Pin 6 Pin 6 Pin 7 Pin 7 Pin 8 Pin 8 Pin 9 SHLD SHLD...
-
Page 12: Names Of Keys And Their Function
2.5 Names of Keys and Their Function Key label Key name Key function Numeric Keys - used for entering numbers Receipt Feed - advances the receipt paper REC EI P T Journal Feed - advances the journal paper JO URN AL Clear CLEAR - clears incorrect entries and stops the error alarm... - Page 13 Key Label Key Name Key Function - calculates sub total Sub Total TOTAL - prints out receipt copy if no receipt opened Cash Payment CASH - used to tender payments in cash Check Payment - used to tender payments in check Check Card Payment - used to tender payments in card...
-
Page 14: Getting Started
3. Getting Started Place the POS Concerto / QTouch on a stable or even surface. Use it only within the operating temperature range (see technical data) and protect it from splashes and high humidity. The POS Concerto / QTouch come with an external power supply. First, please check if the specifications printed on the label fit your local voltage. -
Page 15: Register A Department
4.2 Register a Department Department keys may be used either to enter free prices or to select PLU’s from a list. If you press a department key without entry, you will see a list with all PLU’s which are linked to that department. -
Page 16: Create A Plu During The Sale
4.5 Create a PLU during the Sale Occasionally, a clerk may have to enter a new item, which has not been programmed in the data base of the POS. If this happens, the Concerto / QTouch will automatically prompt you to create this item. -
Page 17: Multiplication/Division
4.6 Multiplication/Division Instead of pressing the same item repeatedly, you may use the “Multiplication” key. First, enter the quantity to be CUSTOMER LOGO rung up, followed by the “Multiplication” key and then the item. 5 Department 1 17,50 3 PLU 25 3,00 Depending on the programming, the “Multiplication”... -
Page 18: Holding A Sale
4.7 Holding a Sale The Hold function is used to temporary save an open receipt, e.g. because a customer has to stop the CUSTOMER LOGO registration of his items and you wish to tend on the next customer. Press the “Hold” key to save the open receipt. 1 PLU 1 0,10 By pressing the “Hold”... -
Page 19: Tendering In Foreign Currency
4.9 Tendering in Foreign Currency In addition to the local currency the POS Concerto / QTouch can operate with different foreign currencies, which are saved separately in the reports. Just press the “FCE” key instead of Subtotal to convert the total amount in a pre-programmed foreign currency. -
Page 20: Corrections
5. Corrections 5.1 Clearing of Inputs and Error Messages To erase an incorrect entry not yet registered, and to clear any error messages just press the “Clear” key. CLEAR 5.2 Error correction The “Error Correct” key (EC) is used to clear the last item CUSTOMER LOGO immediately. -
Page 21: Refund
5.4 Refund A refund is used to return previously sold items. The PLU’s CUSTOMER LOGO will be added to the stock and the money is returned to the customer. The turnover in the reports will be corrected. REFUND -1 PLU 1 -0,10 REFUND To refund an item, press the “Refund”... -
Page 22: Transaction Cancel
5.6 Transaction Cancel The “Transaction cancel” is used to void a complete receipt before it is finalized with a payment. Simply press the key “Transaction cancel” to automatically void all items from the current receipt. 5.7 Tender Correction With the function “Tender Correction” you may change any amount from one payment media to another. -
Page 23: Amount Discount/Surcharge
6.2 Amount Discount/Surcharge Similarly, it is possible to use amount rebates. The only difference is that no percentages are calculated but rather CUSTOMER LOGO total amounts such as coupons are subtracted/added. 1 PLU 1 10,00 Enter the amount directly after the item or the subtotal and 1 PLU 2 5,00 press the “(-)”... -
Page 24: Using Shift Levels
7. Using Shift Levels 7.1 PLU/Department Shift The PLU/department shift is a preset function to switch all article- and department keys to a second level. This is done by adding a pre-programmed offset to the actual PLU or department number. Please note that the shift is valid for the very next item, it will be automatically reset after entry. -
Page 25: Keyboard Levels
7.4 Keyboard Levels Keyboard levels are used to change the complete programming of the keyboard. As a result it is not only possible to change PLU- and department keys, but all functions. It is therefore very easy to activate time- or season-dependant actions and functions without re-programming the POS. Depending on the programming, the keyboard level will be reset automatically after an item, a transaction, or not at all. -
Page 26: Print The Invoice
8.2 Print the Invoice To invoice a table you must re-open it first. All ordered items and the subtotal will be displayed. Now press the key CUSTOMER LOGO “Print Invoice”. INVOICE You may choose to finish the table immediately by Table # payment or receive a proforma invoice. -
Page 27: Splitting A Balance
8.4 Splitting a Balance The function “Table Split” is used to create more than one invoice from the same table. This may be necessary if the guests of one table wish to pay separately, for example. To split a table, first open it and press the key “Table Split”. -
Page 28: Modifiers And Condiments
8.6 Modifiers and Condiments Some special articles need to be specified by supplying cooking instructions or additional items. To do that, press the “Modifier” key directly after registering the PLU. Depending on the programming, it may also be necessary to select a condiment. In that case you do not need to press the “Modifier”... -
Page 29: System Reports
9.1 System Reports Each function of the POS has its own system report, which is permanent in the software. Depending on the configuration, this report can contain different information such as customer count, quantity, and amount. If you press the key “SYS” in mode X or Z you will receive a list of all available system reports. Now, you can select one report with the cursor keys and confirm by pressing “SYS”... -
Page 30: User Reports
9.2 User Reports User reports are freely programmable report lists containing several system reports. Hence, you have the possibility to create your individual reports. While programming the POS, you can define what data should be printed in the “Daily Report”, for instance. Later you only need to call one user report instead of manually selecting several different system reports. -
Page 31: Electronic Journal
9.3 Electronic Journal The Electronic journal will log all operations of the POS by storing a copy of each receipt printout. Depending on the programming you can do this either in binary or in ASCII text format. If you press the key “ENTER” in mode X or Z you will receive a list of all available user reports. Scrolling to the end of the list, you will find the entry “Electronic journal”. -
Page 32: Binary Format
QUORION dealer. He will gladly help you. 10.1 Programming of Date and Time Programming the date and time is achieved in mode P, using the system keys “DATE” and “TIME”. -
Page 33: Easy Plu Programming
10.2 Easy PLU Programming The easy programming of PLU’s is done in manager mode (M) only. To program a PLU enter the code number of the data field you want to change and confirm with the “Subtotal” key. The following codes are available: Sales Price Cost Price Description... -
Page 34: File Programming
10.3 File Programming Start programming either by entering the file number directly on the “TYPE” key or by pressing the “TYPE” key without entry and selecting the file from the programming window. At the end of each line the file number is shown in brackets for reference. Please note that files, which are not activated in the configuration, will not be shown. -
Page 35: Scanning
Flowchart: CODE RECORD CASH VALUE TYPE ENTER TYPE TYPE Example: Change tax rate 1 to 9.00 %: CASH TYPE ENTER TYPE CURSOR 10.4 Scanning When scanning codes are activated in the configuration of the application it is possible to create and/or delete items on the cash-register either in Program Mode or during transaction when an item is not found. - Page 36 When you are in Program Mode# 20 (PLU programming) can also delete codes. When you enter ZERO on the X key the register will ask you if you want to delete the current code which must be confirmed by pressing the CR (User Report) key. Note that the records are only marked for deletion so they will only free up their space after PLU FILE MAINTENANCE.
-
Page 37: Program Version And Test Routines
key table. The register will recognize the entry as a scan code when MORE then 5 digits are entered. Normal key codes have a value of maximal 5 digits. This means that when you want the program a PLU with scan code “123” you MUST enter “000123”. Suppose this PLU is located at record number 5 the register will put 10005 as key code which is also shown on the display. -
Page 38: Training Mode
11. Training Mode The training mode is used to test all functions of the POS Concerto / QTouch without adding the turnover to the reports. The report memory will not be changed and all counters remain constant. Please note that in this mode all receipts will be automatically marked as „Training”. In order to access the training mode, a pre-programmed training clerk must be signed-in. -
Page 39: Service And Maintenance
The POS Concerto / QTouch do not contain any components, which can be serviced or repaired by the user. Please have all maintenance performed by a qualified QUORION dealer. Unauthorized manipulations may lead to a loss of warranty. 12.6 Assembling of the Stand of POS QTouch2 1. -
Page 40: Error Messages
13. Error Messages Error Description Invalid Entry Invalid Time Invalid Date Invalid Article Unknown Report Invalid Function Transbuf. Full Still in Transaction User Break No Under/Tender Still in Tender Scanning Error Select Clerk Select Salesperson Item not Sold No Price Entered No Zero Price Closed Drawer Manager Required... -
Page 41: Information On The Electromagnetic Compatibility And Safety
14. Information on the Electromagnetic Compatibility and Safety CE Conformance This QUORiON cash register conforms to the European Community’s EMV 2004/108 directive. The cash register fulfills the following technical European requirements: • EN 55022: “Norm values and measuring procedures for radio interference properties characteristics of information technology devices“...
Need help?
Do you have a question about the QTouch2 and is the answer not in the manual?
Questions and answers