Table of Contents

Related Manuals for Kitvision Splash


Summary of Contents for Kitvision Splash
- Page 1 A c t i o n c A m e r A Do not dispose of Lithium-ion batteries with general waste. Please return it to battery recycling collection point. Li-ion JB. 3287 / Made in China. © Kitvision 2014. Christchurch, Dorset. BH23 4FL.
- Page 2 Contents • Waterproof up to 15 m Main features Box contents Box contents Functions • Hook mount • Splash action camera Using the camera • Mount adaptor • Waterproof case Connecting the camera • Tripod adaptor • Bicycle mount Mounting the camera •...
- Page 3 Functions 1. Power/shutter button 9. Reset 2. Status indicator light 10. Mode button 3. Lens 11. Waterproof case 4. Micro USB jack 12. Securing clip 5. TF/micro SD card slot 13. Waterproof power/ shutter button 6. Microphone 14. Micro HDMI port 7.
- Page 4 The Splash camera doesn’t have any internal memory. To be 1. Press the POWER button (1) to turn on the camera. able to record video or capture photos using the camera, you 2.
- Page 5 recording videos changing the mode of the camera 1. Turn on the camera and it will start in Video mode The camera has 3 different modes: Capture mode, Video mode automatically. If in another mode, press the MODE button and Playback mode. (10) to set the camera to Video mode.
- Page 6 recording audio within a video Playback of files If using the camera with the waterproof case, audio will be 1. Turn on the camera and press the MODE (10) button to set recorded although it will be barely audible. For best audio the camera to Playback mode.
- Page 7 Viewing video files Changing the camera settings 1. When a video file is selected, press the SHUTTER button (1). General settings 2. The LCD screen (7) will show the options ‘Delete’ or ‘Play’. 1. To enter the general settings menu, press and hold the MODE button (10) whilst in either Video or Capture mode.
- Page 8 MENU FUNCTION TV mode You can review images on TV with a mini HDMI Date This function can be used to add a date to your cable (not supplied). TV Out should be set to either pictures and videos as you take them. To set the NTSC or PAL depending on your TV.
- Page 9 Video mode settings Use the function to help stabilise the image. Anti-shake [On]/[Off] 1. To enter the Video settings menu, press and hold the MODE (10) button whilst in Video mode. Loop recording Set the loop recording time. This will determine how long each video recording is per file.
- Page 10 capture mode settings Set the sharpness of the picture. The sharpness Sharpness level dictates if the edges of objects in the image 1. To enter the Capture settings menu, press and hold the are more or less distinct. [Sharp]/[Normal]/[Soft] MODE button (10) whilst in capture mode. Exposure Set the exposure value manually to compensate 2.
- Page 11 connecting the camera to a Pc Anti-shake Use the function to avoid taking blurry/out of focus photos.[On /[Off There are two ways to download files from the camera’s Micro SD to a computer: Continuous Shot Use this function to take 6 pictures continuously. [On /[Off •...
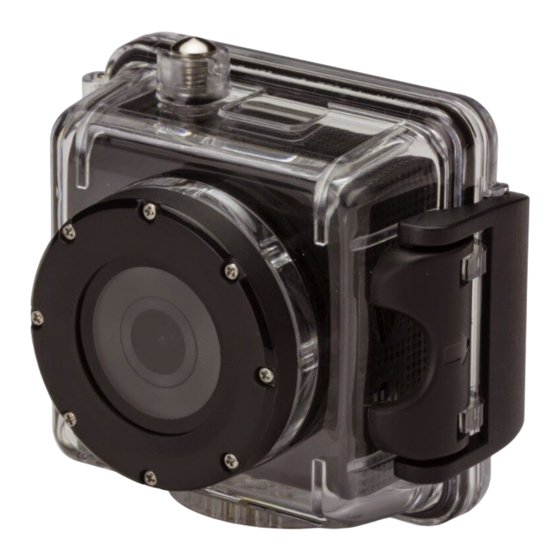
- Page 12 4. Copy the files that you want to your PC. Waterproof case The Splash action camera includes a case that is waterproof How to use the Pc camera function up to 15 metres. When using the camera in a wet environment, 1.
- Page 13 mount accessories In order to use the camera for various outdoor activities, we have provided three different mounts. • Mount (A) is used to fix the camera to the handlebars on a bike. • Mount (B) is used to fix it to a helmet. •...
- Page 14 Fixing the camera to a bike 1. Unscrew both screws and remove the metal ring of Mount A. 2. Place the plastic section underneath the handlebar and place the metal ring over the handlebar. 3. Replace the screws and tighten them up. 4.
- Page 15 Fixing the camera to a helmet 1. Fix connector (iii) to Mount B as shown. iii. 2. If needed, choose extra connectors from the three shown and then fix them to connector (iii). 3. Screw connector (ii) directly to the camera or the camera case. 4.
- Page 16 Fixing the camera to a board/flat surface 1. Ensure the surface is clean and dry before applying the iii. adhesive mount. 2. Peel off adhesive paper and stick the mount in the desired position. 3. Fix connector (iii) to Mount C as shown. 4.
- Page 17 Specification Sensor 5 Megapixel CMOS Ambient Operating: 0° C to 40° C temperature Storage: -20 to 60° C LCD display 1.77 “ TFT screen Microphone Built-in Lens F/2.5, f = 3.2 mm Speaker Built-in Shutter Electronic Shutter: 1/2 ~ 1/800 sec Resolution Image: 12 M/10 M/8 M/5 M/3 M/1.3 M / VGA Video: 1080 p / 720 p / VGA / QVGA...
- Page 18 • Expose the Splash to extreme temperatures or rapid changes of hot to cold or vice versa. Please Do: • Clean the Splash with a soft dry cloth and no detergents.
Need help?
Do you have a question about the Splash and is the answer not in the manual?
Questions and answers