
Subscribe to Our Youtube Channel
Related Manuals for Kitvision ESCAPE 4KW


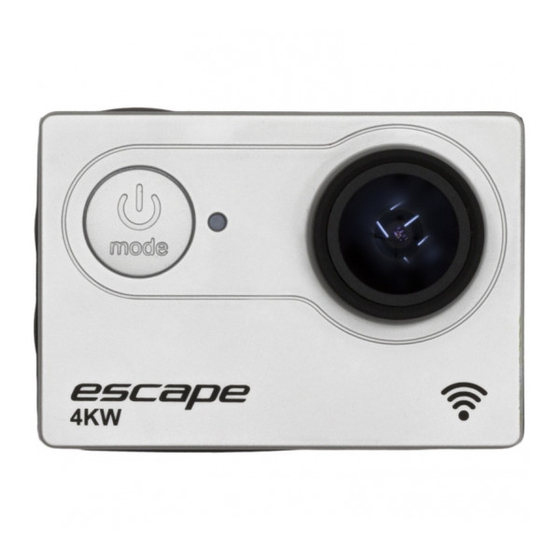
Summary of Contents for Kitvision ESCAPE 4KW
- Page 1 A c t i o n c A m e r A User Manual JB. 4397 / Made in China. © Kitvision 2015 Christchurch, Dorset, BH23 4FL, UK...
-
Page 2: Table Of Contents
13. Down/Wi-Fi Button 28 Connecting your camera 6. Micro USB Input 14. Battery Cover 30 Waterproof case 7. Lens 15. Battery Cover Latch 32 Mount accessories 8. Micro HDMI Output 40 Specification 42 Care for your Escape 4KW Action Camera 43 Troubleshooting... -
Page 3: Box Contents
Box contents 1. Kitvision 4K Action Camera 2. 30 m waterproof case 3. Bicycle mount 4. Mount connector clip 5. Action camera to ¼" tripod screw adaptor 6. Action camera to ¼" tripod thread adaptor 7. Mount connector 8. 90 degree adaptor 9. -
Page 4: Instructions For Use
Instructions for use Inserting the memory card The Escape Action Camera doesn’t have any internal memory. To Turning power on and off be able to record video or capture photos using the camera, you Long Press the Power/Mode button (3) to turn on the must have your micro SD card inserted (32 GB max, not camera. -
Page 5: Changing Mode
Changing the mode of the camera Video Mode For recording video clips The camera has 8 different modes: Video Mode, Photo Mode, Burst Mode, Timed Photo Mode, Time Lapse Mode, Video Photo Mode For taking still photos Playback, Photo Viewer and Settings Mode. Burst Mode Takes a series of 3 / 5 / 10 photos Timed Photo Mode Takes a photo after a set time period Takes a photo at set intervals until... -
Page 6: Using Video/Photo Modes
Using video mode Recording audio within a video 1. Turn on the camera, and it will start in Video mode. If in If using the camera with the waterproof case, audio will be another mode, press the Power/Mode button (3) until you recorded although it will be less audible. -
Page 7: Using Time Lapse Mode
Using burst mode Using time lapse mode 1. Turn on the camera and press the Power/Mode Button (3) 1. Turn on the camera and press the Power/Mode Button (3) to twice to select Burst Mode. enter the Settings mode. 2. Use the built-in LCD (10) to view your shot, and then press the 2. -
Page 8: Using Playback Mode
Using time lapse mode Viewing video files [...continued] 1. O nce a video file is selected press the Shutter/Ok Button (1) to 6. Use the built-in LCD (10) to view your shot, and then press the play. Shutter/Ok Button (1) to activate the Time Lapse photo 2. W hilst playing the video file you can rewind by pressing the Up sequence. -
Page 9: Changing The Camera Settings
Changing the camera settings Looping Video Choose to record video on a 10 minute loop [Off] / [On] General settings 1. To enter the general settings menu, turn on the camera Time Stamp This function can be used to add a date and time to your videos as you take them and press the Power/Mode Button (3) 4 times to enter the [Off] / [Date] / [Date & Time]... -
Page 10: Changing The Camera Settings
Changing the camera settings [...continued] Continuous Lapse Turn this mode on to enable Time Lapse mode, change the Upside Down Activate 180o rotate; when inverted the camera will timing of the intervals by changing the Time Lapse menu automatically rotate the photo or video recording [On] / [Off] [Off] / [On] Screen Saver Activate the screen saver to save power Power Frequency... -
Page 11: Using Wi-Fi
Pairing the camera to your device 1. Turn on the camera and press the Down/Wi-Fi Button (13). With the Escape 4KW’s built-in Wi-Fi, you can use your smart 2. The built-in LCD (10) will show the message ‘Waiting for Wi-Fi device as a camera remote, viewfinder, and download files to connection…’. - Page 12 Pairing the camera Using Wi-Fi for video recording [...continued] Apple App home screen (Figure 1) Apple App video screen (Figure 2) Camera battery Return to home screen indicator Change camera Change white balance settings Remaining hours Camera offline Device list Live feed from camera of available video storage Start and stop...
- Page 13 Using Wi-Fi for photo capture Using Wi-Fi for file playback 1. P ress the file viewer icon in either Video or Photo mode to Apple App photo screen (Figure 3) enter the file gallery. 2. On Apple devices, use the top toggle bar to switch between Camera battery photo gallery and video gallery. On Android devices, photo Return to home screen indicator and video files will be displayed in one gallery, videos will have...
- Page 14 Using Wi-Fi to download files Using Wi-Fi to delete files 1. T o select files to download, press the ‘Select’ title in the top 1. T o select files to delete, press the ‘Select’ title in the top right right corner. corner. 2. Tap on each file you wish to download. 2. Tap on each file you wish to delete. 3. O nce you have chosen your files, press the download icon in 3. O nce you have chosen your files, press the trash icon in the the bottom right corner to download the files to the app home bottom left corner to delete the files from the camera’s micro screen (Figure 1), the files can now be viewed offline (note that SD card. quality will be reduced). A pop-up will appear to advise you of the download progress.
-
Page 15: Connecting To Hdtv/Pc
Connecting your camera Connecting the camera to a PC with the USB cable 1. Connect one end of the supplied USB cable to the camera’s Connecting the camera to an HDTV micro USB input (6), and the other end to the PC’s USB port 1. -
Page 16: Waterproof Case
Using the waterproof case Open the waterproof case by releasing the clip on the top of The Escape 4KW Action Camera includes a case that is the case. To do so, pull the front of the clip backwards and waterproof up to 30 metres. When using the camera in a wet remove the camera. -
Page 17: Mount Accessories
Mount Assembly (B) uses an adhesive mount to hold the Mount accessories • camera and the provided straps to fix it to a helmet vented: In order to use the camera for various outdoor activities, we have provided three different mounts. Mount (A) is used to fix the camera to the handlebars on a bike: • A dhesive Mounts (C) are used to mount the camera to flat/ • curved, smooth surfaces:... - Page 18 Fixing the camera to a bike 1. Unscrew both screws (i) and place both halves (ii) of the Bicycle Mount (A) around the desired position on the bike. 2. Replace the screws (i) and tighten them until the mount is firmly in place.
- Page 19 Fixing the camera to a vented helmet 1. Fix the camera to the Mount Clip (i). 2. T hread the supplied straps through the slots in a flat or curved (ii) Adhesive Mount (don’t remove the adhesive film) (ii). 3. Attach the camera assembly to the strap mount assembly by sliding it in until it clicks into position. 4. A fter fixing the camera to the mount correctly, use the strap to fix it to the helmet. Adjust the length according to the helmet’s size, and then push the clips down into position to lock the...
- Page 20 Fixing the camera to a board/flat surface 1. Ensure the surface is clean and dry before applying the adhesive mount. 2. P eel off adhesive paper and stick the mount in the desired (“Click”) position. 3. Fix the camera to the Mount Clip (i). 4. Attach the camera assembly to the Adhesive Mount (C) by sliding it in until you hear it “Click” into position.
-
Page 21: Specification
Specification Display 2" Photo Modes Single shot / Timed / Burst / Time lapse Lens 170° ultra wide-angle lens Frequency 50 Hz / 60 Hz Language Options [English]/ [Chinese traditional] / [Italian] / [Spanish] / Input Ports Micro HDMI, micro USB [Portugese] / [German] / [Dutch] / [French] / [Czech] / [Polish] / [Turkish] / [Russian] / [Japanese] / [Korean] / Battery Capacity... -
Page 22: Care For Your Escape 4Kw Action Camera
Care for your Escape 4KW Action Camera Troubleshooting We hope you’ve now got all the information you need to get Please DON’T: Get the camera wet, unless sealed in the included waterproof started, but if you’re having problems with anything, please feel •...
Need help?
Do you have a question about the ESCAPE 4KW and is the answer not in the manual?
Questions and answers