Advertisement
Advertisement
Table of Contents

Related Manuals for Legacy AERIS


Summary of Contents for Legacy AERIS
- Page 1 Owners Manual For The AERIS Loudspeaker System...
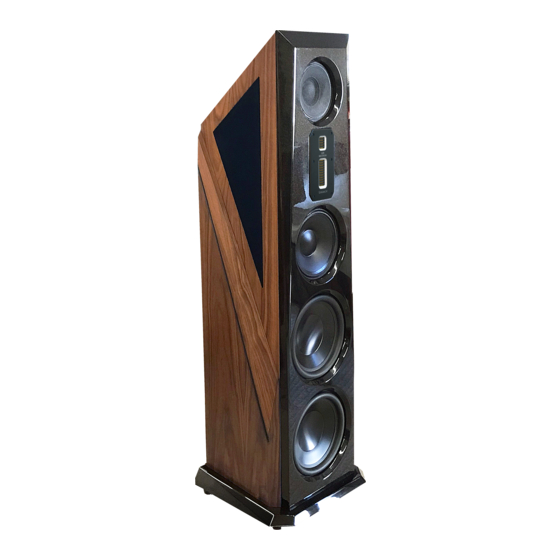
- Page 2 THANK YOU FOR CHOOSING LEGACY AUDIO Aeris is a full range loudspeaker system utilizing the present state of the art in driver, crossover, amplifier and acoustic radiation control technologies. The system is designed, assembled and tested in Springfield, Illinois by a dedicated group of engineers, craftsmen, and music lovers.
-
Page 3: Table Of Contents
The Cabinetry / Our Commitment Warranty Setup Speaker Installation 7- 8 Hooking Up Cables 9 -1 1 Amplification 1 2 -1 5 Speaker Connections 1 6 -2 4 Wavelaunch Processor Technology 2 5 -2 6 Continuing the Pursuit of Perfection Specifications Wavelet for Aeris... -
Page 4: Owners Record
Refer to this when calling your dealer regarding this product. Model: AERIS Serial No: _________________________ Date of purchase: ___________________ Thank you for selecting a Legacy Loudspeaker System. These hand- crafted instruments will provide you with many years of listening en- joyment. -
Page 5: The Cabinetry / Our Commitment
Our Commitment A great deal of forethought, love and satisfaction is instilled in each piece of Legacy workmanship. We take pride in getting to know many of our customers on a first name basis. Your purchase of this product is backed by the renowned “Legacy... -
Page 6: Warranty
Warranty Legacy Audio supports its customers and products with pride. We cheerfully warrant our loud- speaker products we manufacture from defects in materials and workmanship for a period of seven (7) years. Electronic components such as internal amplifiers and digital processors are covered for three (3)years. -
Page 7: Speaker Placement
The amount of recommended "toe-in" is a function of the lis- tening angle. As the overall listening angle increases from 40 degrees, the amount of toe-in should increase. Your Legacy speaker is optimized for a flat response in the far field. Best results are obtained vertically with the lis- tener's ear at tweeter level with the loudspeakers gently toed in toward the listener. -
Page 8: Hooking Up Cables
Hooking Up Cables The ideal conductor would have negligible resistance, inductance and capacitance. The table below shows how a few actual speaker cables measure up. Cable s/ft pF/ft µH/ft 12 ga. 0.0033 0.21 14 ga. 0.0048 0.13 16 ga. 0.0079 0.18 18 ga. - Page 9 Hooking Up Cables What about phase shift due to frequency dependent travel times down the speaker cable? Measurements show that 100 Hz waves will be delayed about 20 billionths of a second behind 10 kHz waves when traveling to the end of a 10 foot speaker cable. Since the cilia of the ear requires 25,000 times longer than this just to transmit phase information, phase shifting is obviously not the primary concern when considering speaker cables.
- Page 10 For this reason, extensive measures have been taken to ensure that each Legacy speaker system represents a smooth, non-reactive load to virtually any amplifier. Often there is much confusion regarding amplification and loudness levels. It should be under- stood that the role of the amplifier goes beyond that of driving loudspeakers to a given sound pressure level.
- Page 11 Some audiophiles feel that 200 watts per channel is the bare minimum to avoid audible clipping distortion when reproducing music at “live” playback levels. Your Legacy speakers are designed to take advan- tage of “high-powered” amplifiers, so don’t be afraid to put them through their paces.
- Page 12 Amplification When an amplifier is unable to fulfill your loudspeakers demands, a damaging harmonic spike may be leaked to the high frequency drivers. Another important point regarding loudness is that the dB scale is a logarithmic one. This means that a 150 Watt amplifier will potentially sound only twice as loud as a 15 Watt amplifier.
-
Page 13: Speaker Connections
Power up the processor next via the rear panel switch, and finally rock the I/O switch on the rear panel of the Aeris to the “I” position to turn on the internal amplifiers. Note that these amplifiers are green compliant, idling at a few watts. - Page 14 Processor Input 2 and Input 4* Processor Output 1 Left Aeris rear panel Bass Input (XLR) Processor Output 2 Left channel input to amplifier driving Aeris upper range Processor Output 5 Right Aeris rear panel Bass Input (XLR) Processor Output 6...
- Page 15 Processor Input 2 and Input 4* Processor Output 1 Left Aeris rear panel Bass Input (XLR) Left channel amp in on integrated amp driving Aeris upper range Processor Output 2 Processor Output 5 Right Aeris rear panel Bass Input (XLR)
- Page 16 Speaker Connections Two 1m Y-cables with RCA Male to XLR Male Two 1m XLR cables with XLR female to RCA Male Two extended length balanced XLR cables to bass section...
-
Page 17: Wavelaunch Processor 1 6 -2
Wave Launch Processor The high definition Digital Wavelaunch Processor hosts a LEGACY custom algorithm which automatically loads when the proc- essor is powered on. Factory settings are ‘plug and play’, and do not require a computer to utilize. Connections between the preamp, power amplifier, and speakers should be as shown on previous page. - Page 18 Wave Launch Processor Downloading and Installing the XConsole software Downloading From Included CD Your Wave Launch Processor will come with a CD or USB drive containing the XConsole software. Insert the CD and find the install file. Move/Save the install file to your computer.
- Page 19 Wave Launch Processor The XP processor will allow you to make adjustments to your system from a laptop computer from your listener position. Connecting Your Computer with the XP-4080 Processor - Connecting will require a long USB Device cable. These can be found at most electronic or big box stores. It is the same cable that a USB printer would use.
- Page 20 Wave Launch Processor - Go back to the XConsole software. At the top of the screen click “Setup” then “Port Connections” This bring up a new dialog box. Select the COM port number you obtained from the device manger and click “OK.” The software will warn you that you must restart the software for your changes to take effect.
- Page 21 Wave Launch Processor Making Adjustments with Wavelaunch Processor After installing the included software, connect the processor to the computer via a USB cable. Launch the XConsole software. When asked if you want to connect to the device, click yes. In the Device List, click on the device that is connected. This will launch the program that is currently on the processor.
- Page 22 Wave Launch Processor In the Device List, click on the device that is connected. This will launch the program that is currently on the processor. Adjustments to the processor can be made to “Input 1: Left” and “Input 2: Right”. Clicking on “In 1: Left”...
- Page 23 Wave Launch Processor Making a boost with the parametric EQ In this example, we have selected Parametric EQ 2 (PEQ2) by clicking in its box, which will turn red to indicate your selection. Once highlighted, locate the blue boxes with up and down arrows, at the bottom of the interface. These arrows are used to in- crease or decrease the gain, frequency and Q of the selected parametric EQ.
- Page 24 Wave Launch Processor Making a cut with the graphic EQ In this example, we have selected Graphic EQ 8 by clicking in its box which will turn red to indicate your selection. Once high- lighted, locate the blue boxes with up and down arrows, at the bottom of the interface. These arrows are used to increase or de- crease the gain of the selected graphic EQ.
- Page 25 Wave Launch Processor Adjusting using the EQ plot Adjustments made to both the parametric and graphic EQ are reflected in the graph occupying the upper portion of the screen. You can select them by clicking on their number, and dragging up to boost, and down to cut. Dragging to the left decreases the frequency, while dragging to the right increases the frequency.
-
Page 26: Continuing The Pursuit Of Perfection 2 5 -2
Continuing the Pursuit of Perfection (Legacy Air Motion Ribbons) LEGACY Audio has been benefiting from low mass ribbon and leaf drivers since 1984. I have a col- lection of ribbon tweeters from the world over and always loved the way good ribbons reproduced the swishing sound of brushes on a snare- and the simple honesty in the reproduction of strings without imparting an edgy ringing effect found in most tweeters. - Page 27 (Legacy Air Motion Ribbons) The recent Aeris loudspeaker development gave me the opportunity to tool a new AMT folded ribbon tweeter to integrate with the smoothest high efficiency 8” midrange built to date. I have yet to find a driver to challenge it. This silky 8” mid has a range of 7 octaves with nary a wrinkle in the response, yet a sensitivity of 98 dB.
-
Page 28: Specifications
Specifications System Type: 6 drivers, 4.5 way Tweeter: Dual Air Motion Tweeter System— 4” AMT Tweeter, 1” AMT Super Tweeter Midrange: 8" Titanium encrusted, Accordion Edge Midwoofer: 10” Accordion Edge Woofer: 2 x 12" spun aluminum diaphragm, rubber surround, total enclosed neo motor, long throw suspension, with cast frame 1 8 Hz –... - Page 29 Wavelet Upgrade for Aeris Wavelet is a control preamp, a premium DAC, a digital crossover with time alignment for each driver section and an acoustic correction system that will literally ‘learn’ your room. True digital flexibility SPDIF (opticalTosLink, coaxial): up to 96kHz/24bit USB: All file formats up to 96kHz/24bit are sent directly from the PC to the Wavelet without any conversion.
- Page 30 In the J-River software this configuration is located in the Player -> DSP Studio - Output Format section. Setup all sample rates up to and including 96kHz to “No Change”. Then set input 176,400 to output 88,000, 192,000 to 96,000 and greater than 192,000 to 96,000. DSD is converted automatically in the software to PCM.
- Page 31 Inside the Wavelet processor carton packaging you’ll find a hard-case containing a measurement microphone, a 25 ft. XLR cable and a mic calibration plot. At the opposite end of the carton you will find a power supply with a five pin locking connector and its 115 V AC cable, a compact remote volume control, a Wi-Pi network connector and a SanDisk USB memory stick.
- Page 32 Wavelet Preamplifier/DAC/Crossover/Room Correction Processor Inputs Analog Two pairs of Stereo balanced inputs on XLR connectors. Input sensitivity without attenuation 0 dBFS = 1 dBV , input impedance 20 kOhm. Analog attenuation available in three steps of -3 dB, -6 dB and -12 dB for an input sensitivity of respectively 0 dBFS = 4 dBV, 7 dBV or 12dBV. ...
- Page 33 Outputs Analog 8 balanced output channles on 8 XLR connectors. 0 dBFS = 8 dBV , 33 Ohm output impedance. An analog output level increase of 6 dB is available through internal jumpers offering 0 dBFS = 14 dBV ...
- Page 34 Wavelet Speaker Connections for Aeris Let's first connect the outputs of your Wavelet to your Aeris speaker and external amplifier. These outputs are all that are necessary to setup your Wavelet with Aeris. The input connections from your Player, Transport, Preamp etc. can be connected after setting up your Wavelet.
- Page 35 Optimizing Analog Outputs When using the analog inputs it is useful to optimize the input levels according to how they are being used. This will maximize the signal to noise ratio and provide optimal gain while preventing distortion from input overload.
- Page 36 with the -12dB setting initially as shown below. Further attenuation of -3, -6dB is available if needed. While you can also further reduce the volume setting from your preamp, the goal is totally avoid clipping at all levels. Again try to establish a Wavelet level setting of about 85dB for typical listening. With a little care you will have minimized your noise floor and prevented input saturation.
- Page 37 Ready to take control of your Aeris with Wavelet?
- Page 38 Introduction Wavelet features can be remote controlled via iPad, iphone, or other mobile device. In order to perform room correction it is essential that you connect the unit to the internet. To maximize enjoyment, we recommend dedicating one of these handheld devices to your music system, thus keeping your phone calls, and messages from interfering directly with your listening and control experience.
- Page 39 Wavelet WiFi Internet Setup 1. To connect your Wavelet to the internet, please open a browser on your PC or Mac and visit http://bohmeraudio.com/setup.html a. Enter your SSID- this is your Wifi Network name. b. Enter your Wifi Network Password and click “Download wifi-conf.txt file”...
- Page 40 e. Copy the “wifi-conf.txt file to the root directory of the SanDis k USB memory stick. Depending on your browser settings, you might find the file downloaded to your Desktop or Downloads folder. After locating it, right click the file and choose copy.
- Page 41 d. You will now see the Volume Control Page- please bookmark this page for future use. The bookmark button on Apple devices is the square and arrow at the bottom of the screen that looks like this: Firefox users can click the Star to bookmark their remote control. TIP You can always return to your remote by visiting and entering your serial number http://bohmeraudio.com/setup.html You do NOT need to re-enter your Internet information, only the serial number...
- Page 42 TIP On any page of the Wavelet, click the “update” button at the top to refresh your handheld device and display the settings that are inside Wavelet. a. First we will verify that all connections are correct by clicking the “Settings” button at the top. Then choose “Setup” and Click Proceed -Settings b.
- Page 43 -Settings -Setup -Proceed c. Select “Ping channels.” You can now follow the on screen prompt and click the corresponding channels to confirm that sound is coming from the appropriate drivers. Please refer to the connection section of this manual for appropriate channel connections. -Settings -Setup -Proceed...
- Page 44 d. Wavelet is capable of setting the channel levels for you- this is useful for balancing your amplifier(s) with the internal amplifier(s). To do so, click the back button and choose “Channel levels & driver polarity tests”. e. Place the microphone that shipped with Wavelet at tweeter center height, 48” away from the left speaker, perpendicular to the speaker baffle.
- Page 45 -Settings -Setup -Proceed -Channel levels & driver polarity tests h. Follow the on screen prompts. With the volume set to 85, select “Auto level & polarity test left channel.” i. If you receive a message that the levels are too low, first check that both ends of the mic cable are firmly docked and repeat the test. Increase volume if necessary.
- Page 46 -Settings -Room correction Click settings at the top of the screen, and choose “Room correction”. a. With the microphone at tweeter center height, 48” away from the left speaker, perpendicular to the speaker baffle, choose “Measure left channel”. Please wait for the process which lasts about 10 seconds. If there is an unexpected noise, please repeat the process by clicking “Measure left channel”...
- Page 47 "Settings" at the top of the screen, and choosing "Room Correction" -Settings -Room correction Adjusting your Wavelet After room correction, you can further tailor the sound of your Legacy speakers in your room via the “Contour” page. Access this page by clicking “Settings” and choosing “Contour”. -Settings -Contour...
- Page 48 The sliders can be adjusted in the same way as the volume control- by placing a finger on the center slider. Moving to the right creates a boost (more volume) and moving to the left creates a cut (less volume) in the given frequency band. A handy “Reset Sliders” button is available at the bottom to reset the Contour Sliders.
- Page 49 You are welcome to further adjust this, if you desire. TIP This is useful if, for example, you are using stereo Legacy Audio subwoofers with Aeris on channels 3 and 7- you can use this slider to control...
- Page 50 Input Selections You can wirelessly switch between inputs on your Wavelet by selecting “Input” at the top and choosing your desired source. USB allows Wavelet to connect to a computer and play back high resolution audio. USB, SPDIF and Toslink allow for digital connectivity and reduces the need for an extra AD conversion- a valuable performance advantage.
- Page 51 Mode & DAC Adjustments Wavelet allows you to listen in Stereo, Mono and Inverted modes. You can access these settings by choosing “Settings” at the top and selecting “Mode” -Settings -Settings -Mode -DAC The Wavelet features an apodizing circuit that corrects for the pre-ringing native to CODECs. Analog lovers can take advantage of balanced XLR or unbalanced RCA inputs without concern of digital artifacts.
- Page 52 Presets -Settings -Presets Wavelet features a number of presets to allow you further control of your listening experience. Access these presets by choosing “Setting” at the top of the screen and clicking “Presets”.
- Page 53 Updating the Wavelet System Wavelet is, by design, easily updated via the app. This allows the device to be updated with new added features as they are requested and developed. To check for updates, choose “Settings” at the top, select “System update” and click “Check for update” -Settings -System update If an update is available, you can click “Download and install update”.
- Page 54 Maintaining directivity in the speaker radiation pattern is essential to preserve this content. Legacy V, Whisper, and Aeris each offer unique directivity control to provide greater clarity, better localization and resonance reduction.
- Page 55 Why is Room Correction Necessary? To the left is a 2 dimensional simulation of a 1ms wave pulse from a pair of conventional speakers into a room similar to the above. Because the dispersion exceeds 60 degrees, undesirable energy from each speaker is reflected back into the room within a few thousandths of a second.
- Page 56 After less than 1/100 of a second, the room has developed a complex wave pattern with energy varying with room position. The listener is now awash in a series of wave-fronts which will soon reflect off the wall behind. A mere 5 milliseconds later, the initial direct wave-front has now reflected off the rear wall and has made its way back to the listener.
- Page 57 To the right is the irregular frequency response of a speaker on axis in the presence of room boundaries. The smoothed curve is the result of applying conventional room correction methods. Below left is the impact of the correction on the Fequency-Time domain.
- Page 58 Legacy Audio Distributor in Low Voltage Directive 2006/95/EC your country. A listing of Legacy EMC Directive 2004/108/EC Audio Distributors can be found on the Legacy Audio website www.legacyaudio.com or by contacting Legacy Audio at: 3023 E.
- Page 59 Notes:...
- Page 60 ©2016 Legacy Audio 3023 E Sangamon Ave. Springfield, IL 62702 Phone: 800-283-4644 Fax: 217-544-1483...
Need help?
Do you have a question about the AERIS and is the answer not in the manual?
Questions and answers