Table of Contents
Advertisement
Advertisement
Chapters
Table of Contents

Related Manuals for Craftsman C950-52060-0


Summary of Contents for Craftsman C950-52060-0
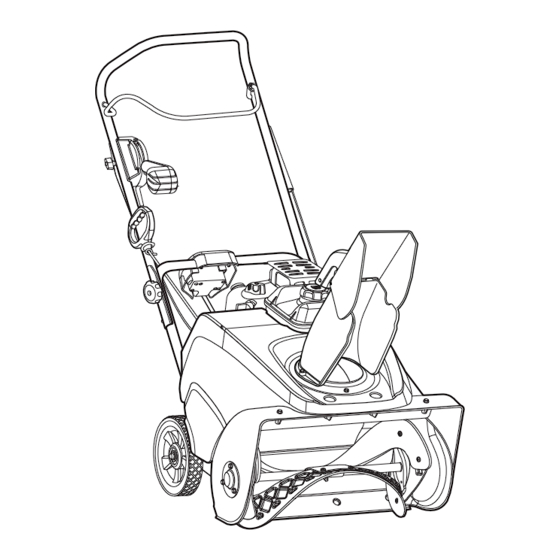
- Page 1 SINGLE STAGE SNOWTHROWER Model C950-52060-0 8.0 T.P. 22 inch CAUTION: You must read and understand this owner’s manual before operating unit. Serial No. ______________ 1750871 - A Sears Canada Inc., Toronto, Ontario M5B 2C3 Rev.: A Visit our Craftsman website: www.sears.ca/craftsman...
-
Page 2: Snow Thrower
Thank you for purchasing this quality-built Craftsman snow thrower. We’re pleased that you’ve placed your confi dence in the Craftsman brand. When operated and maintained according to the instructions in this manual, your Craftsman product will provide many years of dependable service. -
Page 3: Table Of Contents
Table of Contents Operator Safety ................Hazard Symbols and Meanings ..........Control Symbols on Equipment ..........Safety Alert Symbols and Signal Words ........Safety Decals ................Features and Controls ..............Snowthrower Controls and Operation Decals ......Engine Controls ................. Operation ..................Check and Add Oil .............. -
Page 4: Operator Safety
Operator Safety Hazard Symbols and Meanings Control Symbols on Equipment Read the Operator’s Manual for On / Off Key Switch operating and safety instructions Shutoff engine and remove key before performing maintenance and Turn Choke Closed to Start repair work Thrown Objects Hazard Turn Choke Open to Run Fire Hazard... -
Page 5: Safety Alert Symbols And Signal Words
Operator Safety Safety Alert Symbol and Signal Words The safety alert symbol and signal word (DANGER, WARNING WARNING, CAUTION, or NOTICE) is used to indicate the likelihood and potential severity of personal injury and/or damage Read, understand, and follow all the to the product. - Page 6 Operator Safety DANGER DANGER Keep hands, feet, and clothing away from Tragic accidents can occur if the operator is rotating parts. Rotating parts can contact not alert to the presence of children. Children or entangle hands, feet, hair, clothing, or are often attracted to the unit and the operating accessories.
- Page 7 Operator Safety WARNING WARNING Fuel and its vapors are extremely flammable Safe operation of the snowthrower requires the and explosive. Always handle fuel with proper care and maintenance of the engine. extreme care. Failure to observe these safety instructions can cause a fire or explosion which will result in severe burns or death.
- Page 8 Operator Safety This snowthrower is only as safe as the WARNING operator. If it is misused, or not properly maintained, it can be dangerous. Remember This snowthrower must be properly maintained you are responsible for your safety and those to ensure safe operation and performance. around you.
-
Page 9: Safety Decals
Operator Safety Figure 1 Safety Decals Before operating your snowthrower, read the safety decals installed on your snowthrower. The cautions and warnings are for your safety. To avoid a personal injury or damage to your snowthrower, understand and follow all the safety decals. -
Page 10: Features And Controls
Features and Controls Snowthrower Controls and Figure 2 Operation Decals (Figure 2) 1739977 A — Auger Control B — Remote Chute Control C — Defl ector Control Lever D — Electric Start Button E — Power Cord Receptacle F — Starting Instructions / Steps 1-3 G —... -
Page 11: Operation
Operation WARNING The operation of any snowthrower can result in foreign objects being thrown into the eyes, which can result in severe eye damage. Always wear safety glasses or eye shields before beginning snowthrower operation. Check / Add Oil NOTICE: The engine was shipped from the factory without oil. -
Page 12: Fuel Recommendations
Operation Fuel Recommendations Add Fuel Fuel must meet these requirements: WARNING • Clean, fresh, unleaded gasoline. Fuel and its vapors are extremely flammable • A minimum of 87 octane/87 AKI (91 RON). and explosive. High altitude use, see below. Fire or explosion can cause severe burns or •... -
Page 13: Start The Engine
Operation Start the Engine WARNING The electric starter is equipped with a three- wire power cord and plug designed to operate on AC household current. The power cord must be properly grounded at all times to avoid the possibility of electric shock. If your house does not have a three-wire grounded system, do not use this electric starter. -
Page 14: Stop The Engine
Operation Stop the Engine WARNING If the extension cord is damaged, it must be WARNING replaced by the manufacturer (or its service agent) or a similarly qualified person to avoid a Gasoline and vapors are extremely flammable hazard. and explosive. Fire or explosion can cause severe burns or death. -
Page 15: Operate The Snowthrower
Operation Operate the Snowthrower WARNING Before operating, make sure the area in front of the snowthrower is clear of bystanders or obstacles. DO NOT discharge snow toward a building as hidden objects could be thrown with sufficient force to cause damage. -
Page 16: Stop The Snowthrower
Operation Stop the Snowthrower WARNING Read Operator’s Manual before operating machine. This machine can be dangerous if used carelessly. • Never operate the snowthrower without all guards, covers, and shields in place. • Never direct discharge towards windows or allow bystanders near machine while engine is running. -
Page 17: Discharge Chute And Defl Ector
Operation Discharge Chute and Defl ector Quick Defl ector Adjustment (if equipped) 1. Squeeze the button (A, Figure 11) in the deflector Remote Chute Rotation handle and adjust the deflector B) up or down to control 1. Squeeze and hold the button (A, Figure 10, inset) on the snow discharge height and distance. -
Page 18: Maintenance
Maintenance Change the Oil Snowthrower Remove Oil After Each Use Used oil is a hazardous waste product and must be Remove accumulated snow and slush from the unit to prevent disposed of properly. Do not discard with household waste. freezing of controls Check with your local authorities, service center, or dealer for safe disposal / recycling facilities. -
Page 19: Access The Spark Plug
Maintenance Access the Spark Plug Add Oil 1. Place engine level. To access the spark plug, the snow hood must be removed as follows: 2. Clean the oil fill area of any debris. 1. Remove the ON/OFF key (A, Figure 15) or pull out the 3. -
Page 20: Auger Cable Adjustment
Maintenance Auger Cable Adjustment WARNING Do not over-tighten, as this may lift the lever and cause the auger drive to be engaged without depressing the auger drive control. WARNING The auger must stop within 5 seconds after releasing the control. If it does not, see an authorized dealer. If the auger no longer turns when the control is engaged, or if the belt slips under load, the auger cable or belt may have stretched. -
Page 21: Storage
Storage Storage Remove from Storage 1. Raise the upper handle to the operating position and tighten the knobs that secure the upper handle. WARNING 2. Fill the fuel tank with fresh fuel. Fuel and its vapors are extremely flammable 3. Check the spark plug. Make sure the gap is correct. If and explosive. -
Page 22: Troubleshooting
Troubleshooting PROBLEM LOOK FOR REMEDY Auger does not stop Auger control cable out of Adjust auger control cable. Refer to “Cable Adjustment” in the within 5 seconds adjustment Maintenance section of this manual. If the auger does not stop after control lever is within 5 seconds, see authorized dealer for repair. -
Page 23: Warranty
Craftsman Limited Warranty General: Craftsman products are warranted to be free from defects in materials or workmanship for a specifi c time peri- od as set-out below (the “Warranty Period”). Warranties extend to the original purchaser of a Craftsman product only. -
Page 24: Maintenance Agreement
Warranty 3. 1 year: Craftsman power cutters, stump grinders, pole pruners, gas chain saws, electric chain saws, trimmer attach- ments, baggers and pole saws for noncommercial, nonprofessional, non-institutional, or non-income-producing use. 4. 90 days: All defective batteries, which will be replaced during this 90-day Warranty Period. -
Page 26: Specifications
Specifications Model No. 1695932 ENGINE: Brand Briggs & Stratton Model Series Snow Series ™ Gross Torque* 8.00 T.P. @ 3060 rpm Type 4-Cycle - OHV Displacement 12.48 cu in. (205 cc) Starting System Recoil, 110V Electric with Cord Alternator None Oil Capacity 18 - 20 oz (.54 - .59L) Engine Oil... - Page 27 Notes...
-
Page 29: Repair Parts
Repair Parts PTS - 1... -
Page 30: Frame Group
Frame Group CRAFTSMAN 22" C950-52060-0 NOTE: Unless noted otherwise, use the standard hardware torque specification chart. PTS - 2... - Page 31 Frame Group CRAFTSMAN 22" C950-52060-0 REF NO PART NO. QTY. DESCRIPTION 0010 1739225AYP FRAME ASSEMBLY 0020 1739100AYP HOUSING, Drive 0030 1750443YP BOLT, Serrated, 5/16-24 x 3/4 0040 2827187SM SCREW, Hex Washer Head, Taptite, 3/8-16 x 1 0050 1739555YP CHIMNEY 0060...
-
Page 32: Engine Group
Engine Group CRAFTSMAN 22" C950-52060-0 NOTE: Unless noted otherwise, use the standard hardware torque specification chart. PTS - 4... - Page 33 Engine Group CRAFTSMAN 22" C950-52060-0 REF NO PART NO. QTY. DESCRIPTION 0010 12A103-0148-E8 * ENGINE, Briggs & Stratton, 8TP (Engine Model: 12A103-0148-E8) 0010-10 797003 GUARD, Muffler 0010-20 699854 SCREW, Muffler Guard, Hex Washer Head 0010-30 ----- * STARTER, 110V 0020...
-
Page 34: Auger Drive Group
Auger Drive Group CRAFTSMAN 22" C950-52060-0 NOTE: Unless noted otherwise, use the standard hardware torque specification chart. PTS - 6... - Page 35 Auger Drive Group CRAFTSMAN 22" C950-52060-0 REF NO PART NO. QTY. DESCRIPTION 0010 1739730YP PULLEY, Driven 0020 1739179YP PULLEY, Driver 0030 1739526YP ARM, Idler, Drive 0040 1502120MA IDLER, Plastic Ball Bearing 0050 1739338YP BELT, Drive 0060 01X111MA CAPSCREW, Hex Head, 3/8-16 x 1-1/2...
- Page 36 Handles & Controls Group - Remote CRAFTSMAN 22" C950-52060-0 NOTE: Unless noted otherwise, use the standard hardware torque specification chart. PTS - 8...
- Page 37 Handles & Controls Group - Remote CRAFTSMAN 22" C950-52060-0 REF NO PART NO. QTY. DESCRIPTION 0010 1930601SM SCREW, Hex Washer Head, Taptite, 5/16-18 x 5/8 0020 1739362AYP HANDLEBAR, Lower 0030 1739363AYP HANDLEBAR, Upper 0040 1739361BNYP BAIL, Engine Stop 0050 7091189YP...
- Page 38 Wheel & Body Covering Group CRAFTSMAN 22" C950-52060-0 NOTE: Unless noted otherwise, use the standard hardware torque specification chart. PTS - 10...
- Page 39 Wheel & Body Covering Group CRAFTSMAN 22" C950-52060-0 REF NO PART NO. QTY. DESCRIPTION 0010 1739649YP COVER, Top, Red 0020 1739599YP COVER, Drive Case, Black 0030 1750777YP CAPSCREW, Hex Washer Head, 1/4 x 20 x 2 0040 7091603SM NUT, Nylock, 1/4...
-
Page 40: Decals Group
Decals Group CRAFTSMAN 22" C950-52060-0 NOTE: Unless noted otherwise, use the standard hardware torque specification chart. PTS - 12... - Page 41 Decals Group CRAFTSMAN 22" C950-52060-0 REF NO PART NO. QTY. DESCRIPTION 0010 1739966YP DECAL, Chute, FR-EN 0020 1737865YP DECAL, Danger, Chute, FR-ENG 0030 1739970YP DECAL, Chute, FR-EN 0040 1750734YP DECAL, 4, START, FR-EN 0050 1750736YP DECAL, 5, START, FR-EN 0060...
- Page 42 Auger Group CRAFTSMAN 22" C950-52060-0 NOTE: Unless noted otherwise, use the standard hardware torque specification chart. PTS - 14...
- Page 43 Auger Group CRAFTSMAN 22" C950-52060-0 REF NO PART NO. QTY. DESCRIPTION 0010 1751388YP AUGER ASSEMBLY, Complete (Incl. Ref. Nos. 0010-10, 0010-20, 0010-30, 0010-40, 0010-50 & 0010-60) 0010-10 ----- * AUGER SHAFT ASSEMBLY 0010-20 ----- ** FLIGHT, Auger 0010-30 ----- * PLATE, Auger, Center...
- Page 44 Chute Rotation Group - Remote CRAFTSMAN 22" C950-52060-0 NOTE: Unless noted otherwise, use the standard hardware torque specification chart. PTS - 16...
- Page 45 Chute Rotation Group - Remote CRAFTSMAN 22" C950-52060-0 REF NO PART NO. QTY. DESCRIPTION 0010 1739123YP GEAR, Chute Rotation 0020 1739364YP PLATE, Chute Mounting 0030 1739365YP RETAINER, Chute Gear 0040 1750444YP SCREW, Hi-Low, 1/4-15 x 3/4 0050 1739754YP CHUTE ROTATION ASSEMBLY, Remote...
- Page 46 Chute Group - Remote CRAFTSMAN 22" C950-52060-0 NOTE: Unless noted otherwise, use the standard hardware torque specification chart. PTS - 18...
- Page 47 Chute Group - Remote CRAFTSMAN 22" C950-52060-0 REF NO PART NO. QTY. DESCRIPTION 0010 1751170YP PARTS BAG 0010-20 1751399YP SCREW, Hex Washer Head, Self Tap, 1/4-15 x 1-1/4 0020 1739522YP CHUTE ASSEMBLY 0050 6219MA CORD, EL 10FT 110V 3WIRE Footnotes...
- Page 48 12A103- -0148- -E8 1058 OPERATOR’S MANUAL 1329 REPLACEMENT ENGINE 48 SHORT BLOCK 1330 REPAIR MANUAL 1026 1427 307A 307B MSC000295- 2 Assemblies include all parts shown in frames. 07/16/2010...
- Page 49 12A103- -0148- -E8 REF. PART REF. PART REF. PART DESCRIPTION DESCRIPTION DESCRIPTION 699510 Cylinder Assembly 690124 Rod--Connecting 699477 Screw 399269 Kit--Bushing/Seal 791584 Dipper-- (Magneto Armature) (Magneto Side) Connecting Rod 693463 Plug 299819s Seal--Oil 691664 Screw (Crankcase Cover) (Magneto Side) (Connecting Rod) 693618 Dipstick 699485 Gasket--Crankcase (1/4--28x1.09)
- Page 50 12A103- -0148- -E8 1026 1029 1022 1034 1023 914A 1022 MSC000295- 4 Assemblies include all parts shown in frames. 07/16/2010...
- Page 51 12A103- -0148- -E8 REF. PART REF. PART REF. PART DESCRIPTION DESCRIPTION DESCRIPTION 797439 Head--Cylinder 795208 Spacer--Carburetor 699480 Screw 698210 Gasket--Cylinder Head 797442 Plate--Cylinder Head (Rocker Cover) 699482 Screw 797440 Ball--Rocker Arm (M6x15.8mm) (Cylinder Head) 691300 Cap--Valve 914A 797444 Screw 499642 Valve--Exhaust 691043 Plug--Spark (Rocker Cover) 795443 Valve--Intake...
- Page 52 12A103- -0148- -E8 MSC000295- 6 Assemblies include all parts shown in frames. 07/16/2010...
- Page 53 12A103- -0148- -E8 REF. PART REF. PART REF. PART DESCRIPTION DESCRIPTION DESCRIPTION 692555 Gasket--Intake 798917 Carburetor 699484 Screw 691636 Screw 797633 Plug--Welch (Carburetor) (Throttle Valve) 797630 Valve--Throttle 791948 Knob--Choke Shaft 797628 Shaft--Throttle 797136 Float--Carburetor 793006 Hose--Primer 797156 Kit--Idle Speed 798932 Gasket--Float Bowl 791850 Clamp--Hose 797907 Line--Fuel (Green)
- Page 54 12A103- -0148- -E8 1230 1054 1347 MSC000295- 8 Assemblies include all parts shown in frames. 07/16/2010...
- Page 55 12A103- -0148- -E8 REF. PART REF. PART REF. PART DESCRIPTION DESCRIPTION DESCRIPTION 693389 Rope--Starter 794367 Lever-- 690800 Nut 699334 Grip--Starter Rope Governor Control (Rewind Starter) 699228 Screw 799038 Motor--Starter 795901 Cord--Starter (Rewind Starter) 796964 Armature--Magneto 797430 Starter--Rewind (M5x6.35mm) 699477 Screw 692653 Spring/Link-- 690837 Screw (Magneto Armature)
- Page 56 12A103- -0148- -E8 731A 1196 1196 1318 604A 1070 1005 1251 1251A 1036 EMISSIONS LABEL MSC000295- 10 Assemblies include all parts shown in frames. 07/16/2010...
- Page 57 12A103- -0148- -E8 REF. PART REF. PART REF. PART DESCRIPTION DESCRIPTION DESCRIPTION 695745 Tube--Breather 792723 Nut 793382 Primer--Carburetor 798882 Flywheel (Flywheel) 798177 Key Set 699661 Guard--Flywheel 797431 Cup--Flywheel 1005 794273 Fan--Flywheel 699228 Screw 695744 Bracket--Mounting 1036 Label--Emissions (Rewind Starter) 793006 Hose--Primer (Available from a (M5x6.35mm) 699854 Screw...
- Page 58 12A103- -0148- -E8 358 ENGINE GASKET SET 1022 1095 VALVE GASKET SET 1022 MSC000295- 12 Assemblies include all parts shown in frames. 07/16/2010...
- Page 59 12A103- -0148- -E8 REF. PART REF. PART REF. PART DESCRIPTION DESCRIPTION DESCRIPTION 299819s Seal--Oil 692555 Gasket--Intake 1022 691890 Gasket--Rocker Cover (Magneto Side) 791797 Gasket Set--Engine 1095 791798 Gasket Set--Valve 698210 Gasket--Cylinder Head 795440 Seal--Valve 699485 Gasket--Crankcase 691893 Gasket--Exhaust 692550 Seal--Oil 694088 Gasket-- (PTO Side) Cylinder Head Plate...
- Page 60 Hardware Identification & Torque Specifications Common Hardware Types Torque Specification Chart Hex Head Capscrew FOR STANDARD MACHINE HARDWARE (Tolerance ± 20%) Washer Hardware Lockwasher Marks Grade Carriage Bolt SAE Grade 2 SAE Grade 5 SAE Grade 8 Hex Nut Size Of in/lbs in/lbs in/lbs...
- Page 61 Manual d’utilsation CHASSE-NIEGE À DEUX PHASES Modéle C950-52060-0 8.0 T.P. 22 pouces Attention: Lire et bien comprendre ce manuel avant d’utilser le chasse-neige Numéro de série ______________ Sears Canada Inc., Toronto, Ontario M5B 2C3 Visit our Craftsman website: www.sears.ca/craftsman...
- Page 62 Merci d’avoir acheté cette souffl euse à neige Craftsman. Nous sommes heureux que vous ayez placé votre confi ance dans la marque Craftsman. Si vous utilisez et entretenez ce produit Craftsman conformément aux instructions du manuel, vous pourrez l’utiliser pendant de nombreuses années.
- Page 63 Table des matières Sécurité de l’utilisateur ..............Symboles de risque et leur signification ..........4 Symboles de contrôle sur l’équipement ...........4 Symboles d’alerte de sécurité et mots-indicateurs ......5 5Autocollants de sécurité ..............9 Fonctions et commandes ............. Étiquettes autocollantes pour l’utilisation et les commande de la souffleuse à...
-
Page 64: Sécurité De L'utilisateur
Sécurité de l’utilisateur Symboles de risque et leur signifi cation Symboles de contrôle sur l’équipement Lisez le manuel de l’utilisateur pour les instructions d’utilisation et de Clé de contact MARCHE/ARRÊT sécurité Arrêtez le moteur et retirez la clé avant de procéder à l’entretien ou à Fermez le starter pour démarrer des réparations Danger de projection d’objets... - Page 65 Sécurité de l’utilisateur Symboles de sécurité et mots indicateurs AVERTISSEMENT Le symbole d’alerte de sécurité et mot de signalisation Lisez, comprenez et suivez toutes les (DANGER, AVERTISSEMENT, MISE EN GARDE ou AVIS) sont instructions sur la souffleuse à neige dans utilisés pour indiquer la probabilité...
- Page 66 Sécurité de l’utilisateur DANGER DANGER Gardez les mains, les pieds et les vêtements Les objets peuvent être ramassés par la loin des pièces rotatives. Les pièces rotatives tarière et projetés du conduit. Ne rejetez peuvent contacter ou enchevêtrer les mains, jamais de la neige vers des spectateurs et ne les pieds, les cheveux, les vêtements ou permettez à...
- Page 67 Sécurité de l’utilisateur AVERTISSEMENT AVERTISSEMENT Le carburant et ses vapeurs sont extrêmement Le fonctionnement sans danger de la inflammables et explosifs. Veuillez bien prendre souffleuse à neige demande un soin et soin avec précaution du carburant. entretien vigilant. Le fait de ne pas observer ces instructions de sécurité...
- Page 68 Sécurité de l’utilisateur Cette souffleuse à neige est aussi sûre que AVERTISSEMENT son utilisateur puisse l’être. Si mal utilisé ou mal entretenu, ceci peut être dangereux. Cette souffleuse à neige doit être proprement Souvenez-vous que vous êtes responsable entretenue pour assurer un fonctionnement et pour votre sécurité...
- Page 69 Sécurité de l’utilisateur Figure 1 Étiquettes autocollantes de sécurité Avant de mettre en marche votre souffleuse à neige, lisez les étiquettes autocollantes de sécurité sur votre souffleuse à neige. Les précautions et les avertissements sont pour votre sécurité. Pour éviter des blessures personels ou du dommage à...
-
Page 70: Fonctions Et Commandes
Fonctions et commandes Étiquettes autocollantes pour l’utilisation et Figure 2 Figure 2 les commande de la souffl euse à neige 1739977 (Figure 2) A — Commande de tarière B — Commande de la goulotte à distance C — Levier de commande de déflecteur D —... -
Page 71: Fontionnement
Fontionnement AVERTISSEMENT L’utilisation de toute souffleuse à neige peut entraîner la projection d’objets étrangers dans les yeux, ce qui peut être cause de graves blessures oculaires. Portez toujours des lunettes de sécurité ou des écrans protecteurs avant de commencer le fonctionnement de la souffleuse à neige. Vérifi... -
Page 72: Ajouter Du Carburant
Fontionnement Recommandations de carburant Ajouter du carburant Le carburant doit répondre à ces exigences : AVERTISSEMENT • Essence sans plomb, propre et récemment achetée. Le carburant et ses vapeurs sont extrêmement • Au minimum 87 octanes/87 AKI (91 RON). inflammables et explosifs. Utilisation en haute altitude, voir ci-dessous. -
Page 73: Démarrer Le Moteur
Fontionnement Démarrer le moteur AVERTISSEMENT Le démarreur électrique est muni avec un cordon d’alimentation avec une fiche trifilaire conçu pour fonctionner à partir d’un CA de maison. Le cordon d’alimentation doit être mis à la terre en tout temps pour éviter la possibilité de choc électrique. -
Page 74: Arrêter Le Moteur
Fontionnement Arrêter le moteur AVERTISSEMENT Si le cordon de raccordement est endommagé, AVERTISSEMENT il doit être remplacé par le manufacturier ( ou son agent agréé) ou par une personne L’essence et les vapeurs sont extrèmement qualifiée pour éviter le danger. flammables et explosifs. -
Page 75: Utilisation De La Souffleuse À Neige
Fontionnement Utilisation de la souffl euse à neige AVERTISSEMENT Avant de faire fonctionner, assurez-vous que l’endroit devant la souffleuse à neige est dégagé d’obstacles ou de personnes. NE PAS rejeter de la neige en direction d’un bâtiment dans la mesure où des objets cachés pourraient être projetés avec suffisamment de force pour causer des dégâts. -
Page 76: Arrêter La Souffleuse À Neige
Fontionnement Arrêter la souffl euse à neige AVERTISSEMENT Cette machine peut être dangeureuse si utilisée d’une manière négligente. • N’utilisez jamais la souffleuse à neige sans que les protections, caches et éléments protecteurs soient en place. • Veuillez ne pas projeter la neige vers les fenêtres ou permettre les spectateurs près de la machine pendant son fonctionnement. -
Page 77: Débloquer Une Goulotte D'éjection Bouchée
Fontionnement Goulotte et défl ecteur d’éjection Réglage rapide du déflecteur (si équipé) 1. Serrez le bouton (A, Figure 11) de la poignée du Rotation à distance de la goulotte déflecteur et ajustez le déflecteur B) vers le haut ou vers 1. -
Page 78: Entretien
Entretien Vidanger l’huile Snowthrower Retirer l’huile Après chaque utilisation L’huile vidangée est un produit de résidus dangereux et Retirez de la machine la neige et la soupe accumulées pour doit être jetée de façon appropriée. Ne la jetez pas avec les empêcher les commandes de geler déchets ménagers. -
Page 79: Accéder À La Bougie D'allumage
Entretien Accéder à la bougie d’allumage Ajouter de l’huile Pour accéder à la bougie d’allumage, le capot à neige doit 1. Mettez le moteur bien à l’horizontale. être retiré comme suit : 2. Débarrassez de tout débris la zone de remplissage 1. -
Page 80: Réglage Du Câble De Tarière
Entretien Réglage du câble de tarière AVERTISSEMENT Ne serrez pas de trop, sinon le levier pourrait se soulever et forcer l’entraînement de tarière à s’embrayer sans que le levier de commande de tarière ne soit relâché. AVERTISSEMENT La tarière doit s’arrêter dans les 5 secondes après que la commande ait été... -
Page 81: Remisage
Remisage Remisage Souffleuse à neige 1. Nettoyez complètement la souffleuse à neige. 2. Lubrifiez tous les points de lubrifications (voir un AVERTISSEMENT revendeur agréé). Le carburant et ses vapeurs sont extrêmement 3. Assurez-vous que tous les écrous, les boulons et les inflammables et explosifs. -
Page 82: Dépannage
Dépannage PROBLÈME VÉRIFIEZ QUE SOLUTION La tarière s’arrête dans Câble de commande de tarière Réglez le câble de commande de tarière. Se reporter à « Réglage les 5 secondes suivant le déréglé du câble » dans la section Entretien de ce manuel. Si la tarière ne relâchement du levier de s’arrête pas dans les 5 secondes, consultez un revendeur agréé... -
Page 83: Garantie
(la « période de garantie »). En outre, cette garantie est off erte uniquement à l’acheteur initial du produit Craftsman. Les achats eff ectués par l’entremise d’un encan en ligne ou sur tout site Web autre que www.sears.ca sont exclus. - Page 84 Liste des périodes de garantie applicables : La liste ci-dessous indique la période de garantie applicable aux div- ers produits Craftsman qu’elle couvre; la période accordée tient compte du type de produit ou de composants et du type d’utilisation prévue ou eff ective de l’appareil ou du composant : 1.
-
Page 85: Spécifications
Spécifications Modèle nº 1690932 MOTEUR : Marque Briggs & Stratton Série de modèle Snow Series ™ Couple de serrage* 8,00 T.P. à 3 060 tr/min Type 4-cycle - OHV Cylindrée 205 cm³ (12,48 po³) Démarrage du système Lanceur électrique 110 V avec cordon Alternateur Aucun Capacité... - Page 86 Remarques...
- Page 88 manage manage home home...
Need help?
Do you have a question about the C950-52060-0 and is the answer not in the manual?
Questions and answers