Advertisement
Quick Links
Advertisement

Related Manuals for Cannondale Trigger 27.5/29


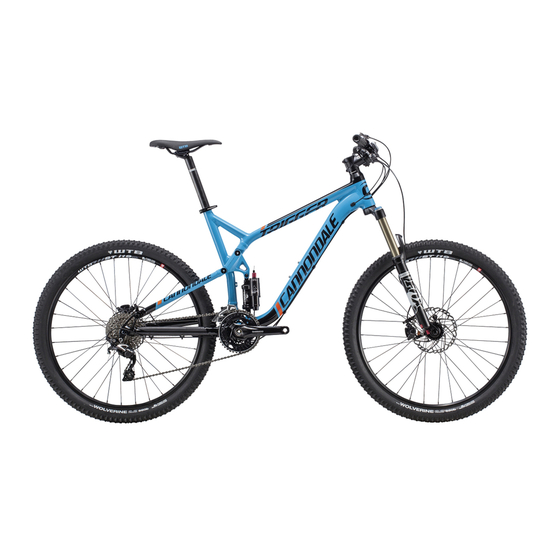
Summary of Contents for Cannondale Trigger 27.5/29
- Page 1 1 3 0 7 2 8...
- Page 2 If you need a manual or supplement, or have a MAIntenAnCe ..........20 question about your bike, please contact your Cannondale Dealer immediately, or call us at one of the telephone numbers listed on the inside cover of this supplement.
-
Page 3: Safety Information
Inspect frame carefully for damage (See PART II, ASTM F2043 All riders must understand a fundamental reality Section D. Inspect For Safety in your Cannondale of composites. Composite materials constructed Bicycle Owner’s Manual. ) of carbon fibers are strong and light, but when... - Page 4 Rear Travel Modes TRIGGER 29 - FLOW - 80 mm, ELEVATE - 130 mm (remote DYAD ever selectable) TRIGGER 27.5 - FLOW - 85 mm, ELEVATE - 140 mm Cannondale Si (see also Replacement Parts for conversion kits) Chainline 50 mm E’...
-
Page 5: Tightening Torques
130728.PDF tightening torques main pivot BEARINGS PRELOAD PIVOT AXLE SHIM SCREW Cable Clamps (large end) (small end) Loctite 242 (blue) 3 Nm (26.5.5 InLbs) FD ADAPTER Loctite 242 (blue) 4 Nm (35 InLbs) pivot axle removal tool M5X20 PIVOT AXLE included in KP169/ Loctite 242 (blue) 5 Nm, (44 inLbs) -
Page 6: Cable Routing
130728.PDF dropout Cable routing KP169/ tool usage BEARINGS small end PIVOT SPACERS SEATSTAYS 13. Nosed End Seal 4 mm DROPOUT 14. Rubber End Seal PIVOT AXLE Check for sufficient housing cable loop. Its about 35mm as shown above. Inadequate loop can result in ghost shifting or housing ends pulling out of down tube when the bike is at full travel. - Page 7 Make sure the bearings(cup or adpater To install bearings, use a headset press and Cannondale tool KT010/ . Clean inside of shell apply a high- parts) are driven out squarely and evenly from inside the shell!!! Do not pry components from shell.
- Page 8 WARNING Use onLY HIGH-pRessURe AIR pUMp – CAnnonDALe – 1Mp01/sLV to set oR ReAD pRessURe. Use of an incompatible pump (one not designed for the high pressure range of the shock) , can result serious personal injury or result in an improper pressure setting...
- Page 9 130728.PDF setting rebound setting travel Rebound controls the rate at which your rear wheel returns after it has been compressed. The proper rebound The DYAD RT2 has two travel modes, activated by the remote handlebar-mounted lever. Switching between setting is of personal preference, and varies with rider weight, riding style and conditions. A basic rule of the modes changes the bike’s sag and BB height, offering a higher BB and steeper angles for climbing, or thumb is to set rebound to be as quick as possible, without kicking back and pushing you off the saddle.
- Page 10 130728.PDF remote Cable installation 8. Install the DYAD RT2 back into the bicycle frame. Clean the mounting bolt threads, apply Loctite 242 Attach remote cable with shock unmounted from frame. (blue) and tighten to 8.0 Nm, 71 InLbs. 1. Place bike in a work stand with the rear wheel 9.
-
Page 11: Replacement Parts
KP173/ (BB30) (BB30) Frame serial number location (7-character barcode label) Use this serial number for M5X16 M5X16 warranty registration and theft recovery. See your Cannondale Bicycle Owner’s Manual 66mm Loctite 242 (blue) 66mm Loctite 242 (blue) 4 Nm (35 InLbs) for more information on warranty registration. -
Page 12: Maintenance
The following table lists only supplemental maintenance items. Please consult your Cannondale Bicycle Owner’s Manual for more information on basic bike maintenance. Consult with your Cannondale Dealer to create a complete maintenance program for your riding style, components, and conditions of use. Follow the maintenance recommendations given by the component manufacturers for the various non-Cannondale parts of your bike. - Page 13 n e r ’s m a n u a a le b ic y c le o w o u r c a n n o n d r e f e r e n c e . le m e n t a n d y t h f o r f u t u r e a d t h is s u p p t io n .
Need help?
Do you have a question about the Trigger 27.5/29 and is the answer not in the manual?
Questions and answers