
Related Manuals for Smalvic S60 SERIES


Summary of Contents for Smalvic S60 SERIES
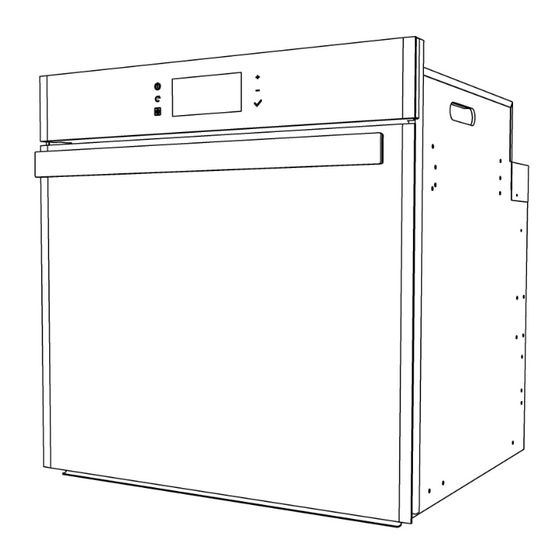
- Page 1 BUILT-IN ELECTRIC OVEN SERIES S60 USE, INSTALLATION AND MAINTENANCE INSTRUCTIONS MODEL SERIES 60 MULTI-FUNCTION (MT 60 OFT) (MT) MULTIFUNZIONE ELETTRICO (OFT) FULL TOUCH CONTROL PRODUCT LABEL...
-
Page 2: Table Of Contents
TABLE OF CONTENTS page USE GUIDE Avvertenze generali OVEN USE GUIDE Pannello comandi Funzioni di cottura selezionabili Description of the oven and accessories SWITCHING THE OVEN ON First start up Setting the time ON/OFF function Oven on: waiting for the controls MENU FUNZIONI COTTURA TEMPERATURE DISPLAY Displays... - Page 3 COOKING INDICATIONS Posizione griglie interne Using the grill Tangential fan MAINTENANCE AND CLEANING Periodic maintenance Cleaning the surfaces Removing the oven door Reinserimento porta forno Taking out the internal glass surfaces 35 Removing/remounting the lateral guides 36 Replacing the oven bulb INSTALLATION INSTRUCTIONS Technical Data Dimensions of the single oven...
-
Page 4: Avvertenze Generali
GENERAL RECOMMENDATIONS This product complies with the EU 2002/96/EEC Directive. It carries the crossed-out wheelie bin symbol which means that, once its useful life is over, it must be treated separately from other domestic waste: it must be taken to a recycling centre for electrical and electronic equipment, or taken back to the retailer upon purchase of a new equivalent device. - Page 5 Correct use of the oven - The use of the device is only intended for adults, keep children away. - L’apparecchio produce calore sia in fase di funzionamento che, per inerzia, anche appena spento. Non toccare le parti interne del forno durante queste fasi e limitare il contatto con le parti esterne.
- Page 6 Correct use of the oven - Pre-heat the oven only for the time strictly necessary; - Open the door only when needed to avoid unnecessary heat loss; - Keep the gaskets clean and efficient to avoid damaging heat dispersions; - Always turn off the oven when you have finished using it; - Per ridurre la formazione di condensa dovuta all’umidità...
-
Page 7: Oven Use Guide
■ OVEN USE GUIDE STANDARD CONTROL PANEL Graphic display KEY 1 : on/off/awakening KEY 4 : +/ temperature KEY 2 : menu selection KEY 5 : - KEY 3 : start/pause KEY 6 : confirm / reset oven light / system time Every time you press a button, a “beep”... - Page 8 Time programming mode area and progressive cooking time display. (position on display: top left) timer alarm clock manual cooking progressive time cooking time cooking end time automatic cooking Cooking mode display area (position on display: central) - AUTO = AUTOMATIC programming - MAN = MANUAL programming Chamber centre temperature display/setting area and temperature diagram.
-
Page 9: Funzioni Di Cottura Selezionabili
SPECIAL FUNCTION INDICATORS “OVEN LIGHT” mode indicator (position on display: central) “PAUSE” mode indicator (position on display: bottom left) “DEFROST” function indicator (position on display:bottom left) “FOOD WARMER” mode indicator (position on display: bottom right) "FOOD PROBE" mode indicator, in models where available (position on display: centre left) COOKING FUNCTIONS THAT CAN BE SELECTED: POSSIBLE TEMPERATURE RANGE: FROM 50 TO 250 °C. - Page 10 1) Control panel; 2) Fully removable guides (where available); 3) Supporting grid; 4) Drip tray; 5) Ventilated cooking fan guard; 6) Grill cooking resistance; 9880027800-EN-180314.doc...
-
Page 11: Switching The Oven On
■ SWITCHING THE OVEN ON ■ FIRST START UP/ RESTORE AFTER POWER FAILURE All the icons remain on for 2 seconds to check the oven operation. Regardless of whether it is the first connection to the mains or a restore after a power failure, the time digits of the system time blink, as shown in the figure. -
Page 12: Setting The Time
SETTING THE SYSTEM TIME The system time (clock) depends on the type of of mains power supply (50Hz or 60Hz). The time must be set when the oven is OFF: Hold key 6 down for at least 3 seconds: when the hour digits blink on the display, use keys 4 and 5 to set the value. -
Page 13: Oven On: Waiting For The Controls
OVEN ON: waiting for the controls The default function is ventilated cooking (Circular resistance + radial Fan) with pre-set temperatures equal to 180 °C. The display appears as shown in the figure: Use the Menu key 2 to scroll through the functions in this order: cooking function menu;... -
Page 14: Menu Funzioni Cottura
■ COOKING FUNCTION MENU ■ Once the oven has been switched on (ON/OFF key 1), you can access the cooking function menu directly by immediately pressing the menu key 2 The central icon and the cooking functions start blinking. Keys 4 and 5 allow you to scroll through the cooking functions available (see COOKING FUNCTIONS THAT CAN BE SELECTED): the relative segments activate. -
Page 15: Temperature Display
■ TEMPERATURE DISPLAY ■ DISPLAYS This is activated after you have switched the oven on with the ON/OFF key 1 , together with the default "ventilated cooking" function. If cooking is enabled, this information appears on the display: - default temperature; - thermometer, up arrow and progressive temperature diagram icons;... -
Page 16: Pre-Heating
SETTINGS AND MODIFICATIONS You can change the temperature any time by selecting a cooking function and then simply using key 4 The temperature and relative icon blink on the display. Use keys 4 and 5 to set the required temperature, and press key 6 to confirm. -
Page 17: Special Functions
■ SPECIAL FUNCTIONS ■ START/PAUSE FUNCTION Key 3 (START/PAUSE) , as already described, is activated once you have selected a cooking function, and it allows you to confirm all the cooking settings and automatic settings; in other words, it starts the cooking phase (START function). The PAUSE function, represented by the icon , is always activated by pressing the START key 3... -
Page 18: Oven Light
OVEN LIGHT CONTROL The light switching on is considered a special function: it is not selected among the cooking functions. The light can be switched on and off any time by using key 6 even when the oven is off (except during the programming phase and/or when editing a function). -
Page 19: Funzione Scaldavivande
FOOD WARMER FUNCTION This function keeps food warm at a recommended temperature of 80 °C: - press Menu key 2 to view the traditional cooking functions; - select the function indicated by the icon - press key 6 or wait 7 seconds for auto-confirmation; - press the START key 3 to activate the function;... -
Page 20: Correct Use Of The Food Probe
Once the food reaches the set temperature, the oven switches off automatically. An intermittent acoustic signal indicates that cooking is completed. This function does not allow the cooking and time programming to be enabled. But it allows setting the timer NOTE: always use the probe supplied with the oven. - Page 21 Place the needle on the bottom, until reaching the centre of the product to be cooked: the sensor should detect the temperature reached by the product core. La cottura sarà tanto più precisa e riuscita quanto migliore sarà posizionato lo spillone. N.B.: during or after the cooking phase, the plug is hot.
-
Page 22: Time Setting Functions
■ TIME SETTING FUNCTIONS ■ TIMER SETTINGS The TIMER function is not connected with the cooking functions and it is not used to program the oven. The function can be activated at any time by pressing the Menu key 2 - with the oven OFF;... -
Page 23: Alarm Clock Setting
ALARM CLOCK SETTING The ALARM CLOCK function (as described in the TIMER function) is not connected with the cooking functions and it is not used to program the oven. The function can be activated at any time by pressing the Menu key 2 - with the oven OFF;... -
Page 24: Timer And Alarm Clock Setting
TIME AND ALARM CLOCK SETTING It is possible to set both functions simultaneously at any time. In other words, it is like having two timers, and these can be set by following the same procedure with the Menu key 2 , for the TIMER first and then for the ALARM CLOCK (or vice-versa). -
Page 25: Programmazione Del Tempo Di Cottura
PROGRAMMING THE COOKING TIME The functions for programming the cooking time are: - cooking time - automatic cooking : the combination between cooking end time and cooking time These functions can be activated: - with the oven ON awaiting controls; - with the oven in cooking mode;... -
Page 26: Cooking Time
COOKING TIME E’ una funzione che permette di bloccare in modo automatico la cottura del forno dopo un tempo determinato. With the oven in "waiting for controls" mode, press Menu key 2 ,to select the blinking icon. Press keys 4 and 5 to set the required value (the max configurable time is 12 hours). -
Page 27: Ora Fine Cottura
COOKING END TIME Once you have activated the cooking time, you can set the cooking end time . The combination between the two functions enables automatic cooking programming (see the paragraph of reference). L'ora di fine cottura è vincolata ad un massimo di 12h di posticipazione. Use the Menu key 2 to select the blinking icon. - Page 28 If a cooking end time greater than the cooking time is not set, the display provides only the cooking time programming. For example, set cooking delayed by 6 hours and a cooking time of 45 minutes. At this point: - the oven is set in low consumption mode; - the function display shows the cooking function selected;...
-
Page 29: Cancellazione / Modifica Programmazione Tempo
PROGR. CANCELLATION/MODIFICATION TIME AND TIMER To cancel or reset the timed programming: - AUTO : - TIMER : Use the Menu key 2 to select the icon of the function you wish to cancel; while the icon blinks, press and hold key 6 for at least 3 seconds. -
Page 30: Posizione Griglie Interne
■ INDICATIONS FOR COOKING ■ INTERNAL GRILL POSITION FOR SPECIFIC COOKING - Position 1 and 2 from bottom Frozen cakes, Long roasts, Turkey, Cakes, well done Steak; - Position 2 from bottom. Cakes, Sandwich Bread, Toasted Sandwiches, Casserole, Whole wheat bread, Meat; - Position 2 and 3 from bottom. -
Page 31: Using The Grill
USING THE GRILL To optimise Grill cooking, pre-heat the oven with Grill on at maximum for 10 minutes. Introduce the dish inside the oven as close as possible to the Grill, depending on the type of food to cook. You can cook fish, vegetables, small kebabs and various types of meat using the grill, with the exception of certain lean game meat. -
Page 32: Maintenance And Cleaning
■ MAINTENANCE AND CLEANING ■ Disconnect the power supply before performing any type of maintenance on the product Do not clean the device using steam cleaners. Do not use rough, abrasive materials or sharp metal scrapers to clean the oven door, as they can scratch or damage the surfaces and break the glass. -
Page 33: Cleaning The Surfaces
CLEANING THE SURFACES The enamelled or stainless steel parts must be treated with caution. Use water or specific products, then accurately dry with a soft cloth. Do not use abrasive products. In case of tough deposits on enamelled parts, use a plastic sponge or similar, soaked in hot water and vinegar. -
Page 34: Removing The Oven Door
■ REMOVING/MOUNTING THE OVEN DOOR ■ Follow the instructions below to remove and place back the oven door. Fully openthe door andinsert a metal rodin both the hinges(not provided) measuringabout 3 mmin diameter, in the holeshown in the picture. This locks the hinge in the open position. Hold the door with both hands from the two sides, at the bottom. -
Page 35: Taking Out The Internal Glass Surfaces
fig. 5 fig. 6 fig. 7 Repeat the same procedure in reverse order to remount the glass surfaces. Be very careful to mount them in the correct order and and in the right way round (the transparent glass, if present must be between the other two) and the position of the texton the glass surfaces must be as shown in (fig. -
Page 36: Removing/Remounting The Lateral Guides
Now, pull the guide towards yourself and lift it to make it come out of its seat at the back (fig.2). fig. 1 fig. 2 To remount the guides, repeat i the procedure in reverse order. Always make sure not to damage the glaze on the walls of the oven. REMOVAL/MOUNTING OF THE SLIDING GUIDES (when applicable) When applicable, there are sliding guides on the left and right, that are therefore not interchangeable on both sides of the oven. - Page 37 fig. 1 To remount the sliding guide, place the top hooks on the special rods of the lateral guide. Always make sure that the sliding element can slide towards outwards from the oven. Now press the sliding element down towards the base of the elements (fig.2 step1) to ensure that it is firmly connected to the bottom rods (fig.
-
Page 38: Replacing The Oven Bulb
■ REPLACING THE OVEN LIGHT ■ Read and follow the procedure below to prevent electric shocks and/or personal damage: Attention: Before replacing the oven light, ensure the electric current has been disconnected by opening the main switch. Ensure the oven and the light are cold then remove protection cap A Do not touch the hot bulb with a damp cloth, the bulb may break. -
Page 39: Installation Instructions
■ INSTALLATION INSTRUCTIONS ■ Installation and technical assistance must be carried out by qualified personnel. Carefully read the safety instructions in this manual before using the oven. Incorrect installation, maintenance, assistance and use of the oven can cause serious damage to persons or objects. This product must be installed as indicated in this manual, in compliance with the national and local regulations in force. -
Page 40: Dimensions Of The Oven With Food Warmer
It is important that all operations relating to installing the device are carried out by qualified personnel. The oven can be installed in a column or below a kitchen cabinet worktop. ■ MEASUREMENTS OF THE OPENING ■ The dimensions of the opening to be made on the cabinet for the fitting of the oven are indicated in the figures. -
Page 41: Measurements Of The Built-In Oven Cabinet With Food Warmer
■ FEATURES OF THE CABINET ■ The technical requisites of the cabinet are the following: - the cabinet and its components must resist to a temperature of 90°C, without showing surface deformations and/or defects; - the cabinet must enable the free passage of the oven connections; - all household kitchen units must be protected using fire-resistant material according to that required by the current regulations;... -
Page 42: Cabinet Features
ELECTRIC CONNECTION OF THE OVEN ■ Make sure that power has been disconnected before connecting the oven to the electric mains. Functioning happens in single-phase alternate current 220-240 V~ 50/60 Hz, using flexible cable. Make sure that the household system can support the electric load of the device. (see serial number plate). -
Page 43: Assembly/Replacement Of The Power Supply Cable
ASSEMBLY/REPLACEMENT OF THE POWER SUPPLY CABLE The electric cable must be kept locked to the terminal box by the cable gland so it cannot come out. The yellow/green cable must be longer than the other two by at least 20 mm. Pay attention that the electric cable does not pass near or come into contact with the surfaces reaching a temperature above 75°C. -
Page 44: Technical Assistance And Spare Parts
■ TECHNICAL ASSISTANCE AND SPARE PARTS TOUCH ERRORS Error Description Cause What to do Err Sc1 Probe detection error, the oven Failed/disconnected Check blocks. probe connection/replacement SOFTWARE PARAMETERS THAT CAN BE CHANGED BY THE USER Access the user settings menu by pressing the Menu key 2 and the START key 3 with the oven in "OFF"... -
Page 45: Spare Parts
SPARE PARTS Only authorised components can be used for the household appliance. Do not repair or replace any oven component not recommended by this manual. All interventions and repairs must be carried out by authorised technical personnel. To request a spare part, indicate the following data: 1) Acronym of oven model (MOD.) and production number (N.L.), found on the product label positioned on the lower front part of the oven side and in the first page of the manual. -
Page 46: Tables Of Reference
■ TABLE OF REFERENCE ■ ELECTRIC DATA PER TYPE AND MODEL Voltage 220-240 V ~ 50/60 Hz FI-60MT Total power 3400 resistance Grill 1800 resistance Base 1200 resistance Circular 2200 resistance Oven light Oven fan Tangential EXTERNAL DIMENSIONS Width 59.5 Height 59.5 Depth...
Need help?
Do you have a question about the S60 SERIES and is the answer not in the manual?
Questions and answers