Table of Contents
Advertisement
Advertisement
Table of Contents

Summary of Contents for Ilife X5
- Page 1 Robotic Vacuum Cleaner Model: X5 User Manual...
-
Page 2: Table Of Contents
Table of Contents Safety Instructions ..............1 Product Parts ................2 ............... 2 Main body and accessories ................3 Robot anatomy ..........4 Charging home base and display panel ................5 Remote control Product Operating ..............6 ................6 How to get started .............. -
Page 3: Safety Instructions
Safety Instructions Before using this product, please read the following safety instructions and follow all normal safety precautions. Read this user manual thoroughly and carefully before using this product. Save this user manual. Any operations that oppose to descriptions in this user manual may lead to harm to human or this product. -
Page 4: Product Parts
Product Parts Main body and accessories Description Q'ty Main Body Charging Home Base Remote Control(battery not included) Virtual wall(optional) Adapter Cleaning Tool User Manual Extra Side Brushes Extra HEPA Filter... -
Page 5: Robot Anatomy
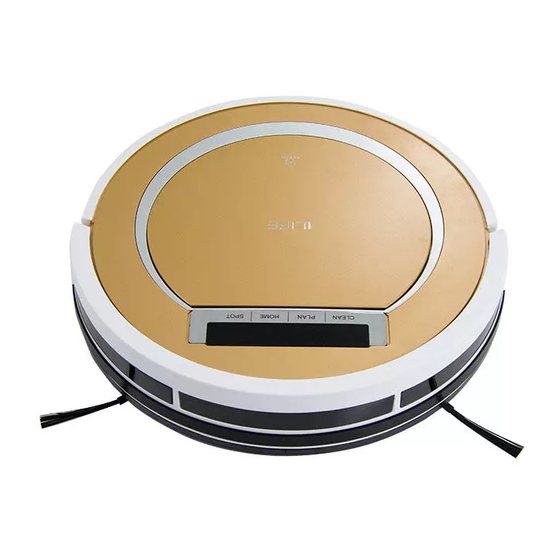
Product Parts Robot anatomy Display Panel Bumper Main Pad Middle Pad Nose Wheel Auto Charging Pin Right Side Brush Left Side Brush Suck Passage Battery Cover Left Wheel Right Wheel Bottom Cover Middle Pad Dust Bin/Water tank Power Supply Socket Power Switch Primary Filter Dust Bin... -
Page 6: Charging Home Base And Display Panel
Product Parts Charging home base Signal Light Top Cover Power Supply Socket Charge Connecting Points Display panel When the robot is working or under operation, display panel will show the current status as below: When the display panel flashes like this, it means the robot is in selected mode, other opeation can be performed. -
Page 7: Remote Control
Product Parts Remote control 1. “ ” Scheduling Button A. In selected mode, press to enter scheduling mode. B. In scheduling mode, press to switch between hour and minute. 2. “ ” Clean Butoon A. In selected mode, press to start work. B. -
Page 8: Product Operating
Product Operating 1. How to get started 1>. Place charging home base, plug in adapter, signal light on charging home base will flash. Note: Put charging home base against the wall and remove 1> obstacles about 1 meter at two sides and about 2 meters forward. 2>. -
Page 9: Starting Up/Pause/Sleeping
Product Operating 2. Starting up/Pause/Sleeping Sleeping mode: Robot is not working, no display on display panel and power switch is on; Selected mode: Robot is not working, “88:88” on display panel is flashing; Cleaning mode: Robot is working, display panel will show different status. 1>. -
Page 10: Cleaning Mode
Product Operating 4. Cleaning mode 1>. Auto cleaning The robot will clean a room automatically and adjust its cleaning according to the situation. Note: Press CLEAN button on robot or on remote control to start auto cleaning. 2>. Spot cleaning Put the robot near a dirty area and press SPOT on remote control to start spot cleaning. -
Page 11: Product Maintaining
Product Maintaining 1. Cleaning side brushes Clean the side brushes when it gets dirty and replace if it’s damaged. Note: Before replacing side brush, check and match “R” “L” mark on both side brush and bottom of robot. 2. Cleaning dust bin and filter Clean and empty dust bin after each use, steps are as shown in below figures. -
Page 12: Troubleshooting
Troubleshooting Error code sheet When the robot meets with some routine troubles, error code will show on the display panel. Error Code Cause Solution Left wheel no work Check left wheel Right wheel no work Check right wheel Main body is picked up Re-place the robot on the floor Clean clif sensors first, if still no Cliff sensor failure... -
Page 13: Product Specifications
Product Specifications Classification Item Detail Diameter 300mm Mechanical Height 70mm Specifications Weight 2.0kg Voltage 11.1V Electrical Specifications Battery specifications Lithium ion 2600mAH 0.3 L Dust bin/ capacity Water tank Auto Charging / Charging type Manual Charging Auto, Spot, Edge, Cleaning mode Cleaning Daily Schedule Specifications... -
Page 14: Parts List
Annex-Operation manual 1 Cloth How To Use Mop cloth: 1. Put the cloths on the bracket provided, and then fix the bracket on the robot, with the four feet on bracket to the four round holes at the bottom of the robot 2. -
Page 15: Parts List (With Water Tank)
Annex-Operation manual 2 ( for Model with water tank only) Cloth Water Tank... - Page 16 Annex-Operation manual 2 ( for Model with water tank only) Rubber Plug Water input hole Handle Weep hole 1. Dry clean is made with dust bin, and wet clean is made with water tank 2. The mop bracket with mop should be on the robot when the water tank is used.


Need help?
Do you have a question about the X5 and is the answer not in the manual?
Questions and answers