Table of Contents
Advertisement
Quick Links
Included in your parts box:
•
Toolkit (4+5mm combo hex wrench,
13+15mm combo open-end wrench)
•
Touch-up paint
•
Reflectors (if not already installed)
Required Tools (not included):
•
Scissors or wire cutters
•
10mm open-end wrench (may be
needed)
Assembly will take about 30
minutess
Electrical System
Your electric scooter comes with a 24 volt sealed lead-acid (SLA) battery. This type of
battery does not have a memory, and riding on a partial charge will not affect its capacity
or performance (you can safely test ride the scooter after assembly, although it won't be
fully charged.). Recommended charge time for this type of battery is 4-6 hours.
Basic Troubleshooting
Scooter won't turn on (no lights
• 5-minute auto shutoff feature has activated; turn scooter off then
on throttle)
on again
• Battery not charged
• Battery may not be connected from factory. Remove your
scooter's deck plate using the thumb screw under the on/off
switch, connect the battery, then replace the plate
• The scooter's fuse may be blown. See your owner's manual for
more information on locating and replacing this fuse, or call our
Customer Service line for help
Brakes rub when riding
• Re-adjust the brakes, referring to the attached document. Do
not ride the scooter if the brake pads are rubbing the front tire.
Can someone help me with...?
Call the Currie Technologies technical and customer service
department at 1-800-377-4532
Assembly Guide
Currie Technologies Technical and
1.800.377.4532
Customer Service
450 QSG V1 2011
Last modified April 27, 2011 3:14 PM
Advertisement
Table of Contents

Related Manuals for eZip e450


Summary of Contents for eZip e450
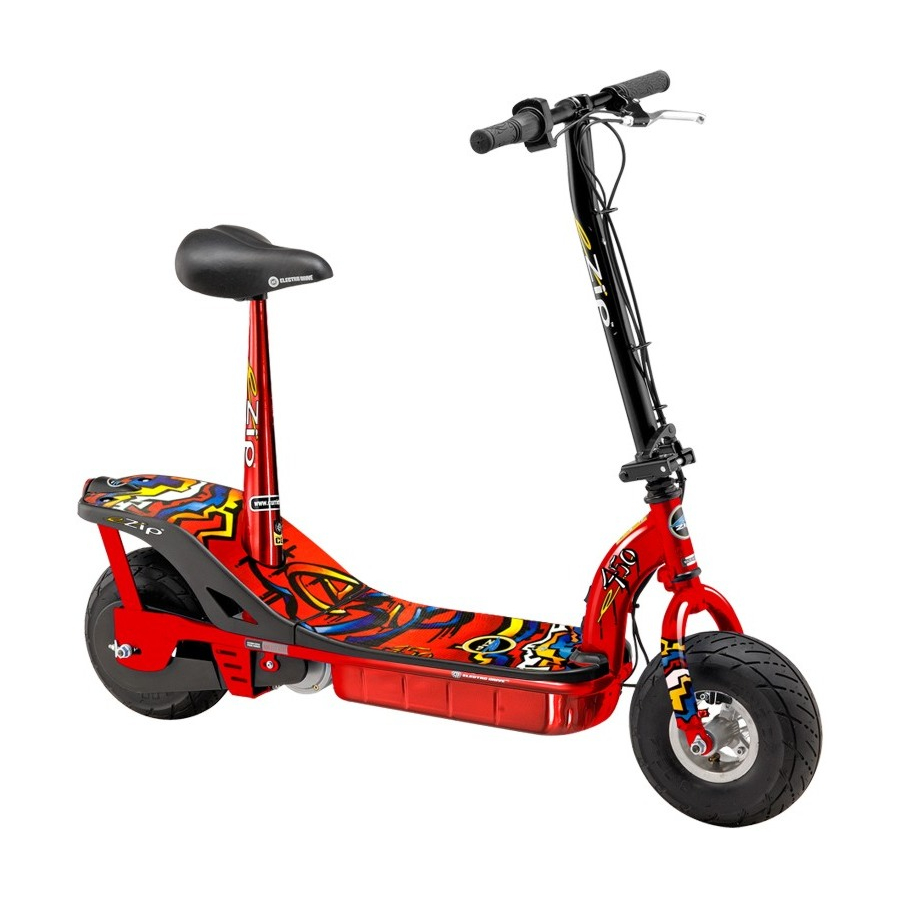
- Page 1 Included in your parts box: • Toolkit (4+5mm combo hex wrench, 13+15mm combo open-end wrench) • Touch-up paint • Reflectors (if not already installed) Required Tools (not included): • Scissors or wire cutters • 10mm open-end wrench (may be needed) Assembly will take about 30 minutess Electrical System...
- Page 2 Unpacking and Preparation Carefully remove the scooter and all accessories from the box. Lift the scooter onto the box as shown in photo A. This will make all sides of the scooter accessible and easier to work on. Seat Mast Insert the seat mast into the frame , making sure that it passes completely through the three supporting rings shown in photo B.
- Page 3 Manual Supplement: Linear-Pull Brakes Cable Fixing Bolt & Washers Brake Noodle Boot Brake Shoes Link Fixing Bolt Linear-Pull Brake Setup 1. While holding the brake shoe against the rim, tighten the shoe 3mm washer B 6mm washer B fixing nut. The brake shoe should be centered vertically on the Shoe fixing nut rim.
- Page 4 Linear-Pull Brake Setup, ctd. 5. For best braking performance, the brake pads should be "toed-in," Direction of so that the trailing portion of each brake pad is about 0.5 - 1.0mm wheel rotation farther from the rim than the leading portion of the pad. This gap can be set by hand or by using a small piece of thick paper as a shim between the rim and the rear half the pad to set the gap.
Need help?
Do you have a question about the e450 and is the answer not in the manual?
Questions and answers