
Subscribe to Our Youtube Channel
Related Manuals for Gree GEH09AA-K3DNA1B


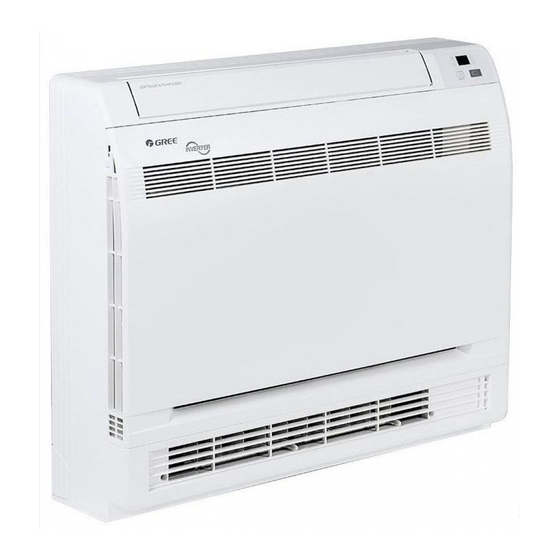
Summary of Contents for Gree GEH09AA-K3DNA1B
-
Page 1: Service Manual
Change for Life Service Manual Models: GEH09AA-K3DNA1B GEH09AA-K3DNA1C GEH12AA-K3DNA1B GEH12AA-K3DNA1C GEH18AA-K3DNA1B GEH18AA-K3DNA1C (Refrigerant R410A) GREE ELECTRIC APPLIANCES,INC.OF ZHUHAI... -
Page 2: Table Of Contents
Service Manual Table of Contents Part Ⅰ : Technical Information .................1 1. Summary ........................1 2. Specifications ......................2 2.1 Specification Sheet ......................2 2.2 Operation Characteristic Curve ..................8 2.3 Capacity Variation Ratio According to Temperature ............9 2.4 Cooling and Heating Data Sheet in Rated Frequency .............10 2.5 Noise Curve ........................10 3. - Page 3 Service Manual 9. Maintenance ......................42 9.1 Error Code List .......................42 9.2 Troubleshooting for Main Malfunction ................44 9.3 Maintenance Method for Normal Malfunction ..............49 10. Exploded View and Parts List ..............51 10.1 Indoor Unit ........................51 10.2 Outdoor Unit .........................54 11. Removal Procedure ..................60 11.1 Removal Procedure of Indoor Unit ................60 11.2 Removal Procedure of Outdoor Unit ................64...
-
Page 4: Part Ⅰ : Technical Information
Service Manual Part Ⅰ : Technical Information 1. Summary Indoor Unit GEH09AA-K3DNA1B/I GEH09AA-K3DNA1C/I GEH12AA-K3DNA1B/I GEH12AA-K3DNA1C/I GEH18AA-K3DNA1B/I GEH18AA-K3DNA1C/I Outdoor Unit GEH09AA-K3DNA1B/O GEH12AA-K3DNA1B/O GEH09AA-K3DNA1C/O GEH12AA-K3DNA1C/O GEH18AA-K3DNA1B/O GEH18AA-K3DNA1C/O Remote Controller YAA1FB1 Technical Information... -
Page 5: Specifications
Service Manual 2. Specifications 2.1 Specification Sheet Value Parameter Unit Model GEH09AA-K3DNA1B GEH09AA-K3DNA1C Product Code CV010001200 CV010002000 V ~ Rated Voltage 220-240 220-240 Power Rated Frequency Supply Phases Power Supply Mode Indoor Indoor Cooling Capacity(Min~Max) 2600(450~3200) 2600(450~3200) Heating Capacity(Min~Max) 2750(450~3750) - Page 6 Service Manual Outdoor Unit Model GEH09AA-K3DNA1B/O GEH09AA-K3DNA1C/O Outdoor Unit Product Code CV010W01200 CV010W02000 ZHUHAI LANDA COMPRESSOR ZHUHAI GREE DAIKIN DEVICE Compressor Manufacturer CO.,LTD CO.,LTD QXA-A086zE190A 1GDY23AXD Compressor Model FVC 68D or RB 68EP DAPHNE FVC50K Compressor Oil Compressor Type Rotary Rotary Compressor LRA.
- Page 7 Service Manual Value Value Parameter Unit Model GEH12AA-K3DNA1B GEH12AA-K3DNA1C Product Code CV010001300 CV010001900 V ~ Rated Voltage 220-240 220-240 Power Rated Frequency Supply Phases Power Supply Mode Indoor Indoor Cooling Capacity(Min~Max) 3500(600~3950) 3500(600~3950) Heating Capacity(Min~Max) 3650(600~4700) 3650(600~4700) Cooling Power Input(Min~Max) 1100(220~1400) 1100(220~1400) Heating Power Input(Min~Max)
- Page 8 Service Manual Outdoor Unit Model GEH12AA-K3DNA1B/O GEH12AA-K3DNA1C/O Outdoor Unit Product Code CV010W01300 CV010W01900 ZHUHAI LANDA COMPRESSOR ZHUHAI GREE DAIKIN DEVICE Compressor Manufacturer CO.,LTD CO.,LTD QXA-A091zE190A 1GDY23AXD Compressor Model FVC 68D or RB 68EP DAPHNE FVC50K Compressor Oil Compressor Type Rotary Rotary Compressor LRA.
- Page 9 Service Manual Value Value Parameter Unit Model GEH18AA-K3DNA1B GEH18AA-K3DNA1C Product Code CV010001400 CV010001800 V ~ Rated Voltage 220-240 220-240 Power Rated Frequency Supply Phases Power Supply Mode Indoor Indoor Cooling Capacity(Min~Max) 5200(1260~6600) 5200(1260~6600) Heating Capacity(Min~Max) 5500(1120~6800) 5500(1120~6800) Cooling Power Input(Min~Max) 1760(380~2450) 1650(380~2450) Heating Power Input(Min~Max)
- Page 10 Service Manual Outdoor Unit Model GEH18AA-K3DNA1B/O GEH18AA-K3DNA1C/O Outdoor Unit Product Code CV010W01400 CV010W01800 ZHUHAI LANDA COMPRESSOR ZHUHAI LANDA COMPRESSOR Compressor Manufacturer CO.,LTD CO.,LTD QXA-B141zF030A QXA-B141zF030 Compressor Model Compressor Oil 68EP 68EP Compressor Type Rotary Rotary Compressor LRA. Compressor RLA Compressor Power Input 1440 1440 1NT11L-6233 or KSD115ºC or...
-
Page 11: Operation Characteristic Curve
Service Manual 2.2 Operation Characteristic Curve 09K 12K Cooling Heating 220V 220V • Conditions Indoor : DB27˚C/WB19˚C Outdoor : DB35˚C/WB24˚C Indoor air flow : High Pipe length : 5m 230V 230V 240V • Conditions 240V Indoor : DB20˚C/WB15˚C Outdoor : DB7˚C/WB6˚C Indoor air flow : High Pipe length : 5m... -
Page 12: Capacity Variation Ratio According To Temperature
Service Manual 2.3 Capacity Variation Ratio According to Temperature 09K 12K Cooling Heating • Conditions • Conditions Indoor: DB27°C/WB19°C Indoor: DB20°C/WB15°C Outdoor: DB35°C/WB24°C Outdoor: DB7°C/WB6°C Indoor air flow: High Indoor air flow: High Pipe length: 5m Pipe length: 5m –15 –10 –5 Outdoor temp. -
Page 13: Cooling And Heating Data Sheet In Rated Frequency
Service Manual 2.4 Cooling and Heating Data Sheet in Rated Frequency Cooling: Pressure of gas pipe Inlet and outlet pipe Rated cooling Compressor temperature of heat Fan speed of Fan speed of condition(°C) connecting indoor and frequency Model outdoor unit exchanger indoor unit outdoor unit... - Page 14 Service Manual Indoor side noise when blowing Outdoor side noise when blowing Indoor fan motor rotating speed Compressor frequency(Hz) Technical Information...
-
Page 15: Outline Dimension Diagram
Service Manual 3. Outline Dimension Diagram 3.1 Indoor Unit Unit:mm Technical Information... -
Page 16: Outdoor Unit
Service Manual 3.2 Outdoor Unit Unit:mm Technical Information... - Page 17 Service Manual Technical Information...
-
Page 18: Refrigerant System Diagram
Service Manual 4. Refrigerant System Diagram Indoor unit Outdoor unit Gas pipe side Valve 4-Way valve Di s charge Heat Suction exchanger (evaporator) Heat exchanger Liquid pipe (condenser) side Valve Electron Strainer Strainer expansion valve COOLING HEATING Connection pipe specification: Liquid pipe:1/4"... -
Page 19: Electrical Part
Service Manual 5. Electrical Part 5.1 Wiring Diagram ● Instruction Symbol Symbol Color Symbol Symbol Color Symbol Name White Jumper cap Green Yellow Brown COMP Compressor Blue Grounding wire Black YEGN Yellow/Green Violet Orange Note: Jumper cap is used to determine fan speed and the swing angle of horizontal lover for this model. ●... - Page 20 Service Manual ● Outdoor Unit GEH09AA-K3DNA1B/O GEH12AA-K3DNA1B/O GEH18AA-K3DNA1B/O Technical Information...
- Page 21 Service Manual GEH09AA-K3DNA1C/O GEH12AA-K3DNA1C/O GEH18AA-K3DNA1C/O These circuit diagrams are subject to change without notice, please refer to the one supplied with the unit. Technical Information...
-
Page 22: Pcb Printed Diagram
Service Manual 5.2 PCB Printed Diagram Indoor Unit ● Top view Name Connect earthing wire Input of live wire Wiring terminal for health function (optional) Input of neutral wire Control the wiring terminal of down swing Communication interface for indoor unit and outdoor unit Terminal of display interface Needle stand of jumper cap Wiring terminal of indoor tube... - Page 23 Service Manual Outdoor Unit GEH09AA-K3DNA1B/O GEH12AA-K3DNA1B/O ● Top view Name Leading foot 1 of induction 4-way valve Electric heating of compressor Electric heating of chassis 10-core communication wire Electronic expansion valve Overload protection Temperature sensor Leading foot 2 of induction ●...
- Page 24 Service Manual GEH09AA-K3DNA1C/O GEH12AA-K3DNA1C/O ● Top view Live wire input of Dred communication plate Heating belt 1 Heating belt 2 4-way valve Neutral wire input of Dred communication plate Dred function terminal Electronic expansion valve terminal Overload terminal of compressor Overload terminal of compressor Temperature sensor terminal...
- Page 25 Service Manual GEH18AA-K3DNA1B/O ● Top view Name Wiring terminal of compressor Overload protection terminal of compressor Terminal of outdoor temperature sensor Terminal of electronic expansion valve Terminal of outdoor fan Terminal of 4-way valve Wiring terminal of chassis electric heater Communication wire with IDU Terminal of outdoor fan...
- Page 26 Service Manual GEH18AA-K3DNA1C/O ● Top view Name Terminal of compressor overload protection Terminal of temperature sensor Terminal of electronic expansion valve 4 Terminal of outdoor fan 5 Terminal of 4-way valve Terminal of compressorelectric heating Terminal of chassis electric heating Terminal of indoor unit and outdoor unit communication 9 Power supply live wire...
-
Page 27: Function And Control
Service Manual 6. Function and Control 6.1 Remote Controller Introduction Buttons on Remote Controller ON/OFF button +/- button MODE button button SWING button I FEEL button button SLEEP button TEMP button QUIET button ClOCK button T-ON T-OFF button TURBO button X-FAN button LIGHT button Introduction for Icons on Display Screen... -
Page 28: Mode Button
Service Manual MODE button Each time you press this button , a mode is selected in a sequence that goes from AUTO,COOL, DRY, FAN, and HEAT * , as the following: *Note:Only for models with heating function. After energization, AUTO mode is defaulted. In AUTO mode, the set temperature will not be displayed on the LCD, and the unit will automatically select the suitable operation mode in accordance with the room temperature to make indoor room comfortable.(As for cooling only unit,it won’t have any action when it receives the signal of heating operation.) button... -
Page 29: Quiet Button
Service Manual (1) Under Sleep 3 mode, press "Turbo" button for a long time, remote control enters into user individuation sleep setting status, at this time, the time of remote control will display "1hour ",the setting temperature "88" will display the corresponding temperature of last setting sleep curve and blink (The fi... -
Page 30: Light Button
Service Manual X-FAN button Pressing X-FAN button in COOL or DRY mode, the icon is displayed and the indoor fan will continue operation for 2 minutes in order to dry the indoor unit even though you have turned off the unit. After energization, X-FAN OFF is defaulted. -
Page 31: Brief Description Of Modes And Functions
Service Manual 6.2 Brief Description of Modes and Functions 1. Cooling mode (1) Under this mode, the fan and the up swing will operate at setting status. The temperature setting range is 16~30ºC. (2) The unit is stopped because of malfunction of outdoor unit or protection. The indoor unit keeps original operation status and the error code is displayed. - Page 32 Service Manual 7.4 I FEEL function When I FEEL command is received, the controller will operate according to the ambient temperature sent by the remote controller (For defrosting and cold blow prevention, the unit operates according to the ambient temperature sensed by the air conditioner). The remote controller will send ambient temperature data to the controller every 10min.
-
Page 33: Part Ⅱ : Installation And Maintenance
Service Manual Part Ⅱ : Installation and Maintenance 7. Notes for Installation and Maintenance Safety Precautions: 10. If the power cord or connection wire is not long enough, please get the specialized power cord or connection wire Important! from the manufacture or distributor. Prohibit prolong the wire by yourself. - Page 34 Service Manual Main Tools for Installation and Maintenance 1. Level meter, measuring tape 2. Screw driver 3. Impact drill, drill head, electric drill 4. Electroprobe 5. Universal meter 6. Torque wrench, open-end wrench, inner hexagon spanner 7. Electronic leakage detector 8.
-
Page 35: Installation
Service Manual 8. Installation 8.1 Choosing an Installation Site Before choosing the installation site,obtain user approval. Indoor unit The indoor unit should be sited in a place where: (1) The restrictions on installation specified in the indoor unit installation drawings are met. (2) Both air intake and exhaust have clear paths met. - Page 36 Service Manual Unit:mm 150cm or more Front grille Front panel 150cm or more 150cm or more Installation and Maintenance...
-
Page 37: Installation Tips
Service Manual 8.3 Installation Tips 1. Removing and Installing Front Pane ●Removal Method (1) Slide until the 2 stoppers click into place (2) Open the front panel forward and undo the string (3) Remove the front panel ●Installation Method (1) Attach the front grille and front panel after pulling the string around them. (2) Close the front panel and slide until the stoppers click outside. - Page 38 Service Manual (Unit : mm) Wall (2) The location of the hole is different depending on which side of the pipe is taken out . (3) For piping ,see6.Connecting the refrigerant pipe , under Indoor Unit Installation(1). (4) Allow space around the pipe for a easier indoor unit pipe connection.
- Page 39 Service Manual 3 tabs 4. Installing Indoor Unit Casing 4-1.Preparation ●Open the front panel, remove the 4 screws and dismount Front the front grille while pulling it forward. grille ●Follow the arrows to disengage the clasps on the front case to remove it. Front panel Remove ●Follow the procedure below when removing the slit portions.
- Page 40 Service Manual (3) Once refrigerant piping and drain piping connections are complete, fill in the gap of the through hole with putty. A gap can lead to condensation on the refrigerant pipe, and drain pipe, and the entry of insects into the pipes. (4) Attach the front panel and front grille in their original positions once all connections are complete.
- Page 41 Service Manual Inter-unit wiring 6-2. Selection of Copper and Heat Insulation Materials When using commercial copper pipes and fittings, observe the Gas pipe following: Liquid pipe (1) Insulation material: Polyethylene foam Heat transfer rate:0.041 to 0.052W/mK(0.035 to 0.045kca/(mh Refrigerant gas pipes surface temperature reaches 110 max. Liquid pipe Gas pipe insulation...
-
Page 42: Outdoor Unit Installation
Service Manual Sensor securing plate Firmly fix the wires with the terminal screws Outdoor unit Terminal block Shape wires so When wire length exceeds 10m, that the front metal use 2.0mmdiameter wires Electrical plate cover will fit component securely. Wire retainer Firmly secure wire retainer so that wires sustain no... -
Page 43: Vacuum Pumping And Leak Detection
Service Manual 2. Install Drain Joint(Only for cooling and heating unit) Foot holes (1) Connect the outdoor drain joint into the hole on the chassis. (2) Connect the drain hose into the drain vent. 3. Fix Outdoor Unit (1) Place the outdoor unit on the support. (2) Fix the foot holes of outdoor unit with bolts. -
Page 44: Check After Installation And Test Operation
Service Manual 2. Leakage Detection (1) With leakage detector: Check if there is leakage with leakage detector. (2) With soap water: If leakage detector is not available, please use soap water for leakage detection. Apply soap water at the suspected position and keep the soap water for more than 3min. -
Page 45: Maintenance
Service Manual 9. Maintenance 9.1 Error Code List Malfunction and mode display sheet Display of indicator Malfunction name Malfunction type Double 8 Operation Cooling Heating indicator indicator indicator Hardware Zero-cross detection circuit malfunction blinks 17 times malfunction Hardware Malfunction protection of jumper cap blinks 15 times malfunction Hardware... - Page 46 Service Manual Hardware Temperature drift protection malfunction Hardware Sensor connection protection malfunction Hardware Drive board communication malfunction blinks 16 times malfunction Hardware Compressor heat overload protection blinks 3 times malfunction Indoor unit and outdoor unit do not Hardware blinks 19 times match malfunction Hardware...
-
Page 47: Troubleshooting For Main Malfunction
Service Manual 9.2 Troubleshooting for Main Malfunction (1) Troubleshooting for malfunction of temperature sensor main check point: ●Whether the temperature sensor is broken or damaged; ●Whether the temperature sensor terminal is loosened or not connected; ●Whether the mainboard is damged; Check flow chart: Start the troubleshooting for temperature sensor... - Page 48 Service Manual (2) Troubleshooting for communiction malfunction Main check point: ●Check whether the connection wire for indoor and outdoor units and the wires inside the indoor unit is connected well; ●Check whether the mainboards of indoor unit or outdoor unit are damaged; Check flow chart: Communication malfunction for some indoor unit...
- Page 49 Service Manual All indoor units alarms communication malfunction Disconnect the power, and check connection wire for indoor and outdoor units and wires inside electric box are connected correctly Connect wire Wires are connectly according connected correctly? Is malfunction eliminated? to wiring diagram Disconnect the power, and check whether theconnection wires between mainboard of outdoorunit and filter palte are connected...
- Page 50 Service Manual (3) Troubleshooting for C5 malfunction Display displays C5 Check whether the Insert the jumper mainbaord ofcontroller is inserted with thejumper cap? Is malfunction eliminated? Check Re-insert the jumper whether the jumper cap is poorly connected? Is malfunction eliminated? Replace the jumper Is malfunction eliminated?
- Page 51 Service Manual (4) Troubleshooting for H6 malfunction Start the troubleshooting for H6 malfunction Check whether the terminal of DC motor is connected tightly Insert the motor terminal tightly Is mafunction eliminated? Pull blade with hand to see whether it can rotate smoothly Re-assemble blade and motor correctly...
-
Page 52: Maintenance Method For Normal Malfunction
Service Manual 9.3 Maintenance Method for Normal Malfunction 1. Air Conditioner Can't be Started Up Possible Causes Discriminating Method (Air conditioner Status) Troubleshooting Confirm whether it's due to power failure. If yes, No power supply, or poor After energization, operation indicator isn’t bright wait for power recovery. - Page 53 Service Manual 4. ODU Fan Motor Can't Operate Possible causes Discriminating method (air conditioner status) Troubleshooting Connect wires according to wiring diagram to Check the wiring status according to circuit Wrong wire connection, or poor make sure all wiring terminals are connected connection diagram firmly...
-
Page 54: Exploded View And Parts List
Service Manual 10. Exploded View and Parts List 10.1 Indoor Unit Installation and Maintenance... - Page 55 Service Manual Part Code Description GEH09AA-K3DNA1B/I GEH12AA-K3DNA1B/I GEH18AA-K3DNA1B/I Product Code CV010N01200 CV010N01300 CV010N01400 Front Panel Assy 20012756 20012756 20012756 Filter Sub-Assy 11122139 11122139 11122139 Front Case Assy 20012601 20012601 20012601 Evaporator Assy 01002637 01002333 01002333 Cold Plasma Generator 1114001604 1114001604...
- Page 56 Service Manual Part Code Description GEH09AA-K3DNA1C/I GEH12AA-K3DNA1C/I GEH18AA-K3DNA1C/I Product Code CV010N02000 CV010N01900 CV010N01800 Front Panel Assy 20012756 20012756 20012756 Filter Sub-Assy 11122139 11122139 11122139 Front Case Assy 20012601 20012601 20012601 Evaporator Assy 01100100161 01100100160 01100100164 Cold Plasma Generator 1114001604 1114001604 1114001604 Rear Case Assy 22202462...
-
Page 57: Outdoor Unit
Service Manual 10.2 Outdoor Unit Installation and Maintenance... - Page 58 Service Manual Part Code Description GEH09AA-K3DNA1B/O GEH09AA-K3DNA1C/O Product Code CV010W01200 CV010W02000 Electric Box Assy 02613720 10000100274 Electric Box Sub-Assy 02613921 10000500127 Main Board 30138000063 30138000676 Reactor 43130184 43130184 Terminal Board 42011113 42011113 Wire Clamp 71010003 71010003 Front Grill 22413027 22413027...
- Page 59 Service Manual Installation and Maintenance...
- Page 60 Service Manual Part Code Description GEH12AA-K3DNA1B/O GEH12AA-K3DNA1C/O Product Code CV010W01300 CV010W01900 Electric Box Assy 02613721 10000100271 Electric Box Sub-Assy 02613922 20113032 Main Board 30138000064 30138000675 Reactor 43130184 43130184 Terminal Board 420111041 420111041 Wire Clamp 71010003 71010003 Front Grill 22413027 22413027 Front Panel 0153303204P 0153304701...
- Page 61 Service Manual Installation and Maintenance...
- Page 62 Service Manual Part Code Description GEH18AA-K3DNA1B/O GEH18AA-K3DNA1C/O Product Code CV010W01400 CV010W01800 Front Grill 22413025 22413025 Front Panel 01535013P 01535013P Drainage Connecter 06123401 06123401 Chassis Sub-assy 02803270P 02803270P Drainage hole Cap 06813401 06813401 Compressor and fittings 00105249G 00105246G Magnet Coil 4300040033 4300040045 4-Way Valve Assy 03073203...
-
Page 63: Removal Procedure
Service Manual 11. Removal Procedure Warning: Be sure to wait for a minimum of 20 minutes after turning off all power supplies and discharge the refrigerant completely before removal. 11.1 Removal Procedure of Indoor Unit Steps Procedure 1. Remove panel Pull sliding clasps at both sides of panel, pull out the panel outwards and then move the panel upwards to remove it. - Page 64 Service Manual 4. Remove swing parts swing parts screw Remove 2 screws fixing the swing parts, and then pull the swing parts outwards to remove it. 5. Remove water tray Remove 2 screws fixing water tray, and then pull the water tray outwards to remove it.
- Page 65 Service Manual 7. Remove fixer of piping Pry out the clasps connecting fixer of piping and bottom case, and then pull the fixer of piping outwards to remove it. clasps fixer of piping 8. Remove evaporator Pry out the clasps connecting evaporator clasps and bottom case, and then pull the evaporator...
- Page 66 Service Manual 10. Remove centrifugal blade Remove one nut fixing the centrifugal blade, and then pull the centrifugal blade outwards to remove it. centrifugal blade 11. Remove fixing bracket of motor Remove 3 nuts on fixing bracket of motor, and then pull the fixing bracket of motor fixing bracket outwards to remove it.
-
Page 67: Removal Procedure Of Outdoor Unit
Service Manual 11.2 Removal Procedure of Outdoor Unit 09K 12K Steps Procedure 1. Remove big handle Right side plate Remove the screw fixing big handle; slide out the big handle upwards to make the clasp of big handle separate from the groove of right side plate, and then remove the big handle. - Page 68 Service Manual Procedure Steps 4. 拆面罩 Screws 拧下固定面罩的螺钉,拆下面罩。 Screws Screws 面罩 Screws 5. Remove axial flow blade Remove the nut fixing axial flow blade and then remove the axial flow blade. Axial flow blade Installation and Maintenance...
- Page 69 Service Manual Steps Procedure 6. Remove protective grille and right side plate Remove the screws 1 fixing protective grille and then remove the protective Protective grille. grille Screws 2 Screws 1 Right side plate Right side plate Remove the screws 2 fixing right side plate and then remove the right side plate.
- Page 70 Service Manual Steps Procedure 8. Remove 4-way valve assy Unsolder the spot weld of 4-way valve assy, compressor and condenser, and then remove the 4-way valve assy . 4-way valve assy Note: When unsoldering the spot weld, wrap the 4-way valve with wet cloth completely to avoid damaging the valve due to high temperature.
- Page 71 Service Manual Steps Procedure 11. Remove gas valve and liquid valve Remove two screws fixing the gas valve, then remove the gas valve. Remove two screws fixing the liquid valve, then remove the liquid valve. Liquid valve Screws Gas valve Screws 12.
- Page 72 Service Manual Steps Procedure 14. Remove compressor Remove 3 foot nuts on compressor, and then remove the compressor. Note: Protect the ports of discharge pipe and suction pipe to avoid foreign objects to enter it. Compressor Foot nuts 15. Remove condenser Remove one screw fixing the condenser, then remove the condenser.
- Page 73 Service Manual Steps Procedure 1. Remove handle and valve cover Remove the screws used for fixing the handle and valve cover,pull the handle and valve Handle cover up ward to remove them. Screw Screw Valve cover 2. Remove top panel Screws Top panel Screws...
- Page 74 Service Manual Procedure Steps 4. Remove front panel Screws Front panel Remove the screws connecting the front panel with the chassis and the motor support, and then remove the front panel. Screws 5. Remove rear grill and right side plate Rear grill Remove the screws 1 connecing the left side Screws 2...
- Page 75 Service Manual Steps Procedure 6. Remove left side plate Left side plate Remove the screws connecting the left side plate and the chassis, and then remove the left side plate. Screws 7. Remove axial flow blade Remove the nut fixing the blade and then remove the axial flow blade.
- Page 76 Service Manual Steps Procedure 9. Remove electric box assy Screws Remove the screws fixing electric box Electric box assy assy ; pull out each wiring terminal; lift the electric box assy upwards to remove it. Note: When pulling out the wiring terminal, pay attention to loose the clasp and don’t pull it so hard.
- Page 77 Service Manual Steps Procedure 12. Remove clapboard Clapboard Remove the screws fixing clapboard and then remove the clapboard. Screws 13. Remove gas valve ,liquid valve and valve support Since the piping ports on the soundproof sponge are torn easily, remove the soundproof sponge carefully.
- Page 78 Service Manual Steps Procedure 15. Remove condenser Condenser Remove one screw fixing the condenser, then remove the condenser. Screw Installation and Maintenance...
-
Page 79: Appendix
Service Manual Appendix: Appendix 1: Reference Sheet of Celsius and Fahrenheit Conversion formula for Fahrenheit degree and Celsius degree: Tf=Tcx1.8+32 Set temperature Fahrenheit Fahrenheit Fahrenheit Fahrenheit Fahrenheit Fahrenheit display display display Celsius (℃) Celsius (℃) Celsius (℃) temperature temperature temperature (℉)... -
Page 80: Appendix 3: Pipe Expanding Method
Service Manual Appendix 3: Pipe Expanding Method Pipe Note: Pipe cutter Improper pipe expanding is the main cause of refrigerant leakage.Please expand the pipe according to the following steps: Leaning Uneven Burr A:Cut the pip ● Confirm the pipe length according to the distance of indoor unit and outdoor unit. ●... -
Page 81: Appendix 4: List Of Resistance For Temperature Sensor
Service Manual Appendix 4: List of Resistance for Temperature Sensor Resistance Table of Ambient Temperature Sensor for Indoor and Outdoor Units(15K) C) Resistance(kΩ) C) Resistance(kΩ) Resistance(kΩ) Resistance(kΩ) Temp( Temp( Temp( Temp( 138.1 18.75 3.848 1.071 128.6 17.93 3.711 1.039 121.6 17.14 3.579 1.009... - Page 82 Service Manual Resistance Table of Tube Temperature Sensors for Outdoor and Indoor(20K) C) Resistance(kΩ) C) Resistance(kΩ) Resistance(kΩ) Resistance(kΩ) Temp( Temp( Temp( Temp( 181.4 25.01 5.13 1.427 171.4 23.9 4.948 1.386 162.1 22.85 4.773 1.346 153.3 21.85 4.605 1.307 20.9 4.443 1.269 137.2 4.289...
- Page 83 Service Manual Resistance Table of Discharge Temperature Sensor for Outdoor(50K) C) Resistance(kΩ) Resistance(kΩ) C) Resistance(kΩ) Resistance(kΩ) Temp( Temp( Temp( Temp( 853.5 18.34 4.75 799.8 93.42 17.65 4.61 89.07 16.99 4.47 703.8 84.95 16.36 4.33 660.8 81.05 15.75 4.20 620.8 77.35 15.17 4.08 580.6...
- Page 84 GREE ELECTRIC APPLIANCES,INC.OF ZHUHAI Add: West Jinji Rd, Qianshan, Zhuhai, Guangdong, China 519070 Tel: (+86-756) 8522218 Fax: (+86-756) 8669426 Email: gree@gree.com.cn Http://www.gree.com HONG KONG GREE ELECTRIC APPLIANCES SALES LIMITED Add: Unit 2612,26/F.,Miramar Tower 132 Nathan Road,TST,Kowloon,HK Tel: (852) 31658898 Fax: (852) 31651029...
Need help?
Do you have a question about the GEH09AA-K3DNA1B and is the answer not in the manual?
Questions and answers