Table of Contents
Advertisement
Quick Links
Advertisement
Table of Contents

Related Manuals for BELGACOM Twist 608


Summary of Contents for BELGACOM Twist 608
- Page 1 Belgacom Twist User manual...
-
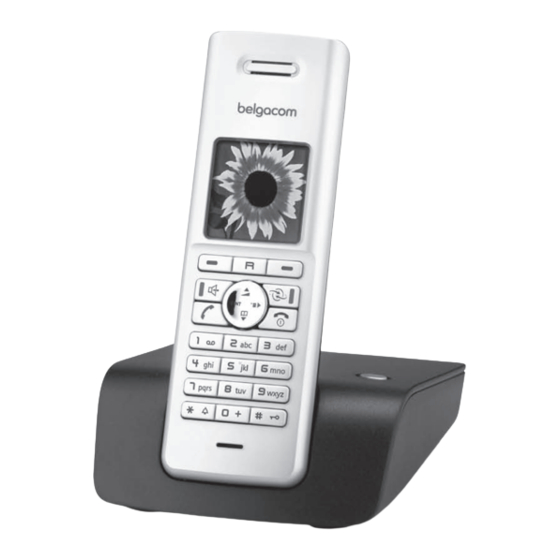
Page 2: The Handset At A Glance
The handset at a glance The handset at a glance 1 Charge status of the battery pack = e V U (flat to full) flashes: battery pack almost flat e V U flashes: battery pack charging 2 Display (screen) in idle status 3 Display keys (page 10) 4 Recall key - Confer (flash) -
Page 3: Table Of Contents
SMS mailboxes ....27 Setting SMS centres ....28 Twist 608 – More than just a telephone ..6 Using the network mailbox (PhoneMail) . - Page 4 Contents Setting the base station ..39 Protecting against unauthorised access ......39 Activating/deactivating music on hold .
-
Page 5: Safety Precautions
The base station and charging cradle are not splashproof (page 41). Do not use your phone in environments with a potential explosion hazard (e.g. paint shops). If you give your Twist 608 to someone else, make sure you also give them the ƒ user guide. - Page 6 Safety precautions All electrical and electronic equipment must be disposed of separately from gen- eral household waste using the sites designated by local authorities. If a product displays this symbol of a crossed-out rubbish bin, the product is sub- ject to European Directive 2002/96/EC. The appropriate disposal and separate collection of used equipment serve to prevent potential harm to the environment and to health.
-
Page 7: Twist 608
Twist 608 – More than just a telephone Twist 608 – Installing the base station More than just a telephone The base station is designed for use in closed, dry rooms with a temperature range of +5 °C to +45 °C. -
Page 8: Setting Up The Handset For Use
First steps Setting up the handset for use Connecting the base station ¤ First connect the power supply unit The display is protected by and then the phone jack as shown a plastic film. Please below and place the cables in the cable remove the protective recesses. - Page 9 First steps Attaching the belt clip If the internal numbers 1–6 are already assigned to other devices, the number 6 is There are notches for attaching the belt overwritten. clip on the side of the handset at the same height as the display. ¤...
- Page 10 First steps Display in idle status Please note: Once the phone is registered and the time After the first battery charge and discharge set, the idle display is as shown here you may replace your handset in its base sta- (example) tion after every call.
-
Page 11: Operating The Handset
Operating the handset Operating the handset In the main menu Navigate up/down/right/left. In submenus and lists Activating/deactivating the handset t / s Scroll up/down line by line. In idle status, press and hold Open the submenu or confirm the end call key (confirmation the selection. -
Page 12: Reverting To Idle Status
Operating the handset Ó Copy number into directory. ¤ • Enter the corresponding digit combina- Open the last number redial tion (page 13). list. Briefly press the end call key a once to Reverting to idle status return to the previous menu level/cancel the operation. -
Page 13: Eco Dect
Please note: – Activating eco mode reduces the range of the base station. – If external handsets (GAP) and handsets from earlier Twist 608 versions are used, your handset will not automatically reduce the transmission power to the base station. -
Page 14: Menu Tree
Menu tree Menu tree Instead of scrolling to locate a menu function, you can select a function more quickly by opening the menu and keying in a digit combination (or shortcut). Example: v 5 2 for "Set ringer tone for external calls". With the telephone in idle status, press v (open main menu): î... - Page 15 Menu tree Functions 2-6-1 Automatic Recall (page 18) 2-6-3 Withhold No. (page 17) 2-6-4 Send Number (page 17) 2-6-6 All Calls (page 17) 2-6-7 Ringback Off (page 18) ì Alarm Clock (page 38) í Add. Features Room Monitor (page 33) ï...
-
Page 16: Making Calls
Making calls Making calls If the handset is in the charging cradle and function is activated Auto Answer (page 36), the handset will take a call automatically when you lift it out of the Making an external call cradle. If the ringer tone is intrusive, press the External calls are calls using the public tel- display key. -
Page 17: Handsfree Talking
Making calls Display with CNIP Switching between earpiece and handsfree mode If you have CNIP, then the name that is Press the handsfree key. registered with your network provider for During a call activate or deactivate hands- that calling number will also be displayed. free. -
Page 18: Making Calls Using Network
Press s. Select number from the direc- Belgacom. ¤ tory and press §OK§ If you require assistance, please con- Press to save. §Save§ tact Belgacom. Status: Activate/deactivate call diversion. Setting functions for the ¤ Press the display key §Send§ next call After the announcement, press the end call key. -
Page 19: Functions After A Call
Making calls using network services Functions after a call Consultation During a call: Cancelling ringback Press the display key. §Ext.Call§ ¢ ¢ Enter the number. Ringback Off You have the following options: Call back last caller ¢ ¢ Toggling: ¤ Automatic Recall Use q to toggle between the par- ticipants. -
Page 20: Using The Directory And Lists
Using the directory and lists Using the directory and lists Name Enter name. Quick Dial: The options are: Select key for quick dial. ¤ Directory Save the changes. Info services list Last number redial list Saving a number in the info services SMS list list ¢... -
Page 21: Key
Using the directory and lists Dialling with the directory/info Delete List Delete all entries in the directory or info services list services list. ¢ ¢ s / ( s (select entry). Copy List Press the talk key. The number Send complete list to a handset is dialled. -
Page 22: Last Number Redial List
Using the directory and lists Copying a displayed number to the Managing entries in the last number directory redial list Numbers displayed in a list, e.g. the call Press the key briefly. history or the last number redial list, in an Select entry. - Page 23 Using the directory and lists You can open message lists according to Setting the call history type the situation: ¢ ¢ ¢ Ð Base Calls List Type If the network services key is flashing: Missed Calls / All Calls Press the network services key. ‰...
-
Page 24: Network Services Key
Network services key Information See following section entitled "Display- ing CNIP information". When you quit the call history, all entries are set to the status "old", i.e. the next time you call the list up they will no longer be shown in bold. Displaying CNIP information If you have CNIP, you can display the name that is registered for this number. -
Page 25: Sms (Text Messages)
SMS (text messages) SMS (text messages) Select number from the direc- tory or enter number directly. Your phone is supplied ready for sending For sending SMS to an SMS SMS messages immediately. mailbox: add the mailbox ID to SMS messages are exchanged between the end of the number. -
Page 26: Receiving An Sms
SMS (text messages) Writing/changing an SMS Opening the incoming message list with ¤ You are reading an SMS in the draft message list. Press. Open menu. §Options§ Select mailbox if necessary and enter mail- box PIN. You have the following options: The incoming message list is displayed as New SMS follows (example):... -
Page 27: Notification By Sms
SMS (text messages) Notification by SMS Replying to or forwarding SMS messages ¤ You can be notified about missed calls. Read the SMS (page 25): Precondition: For missed calls, the caller's Press the display key. §Options§ number (CLI) must have been transmit- You have the following options: ted. -
Page 28: Sms Mailboxes
SMS (text messages) ‰ SMS mailboxes Active mailboxes are marked with the mailbox list. They are shown in the SMS list and can, if necessary, be displayed The general mailbox is the default set- by pressing the key f. ting. Anyone can access this mailbox and it cannot be protected by a PIN. -
Page 29: Setting Sms Centres
SMS (text messages) Setting SMS centres Entering/changing SMS centres ¢ ¢ ¢ î Settings Service Centres Select SMS centre (e.g. Service 1) and press Centr. §OK§ ¤ Change multiple line input: Active Send: Select if SMS messages are to be sent via the SMS centre. -
Page 30: Using The Network Mailbox (Phonemail)
Using the network mailbox (PhoneMail) Using the network mailbox (PhoneMail) Configuring fast access for the network mailbox With fast access, you can dial the network mailbox directly. Fast access (1230) is set for the network mailbox. You only need to enter the number of the network mailbox. -
Page 31: Using Several Handsets
Using several handsets Using several handsets Manual registration to Twist 608/ You must activate manual registration of the handset on both the handset and the Registering handsets base station. Once it has been registered, the handset You can register up to six handsets to your returns to idle status. -
Page 32: Deregistering Handsets
Using several handsets Deregistering handsets Calling all handsets ("group call") Initiate internal call. You can deregister any other registered Press the star key. All handsets handset from any registered handset. are called. Open list of internal parties. Ending a call The handset you are currently using is indicated by <. -
Page 33: Listening In To An External Call
Using several handsets Listening in to an external call Select handset and press §OK§ You are connected with the internal participant. Precondition: The function Listening In must be activated. Either: You are conducting an external call. An Press the display key. §End§... -
Page 34: Changing The Name Of A Handset
Using several handsets Changing the name of a handset Using a handset as a room monitor The names "INT 1", "INT 2" etc. are assigned automatically at registration. If the room monitor is activated, a previ- You can change these names. The name ously saved destination number is called must be no more than 10 characters. -
Page 35: Setting The Handset
Setting the handset Activating the room monitor and Deactivating the room monitor entering the number to be called remotely ¢ ¢ í Room Monitor Preconditions: The phone must support ¤ touch tone dialling and the room monitor Change multiple line input: should be set for an external destination Room M.: number. -
Page 36: Changing The Display Language
Setting the handset Press briefly. SMS Notific. Assign key with the menu for activating Select and press Contrast §OK§ SMS notification (page 26). Select contrast. Withhold No. Press the display key. §Save§ Suppress Calling Line Identification for Press and hold (idle status). the next call (page 17). -
Page 37: Setting The Display Backlight
Setting the handset Setting the display backlight Changing the handsfree/ earpiece volume Depending on whether or not the handset is in the charging cradle, you can activate You can set the loudspeaker volume for or deactivate the backlight. If the base sta- handsfree talking to five different levels tion is turned on, the display is perma- and the earpiece volume to three different... -
Page 38: Changing Ringer Tones
Setting the handset Changing ringer tones Activating/deactivating the ringer tone You can deactivate the ringer tone on your Volume: handset before you answer a call or when You can choose between five volumes the handset is in idle status; the ringer (1–5;... -
Page 39: Activating/Deactivating
Setting the handset Activating/deactivating Activating/deactivating the alarm clock and setting the wake-up time advisory tones ¢ ì ¤ Your handset uses "advisory tones" to tell Change multiple line input: you about different activities and statuses. Activation: The following advisory tones can be acti- Select or Off. -
Page 40: Restoring The Handset To The Factory Settings
Setting the base station Restoring the handset to the Resetting the system PIN factory settings If you have forgotten your system PIN you can reset the base station to the original You can reset any individual settings and code 0000: changes that you have made. -
Page 41: Connecting The Base Station
Connecting the base station to PABX Connecting the base station If an access code has been saved: The access code is prefixed automati- to PABX cally when you select from the follow- ing lists: numbers of the SMS centres, call history or answer machine list. The following settings are only necessary The access code must be entered when when your PABX requires them;... -
Page 42: Appendix
Appendix Appendix "Base station x" flashes on the display. 1. The handset is outside the range of the base station. ¥ Care Move the handset closer to the base sta- tion. ¤ Wipe the base station, charging cradle The base station's range is reduced because eco mode is activated. -
Page 43: Declaration Of Conformity
We, Gigaset Communication GmbH, ural resources for its production. It may declare, that the Twist 608 is manufac- content hazardous substances for the tured according to our Full Quality Assur- health and the environment. - Page 44 Handset operating times/charging General specifications times DECT standard is supported The operating time of your Twist 608 depends on the capacity and age of the GAP standard is supported batteries and the way they are used. (All No. of channels...
-
Page 45: Guarantee Terms
Equipment. If you have any problems with the equip- Belgacom shall not be liable for any indi- ment, you should take it to a Teleboutique rect or immaterial loss sustained by the or to one of our authorized agents, in its... -
Page 46: Notes On The User Guide
Notes on the user guide Notes on the user guide Press and hold (idle status). ¤ Press and hold the end call key until the This section explains the meaning of cer- handset returns to idle status. tain typographical conventions that are used in this user guide. -
Page 47: Writing And Editing Text
Notes on the user guide ¤ Setting upper/lower case or digits Save the changes. Press the hash key # briefly to switch ¤ Press the display key §Save§ from "Abc" mode to "123" and from "123" ¤ Then press and hold the a key. to "abc"... -
Page 48: Index
Index Index transferring (connect) ..Call acceptance ....Call diversion ....Call duration . - Page 49 Index Deleting Entry characters ....saving (network mailbox) ..Deregistering (handset) ... selecting (menu) .
- Page 50 Index Headset socket ....Liquid ......Hearing aids .
- Page 51 Index Notification by SMS ....Number Saving (access code) ... . . as destination for room monitor .
- Page 52 Index Talk key ..... Text message, see SMS Toggling ..... . Touch tone dialling .
Need help?
Do you have a question about the Twist 608 and is the answer not in the manual?
Questions and answers