Table of Contents
Advertisement
Quick Links
Advertisement
Table of Contents

Related Manuals for BELGACOM Twist 359


Summary of Contents for BELGACOM Twist 359
- Page 1 Belgacom Twist 359 User manual...
-
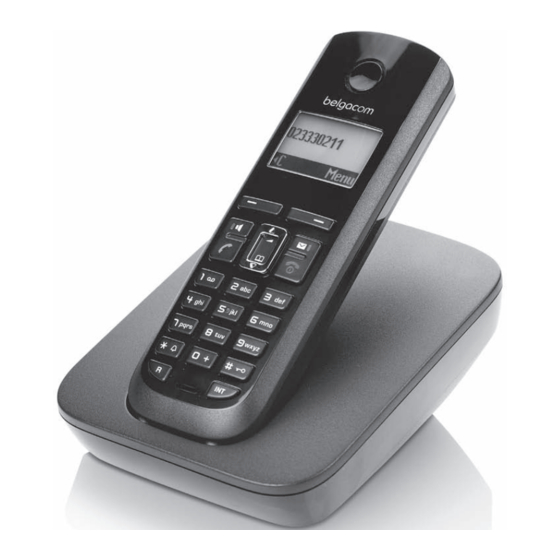
Page 2: The Handset At A Glance
The handset at a glance The handset at a glance 1 Display in idle status (example) ¢ 2 Charge status of the batteries( page 8) ¢ 3 Display keys ( page 14) ¢ 4 Message key ( page 23) Access to calls and message lists; Flashes: new message or new call 5 End call key, On/Off key End call, cancel function, go back one menu... -
Page 3: Table Of Contents
Contents Contents The handset at a glance ........1 The base station at a glance . - Page 4 Contents Using the network mailbox ......29 Configuring fast access for the network mailbox ..... 29 Viewing the network mailbox report .
-
Page 5: Safety Precautions
41). Do not use your phone in environments with a potential explosion hazard (e.g. paint shops). If you give your Twist 359 to someone else, make sure you also give them the ƒ user guide. Please remove faulty base stations from use or have them repaired by... -
Page 6: First Steps
First steps First steps Check the package contents one Twist 359 base station, one mains adapter, one handset, one phone cord with a four-pin connection, two batteries, one battery cover, one user guide. -
Page 7: Setting Up The Base Station
43. Please note: Never expose the telephone to the influence of heat sources, direct sunlight or other electrical devices. Protect your Twist 359 from moisture, dust, corrosive liquids and vapours. Connecting the base station ¤ First connect the mains adapter 1. -
Page 8: Setting Up The Handset For Use
First steps Setting up the handset for use The display is protected by a plastic film. Please remove the protective film! Inserting the batteries and closing the battery cover Warning ¢ Use only the rechargeable batteries ( page 41). Never use a conventional (non-rechargeable) battery or other battery types as this could result in sig- nificant health risks and personal injury. - Page 9 First steps Placing the handset in the base station and registering Before you can use the phone, you must first register the handset to the base station. ¤ Place handset Place the handset with the display into base facing up in the base station. Menu The handset registers automatically.
- Page 10 First steps Initial charging and discharging of batteries The correct charge level can only be displayed if the batteries are first fully charged and discharged. ¤ Place the handset in the base station or charging cradle for ten hours. ¤ Then remove the handset from the base station or 10 h...
- Page 11 First steps Setting the date and time Set the date and time so that the correct date and time can be assigned to incoming calls, and so that the alarm can be used. Þ Menu ¤ Press the key below on the §Menu§...
- Page 12 First steps ¤ The active line is marked [...]. Enter Date: Enter day, month and year as an 8-digit number via the handset, e.g. Q [01.10.2008] Q2QQN for 01/10/08. Ç If you want to correct an entry, press the top or bottom of the control key to toggle between fields.
- Page 13 First steps Display in idle status Once the phone is registered and the time Ð set, the idle display is shown as in this exam- Þ 01.10.08 07:15 Your phone is now ready for use. Menu Please note ¢ The range icon is only displayed in idle status if Eco Mode+ ( page 30) is deactivated.
-
Page 14: What Would You Like To Do Next
First steps What would you like to do next? Now you have successfully started your telephone you will probably want to adapt it to your personal requirements. Use the following guide to quickly locate the most important subjects. If you are unfamiliar with menu-driven devices such as other telephones you ¢... -
Page 15: Using The Phone
Using the phone Using the phone Control key In the following description the side of the control key you need to press for each operation is indicated accordingly, e.g. t for "press the top of the control key". The control key has a number of different functions: When the handset is in idle status Open the directory. -
Page 16: Keys On The Keypad
Using the phone Keys on the keypad c / Q / * etc. Press the matching key on the handset. Enter digits or letters. Correcting incorrect entries You can correct incorrect characters in the text by navigating to the incorrect entry using the control key. -
Page 17: Activating/Deactivating The Handset
Using the phone Activating/deactivating the handset With the phone in idle status, press and hold the end call key (con- firmation tone) to switch off the handset. Press and hold the end call key again to switch the handset on. Activating/deactivating the keypad lock The keypad lock prevents any inadvertent use of the phone. -
Page 18: Illustration Of Operating Steps In The User Guide
Using the phone Illustration of operating steps in the user guide The operating steps are shown in abbreviated form. Example: The illustration: ‰ ¢ ¢ ¢ = on) Settings Handset Auto Answer §Menu§ means: Þ Menu ¤ Press the display key §Menu§... -
Page 19: Menu Tree
Menu tree Menu tree Instead of scrolling to locate a menu function, you can select a function more quickly by opening the menu and keying in a digit combination (or shortcut). M 2 2 for "Set ringer tone volume". Example: §Menu§... -
Page 20: Making Calls
Making calls Making calls Answering a call The handset indicates an incoming call in three ways: by ringing, by a display on Making an external call the screen and by the flashing handsfree key d. External calls are calls using the public tel- You can answer the call by: ephone network. -
Page 21: Handsfree Talking
Making calls Handsfree talking Call display with CLIP/CLI If the caller's number is saved in your In handsfree mode, instead of holding the directory, the caller's name will also be handset to your ear you can put it down, displayed. for example on the table in front of you. -
Page 22: Using The Directory And Lists
Using the directory and lists Using the directory and lists Storing a number in the directory ¢ ¢ New Entry §Menu§ The options are: Enter the number and press Directory §OK§ Last number redial list Enter the name and press §OK§... - Page 23 Using the directory and lists Using other functions Enter the internal number of the receiving handset and Press the display key. §Menu§ press §OK§ The following functions can be selected with q: Successful transmission is acknowledged with the message . You can Entry copied.
-
Page 24: Last Number Redial List
Using the directory and lists The message key f will flash as soon as Last number redial list a new entry is received in a list (switches off when the key is pressed). The message The last number redial list contains the ten You have new messages appears in the dis- numbers last dialled with the handset... -
Page 25: Making Cost-Effective Calls
Making cost-effective calls The calls list is displayed as follows: You can delete the current entry with ¢ Delete Entry. §Menu§ Displaying CNIP information Calls List: Ç 02+03 If you have CNIP, you can display the name that is registered for this number. You have selected a list entry. -
Page 26: Sms (Text Messages)
SMS (text messages) SMS (text messages) Please note If you are interrupted by an external Your phone is supplied ready for sending call while writing an SMS, the text is SMS messages immediately. automatically saved in the draft SMS messages are exchanged between message list. -
Page 27: Receiving An Sms
SMS (text messages) Writing/changing an SMS Opening the incoming message list with You are reading an SMS in the draft mes- sage list. Press. Press the display key. The incoming message list is displayed as §Menu§ follows (example): You have the following options: Write Message Write and then send a new SMS or save. -
Page 28: Setting Sms Centres
SMS (text messages) Setting SMS centres Deleting the incoming message list All new and old SMS messages in the list are deleted. ¤ Entering/changing SMS centres Open the incoming message list. ¢ ¢ ¢ Settings §Menu§ Delete List §Menu§ ¢ Service Centres Select and press §OK§... -
Page 29: Sms On A Pabx
SMS (text messages) SMS on a PABX SMS messages can only be received if you have subscribed to the Calling Line Identification Presentation (CLIP) service and this information is sent to your inbox. If required, you must prefix the number for the SMS centre with the access code (depending on your PABX). -
Page 30: Using The Network Mailbox
Using the network mailbox Using the network mailbox Viewing the network mailbox report Configuring fast access for the When a message arrives, you will receive a notification to tell you a message is network mailbox waiting. If key 1 is configured correctly, the noti- With fast access, you can dial the network fication is recorded in the calls list mailbox directly. -
Page 31: Eco Dect
ECO DECT ECO DECT Status displays Display icon You are helping to protect the environ- Reception strength: ment with your Twist 359. Ð i Ñ Ò – good to low |(flashes) Reduced energy consumption – no reception ¼ Eco Mode+ enabled... -
Page 32: Setting The Alarm Clock
Alarm Clock Wake up time §Menu§ Manual registration of the handset to Enter the wake-up time in Twist 359 hours and minutes, then press §OK§ You must activate manual registration of the handset on both the handset and the When the alarm clock rings…... -
Page 33: De-Registering Handsets
Using several handsets Registering other handsets press . The handset is §OK§ called. You can register other handsets and hand- sets for other devices with GAP functional- Press the display key and ity as follows. §All§ §OK§ All handsets are called. On the handset ¤... -
Page 34: Listening In To An External Call (Listening In)
Handset settings Handset settings Listening in to an external call (listening in) Your handset is preconfigured, but you can change the settings to suit your indi- You are conducting an external call. An vidual requirements. internal participant can listen in on this call and take part in the conversation. -
Page 35: Setting The Display
Handset settings Setting the display Adjusting the volume via the menu ¢ ¢ Settings Audio Settings §Menu§ ¢ ¢ You can display a digital clock when the Call Volume Earpiece Volume handset is in idle status. Handsfree Volume ¢ ¢ ¢... -
Page 36: Advisory Tones
Handset settings Setting the ringer melody Battery low beep: the battery requires charging. Set different ringer melodies for external You cannot deactivate the confirmation calls, internal calls and the alarm clock. ¢ ¢ tone for placing the handset in the base Settings Audio Settings §Menu§... -
Page 37: Base Station Settings
Base station settings Base station settings Restoring the base station to the factory settings The base station settings are carried out using a registered handset. When restoring factory settings: Handsets are de-registered Protecting against unauthorised – When resetting via the menu: all handsets access –... -
Page 38: Connecting The Phone To A Pabx
Connecting the phone to a PABX Connecting the phone to a Setting pauses PABX Changing pause after line seizure The following settings are only necessary You can change the length of pause that is when your PABX requires them; see the inserted between pressing the talk key c and sending the number. -
Page 39: Customer Care And Support
Customer Care and support Customer Care and support Forgotten the system PIN. ¥ Reset the system PIN to 0000 ¢ page 36). Questions and answers The other party cannot hear you. You have pressed the §Mute§ display key. The table below contains a list of common The handset is "muted". -
Page 40: Declaration Of Conformity
We, Gigaset Communications GmbH, wise specified. The warranty shall be valid declare, that the Twist 359 is manufac- from the date on which the equipment is tured according to our Full Quality Assur- collected or delivered. -
Page 41: Environment
Equipment. Disposal Belgacom shall not be liable for any indi- Batteries should not be disposed of in gen- rect or immaterial loss sustained by the eral household waste. Observe the local... -
Page 42: Appendix
If the handset should come into contact times with liquid: 1. Turn the handset off and remove the The operating time of your Twist 359 batteries immediately. depends on the capacity and age of the batteries and the way they are used. -
Page 43: Writing And Editing Text
Appendix General specifications Writing an SMS/names Press the relevant key several times to DECT standard is supported enter letters/characters. GAP standard is supported Standard characters No. of channels 60 duplex channels 1x 2x 3x 4x 5x 6x 7x 8x 9x 10x 11x 12x 13x 14x Radio frequency range 1880–1900 MHz 1 €... -
Page 44: Mounting The Base Station To The Wall
Mounting the base station to the wall Mounting the base station to the wall approx. 2.5 mm... -
Page 45: Index
Index Index internal ..... Calling Line Identification ..Care of the telephone . - Page 46 Index Display restoring to factory settings ..call duration setting ........changing display language setting up .
- Page 47 Index Last number redial On/Off key ........List Order in directory .
- Page 48 Index Setting up handset ..... . Unknown caller ....Shortcut .
Need help?
Do you have a question about the Twist 359 and is the answer not in the manual?
Questions and answers