Table of Contents
Advertisement
Quick Links
Advertisement
Table of Contents

Related Manuals for BELGACOM Twist 500


Summary of Contents for BELGACOM Twist 500
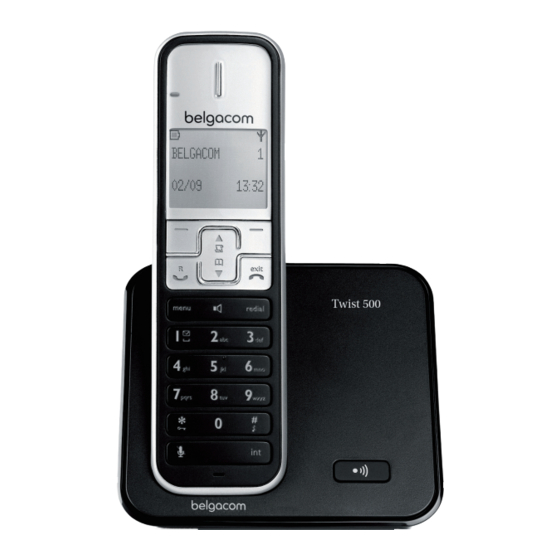
- Page 1 Belgacom Twist 500 User manual...
-
Page 2: Declaration Of Conformity
Declaration of Conformity PHILIPS Consumer Lifestyle Tussendiepen 4 9206 AD Drachten The Netherlands Declare that product model TWIST ™ 500 is in compliance with ANNEX IV of the R&TTE-Directive 1999/5/EC and then with the following essential requirements: Article 3.1 a : (protection of the health & the safety of the user) Safety : EN 60950-1:2006 SAR: EN50360:2001/EN50385:2002... -
Page 3: Table Of Contents
6 Text and numbers 1 Important Enter text and numbers Safety instructions Switch between uppercase and lowercase 2 Your Twist 500 What is in the box 7 Phonebook Overview of the phone View the phonebook Overview of the base station... - Page 4 12 Extra features Alarm clock Auto clock Keypad lock Locate the handset 13 Advanced settings Register the handsets Unregister the handsets Restore default settings 14 Default settings 15 Technical data 16 Frequently asked questions Contents...
-
Page 5: Important
1 Important • This equipment is not designed to make emergency calls when the power fails. An alternative has to be made available to allow emergency calls. Safety instructions • Do not expose the phone to excessive heat caused by heating equipment or direct sunlight. Power requirements •... - Page 6 registering a handset. To register a handset from different make to the base station, put the base station in registration mode, then When this logo is attached to a product, follow the procedure described in the handset it means a financial contribution has been manufacturer’s instructions. paid to the associated national recovery and recycling system.
-
Page 7: Your Twist 500
2 Your Twist 500 What is in the box Line cord Base station with bracket Line adapter User Manual Handset Power supply Your Twist 500... -
Page 8: Overview Of The Phone
Pause key • Turn the ringer on/off • Switch between the lower and upper case during text editing Intercom/ • Make the intercom call Conference • Make the conference call Microphone Mute key • Mute/unmute the microphone Your Twist 500... -
Page 9: Overview Of The Base Station
Call log There is unheard voice message. Overview of the base station Scroll up for more options Scroll down for more options The ECO mode is activated. Name Descriptions Paging • Find handsets • Enter registration mode Your Twist 500... -
Page 10: Get Started
3 Get started Connect the power socket to a standard wall outlet. Connect the telephone line cord to the phone socket at the bottom of the base station and the wall phone socket. Caution • Ensure you have read the safety instructions in the “Important”... -
Page 11: Wall Mount The Base Station
Wall mount the base station Warning • You must follow the instructions below to wall mount the base station. Remove the bracket from the base station. Align the mounting holes on the back of the base station with the screws on the Turn the bracket around. -
Page 12: Install The Handset
Install the handset Caution • Risk of explosion! Keep batteries away from heat, sunshine or fire. Never discard batteries in fire. • Use only the supplied batteries. • Risk of decreased battery life! Never mix different brands or types of batteries. Note • Charge the batteries for 24 hours before first use. Warning • Check the battery polarity when inserting in the battery compartment. -
Page 13: Welcome Mode
or [24 HOURS] as the time display. Then Welcome mode press [SELECT] to confirm. The setting is saved. » To ensure that the phone functions properly, make the following initial settings. When you see the welcome message, What is standby mode? press [OK]. Select your language, press [SELECT] to Your phone is in standby mode when it is idle. -
Page 14: Calls
4 Calls Redial the most recent number Press Press redial. Press [SELECT]. Note The most recent number is then dialed » • When the power fails, the phone cannot out. access emergency services. Call from the redial list You can make a call from the redial list. •... -
Page 15: End A Call
End a call Mute the microphone You can end a call in these ways: Press during a call. The handset displays [MUTE ON]. » • Press ; or » The caller cannot hear you, but you • Place the handset to the base station can still hear his voice. -
Page 16: Toggle Between Two Calls
Toggle between two calls You can toggle your calls in these ways: Press ; or Press [OK] and select [SWITCH CALLS], then press [OK] again to confirm. The current call is put on hold, and you » are now connected to the other call. Make a conference call Note •... -
Page 17: Intercom And Conference Calls
5 Intercom and Toggle between calls conference calls Press int to switch between the outside call and the intercom call. An intercom call is a call to another handset Transfer a call that shares the same base station. A conference call involves a conversation among you, another Press int during a call. -
Page 18: During The Conference Call
Note • Press to join an ongoing conference with another handset if [ADVANCED SET] > [CONFERENCE] is set to [ON]. During the conference call Press int to put the external call on hold and go back to the internal call. The external call is put on hold. -
Page 19: Text And Numbers
6 Text and Characters (Lower case) . 0 , / : ; “ ‘ ! ¡ ? ¿ * + - % \ ^ numbers [Sp] 1 @ _ # = < > ( ) & € £ $ ¥ [ ] { } ¤ § … a b c 2 à â Æ á ã â ä å ą ç ć č You can enter text and numbers for handset d e f 3 ď đ ė ĕ è é ê ë ę Δ Φ... -
Page 20: Phonebook
7 Phonebook Enter the first character of a contact Access the phonebook menu. Select [LIST]. This phone has a phonebook that stores up Press the alphanumerica key that to 200 records. You can access the phonebook corresponds to the character. from the handset. Each record can have a name The first record that starts with this »... -
Page 21: Set The Melody
Enter the number, then press [SAVE] to Edit a record confirm. Press menu. Select [PHONEBOOK] > [EDIT ENTRY], then press [SELECT] to • For more information on how to edit the name and number, see the section on Text confirm. and numbers. -
Page 22: Call Log
8 Call log Delete a call record Press . Select [CALL LIST]. The call log stores the call history of all outgoing, missed or received calls. The incoming Select a record, then press [OPTION] to call history includes the name and number confirm. -
Page 23: Redial List
9 Redial list Delete a redial record Press redial to enter the list of dialed calls. The redial list stores the call history of dialed Select a record, then Press [SELECT] calls. It includes the names and/or numbers you then [OPTION]. have called. -
Page 24: Self-Defined Settings
10 Self-defined Select [PERSONAL SET] > [HANDSET TONES] > [RING TONES], then press settings [SELECT] to confirm. Select a ringtone, then press [SELECT] to confirm. The setting is saved. » Customize the settings to make it your own phone. Set the handset’s ringtone volume Personalize the phone display You can select among 6 ringtone volume levels or [OFF]. - Page 25 When you are in standby mode, Press menu. Select [ADVANCED SET] > [XHD SOUND], then press [SELECT] to confirm. Select the new setting, then press [SELECT] to confirm. » The setting is saved. When you are in a call, Press [OPTION] to enter the options menu.
-
Page 26: Call Features
11 Call features Select the recall duration Ensure that the recall time is set correctly before you can answer a second call. In normal The phone supports a number of call-related case, the phone is already preset for the recall features that help you handle and manage the duration. -
Page 27: Eco Mode
ECO mode The [ECO] mode reduces the transmission power of the handset and base station. Press menu. Select [ADVANCED SET] > [ECO], then press [SELECT] to confirm. Select the new setting, then press [SELECT] to confirm. The setting is saved. » » [ECO] is displayed instead of standby mode Note •... -
Page 28: Extra Features
12 Extra features Set the alarm melody Press menu. Select [CLOCK & ALARM] > [ALARM Your phone offers you extra features which TONE], then press [SELECT] to confirm. keep you organized and informed while on the Select a new melody, then press move. -
Page 29: Locate The Handset
Lock the keypad Press and hold in standby mode. The keypad is locked. » Note • When the keypad is locked, no call can be made. You can still answer the incoming calls. The keypad is unlocked during the call but is locked automatically after you finish the call. -
Page 30: Advanced Settings
13 Advanced Note settings • The preset PIN is 0000. No change can be made on it. Register the handsets Unregister the handsets You can register additional handsets to the base If two handsets share the same base station. The base station can register up to 5 station, you can unregister a handset with handsets. -
Page 31: Default Settings
14 Default settings Language Country dependent Handset name BELGACOM Date 01/01/10 Date format DD/MM Time 00:00 Time format 24-hour Auto clock Alarm Phonebook list Unchanged Auto hang up Recall time Country dependent Network type PSTN (DECT phone for connection to... -
Page 32: Technical Data
15 Technical data Display • Progressive LCD backlight General telephone features • Dual mode caller name & number identification • 10 polyphonic ringer melodies and 5 standard ringer melodies • Conference call and voicemails • Intercom Phonebook list, Redial list and Call log •... -
Page 33: Frequently Asked Questions
16 Frequently No display • Ensure the batteries are charged. asked questions • Ensure there are power and phone connections. Bad audio (crackles, echo, etc.) • The handset is nearly out of range. Move The signal icon flashes. it closer to the base station. •...
Need help?
Do you have a question about the Twist 500 and is the answer not in the manual?
Questions and answers