Table of Contents
Advertisement
Quick Links
Advertisement
Table of Contents

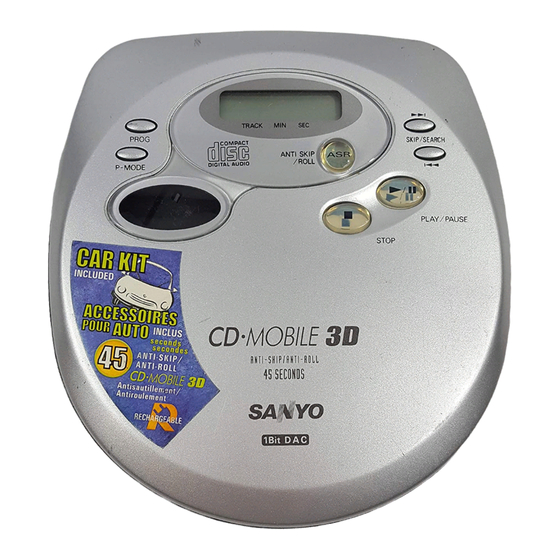
Summary of Contents for Sanyo CDP-4100CR
- Page 1 INSTRUCTION MANUAL CDP-4100CR Compact Disc Player...
- Page 2 PRECAUTIONS CAUTION USE OF CONTROLS OR ADJUSTMENT OR PERFORMANCE OF PROCEDURES OTHER THAN THOSE SPECIFIED HEREIN MAY RESULT IN HAZARDOUS RADIATION EXPOSURE. THIS COMPACT DISC PLAYER SHOULD NOT BE ADJUSTED OR REPAIRED BY ANYONE EXCEPT QUALIFIED SERVICE PERSONNEL. CAUTION – INVISIBLE LASER RADIATION WHEN OPEN AND INTERLOCKS DEFEATED.
- Page 3 • High volume levels can create poten- • Do not use where there are extremes tially dangerous situations by drown- of temperature (below 5°C or ex- ing out surrounding sounds. Use cau- ceeding 35°C). tion when driving while operating the •...
- Page 4 CONTROLS 1. Disc compartment 9. Battery compartment (bottom) 2. Play/Pause button (PLAY/PAUSE) 10. External DC socket (DC 6V) 3. Stop button (STOP) 11. Line output socket (LINE OUT) 4. Play mode button (P-MODE) 12. Headphones socket (PHONES) 5. Programme button (PROG) 13.
- Page 5 The buttons on the remote control function in the same way as the corresponding buttons on the unit. 1. Skip/Search buttons (SKIP) 2. Volume Control (VOLUME) 3. Play/Pause button (PLAY/PAUSE) 4. Stop button (STOP)
-
Page 6: Power Supply
AC power source and the in- stalled batteries are disconnected. Rechargeable battery 1. Install the rechargeable nickel-cad- mium battery (SANYO NBP-50A) as shown below. Observe proper polar- ity. Battery recharging or replacement If the rechargeable battery or alkaline batteries are weak and discharged, “... -
Page 7: Cigarette Lighter Adaptor
CIGARETTE LIGHTER ADAPTOR The supplied cigarette lighter adaptor is designed for use with vehicles that have a 12V, negative ground electrical system. Most vehicles have this type of electrical system, but if you are unsure about the type your vehicle has, contact the ve- hicle dealer. -
Page 8: Before Operation
BEFORE OPERATION Anti rolling shock function In the previous anti-shock function, when skips occurred while available memory runs out, then the sound would suffer some interruption. The new anti rolling shock function is designed to prevent skipping to the great- est extent possible instead of supple- menting the skipped portion of the sound. - Page 9 Bass expander system If the operating buttons do not Set the BASSXPANDER switch to ON to function when pressed ... enhance the bass sound. 1. Check whether the HOLD switch is on or not. Auto power on function 2. Remove the batteries and/or dis- The power turns on automatically when connect the AC adaptor from the PLAY/PAUSE button is pressed.
-
Page 10: Handling Compact Discs
HANDLING COMPACT DISCS Use compact discs bearing the symbol • Handle the disc by its edge. Do not shown below. In addition to conventional touch the playing surface (glossy 12 cm CDs, this unit can be used to play side). 8 cm CDs without an adaptor. -
Page 11: Playing A Disc
PLAYING A DISC • Be sure to reduce the volume before 3. Hold the disc with the labeled side up connecting or disconnecting the and press it onto the pivot until it headphones. “clicks” into place. BASIC CD PLAY 1. Connect the remote control and head- phones, then plug the cord from the remote control into the PHONES socket. - Page 12 5. Press the PLAY/PAUSE button to Skip play begin play. To skip to track 6 while track 3 is playing, press the e SKIP/SEARCH button re- peatedly until “06” appears on the display. To skip back to track 3 while track 6 is playing, press the f SKIP/SEARCH button repeatedly until “03”...
-
Page 13: Programmed Play
PROGRAMMED PLAY Up to 24 tracks on a disc can be pro- 4. Repeat steps 2 and 3 to programme grammed for play in any order. tracks. 1. Press the PROG button during stop. 5. To check the programme contents a f t e r a l l t r a c k s h a v e b e e n programmed, press the PROG but- ton repeatedly. - Page 14 VARIOUS PLAYING MODE Press the P-MODE button repeatedly INTROSCAN during stop to select a various play mode 1. Press the P-MODE button three times available. Each time the button is pressed, during stop. “INTRO” appears. the mode changes as shown below: 2.
- Page 15 CAR CASSETTE ADAPTOR Before use Using in a car Check the cassette tape insert slot of 1. Plug the cord into the LINE OUT your car stereo. If necessary, change the socket. direction of the cord on the cassette 2. Insert the pack with “THIS SIDE UP/ shaped pack of the adaptor.
- Page 16 USING THE LINE OUT SOCKET To record from the CD player To hear through a pair of speakers Connect the patch cable (not supplied) Connect the patch cable (not supplied) from the LINE OUT socket on the unit to from the LINE OUT socket on the unit to the LINE INPUT socket on a cassette the AUX or CD INPUT sockets on a recorder.
- Page 17 CLEANING Cleaning the pickup lens • To clean the pickup lens, open the Dust on the pickup lens can lead to erratic disc compartment lid. Blow the dust operation and interruption of the sound off of the lens using a camera lens during play.
-
Page 18: Specifications
SPECIFICATIONS Channels: 2 channels S/N ratio: 60 dB Wow and flutter: undetectable Sampling frequency: 44.1 kHz Pickup light source: Semiconductor laser Pickup wave length: 790 nm Laser output: 0.5 mW (continuous wave max.) Terminal impedance: PHONES: 16 - 32 ohms LINE OUT: 47 kohms Power source: DC: 6V (AC adaptor or Cigarette lighter adaptor) - Page 20 1AD6P1P1251-- SANYO Electric Co., Ltd. (AU) Printed in China...


Need help?
Do you have a question about the CDP-4100CR and is the answer not in the manual?
Questions and answers