Table of Contents
Advertisement
Available languages
Available languages
Quick Links
Advertisement
Table of Contents

Related Manuals for Targus AMW14EU


Summary of Contents for Targus AMW14EU
- Page 1 8-button wireless laser mouse USER GUIDE...
- Page 2 Table of Contents English - - - - - - - - - - - - - - - - - - - - - - - 3 Deutsch - - - - - - - - - - - - - - - - - - - - - 14 Español - - - - - - - - - - - - - - - - - - - - - 26 Français - - - - - - - - - - - - - - - - - - - - - 38 Italiano - - - - - - - - - - - - - - - - - - - - - - 50...
- Page 3 CAUTION LASER RADIATION. DO NOT STARE INTO BEAM VIEW DIRECTLY WITH OPTICAL INSTRUMENTS. CLASS I LASER PRODUCT. NEVER POINT A LASER BEAM INTO A PERSON’S EYES OR VIEW A LASER BEAM DIRECTLY, AS PROLONGED EXPOSURE CAN BE HAZARDOUS TO THE EYES. MOMENTARY EXPOSURE FROM A LASER POINTER, SUCH...
-
Page 4: Package Contents
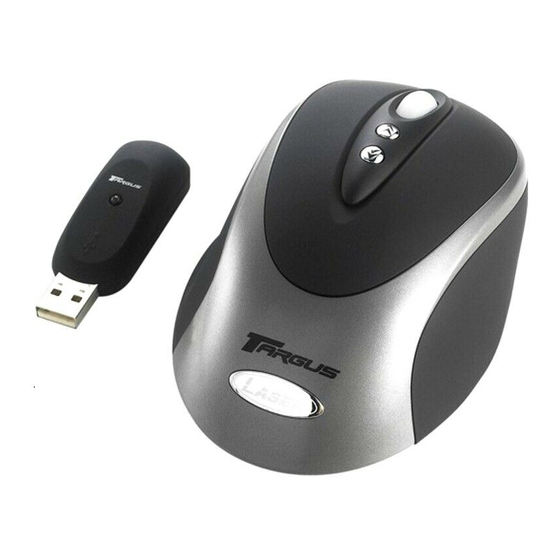
TARGUS 8-BUTTON LASER WIRELESS MOUSE Introduction Congratulations on your purchase of the Targus 8-Button Laser Wireless Mouse desktop. This ergonomically-designed mouse offers the latest in laser tracking technology as well as the most up-to-date wireless features. It allows for improved tracking accuracy on most types of surfaces, even some mirror and glass. -
Page 5: System Requirements
Targus 8-Button Laser Wireless Mouse • 2 x AA Rechargeable Batteries • User Guide System Requirements Hardware • USB interface Operating System • Windows 2000/XP ® • Windows Vista™ For Desktop PCs For instances where the PC is positioned under a desk or other places that might impede wireless connectivity, use of the extension seat is recommended. -
Page 6: Installing The Batteries
Targus 8-Button Laser Wireless Mouse For Notebook PCs 1 Connect the extension seat to an available USB port on your PC. 2 Plug the USB wireless receiver into the port labeled 'receiver' located at the top of the seat. 3 Connect the charge cable's USB end to the USB port labeled 'charger' on the extension seat. -
Page 7: Charging The Mouse
Targus 8-Button Laser Wireless Mouse WARNINGS: U ONLY HEAVY DUTY RECHAREGEABLE BATTERIES EVER USE ALKALINE BATTERIES VOID MIXING NEW AND USED BATTERIES 3 Slide the battery cover back into position until it “clicks” firmly into place. Charging the Mouse For best results, you should charge the mouse at least eight hours before using it. - Page 8 Targus 8-Button Laser Wireless Mouse Synchronisation Make sure that your computer is turned on and has detected the USB receiver before you synchronise. 1 Press and release the connect button on the receiver. Connect button 2 Press and release the connect button located on the bottom of the mouse.
-
Page 9: Using The Mouse
Targus 8-Button Laser Wireless Mouse NOTE: R EMOVING THE BATTERIES WILL REQUIRE YOU TO SYNCHRONIZE THE MOUSE WITH THE RECEIVER AGAIN Using the Mouse 1: Left Mouse Button 5: Application Switch 2: Right Mouse Button 6: Internet Page Backward 3: Middle Button/Scrolling... -
Page 10: Safety Measures
Targus 8-Button Laser Wireless Mouse Safety Measures • Although this mouse is a Class 1 Laser Product and safe for operation, avoid pointing the laser into the eyes or looking directly into the laser emitter. • Keep the mouse away from young children. - Page 11 Targus 8-Button Laser Wireless Mouse extension seat, or that the extensions seat's cable is connected to your PC. • Make sure you have established a wireless link between mouse receiver. “Synchronisation” on page 8. I do not see the laser light when the mouse is active.
-
Page 12: English
Targus 8-Button Laser Wireless Mouse Technical Support For technical questions, please visit: Internet http://www.targus.com/support.asp English http://www.targus.com/uk/support.asp French http://www.targus.com/fr/support.asp German http://www.targus.com/de/support.asp Spanish http://www.targus.com/sp/support.asp Italian http://www.targus.com/it/support.asp Our knowledgeable staff is also available to answer your questions through one of the following telephone numbers. -
Page 13: Product Registration
This warranty does not cover accidental damage, wear and tear, or consequential or incidental loss. Under no conditions is Targus liable for loss of, or damage to a computer; nor loss of, or damage to, programs, records, or data; nor any consequential or incidental damages, even if Targus has been informed of their possibility. -
Page 14: Declaration Of Conformity
Changes or modifications not authorized by the party responsible for compliance could void the user’s authority to operate this product Declaration of Conformity Hereby, Targus, declares that this device is in compliance with the essential requirements and other relevant provisions of Directive 1999/5/EC. Targus Recycling Directive At the end of this product’s useful life please dispose at an... - Page 15 VORSICHT LASERSTRAHLUNG. NICHT IN DEN STRAHL BLICKEN ODER DIREKT MIT OPTISCHEN GERÄTEN ANSEHEN. LASERPRODUKT DER KLASSE I. DER LASERSTRAHL DARF NICHT AUF DIE AUGEN EINER ANDEREN PERSON GERICHTET ODER DIREKT ANGESEHEN WERDEN, WEIL EINE LÄNGERE EXPOSITION SCHÄDLICH FÜR DIE AUGEN IST. EINE KURZE EXPOSITION...
- Page 16 TARGUS DRAHTLOSE LASER-MAUS Einführung Gratulation zu Ihrem Erwerb der Targus kabelfreien Laser-Maus für den Desktop-Computer. Diese in ergonomischer Hinsicht entwickelte Maus bietet sowohl den neuesten Stand der Laserführungstechnologie als auch die modernsten drahtlosen Funktionen. Sie ermöglicht verbesserte Aufspürexaktheit auf den meisten Oberflächenarten, selbst auf manchen Spiegeln und...
- Page 17 Targus Drahtlose Laser-Maus Systemanforderungen Hardware • USB-Anschluss Betriebssystem • Windows 2000/XP ® • Windows Vista™ Für Desktop-Computer Wenn sich der Computer unter einem Tisch oder an anderen Orten befindet, einer drahtlosen Verbindungsfähigkeit hinderlich sein können, wird die Verwendung des Erweiterungssitzes empfohlen.
- Page 18 Targus Drahtlose Laser-Maus 2 USB-Empfänger Anschluss Bezeichnung "receiver" ("Empfänger") Oberseite des Sitzes einstecken. 3 Das USB-Ende des Ladekabels an den USB- Anschluss Bezeichnung "charger" ("Ladegerät") am Erweiterungssitz anschliessen. Ersatzweise, wenn mehr USB-Anschluss verfügbar ist, haben Möglichkeit Erweiterungssitz nicht zu benutzen, wobei Sie den Empfänger und das Ladekabel direkt in die offenen USB-...
- Page 19 Targus Drahtlose Laser-Maus WARNUNG: F ÜR DEN ATTERIEAUSTAUSCH DÜRFEN NUR AUFLADBARE MH-B ATTERIEN MIT HOHER EISTUNG VERWENDET WERDEN IEMALS ALKALISCHE ATTERIEN VERWENDEN EUE UND GEBRAUCHTE ATTERIEN DÜRFEN NICHT ZUSAMMEN VERWENDET WERDEN 3 Den Deckel zum Batteriefach wieder zuschieben bis es "klickt".
- Page 20 Targus Drahtlose Laser-Maus Synchronisation Der Computer muss eingeschaltet sein und den USB- Empfänger gefunden haben bevor Sie synchronisieren können. 1 Die Verbindungstaste am Empfänger drücken und loslassen. Verbindungs- Taste 2 Die Verbindungstaste unten an der Maus drücken und loslassen. Verbindungs-Taste Die Statusleuchte des Empfängers blinkt, während er...
- Page 21 Targus Drahtlose Laser-Maus Nach der erfolgreichen Synchronisation ist die Maus einsatzbereit. HINWEIS: ATTERIEWECHSEL BEDEUTET NOCHMALIGES YNCHRONISEREN DER AUS MIT DEM MPFÄNGER Benutzung der Maus 1: Linke Maus-Taste 5: Anwendungswechsel 2: Rechte Maus-Taste 6: Internetseite-zurück 3: Mittlere Taste/Rollrädchen 7: Aufwärtsrollen 4: Internetseite-vorwärts 8: Abwärtsrollen...
- Page 22 Targus Drahtlose Laser-Maus Sicherheitsmassnahmen • Obwohl diese Maus ein Laserprodukt der Klasse 1 und ihr Betrieb sicher ist, ist es zu vermeiden den Laser direkt auf die Augen zu richten oder direkt in den Laser-Emitter zu schauen. • Die Maus von kleinen Kindern fernhalten.
- Page 23 Targus Drahtlose Laser-Maus • Prüfen ob der USB-Konnektor des Empfängers fest am USB-Anschluss an Ihrem Computer angeschlossen ist. • Überprüfen ob eine drahtlose Verbindung zwischen der Maus ihrem Empfänger besteht. Siehe “Synchronisation”. Was tun, wenn die Reaktionszeit der Maus langsam ist oder die Maus sporadisch aufhört zu arbeiten? •...
-
Page 24: Deutsch
Targus Drahtlose Laser-Maus Technische Unterstützung Wenn Sie technische Fragen haben, besuchen Sie bitte: Internet http://www.targus.com/support.asp Englisch http://www.targus.com/uk/support.asp Französisch http://www.targus.com/fr/support.asp Deutsch http://www.targus.com/de/support.asp Spanisch http://www.targus.com/sp/support.asp Italienisch http://www.targus.com/it/support.asp Unser Expertenteam steht Ihnen auch telefonisch zur Beantwortung Ihrer Fragen zur Verfügung. Belgien 02-717-2451 Dänemark... - Page 25 Geben Sie bitte Ihren vollständigen Namen, Ihre E-Mail-Adresse, Telefonnummer und Firmeninformationen an (falls zutreffend). Garantie Targus garantiert zwei (2) Jahre lang, dass Zubehör von Targus frei von Fehlern im Material und in der Verarbeitung ist. Erweist sich Ihr Targus-Zubehör während dieser Zeit als fehlerhaft, wird es umgehend repariert oder ersetzt.
- Page 26 Konformität verantwortlichen Partei genehmigt wurden, können zum Verlust des Benutzerbetriebsrechts führen Konformitätserklärung Hiermit erklärt Targus, dass sich das Gerät in Übereinstimmung mit den grundlegenden Anforderungen und den übrigen einschlägigen Bestimmungen der Richtlinie 1999/5/EG befindet. Dieses Gerät hat einen niedrigen Energiebedarf. Gerät ist nur für Büro und häuslichen Bereich bestimmt.
- Page 27 PRECAUCIÓN RADIACIÓN LÁSER. MIRE DIRECTAMENTE EL RAYO NI LO OBSERVE DIRECTAMENTE TRAVÉS INSTRUMENTOS ÓPTICOS. PRODUCTO LÁSER DE CLASE I. NUNCA APUNTE UN RAYO LÁSER A LOS OJOS PERSONA, DIRECTAMENTE EL RAYO LÁSER, YA QUE LA EXPOSICIÓN PROLONGADA PUEDE NOCIVA PARA LA VISTA. EXPOSICIÓN MOMENTÁNEA PUNTERO...
-
Page 28: Contenido Del Paquete
RATÓN LÁSER INALÁMBRICO DE TARGUS Introducción Felicidades por su compra del ratón láser inalámbrico de sobremesa Targus. Este ratón de diseño ergonómico le ofrece lo último en tecnología de movimiento por láser, así como características inalámbricas más modernas. Le ofrece un movimiento de precisión mejorada sobre casi cualquier tipo de superficie, incluso sobre algunas superficies de reflectantes o de vidrio. -
Page 29: Requisitos Del Sistema
Ratón láser inalámbrico de Targus Requisitos del sistema Hardware • Puerto USB Sistema operativo • Windows 2000/XP ® • Windows Vista™ Para ordenadores personales de sobremesa Se recomienda usar la base de extensión en los casos en que el ordenador está ubicado debajo del escritorio o en otros lugares que obstruyan la conectividad inalámbrica. - Page 30 Ratón láser inalámbrico de Targus 3 Conecte el extremo USB del cable de carga al puerto USB de la base marcada como "cargador". Como alternativa, si dispone de más de un puerto USB, puede elegir no usar la base de extensión y conectar el receptor y el cable de carga directamente a los puertos USB disponibles de su ordenador portátil.
- Page 31 Ratón láser inalámbrico de Targus VITE USAR PILAS NUEVAS CON PILAS USADAS EN UN DISPOSITIVO 3 Deslice la cubierta de las pilas hasta que se trabe firmemente en su sitio. Cómo cargar el ratón Para obtener mejores resultados, debe cargar el ratón al menos por ocho horas antes de usarlo.
- Page 32 Ratón láser inalámbrico de Targus 1 Oprima y suelte el botón de conexión del receptor. Botón de conexión 2 Oprima y suelte el botón de conexión, ubicado en la parte inferior del ratón. Botón de conexión Emisor de rayo láser La luz indicadora de condición del receptor se...
- Page 33 Ratón láser inalámbrico de Targus Cómo usar el ratón 1: Botón izquierdo 5: Salto entre aplicaciones 2: Botón derecho 6: Regresar a página de 3: Botón del medio/rueda de 7: Desplazamiento hacia 4: Avanzar a página de Internet 8: Desplazamiento hacia...
- Page 34 Ratón láser inalámbrico de Targus Medidas de seguridad • Aunque este ratón es un producto láser de clase A y su operación es muy segura, evite apuntar el ratón directamente hacia sus ojos o mirar directamente hacia el emisor de láser.
- Page 35 Ratón láser inalámbrico de Targus • Verifique que el conector USB del receptor esté bien conectado al puerto USB de su ordenador. • Verifique haber establecido un enlace inalámbrico entre presentador receptor. “Sincronización”. ¿Qué hago si el tiempo de respuesta del ratón es muy lento o si éste deja de funcionar por...
-
Page 36: Español
Ratón láser inalámbrico de Targus Soporte técnico Si tiene preguntas técnicas, por favor visite: Internet http://www.targus.com/support Inglés http://www.targus.com/uk/support.asp Francés http://www.targus.com/fr/support.asp Alemán http://www.targus.com/de/support.asp Español http://www.targus.com/sp/support.asp Italiano http://www.targus.com/it/support.asp Nuestro personal experto también puede contestarle sus preguntas a través de uno de los siguientes números telefónicos. -
Page 37: Registro Del Producto
Targus se le informó de la posibilidad que existieran. La presente garantía no afecta los derechos que la ley le otorga. - Page 38 Declaración de Conformidad Por medio de la presente Targus declara que al equipo cumple con los requisitos esenciales y cualesquiera otras disposiciones aplicables o exigibles de la Directiva 1999/5/CE. Este dispositivo es de baja potencia.
- Page 39 AVERTISSEMENT RAYONNEMENT LASER. JAMAIS REGARDER DROIT DANS LE RAYON NI L'OBSERVER DIRECTEMENT MOYEN D'UN QUELCONQUE DISPOSITIF OPTIQUE. APPAREIL LASER CLASSE I. NE JAMAIS POINTER UN RAYON LASER VERS LES YEUX D'UNE PERSONNE OU REGARDER DROIT DANS UN RAYON LASER, CAR TOUTE EXPOSITION PROLONGÉE EST DANGEREUSE POUR LES YEUX.
- Page 40 SANS FIL DE TARGUS Introduction Nous vous félicitons d'avoir acheté une souris laser Targus sans fil. De conception ergonomique, cette souris vous apporte ce qu'il y a de plus récent en matière de repérage au laser, ainsi que d'excellentes propriétés, dont les caractéristiques se placent à...
-
Page 41: Configuration Requise
Mini souris laser sans fil de Targus Configuration requise Équipement • Port USB Système d'exploitation • Windows 2000/XP ® • Windows Vista™ Pour ordinateurs de bureau Dans les cas où l'ordinateur est placé sous un bureau ou dans une position susceptible de gêner la connexion sans fil, l'usage du socle de prolongement est recommandé. -
Page 42: Installation Des Piles
Mini souris laser sans fil de Targus Autre possibilité : si plus d'un port USB est disponible, vous pourriez décider de ne pas vous servir du socle de prolongement et de brancher le récepteur et le câble de recharge directement dans les ports USB disponibles de l'ordinateur portable. - Page 43 Mini souris laser sans fil de Targus 3 Replacez le couvercle du compartiment des piles en le glissant jusqu'à ce qu'il s'emboîte fermement en cliquant. Recharge de la souris Pour profiter au maximum de la souris, chargez-la pendant au moins 8 heures avant de l'utiliser.
- Page 44 Mini souris laser sans fil de Targus Synchronisation Vérifiez que l'ordinateur est en marche et qu'il a détecté le récepteur USB avant de procéder à la synchronisation. 1 Appuyez le doigt sur le bouton de connexion du récepteur puis relâchez-le..
- Page 45 Mini souris laser sans fil de Targus NOTE : S I VOUS RETIREZ LES PILES VOUS DEVREZ SYNCHRONISER À NOUVEAU LA SOURIS ET LE RÉCEPTEUR Mode d'emploi de la souris 1 : Bouton de gauche de la 5 : Changement d'écran...
- Page 46 Mini souris laser sans fil de Targus Gestion de la consommation d'énergie de la souris Lorsqu'elle est sous tension, la souris entre en « mode veille » au bout de 8 minutes d'inactivité. Pour activer la souris, appuyez sur n'importe quel bouton de la souris.
- Page 47 Mini souris laser sans fil de Targus étant donné que la souris ne se rechargera pas si l'ordinateur est en mode veille. • Vérifiez que le connecteur USB du récepteur est solidement enfiché dans le port USB de l'ordinateur. • Assurez-vous que le lien de communication sans fil a effectivement été...
-
Page 48: Français
Mini souris laser sans fil de Targus Support technique Pour les questions techniques, merci de visiter : Internet http://www.targus.com/support Anglais http://www.targus.com/uk/support.asp Français http://www.targus.com/fr/support.asp Allemand http://www.targus.com/de/support.asp Espagnol http://www.targus.com/sp/support.asp Italien http://www.targus.com/it/support.asp Nos employés qualifiés sont également disponibles aux numéros de téléphone ci-dessous pour répondre à vos questions. -
Page 49: Enregistrement Du Produit
(le cas échéant). Garantie Targus garantit ce produit contre tout défaut de matériel ou de fabrication pour une durée de deux ans. Si votre accessoire Targus s'avère défectueux sous cette garantie, nous veillerons à... - Page 50 Lorsque ces produits ne sont plus utilisables, merci de les apporter à un centre de recyclage approprié dans votre pays. La politique de recyclage TARGUS est consultable à l'adresse www.targus.com/recycling Microsoft, Windows et Windows Vista sont des marques déposées ou commerciales de Microsoft Corporation aux États-Unis et/ou dans d'autres pays.
- Page 51 ATTENZIONE RADIAZIONI LASER. FISSARE SGUARDO SUL FASCIO E NON GUARDARE DIRETTAMENTE TRAMITE STRUMENTI OTTICI. PRODOTTO LASER DI CLASSE 1. NON PUNTATE MAI UN FASCIO LASER AGLI OCCHI PERSONA, GUARDATE MAI DIRETTAMENTE AD UN FASCIO LASER, IN QUANTO L'ESPOSIZIONE PROLUNGATA PUO' ESSERE NOCIVA PER GLI OCCHI.
- Page 52 MOUSE LASER SENZA FILI TARGUS Introduzione Congratulazioni per aver acquistato il Mouse laser senza fili Targus per desktop. Questo mouse ergonomico offre la più recente tecnologia di puntamento laser e le caratteristiche wireless più aggiornate. mouse consente una migliore accuratezza di puntamento sulla maggior parte delle superfici, anche su alcuni tipi di specchi e di vetri.
-
Page 53: Requisiti Del Sistema
Mouse laser senza fili Targus Requisiti del sistema Hardware • Porta USB Sistema operativo • Windows 2000/XP ® • Windows Vista™ Per PC desktop Nei casi in cui il PC si trova sotto una scrivania o in altri posti che potrebbero impedire la connettività wireless, si consiglia di usare una prolunga. - Page 54 Mouse laser senza fili Targus 3 Collegare l'estremità USB del cavo di ricarica alla porta USB contrassegnata dalla scritta 'caricatore' sulla base di prolunga. Altrimenti, se sono disponibili più porte USB, si può non usare la prolunga inserendo il ricevitore ed il cavo di ricarica direttamente nelle porte USB libere del PC notebook.
- Page 55 Mouse laser senza fili Targus 3 Rimettere il coperchio delle batterie in posizione finché non si sente un "clic" e non è ben fissato. Carica del mouse Per ottenere i migliori risultati, si dovrebbe caricare il mouse almeno otto ore prima di usarlo.
- Page 56 Mouse laser senza fili Targus 1 Premere e lasciare andare il tasto di connessione sul ricevitore. Tasto di connessione 2 Premere e lasciare il tasto di connessione situato sotto il mouse. Tasto di connessione La spia del ricevitore lampeggia mentre scansiona i codici d'identificazione.
- Page 57 Mouse laser senza fili Targus Utilizzo del mouse 1: Tasto sinistro 5: Interruttore per applicazioni 2: Tasto destro 6: Indietro tra le pagine Internet 3: Tasto intermedio/Rotellina 7: Scroll Up di scorrimento 4: Avanti tra le pagine Internet 8: Scroll Down...
- Page 58 Mouse laser senza fili Targus Gestione dell'Alimentazione del Mouse Quando è acceso, il mouse entra in “modalità Sleep” dopo 8 minuti d'inattività. Per attivare il mouse, basta cliccare un qualsiasi tasto del mouse stesso. Misure di sicurezza • Benché questo mouse sia un prodotto laser di Classe 1 e sia sicuro da usare, evitare di puntare il laser agli occhi o di guardare direttamente il fascio laser.
- Page 59 Mouse laser senza fili Targus • Controllare che il connettore USB del ricevitore sia saldamente connesso alla porta USB sul computer. • Accertarsi di aver stabilito un collegamento senza fili tra il mouse ed il ricevitore. “Vedere Sincronizzazione”. Cosa fare se il tempo di risposta del mouse é...
-
Page 60: Italiano
Mouse laser senza fili Targus Supporto tecnico In caso di quesiti tecnici, visitare: Internet http://www.targus.com/support.asp Inglese http://www.targus.com/uk/support.asp Francese http://www.targus.com/fr/support.asp Tedesco http://www.targus.com/de/support.asp Spagnolo http://www.targus.com/sp/support.asp Italiano http://www.targus.com/it/support.asp Il nostro staff di tecnici esperti è anche disponibile per rispondere telefonicamente alle vostre domande. Potete quindi chiamare uno dei numeri seguenti. - Page 61 (se applicabili). Garanzia Targus garantisce per la durata di due anni che questo prodotto è privo di difetti di materiale e di manodopera. Se l'accessorio Targus dovesse rivelarsi difettoso durante questo periodo, verrà...
- Page 62 Mouse laser senza fili Targus garanzie avvengano interferenze particolari installazioni. Qualora questo apparecchio dovesse creare interferenze per la ricezione di radio o televisioni, che possono essere determinate dall'accensione e dallo spegnimento dell'apparato, al cliente viene consigliato di provare a correggere l'interferenza tramite l'utilizzo di una o piu' di una delle seguenti soluzioni: •...
- Page 63 WAARSCHUWINGEN LASERSTRALING. STAAR NIET STRAAL KIJK NIET DIRECT OPTISCHE INSTRUMENTEN. LASERPRODUCT VAN CATEGORIE I. RICHT NOOIT EEN LASERSTRAAL NAAR DE OGEN VAN IEMAND EN KIJK ZELF NOOIT DIRECT STRAAL, AANGEZIEN LANGDURIGE BLOOTSTELLING GEVAARLIJK KAN ZIJN VOOR DE OGEN. KORTE BLOOTSTELLING LASERAANWIJZER, BIJVOORBEELD ALS U ONOPZETTELIJK LICHT...
- Page 64 TARGUS DRAADLOZE LASERMUIS Inleiding Gefeliciteerd met uw aankoop van de Targus draadloze lasermuis voor pc's. Deze ergonomisch ontworpen muis biedt u de allernieuwste laser-tracking-technologie en de meest up-to-date draadloze functies. Met de muis wordt de nauwkeurigheid van tracking verhoogd op diverse oppervlakten, zelfs op spiegel- en glasoppervlakten.
- Page 65 Targus draadloze lasermuis Systeemvereisten Hardware • USB-poort Besturingssysteem ® • Windows 2000/XP • Windows Vista™ Voor pc's Indien de pc onder een bureau is geplaatst of in een andere plaats waar draadloze connectiviteit kan worden gehinderd, is gebruik van het verleng onderdeel aanbevolen.
- Page 66 Targus draadloze lasermuis 2 Verbind de draadloze USB-ontvanger met de poort die als 'ontvanger' (receiver) is aangeduid bovenaan het onderdeel. 3 Verbind het USB-uiteinde van de oplaadkabel met de USB-poort van het onderdeel die als 'oplader' (charger) is aangeduid. Indien er meer dan één USB-poort beschikbaar is, hebt u...
-
Page 67: De Muis Opladen
Targus draadloze lasermuis WAARSCHUWING: G EBRUIK VOOR TE VERVANGEN BATTERIJEN UITSLUITEND OPLAADBARE BATTERIJEN VOOR ZWAAR GEBRUIK EBRUIK NOOIT ALKALINEBATTERIJEN EBRUIK NOOIT NIEUWE EN OUDE BATTERIJEN TEGELIJKERTIJD IN EEN TOESTEL 3 Schuif het batterijenluikje terug totdat u een “klik” hoort en het stevig vastzit. - Page 68 Targus draadloze lasermuis Synchronisatie Uw computer moet aan staan en de USB-ontvanger hebben gevonden, voordat u synchroniseert. 1 Druk op de verbindingsknop van de ontvanger en laat los. Aansluit- knop 2 Druk op de aansluitknop onderaan de muis en laat los.
- Page 69 Targus draadloze lasermuis Na een goede synchronisatie bent u klaar om de muis te gebruiken. N.B.: N A VERWIJDERING VAN DE BATTERIJEN ZULT U DE MUIS OPNIEUW MET DE ONTVANGER MOETEN SYNCHRONISEREN Gebruik van de muis 1: Linkermuisknop 5: Applicatieschakelaar...
-
Page 70: Problemen Oplossen
Targus draadloze lasermuis EEN CONVENTIONELE OPTISCHE MUIS KUNT DE INSTELLINGEN VAN DE CURSOR WIJZIGEN IN HET CONFIGURATIESCHERM VAN UW COMPUTER Controle van de stroom naar de muis Als de stroom is aangeschakeld, gaat de muis in de "slaapmodus" indien deze gedurende 8 minuten niet gebruikt wordt. - Page 71 Targus draadloze lasermuis negatieve aansluitingen batterijencompartiment. • Controleer of de batterijen volledig zijn opgeladen. Controleer de instellingen van uw computer voor de modus Onderbreken, aangezien de muis in deze modus niet zal opladen. • Controleer of de USB-steker van de ontvanger goed in de USB-poort van uw computer steekt.
- Page 72 Targus draadloze lasermuis Supporto tecnico In caso di quesiti tecnici, visitare: Internet http://www.targus.com/support.asp Inglese http://www.targus.com/uk/support.asp Francese http://www.targus.com/fr/support.asp Tedesco http://www.targus.com/de/support.asp Spagnolo http://www.targus.com/sp/support.asp Italiano http://www.targus.com/it/support.asp Il nostro staff di tecnici esperti è anche disponibile per rispondere telefonicamente alle vostre domande. Potete quindi chiamare uno dei numeri seguenti.
- Page 73 (se applicabili). Garanzia Targus garantisce per la durata di due anni che questo prodotto è privo di difetti di materiale e di manodopera. Se l'accessorio Targus dovesse rivelarsi difettoso durante questo periodo, verrà...
- Page 74 Questo prodotto può essere utilizzato in tutti i Paesi della Comunità Europea. Direttive di Riciclaggio Targus Disporre il prodotto alla fine del suo ciclo di vita utile, in un punto appropriato di raccolta per il riciclaggio collocato nel tuo territorio.
- Page 75 CUIDADO RADIAÇÃO LASER. NÃO OLHE FIXAMENTE PARA O RAIO NEM VEJA DIRECTAMENTE COM INSTRUMENTOS ÓPTICOS. PRODUTO LASER DA CLASSE I. NUNCA APONTE UM RAIO LASER PARA OS OLHOS DE UMA PESSOA NEM VEJA UM RAIO LASER DIRECTAMENTE, UMA VEZ QUE A EXPOSIÇÃO PROLONGADA PODE SER PERIGOSA PARA OS OLHOS.
- Page 76 FIOS DA TARGUS Introdução Parabéns pela sua aquisição do Rato Laser Sem Fios da Targus para computador tipo desktop. Este rato, desenhado com características ergonómicas, oferece a última palavra em tecnologia de detecção por laser bem como as características mais actualizadas de sem fios.
-
Page 77: Requisitos Do Sistema
Rato Laser Sem Fios da Targus Requisitos do Sistema Hardware • Porta USB Sistema Operativo • Windows 2000/XP ® • Windows Vista™ Para Computadores tipo Desktop Para casos em que o computador se encontra posicionado debaixo de uma secretária ou outros locais que possam impedir a conectividade sem fios, é... - Page 78 Rato Laser Sem Fios da Targus 2 Ligue o receptor sem fios USB a uma porta designada como 'receiver' (receptora) existente no topo do posto. 3 Ligue a extremidade USB do cabo de carga à porta designada como 'charger' (carregadora) existente no posto de extensão.
- Page 79 Rato Laser Sem Fios da Targus ADVERTÊNCIAS: Q UANDO SUBSTITUIR AS PILHAS USE APENAS PILHAS RECARREGÁVEIS DO TIPO PARA GRANDE DESEMPENHO UNCA USE PILHAS ALCALINAS VITE MISTURAR PILHAS USADAS COM NOVAS NUM MESMO APARELHO 3 Volte a deslizar a cobertura das pilhas para a posição, até...
- Page 80 Rato Laser Sem Fios da Targus Sincronização Assegure-se de que o seu computador está ligado e detectou o receptor USB antes de sincronizar. 1 Pressione e liberte o botão de conexão existente no receptor. Botão de Conectar 2 Pressione e liberte o botão de conexão, localizado na parte inferior do rato.
- Page 81 Rato Laser Sem Fios da Targus NOTA: S E REMOVER AS PILHAS TERÁ DE SINCRONIZAR O RATO COM O RECEPTOR OUTRA VEZ Utilização do Rato 1: Botão Esquerdo do Rato 5: Mudança de Aplicação 2: Botão Direito do Rato 6: Página Anterior na Internet 3: Botão do Meio/Roda de...
- Page 82 Rato Laser Sem Fios da Targus MAIS RÁPIDO QUE NUM RATO ÓPTICO CONVENCIONAL S DEFINIÇÕES DO CURSOR PODEM SER ALTERADAS A PARTIR DO AINEL DE ONTROLO DO SEU COMPUTADOR Administração da Energia do Rato Quando a energia está ligada, o rato entra no "modo de dormir"...
- Page 83 Rato Laser Sem Fios da Targus do seu computador, uma vez que o rato não carrega enquanto o computador estiver em modo suspenso. • Verifique se o conector do receptor USB está firmemente encaixado porta computador. • Assegure-se de que estabeleceu um elo sem fios entre o rato e o seus receptor.
- Page 84 Rato Laser Sem Fios da Targus Assistência Técnica Para questões de ordem técnica, é favor visitar: Internet: http://www.targus.com/support.asp Inglês http://www.targus.com/uk/support.asp Francês http://www.targus.com/fr/support.asp Alemão http://www.targus.com/de/support.asp Espanhol http://www.targus.com/sp/support.asp Italiano http://www.targus.com/it/support.asp O nosso pessoal especializado está também disponível para responder às suas questões através de um dos seguintes números de telefone.
-
Page 85: Registo De Produto
Rato Laser Sem Fios da Targus Registo de Produto A Targus recomenda que registe o seu acessório Targus logo após o ter comprado. Para registar o seu acessório Targus, vá a: http://www.targus.com/registration.asp Necessitará de fornecer o seu nome completo, endereço de email, número de telefone e informação sobre a companhia (se... - Page 86 Rato Laser Sem Fios da Targus utilizado de acordo com as instruções, poderá causar interferência prejudicial em comunicações de rádio. No entanto, não existe qualquer garantia de que não ocorrerá interferência numa instalação em particular. Se este equipamento não causar interferência prejudicial para a recepção de rádio ou televisão, o que pode ser determinado...
- Page 87 Visit our Website at www.targus.com/emea Features and specifications subject to change without notice. © 2006 Targus Group International, Inc. and Targus Group (UK) Ltd. AMW14EU / 410-0069-003C...
Need help?
Do you have a question about the AMW14EU and is the answer not in the manual?
Questions and answers