Table of Contents
Advertisement
Advertisement
Table of Contents

Summary of Contents for Pagsta BOBBER
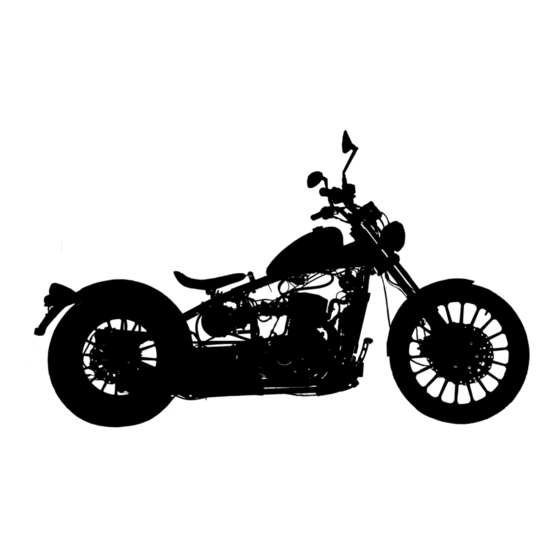
- Page 1 Las Vegas, NV 89128 855.572.4782 PAGSTA MOTORCYCLES - 320CC - CRUISER / CHOPPER / BOBBER Please note that the images in the manual show the "Chopper" version. The controls and maintenance for the 320cc series are virtually the same.
- Page 2 Thank purchasing PAGSTA motorcycle. For your safety, and to maintain your PAGSTA, please familiarize yourself with this manual before riding. This motorcycle has a total displacement of 320cm³(cc). You must hold a corresponding motorcycle driver's license in order to drive on public roads. The vehicle is designed to carry a maximum of two people, including the rider.
-
Page 3: Table Of Contents
CONTENTS Preface Clutch Adjustment Important Notice Drive Chain Check, Adjustment and Lubrication Motorcycle Safety Front wheel hydraulic left, right disc brake Safe Riding Rules Wheel Hydraulic left, right disc brake Front Protective Apparel Wheel Disassembly and Replacement Rear Modification Wheel Disassembly and Replacement Battery Maintenance Loading Instruction... -
Page 4: Preface
Proper operation and maintenance of the motorcycle will ensure less trouble, optimum performance and service life. Your authorized PAGSTA dealer will be happy to provide you with instruction, guidence and after- sales service. -
Page 5: Important Notice
2. Keep RPMs below 6,000 at all times during this period. 3. After the first 500 miles, have your initial service performed at an authorized PAGSTA dealer or service center in accordance with the requirements of Operation and Maintenance Schedule in this Manual. - Page 6 CAUTION Motorcycles are different from other vehicles. They operate, steer, handle and brake differently. Unskilled or improper use could result in loss of control, death or serious injury. • Take a rider training course. • Read Owner's Manual before riding, adding accessories or servicing. •...
-
Page 7: Motorcycle Safety
Never ride without a certified helmet and eye protection. Look for the U.S. Department of Transportation label. 4. Get the training you need. Read this owner’s manual cover to cover to get familiar with your PAGSTA. Take a motorcycle rider training course. Proper training can provide the knowledge and skills you need to operate your motorcycle safely and proficiently. -
Page 8: Protective Apparel
IMPORTANT SAFETY INFORMATION Your PAGSTA motorcycle can provide many years of service and pleasure if you take responsibility for your own safety and understand the challenges you can meet while riding. There is much that you can do to protect yourself when you ride. -
Page 9: Loading
LOADING Keep cargo low and close to the center of the motorcycle. Load weight equally on both sides of the motorcycle to minimize imbalance. As weight is located further from the center of gravity, handling is proportionally affected. Improper loading of your motorcycle can result in injury or death. Firmly mount loads on the motorcycle in order to ensure stable handling. -
Page 10: Parts Location
INSTRUCTIONS PARTS LOCATION 1. Rearview mirror 6. Throttle grip 2. Clutch lever 7.Right handlebar control 3. Left handlebar control (starter button, headlight switch, engine cut-off (horn button, Headlight 8.Instrument panel dimmer switch, turn signal switch) 9.Right fuel cap(true) Please note: Your specific model 4. - Page 11 Please note: Your specific model may have some slight design differences. 1. Front Headlight 2. Front left turn signal 3. Side reflector 4. Front brake disc 5. Front brake pump 6. Radiator cap 7. Gearshift lever 8. Left footpeg 9. Engine 10. Engine serial number 11. Kick stand 12.
- Page 12 Please note: Your specific model may have some slight design differences. ¢1Ù ¢2Ú 1. Front right turn signal light 2. Front fork 3. Front wheel 4. Front brake disc 5. Front brake pump 6. Vin # Location 7. Rear brake pedal 8. Right foot peg 9. Radiator 10. Radiator 11. Throttle valve assembly 12.
-
Page 13: Parts Function
Please note: Your specific model may have some slight design differences. [INSTRUMENTS AND INDICATORS] 1. Odometer is located in instrument cluster 2. Multi-function instrument cluster includes: Speedometer, Odometer, Tripometer, L/R Turn signal indicators, Hi beam indicator, Water ¢2Ù temperature alarm and indicator, EFI indicator 3. - Page 14 STEERING LOCK The lock is below the steering stem.To lock the steering, turn the handlebars all the way to the left, turn the ignition key clockwise to lock while pushing in, and then remove the key. ¢1Ù Caution: Always lock the steering when the motorcycle is parked.
- Page 15 Continued from previous page 2. [Turn Signal Light Switch] The turn signal light switch has three positions. If need to turn left, move the turn signal light ",both front and rear left turn signal lights on, and if you need to turn right, move the turn switch to "...
- Page 16 [Electric Starter Button] The starter button is on the right handlebar controls. 1.Make sure that the gear is shifted to neutral and the fuel switch is in the position of " ", or grasp the clutch lever to separate the clutch when the motorcycle remains in any other gear. 2.
- Page 17 [Rear shock absorber] It is recommended that your PAGSTA dealer make the following adjustments. There are 2 Rear shock absorbers located under the middle of the frame. The rear shocks have four adjusting positions for different road and driving conditions. By adjusting the spring force, the riders comfort is affected.
- Page 18 CAUTION Do not overfill the fuel tank! The tank is full when the fuel is 1/4" below the lip. Overfilling the tank may cause damage to the bike and/or cause a fire hazard. After fueling, make sure that fuel cap is closed securely. While refueling, fuel should be filtered through the filter at the mouth of the tank.
- Page 19 ENGINE OIL Engine oil quality is the chief factor affecting engine performance and service life. Your PAGSTA motorcycle uses standard engine oil SAE10w/40 API SG. Use only quality engine oil certified to meet or exceed requirements for service SG. The viscosity grade of engine oil should be based on the atmospheric temperature in your riding area as shown at right.
- Page 20 Check tires for dents or deformation. If there is any damage, see your authorized PAGSTA dealer for repair or replacement. Replace tires before tread depth at the center of the tire reaches the following limit: Minimum tread depth(mm) Front: 1/16"...
-
Page 21: Operation
OPERATION PRE-RIDE INSPECTION Inspect your motorcycle before you ride. 1. Oil level: Check the level and if necessary, add oil. And check for oil leaks 2. Front and rear brakes: Check operation. 3. Tires: Check condition and pressure of both front and rear tires. If necessary, charge or repair. 4. -
Page 22: Starting The Engine
STARTING PROCEDURE 2016 AND LATER MODEL YEARS Position yourself on motorcycle in a safe manner. (both feet on the ground and hands on hands on grips) Position motorcycle in riding stance (horizontal) and dis-engage kick stand. (Motorcycle will crank, but will not start if kick stand is in the down position) Flip open rain cover on ignition switch exposing lock cylinder, using round key unlock ignition switch. -
Page 23: Riding
[Preparing to ride] Insert the ignition key and turn it clockwise 90 degrees to unlock the lock, and turn the ignition switch(left/right). Turn the fuel switch handle to " ", and turn engine cut-off switch to " ". Shift the gear to the neutral position with neutral gear indicator on (green), or shift to any gear, grasp the clutch lever and start the engine. -
Page 24: Breaking-In
[Shifting Gears] Your motorcycle has five forward gears in a one-down, four-up shift pattern which is coordinated with a cable- operated clutch system.Learning when to shift gears comes with experience. Keep the following tips in mind: • As a general rule, shift while moving in a straight line. •... - Page 25 Warning Never shift gears when the clutch is not engaged and the throttle is not decreased. Otherwise you may damage the engine, the driving chain and other components. Shifting gears with out properly engaging the clutch may cause an accident. [Braking] •...
-
Page 26: Maintenance
Maintenance Checking and changing of engine oil, and cleaning of FILTER. [Engine Oil Lever Check] Check the engine oil level each day before riding the motorcycle. There is a dipstick behind the left crankcase cap for checking the oil level. The level must be maintained between the upper and lower level... - Page 27 Add 1.9L of new oil. If you go to a PAGSTA service dealer, you can ask the servicemen to open the right crank case and remove the oil filter screen for cleaning.
-
Page 28: Spark Plug Selection And Replacement
SPARK PLUG SELECTION AND REPLACEMENT [Spark Plug Selection] 1.When riding usually at low speed or low temperature in winter, you are recommended to select CR5HSA spark plug of which the center electrode is black plug of which center electrode is black. 2.When riding usually at high speed or under high temperature in summer, you are recommended to select CR7HSA spark plug of which center electrode is gray. -
Page 29: Changing And Assembly Of Air Filter
AIR CLEANER REPLACEMENT The air cleaner should be serviced at regular intervals. Service more frequently when riding in unusually wet or dusty areas. Remove the protective cover, remove the screw , disassemble the air filter cover and take off the air filter parts , and then assemble the new filter parts. Please use the new filter or the high quality air filter of the same model according to the user's Manual, otherwise the engine may be damaged. -
Page 30: Clutch Adjustment
CLUTCH ADJUSTMENT Free play at the tip of the left clutch lever is 10 to 20mm. If adjustment is necessary, unscrew the lock nut positioning the clutch cable on the locator of the crankcase and adjust it. Turn the lever as (A) shows to decrease free play. Turn as (B) shows to increase. The same for the adaptor on the left clutch lever. -
Page 31: Drive Chain Check, Adjustment And Lubrication
DRIVING CHAIN CHECK, ADJUSTMENT AND LUBRICATION [Driving Chain Cheek] Check for wear of the drive chain . Lubricate it when needed. Use the center stand to support the motorcycle, and step on the gearshift pedal to shift into neutral. Place your finger between both front and rear wheels, and swing the chain up and down to adjust the chain to 10-20mm. -
Page 32: Front Wheel Hydraulic Left, Right Disc Brake
FRONT LEFT AND RIGHT DISC BRAKE [Brake Fluid] Brake fluid reservoir Check the fluid level in the brake fluid reservoir of the right brake lever. If the level is low, add brake fluid, the fluid level will descend as the fluid automatically flows into the brake lines. -
Page 33: Wheel Hydraulic Left, Right Disc Brake Front
2. If it is necessary to repair the brake system or for leaks or cracks; d) Check wear of the brake disc; the disc, have the work performed by an authorized e)Ensure the brake lever has the PAGSTA dealer or service center. correct amout of free play and functions properly. -
Page 34: Wheel Disassembly And Replacement Rear
Brake Fluid Brake Pedal REAR DISC BRAKE [Brake Fluid] Check the fluid level in the rear brake fluid reservoir. If the level is low, add brake fluid. The brake fluid level of the rear brake fluid reservoir will descend as the fluid automatically flows into the system. - Page 35 2. If it is necessary to repair the brake system or C. Check wear of the brake disc the disc, have the work performed by an authorized D. Ensure the brake lever has the correct PAGSTA dealer or service center. amout of free play and functions properly.
-
Page 36: Wheel Disassembly And Replacement
FRONT WHEEL DISASSEMBLY AND REPLACEMENT Unscrew the lock , disassemble speedometer cable,remove the axle nut ,unscrew the front wheel axle and take off the front wheel (including brake disc). To replace the front wheel or brake disc, unscrew the brake disc lock bolt ,and take off brake disc replace in reverse order. - Page 37 REAR WHEEL DISASSEMBLY AND REPLACEMENT Use a jack to raise the motorcycle's rear wheel off the ground. Unscrew the rear brake adjusting nut . Hold the other side of rear wheel axle with wrench, and remove the rear axle nut , and take out the rear wheel axle .Move the rear wheel forward and remove the driving chain from the drive gear, and remove the rear wheel.
-
Page 38: Battery Maintenance
BATTERY MAINTENANCE The motorcycle is supplied with 12V9ah DC lead-acid battery. When riding the motorcycle, insufficient electrolyte in the battery will cause damage to the cells. If electrolyte in battery runs out quickly, insufficient electrolyte will lower strength of the current thus making it hard to start the engine or causing other issues with the electrical system. -
Page 39: Cooling System
COOLING SYSTEM [Adding Coolant] The coolant consists of refrigerant and distilled water, and has the function of anti-freezing. The coolant will prevent the engine from overheating in neutral rotation or rotating in low speed. We reccommend a 50/50 mix of Ethyl Glycol and distilled water. You will need about 1600ml for a complete flush. 1. - Page 40 In order to check whether the radiator house is damaged and aging, you can squeeze the hose by hand to see whether it has cracks. If there's a leak or crack it will need to be replaced. In this case take the motorcycle to your PAGSTA dealer or service center.
-
Page 41: Fuse Replacement
When frequent fuse failure occurs, it usually indicates a short circuit or an overload in the electrical system. See your authorized PAGSTA dealer or service center for repair. Caution: Replace with the specified fuse. Never use other conductive materials for replacement. -
Page 42: Cleaning
CLEANING Clean your motorcycle regularly to protect the surface finishes and inspect it for damage, wear and oil leaks. CAUTION: High pressure water can damage certain parts of the motorcycle. Avoid spraying high pressure water at the following areas: ignition switch, handlebar switches, instruments, muffler outlet and under seat. -
Page 43: Maintenance Schedule
1.INSPECT, CLEAN, ADJUST, LUBRICATE OR REPLACE IF NECESSARY. C:CLEAN R:REPLACE A: ADJUST L:LUBRICATE I:INSPECT * Should be serviced by your authorized PAGSTA dealer. ** I n the interest of safe ty, we recommend these items be serviced only by your authorized service dealer. -
Page 44: Maintenance Schedule
At higher odometer readings, repeat at the frequency interval established here. Adjustment of the timing chain tension and the valve clearance should be made only by your authorized PAGSTA dealer for warranty compliance. MAINTENENCE SCHEDULE - For all maintenance inquiries, please contact your dealer... -
Page 45: Maintenance Schedule
MAINTENENCE SCHEDULE - For all maintenance inquiries, please contact your dealer... -
Page 46: Motorcycle Specifications
PAGSTA 320CC CHOPPA MOTORCYCLE SPECIFICATIONS Component Item Unit MODEL DD262MP Model Engine Twin Cylinder 4 Stroke Type Overhead Cam, Balanced Displacement 320cc Minimum fuel- g/kw. consuming ratio Compression ratio 10.2:1 Minimum idle 1500 100 speed Spark plug gap 0.6~0.7 International 5 Gears...
Need help?
Do you have a question about the BOBBER and is the answer not in the manual?
Questions and answers