
Related Manuals for Orla CDP 101


Summary of Contents for Orla CDP 101
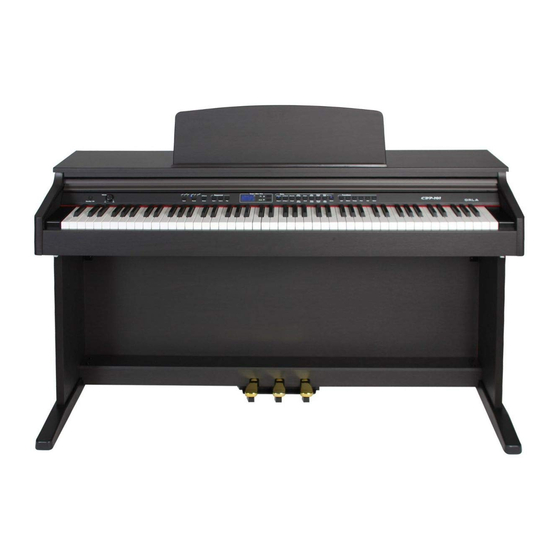
- Page 1 D i g i t a l P i a n o s STAGE STUDIO Portable Piano CDP 101 Digital Piano O w n e r 's M a n u a l...
-
Page 2: Safety Precautions And Instructions
SAFETY PRECAUTIONS AND INSTRUCTIONS WARNING Make sure that the voltage set is suitable for the instrument (the voltage is indicated next to the AC power inlet). When using electric products, always follow basic precautions, including the following: Read all of these instructions before using the product. To reduce the risk of injury, close supervision is necessary when the product is used near children. -
Page 3: Taking Care Of Your Digital Piano
DANGER Do not modify the plug provided with the product - if it will not fit - have a proper outlet installed by a qualified electrician TEMPO / VALUE DISPLAY The messages contained in the Display may not always match the display pages They are merely examples of the many features of the product DISCLAIMER The information contained in this manual has been very carefully revised. -
Page 4: Master Volume
INTRODUCTION Welcome to the high tech world of electronic instruments. Your piano has been designed and made using the latest technology and computerized systems, to offer you years of trouble free pleasure. The new Bluetooth Audio Connection will connect your Smart Phone or Digital tablet to the piano to wireless transmit your personal music selection. -
Page 5: Sustain Pedal
SUSTAIN PEDAL STAGE STUDIO – it is supplied with a Sustain Pedal. An optional 3 pedal unit is also available. CDP 101 – It is supplied with the 3 pedal unit. STAGE STUDIO Digital Piano is supplied with a Sustain Pedal. -
Page 6: Control Panel
CONTROL PANEL Your instrument's control panel is designed to be easy to use. Most of the controls are single function. Each control has an LED showing if the function has been activated. Whenever your instrument is switched on, it will automatically select PIANO 1 (Grand Piano) on the keyboard. - Page 7 It is also possible to play two sounds at the same time, selecting them from the top and the bottom row, for example PIANO 1 and BRASS. To select the PIANO 1 sound press and hold the related button. While holding down the PIANO 1 button also press the SELECT button to select the upper row.
- Page 8 SPLIT When the SPLIT button is pressed (its Led will start blinking) the instrument automatically splits the keyboard in two parts and a different sound is automatically selected on the left part of the keyboard. The STRINGS 1 Sound is automatically selected to the left part of the keyboard and the display will indicate: After a few seconds the SPLIT button Led will stop blinking and the display will indicate: The instrument is now in Split mode with Strings1 on the left and Piano on the Right.
-
Page 9: Split Point
To select a new sound press the SPLIT button (its Led is blinking) and use the (/\) UP and (\/) Down DATA buttons to select the desired sound on the display. After you have selected the desired sound wait a few seconds until the SPLIT button Led stops blinking. The new sound is now selected. -
Page 10: Brilliance Control
BRILLIANCE CONTROL It is possible to adjust the sound of the instrument, changing it to a mellower or sharper sound. By pressing the Brilliance/Chorus button for a few seconds, the display will show: The Brilliance button Led is now blinking and using the (/\) UP and (\/) Down DATA buttons it is possible to change the sound. - Page 11 press the Touch Sense button and hold it. The display shows: using the (/\) UP and (\/) Down DATA buttons it is possible to change the response from 0 (no sound) to 127 (maximum volume). TRANSPOSE The natural pitch of the instrument is C but can be modified as follows: press the TRANSPOSE button in the FUNCTIONS section.
- Page 12 Press the (\/) Down button two times (two semitones). As soon as the button is pressed, the display will show: When the TRANSPOSE Leds are blinking, it is possible to restore the C natural keying by pressing the (/\) UP and (\/) Down DATA buttons at the same time. At Power Up the instrument returns automatically to the original tuning.
- Page 13 The Metronome will start running according to selected Time Signature. Press the Metronome Off to stop it. There are different Time Signatures available: Mono Click (1/4), 2/4, 3/4, 4/4, 5/4 and 6/8. How to select the different Time Signatures: press and hold the METRONOME button in the FUNCTIONS section and press it for a few seconds.
-
Page 14: Midi Functions
MIDI FUNCTIONS Press the MIDI button several times to select the midi features of the instrument. While in the midi pages the Midi Led is blinking. Midi Out On/Off It allows to enable or disable the Midi Out Signal of the instrument. Press the MIDI button 1 time to select the Midi Out Port On or Off function. -
Page 15: Bluetooth Audio Connection
Using the (/\) UP and (\/) Down DATA buttons it is possible to set the Midi Control Change On or Off. Twin Function On/Off This configuration is very good for practice. Teacher and pupil can play at the same time the same notes in the same instrument. Press the MIDI button 5 times to select the TWIN Function. - Page 16 VOLUME PEDAL If necessary it is possible to connect a Volume Pedal, but it is necessary to set the instrument. Insert the volume pedal jack plug in the socket in the back of the instrument (Expression in the panel). To program the volume pedal parameters follow these procedures: Press the SPLIT and METRONOME buttons at the same time (their Leds are blinking).
- Page 17 Press HARPSI button again to configure Normal Volume Setting. The Display will indicate: Make sure that the Volume Pedal is working properly and save the obtained configuration by pressing the SELECT button (in the VOICE section). The display will indicate: To return to standard piano pedal setting press the SPLIT and METRONOME buttons again ( the Led are blinking).
- Page 18 RESET If it should be necessary to completely erase the internal RAM memory, a very simple reset feature is provided. Make sure that the instrument is switched off. Press and hold the (/\) UP and (\/) Down DATA buttons Switch on the instrument while holding the (/\) and (\/) buttons down. The display shows Resetting.
- Page 19 STAGE STUDIO – it is supplied with a Sustain Pedal. Connect it to the Pedal Input Sustain/Sostenuto obtain the Sustain effect when used. CDP 101 – It is supplied with a complete set of 3 pedals. Insert the mono jack to the Pedal Input Soft/Expression and the stereo jack in the Pedal Input Sustain/Sostenuto.
- Page 20 STAGE STUDIO Digital Piano - MIDI IMPLEMENTATION CHART V 1.0 -------------------------------------------------------------------------------------------------------------------------- FUNCTION TRANSMITTED RECOGNIZED REMARKS -------------------------------------------------------------------------------------------------------------------------- Basic Channel Default 1 to 16 Ch. 10 omitted Changed 1 - 2 1 to 16 Ch. 10 omitted -------------------------------------------------------------------------------------------------------------------------- Mode Default Mode 3 Mode 3 Messages --------------------------------------------------------------------------------------------------------------------------...
Need help?
Do you have a question about the CDP 101 and is the answer not in the manual?
Questions and answers