Table of Contents

Related Manuals for Memphis VGB0001S


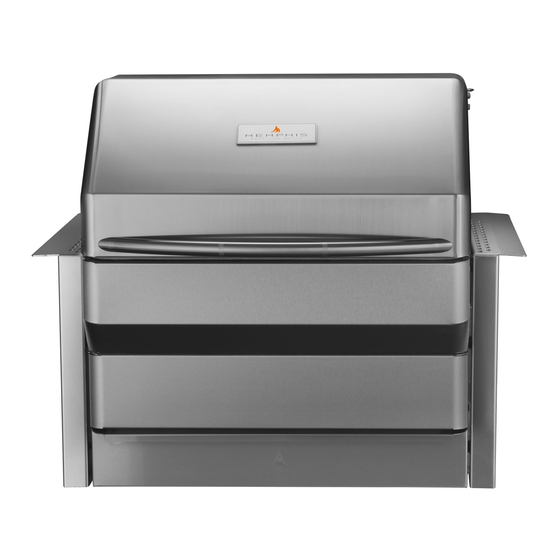
Summary of Contents for Memphis VGB0001S
- Page 1 Memphis Pro Built-In Model Number VGB0001S Appendixes and Model-Specific Information Contents Grill Clearance to Combustible Materials Grill Island Dimensions Hardware Kit Installation Step 1-6 5-10 WiFi Setup Wiring Diagram 12-13...
-
Page 2: Clearance To Combustible Materials
Clearance To Combustible Materials WARNING: The structure and surrounding objects MUST maintain the specified minimum clearance to combustible materials. Built-in structures constructed of wood or other combustible materials may require the use of the OPTIONAL Built- In Heat Shield Kit to maintain the required clearance to combustible materials. -
Page 3: Grill Island Dimensions
Built-In Grill Island Dimensions WARNING: See clearance to combustible materials, when designing and constructing a built-in island. Built-In islands must be built to the specifications listed below. The owner and/or builder are responsible for consulting local, county and state building codes for securing any necessary building permits before construction. -
Page 4: Hardware Components
HARDWARE COMPONENTS CONT. HARDWARE COMPONENTS DESCRIPTION/PART QTY: DESCRIPTION/PART QTY: PICTURE PICTURE 13) Left Mounting Bracket 1) Grate Kit VG0803 VG4409 14) Right Mounting Bracket 2) Flavorizer VG0802 VG4403 15) Rear Mounting Bracket 3) Direct Flame VG0801 Insert VG4407 16) Prewired Controller Box VG1165 4) Genie Tool VG1594... -
Page 5: Controller Box
INSTALLATION STEP 1: UNPACKING Grill requires (2) two people for safe assembly Please note that during shipping some movement may have taken place, so a complete visual inspection is required. Be sure to inspect entire grill after removing the protective shipping carton. Report any damage to your local dealer immediately. - Page 6 INSTALLATION STEP 2: WIRING Follow the assembly steps listed below, prior to installation of the unit. 6) Remove the back panel of the grill by removing the two screws as shown and then lifting the panel up. 7) The prewired controller box has an Ethernet cord which must be routed through the controller cableway and into the back of the grill body before the...
- Page 7 INSTALLATION STEP 3: BRACKETS Follow the assembly steps listed below, prior to installation of the unit. The unit can be supported by either the support brackets (items 13, 14 & 15) or by the four leveling feet (item 10). Refer to page 4 for item part numbers, descriptions and quantities.
- Page 8 INSTALLATION STEP 4: GRILL MOUNTING 17) Route the component harness and power cord alongside of the Ethernet cable previously routed in the controller cableway. Connect the ends to the controller box as shown. 18) Place the unit into the island, and position it to the desired depth.
- Page 9 INSTALLATION STEP 5: CONTROLLER BOX INSTALL Refer to page 5 for item part numbers, descriptions and quantities 25) Skip this step if grill will be supported by the support brackets. Adjust the four leveling feet from the inside of the ash/grease drawer cavity with a 1/4”...
- Page 10 INSTALLATION STEP 6: FINAL ASSEMBLY Refer to page 5 for item part numbers, descriptions and quantities 28) Insert the three ash/grease drawers back into the unit. 29) Place Flavorizer (item 2) onto the left and right lower brackets found inside the unit. 30) Place the four lower cook grates (item 1) onto the front and rear supports.
-
Page 11: Wifi Setup
ON YOUR GRILL CONTROLLER: 1) A Wi-Fi connection can be set up in minutes on your Memphis Wood Fire Grill. First power the grill on pressing the top left button on the controller, and from the home screen press the “MENU”... -
Page 12: Wiring Diagram
MEMPHIS PRO BUILT-IN CONTROLLER BOX WIRING DIAGRAM LOAD NEUTRAL GROUND Item # NAME DESCRIPTION Used to update your grill, see the “Updating Controller Software” section of the USB Port main manual for information. Meat Probe Wiring This terminal is used to connect the meat probes to the controller. - Page 13 NOTE: ALL TWO WIRE PAIRS FOR A SPECIFIC COMPONENT ARE REVERSABLE MEMPHIS PRO BUILT-IN Example: The auger motor wiring can have the either spade connector from COMPONENT WIRING its two wire pair attached to either terminal and the motor will function DIAGRAM normally.
Need help?
Do you have a question about the VGB0001S and is the answer not in the manual?
Questions and answers