
Related Manuals for SHOWTEC XS-2 Dual Beam


Summary of Contents for SHOWTEC XS-2 Dual Beam
- Page 1 MANUAL ENGLISH XS-2 Dual Beam Ordercode: 40173 Highlite International B.V. – Vestastraat 2 – 6468 EX – Kerkrade – the Netherlands...
-
Page 2: Table Of Contents
Installation ....................................... 7 Set Up and Operation ..................................... 7 Control Modes ....................................8 One XS-2 Dual Beam (Built-in Programs) ............................8 One XS-2 Dual Beam (Sound-controlled) ............................ 8 Multiple Dual Beams (Master/Slave control) ..........................8 Multiple Dual Beams (DMX Control) ............................. 9 Fixture Linking .................................... -
Page 3: Warning
Save the carton and all packing materials. In the event that a fixture must be returned to the factory, it is important that the fixture be returned in the original factory box and packing. Your shipment includes: • Showtec XS-2 Dual Beam • 1 mounting bracket •... - Page 4 Leave the device switched off until it has reached room temperature. • If your Showtec device fails to work properly, discontinue the use immediately. Pack the unit securely (preferably in the original packing material), and return it to your Showtec dealer for service.
-
Page 5: Operating Determinations
XS-2 Dual Beam • The user is responsible for correct positioning and operating of the XS-2 Dual Beam. The manufacturer will not accept liability for damages caused by the misuse or incorrect installation of this device. • This device falls under protection class I. Therefore it is essential to connect the yellow/green conductor to earth. -
Page 6: Connection With The Mains
XS-2 Dual Beam Connection with the mains Connect the device to the mains with the power plug. Always check if the right color cable is connected to the right place. International EU Cable UK Cable US Cable BROWN YELLOW/COPPER PHASE... -
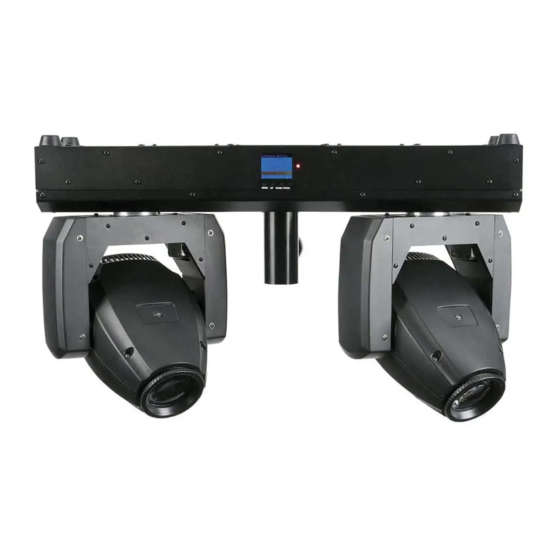
Page 7: Description Of The Device
The fixture creates two strong and tight beams. The XS-2 Dual Beam is the ideal solution for mobile DJs and will create a fantastic lightshow with only one unit. Combine the XS-2 Dual Beam with a Showtec compact light set (30268) and your lightshow is complete! •... -
Page 8: Backside
10) T-bar, attach the Dual Beam to a truss, using the included M10 screws and the mounting bracket. Installation Remove all packing materials from the XS-2 Dual Beam. Check that all foam and plastic padding is removed. Connect all cables. -
Page 9: Control Modes
02) Plug the end of the electric mains power cord into a proper electric power supply socket. 03) Turn on the music. If the device is set to sound-control, then the XS-2 Dual Beam will react to the music beats. Please, see page 13 for more information about the sound control options (2.3 Sound). -
Page 10: Multiple Dual Beams (Dmx Control)
XS-2 Dual Beam Multiple Dual Beams (DMX Control) 01) Fasten the effect light onto firm trussing. Leave at least 0,5 meter on all sides for air circulation. 02) Always use a safety cable (ordercode 70140 / 70141). 03) Plug the end of the electric mains power cord into a proper electric power supply socket. -
Page 11: Fixture Linking
XS-2 Dual Beam Fixture Linking You will need a serial data link to run light shows of one or more fixtures using a DMX-512 controller or to run synchronized shows of two or more fixtures set to a master/slave operating mode. The combined number of channels required by all the fixtures on a serial data link determines the number of fixtures the data link can support. -
Page 12: Control Panel
Controlling: After having addressed all the fixtures, you may now start operating these via your lighting controller. Note: After switching on, the XS-2 Dual Beam will automatically detect whether DMX 512 data is received or not. If there is no data received at the DMX-input, the LED on the control panel will not flash. -
Page 13: Menu Overview
XS-2 Dual Beam Menu Overview Ordercode: 40173... -
Page 14: Main Menu Options
XS-2 Dual Beam Main Menu Options DMX Address DMX Mode / Built-in Programs / Sound-controlled / Master-Slave Mode Slave Settings / Audio Sensitivity / Mast Settings / Pan and Tilt Reverse Display Reverse / Pan and Tilt Angle System Information 1. -
Page 15: Built-In Programs Mode
XS-2 Dual Beam 2. Built-in Programs Mode You can select 4 different programs when using the XS-2 Dual Beam. 01) Press MODE until the display shows , then press ENTER to open the menu and change your settings. 02) Use the Up/Down buttons to select one of the 4 programs. -
Page 16: Advanced Mode
XS-2 Dual Beam 3. Advanced Mode You can select 6 different Advanced settings when using the XS-2 Dual Beam. 01) Press MODE until the display shows , then press ENTER to open the menu and change your settings. 02) Use the UP / DOWN buttons to select the following settings: 3.1 Slave Settings... -
Page 17: Tilt Reverse 1 And 2 Mode
XS-2 Dual Beam 3.5 Tilt Reverse 1 and 2 Mode 01) When the display shows and both those options are turned off, the device is in normal Tilt Mode. 02) Press ENTER to open the menu and change your settings. -
Page 18: Dmx Channels
XS-2 Dual Beam DMX Channels 10 Channels Channel 1 – Head 1 and 2, Horizontal movement (Pan) Move the slider up and down, in order to move head horizontally (PAN). Gradual head adjustment by moving the slider from one end to the other (0-255). - Page 19 XS-2 Dual Beam Channel 8 – Channel Functions Not used 10-14 Pan/tilt blackout 15-19 Color blackout 20-24 Gobo blackout 25-29 Pan/tilt/color blackout 30-34 Pan/tilt/gobo blackout 35-39 Color/gobo blackout 40-44 Pan/tilt/color/gobo blackout 45-49 Not used 50-54 M-2 mode (after 5 seconds)
-
Page 20: Channels
XS-2 Dual Beam 17 Channels Channel 1 – Head 1, Horizontal movement (Pan) Move the slider up and down, in order to move head horizontally (PAN). Gradual head adjustment by moving the slider from one end to the other (0-255). - Page 21 XS-2 Dual Beam Channel 11 – Head 1 and 2, Static Gobo Wheel 64-69 Gobo 9 shake effect , from slow to fast 70-75 Gobo 8 shake effect , from slow to fast 76-81 Gobo 7 shake effect , from slow to fast...
- Page 22 XS-2 Dual Beam 125-129 Cancellation of axes X1, X2, Y1, Y2 movement inversion (after 5 seconds) 130-135 Not used 136-175 Chase 1 effect, from slow to fast 176-215 Chase 2 effect, from slow to fast 216-255 Chase 3 effect, from slow to fast Channel 16 –...
-
Page 23: Channels
XS-2 Dual Beam 20 Channels Channel 1 – Head 1, Horizontal movement (Pan) Move the slider up and down, in order to move head horizontally (PAN). Gradual head adjustment by moving the slider from one end to the other (0-255). - Page 24 XS-2 Dual Beam Channel 9 – Head 2, Horizontal movement (Pan) Move the slider up and down, in order to move head horizontally (PAN). Gradual head adjustment by moving the slider from one end to the other (0-255). The head can be turned by 360° and stopped in any position.
- Page 25 XS-2 Dual Beam Channel 18 – Channel Functions Not used 10-14 Pan/tilt blackout 15-19 Color blackout 20-24 Gobo blackout 25-29 Pan/tilt/color blackout 30-34 Pan/tilt/gobo blackout 35-39 Color/gobo blackout 40-44 Pan/tilt/color/gobo blackout 45-49 Not used 50-54 M-2 mode (after 5 seconds)
-
Page 26: Maintenance
04) The electric power supply cables must not show any damages or material fatigue. The Showtec XS-2 Dual Beam requires almost no maintenance. However, you should keep the unit clean. Otherwise, the fixture’s light-output will be significantly reduced. Disconnect the mains power supply, and then wipe the cover with a damp cloth. -
Page 27: Static Gobo Wheel And Color Wheel
XS-2 Dual Beam Static Gobo wheel and Color wheel Static Gobo-wheel Fig. 10 Color wheel Fig. 11 Ordercode: 40173... -
Page 28: Troubleshooting
Response: Suspect three potential problem areas as: the power supply, the LEDs, the fuse. 01) Power supply. Check that the unit is plugged into an appropriate power supply. 02) The LEDs. Return the XS-2 Dual Beam to your Showtec dealer. 03) The fuse. Replace the fuse. See page 28 for replacing the fuse. - Page 29 XS-2 Dual Beam Problem Probable cause(s) Solution No power to the fixture • Check if power is switched on and One or more cables are plugged in fixtures do not function at all Primary fuse blown • Replace fuse Fixtures reset The controller is not connected.
-
Page 30: Product Specifications
XS-2 Dual Beam Product Specifications Model: Showtec XS-2 Dual Beam Input Voltage: 100~240VAC 50/60Hz Power consumption: 105W Fuse: F3AL/250V Dimensions: 555 mm x 125 mm x 360 mm (LxWxH) Weight: 9 Kg Operating and Programming: Signal pin OUT: Pin 1 (earth), pin 2 (-), pin 3 (+) -
Page 31: Dimensions
XS-2 Dual Beam Dimensions Website: www.Showtec.info Email: service@highlite.nl Ordercode: 40173... - Page 32 ©2014 Showtec...
Need help?
Do you have a question about the XS-2 Dual Beam and is the answer not in the manual?
Questions and answers