Table of Contents
Advertisement
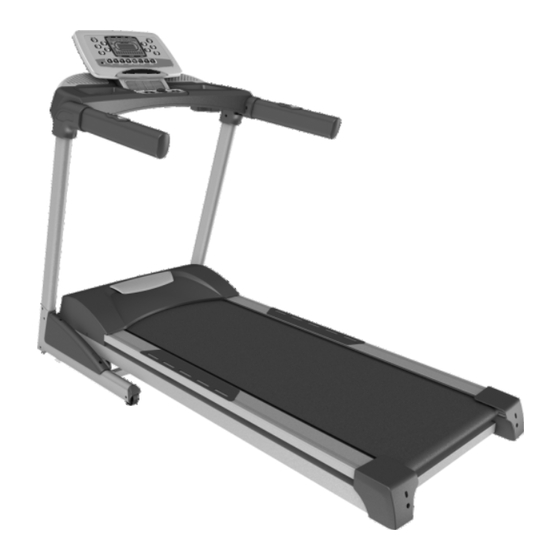
C 249 29279 0
OWNER'S MANUAL
ASSEMBLY‧OPERATION‧MAINTENANCE
WARRANTY‧PART ORDERING
CAUTION:
Exercise of a strenuous nature, as is customarily done on this equipment, should not be
undertaken without first consulting a physician. No specific health claims are made or implied as they
relate to the equipment.
IMPORTANT:
Read all instructions carefully before using this product. Retain this owner's
manual for future reference.
‧
SEARS CANADA INC.
TORONTO , ONTARIO M5B 2B8
Advertisement
Table of Contents

Related Manuals for Free Spirit C 249 29279 0


Summary of Contents for Free Spirit C 249 29279 0
- Page 1 C 249 29279 0 OWNER’S MANUAL ASSEMBLY‧OPERATION‧MAINTENANCE WARRANTY‧PART ORDERING CAUTION: Exercise of a strenuous nature, as is customarily done on this equipment, should not be undertaken without first consulting a physician. No specific health claims are made or implied as they relate to the equipment.
-
Page 2: Table Of Contents
TABLE OF CONTENTS Warranty………………………………. 2 Safety Precautions………………… Hardware Bag Check List………… Assembly Instruction……………… Treadmill & Monitor Operation…… 6-11 Folding Instruction…………………… 12 Parts list………………………………. 13-16 Overview Drawing………………….. 17-18 Trouble Shooting……………………. Maintenance ………………………… 20-23 Training guidelines………………….. 24-27 Stretching……..………………………. 28-29 Ordering Replacement parts ………. Service and Parts ……………………. -
Page 3: Important Safety Information
IMPORTANT SAFETY INFORMATION THIS UNIT IS INTENDED FOR HOUSEHOLD USE ONLY READ ALL INSTRUCTIONS BEFORE USING THIS TREADMILL CAUTION: Before starting any exercise program, it is recommended that you consult your physician. WARNING: Connect this unit to a properly grounded outlet only. DANGER: To reduce the risk of electric shock, always unplug the treadmill from the electrical outlet immediately after using and before cleaning. - Page 4 19. Use the treadmill only for its intended use as described in this manual. Do not use any attachments that are not recommended by the manufacturer. 20. User weight should not exceed 285 lbs (130 kg). 21. Never allow more than one person on the treadmill at once. 22.
-
Page 5: Before You Begin
Before you begin. Thank you for purchasing our product. Even though we go to great efforts to ensure the quality of each product we produce, occasional errors and /or omissions do occur. In any event should you find this product to have either a defective or a missing part please contact us for a replacement. - Page 6 Assembly t will take two people to assemble your unit. Set the treadmill in a cleared area and remove all packing material. Do not dispose of the material until your assembly is completed. Note: The underside of your treadmill’s walking belt is coated with a lubricant.
-
Page 7: Assembly Instruction
ASSEMBLY INSTRUCTIONS Step1 It will take two people to assemble your unit. Remove all the components from the carton. Step 2 Slide the lower computer wire (53) into the right upright (4). Step 3 Insert the Uprights (L, R)(5,4) into the Frame Base (2) with the 8pcs of 5/16" ×1/2" Button Head Socket Bolts (99), 4pcs of 5/16"... - Page 8 Step 4 Connect the lower computer cable (53) to the upper computer wire (55). Step 5 Install the Console Support (6) into the Uprights (L,R) (5,4) with the 6pcs of 5/16" ×1/2" Button Head Socket Bolts (99) , 2pcs of 5/16" x 18 x 1.5T Flat Washers (100) and 4pcs of 5/16" × 23 × 1.5T Curved Washers (101) by using the Combination M5 Allen Wrench &...
- Page 9 Step 6 Install the Outer Handlebar Covers (L & R) (129 & 130) on the Console Support (6) with the 4pcs of 3.5 × 12 m/m Sheet Metal Screws (74) by using the Combination M5 Allen Wrench & Phillips Head Screw Driver (102) and tighten them.
- Page 10 Step 7 Connect the upper computer wire (55) to the computer cable (21-10) of the monitor (21). Connect the computer wire (90-7) to the computer cable (21-9) of the monitor(21). Connect the speaker computer wire (90-8) to the computer cable (21-11) of the monitor (21). 21-11 21-10 21-9...
-
Page 11: Treadmill & Monitor Operation
TREADMILL OPERATION Your treadmill features a walking belt coated with a lubricant. IMPORTANT: Never apply silicone spray or other substances to the walking belt or walking board. Such substances will deteriorate the walking belt and cause excessive wear. How to plug in the power cord. GROUNDING INSTRUCTIONS. -
Page 12: Computer Operation Instructions
COMPUTER OPERATION INSTRUCTIONS CAUTION: Before operating the console, read the following precautions: • Do not stand on the walking belt when turning on the treadmill • Always wear the safety key • Adjust the speed in small increments to avoid sudden jumps in speed •... - Page 13 Function Buttons on monitor: 5 preset incline: 2%, 4%, 6%, 8%, 10% Press your desired incline position and the treadmill will automatically adjust to your preset incline. 5 preset speed: 2 mph, 4 mph, 6mph, 8mph, 10mph Press your desired speed and the treadmill will automatically adjust to your preset speed.
-
Page 14: Programmable Features
Function Buttons on handrail tubes: Fast: Press the “fast” button to increase your speed from 1 to 10mph (16kmph). Slow: Press the “slow” button to decrease your speed from 10mph (16kmph) to 1. Press the “up” button to raise the incline position. The maximum incline position is 10. Down: Press the “down”... -
Page 15: Random Program
RANDOM PROGRAM This mode which is a profile includes speed and incline automatically generated by the program. The user can continually choose the profiles until the one which is satisfied. It can also save the USER mode and make adjustments until a most suitable profile is reached. The operation is as follows: A. -
Page 16: User Programs
User Programs: STEP 1: Select the user you desire. User 1 through User 5 via the PROGRAM key then press Enter. Note that the dot matrix display portion will have a single row of dots at the bottom (Unless there is a previously stored program. - Page 17 FOLDING AND MOVING YOUR TREADMILL Before folding the treadmill, ensure that the treadmill is at it’s lowest incline position. Turn the power switch off, located on the front of the motor cover and unplug the power cord. CAUTION: You must be able to safely lift 20 kg (45lbs) in order to raise and lower the treadmill. To decrease the possibility of injury, bend your legs and keep your back straight while you are raising or lowering your treadmill.
-
Page 18: Parts List
PARTS LIST Key No Part No Description Q'ty 284001 Main Frame 284002 Frame Base 284003 Incline Bracket 284004 Right Upright 284005 Left Upright 284006 Console Support 284007 Outer Slide 284008 Inner Slide 284009 Locking Knob 284010 Incline Motor 284011 Drive Belt 284012 Motor Bracket 284013... - Page 19 Key No Part No Description Q'ty 284034 Frame Base Rear Wheel 284035 Cushion 284036 Handgrip Foam 284037 Foot Rail 284038 Non-Slip Rubber 284040 Motor Cover Anchor □21.4 × 21.4m/m_Square End Cap 284041 284042 □25.4 × 25.4m/m_Square End Cap 284043 □30 × 60m/m_Square End Cap 284044 800m/m_Safety Key 284045...
- Page 20 Key No Part No Description Q'ty 284074 3.5 × 12 m/m_Sheet Metal Screw 284075 1/2" × 8T_Nyloc Nut 284076 3/8" × 7T_Nyloc Nut 284077 5/16" × 7T_Nyloc Nut 284078 M8 × 8T_Nyloc Nut 284079 3/8" × 2T_Split Washer 284080 M8 × 1.5T_Split Washer 284081 M5_Split Washer 284082...
- Page 21 Key No Part No Description Q'ty 2840106 Beverage Holder Cover 2840107 500m/m_Speaker W/Cable 2840108 Speaker Grill Anchor 2840109 3 × 10m/m_Sheet Metal Screw 2840111 3.5 × 16m/m_Tapping Screw 2840112 Wire Tie Mount 2840113 Top Motor Cover Plate 2840114 Console Speaker Cover (L) 2840115 Console Speaker Cover (R) 2840116...
- Page 22 EXPLODED DIAGRAM ©2011...
-
Page 23: Trouble Shooting
TROUBLE SHOOTING Problem Cause Correction Treadmill will not start Treadmill not plugged in Plug into three prong (grounded) outlet On / off switch not on Push the on/off button to on House circuit breaker tripped Reset or replace Treadmill reset switch tripped Reset treadmill reset switch see reset switch resetting Treadmill motor controller... -
Page 24: Maintenance
MAINTENANCE INSTRUCTIONS TREADBELT ADJUSTMENT The treadbelt has been factory pre-adjusted, however if during the operation: If Treadbelt slips If TREADMILL during use. slips during use. Treadbelt slips during use if the treadbelt is too loose: a) Tighten both rear roller adjusting bolts a 1/4 turn clockwise using allen wrench. -
Page 25: Maintenance
MAINTENANCE INSTRUCTIONS CLEANING Care has been taken to assure that your treadmill has been properly adjusted and lubricated at the factory. It is not recommended that the user attempt service on the internal components instead seek service from an authorized service center. However, from time-to-time the outer surfaces may appear dull or dirty, following the instructions listed below will restore and preserve the original finish. - Page 26 MAINTENANCE INSTRUCTIONS TREADMILL LUBRICATION Your treadmill should require little maintenance other then periodically applying lubricant. Lubricating under the treadbelt will ensure superior performance and extend its life expectancy. HOW TO CHECK TREADBELT FOR PROPER LUBRICATION 1- Monitor will display a message prompting you to lubricate the treadmill after the treadmill has a total of 60 miles accumulated.
- Page 27 RESET SWITCH RESETTING If your treadmill looses power or will not start, check the reset switch located on the front of the motor cover. If the white tab of the reset switch is not showing then the reset switch has not been tripped. If the white tab of the reset switch is showing, the reset switch has tripped.
-
Page 28: Training Guidelines
TRAINING GUIDELINES Exercise is one of the most important factors in the overall health of an individual. Listed among its benefits are: Increased capacity for physical work (strength endurance) Increased cardiovascular (heart and arteries/veins) and respiratory efficiency Decreased risk of coronary heart disease Changes in body metabolism, e.g. -
Page 29: Stretching
Specificity Different forms of exercise produce different results. The type of exercise that is carried out is specific both to the muscle groups being used and to the energy source involved. There is little transfer of the effects of exercise, i.e. from strength training to cardiovascular fitness. That is why it is important to have an exercise program tailored to your specific needs. - Page 30 The following table is a guide to those who are keeping fit. Here we are working at about 80% of maximum. Target heart Rate 10 Second Count Beats per Minute Don’t push yourself too hard to reach the figures on this table. It can be very uncomfortable if you overdo it.
-
Page 31: Stretching
STRETCHING Stretching should be included in both your warm up and cool down, and should be performed after 3-5 minutes of low intensity aerobic activity or callisthenic type exercise. Movements should be performed slowly and smoothly, with no bouncing or jerking. Move into the stretch until slight tension, not pain, is felt in the muscle and hold for 20-30 seconds. - Page 32 ©2011...
- Page 33 WARRANTY MANUFACTURER LIMITED WARRANTY, REPAIR AND SERVICE WHAT DOES THIS WARRANTY COVER? This warranty covers your Free Spirit Treadmill against defects in material and workmanship when used for the purpose intended, under normal conditions and provided it receives proper care.
-
Page 34: Ordering Replacement Parts
When ordering parts by mail, selling prices will be furnished on request or parts will be shipped at prevailing prices and you will be billed accordingly. C249 29279 0 WHEN ORDERING REPLACEMENT PARTS, ALWAYS GIVE THE FREE SPIRIT FOLLOWING INFORMATION. TREADMILL 1. - Page 35 Get it fixed, at your home or ours! Just Call: 1-800-4-MY-HOME ® (1-800-469-4663) 24 hours a day, 7 days a week For the repair of major brand appliances in your own home … no matter who made it, no matter who sold it! For your nearest Sears Parts &...
Need help?
Do you have a question about the C 249 29279 0 and is the answer not in the manual?
Questions and answers