
Subscribe to Our Youtube Channel
Related Manuals for Bodart&Gonay Series 603


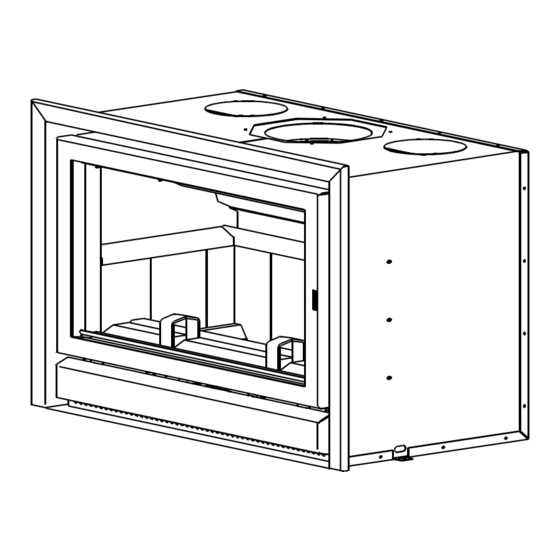
Summary of Contents for Bodart&Gonay Series 603
- Page 1 IN-FIRE Series 603 - 683 - 743 604 - 684 - 744 USER'S MANUAL, MAINTENANCE MANUAL INSTALLATION INSTRUCTIONS 04/98 07DH683A...
- Page 2 Dear Customer Congratulations on the purchase of your new Bodart & Gonay appliance! Your choice shows the interest you have for high quality products. You are now a full member of the large international family of Bodart & Gonay customers, who have enjoyed for many years the elegance, efficiency and reliability of our equipment.
-
Page 3: Table Of Contents
TABLE OF CONTENTS USERS AND MAINTENANCE MANUAL A. IMPORTANT RECOMMENDATIONS B OPERATION OF THE APPLIANCE C. MAINTENANCE D. OPERATION ANOMALIES E. GUARANTEE INSTALLATION INSTRUCTIONS A. SAFETY B. RECESS C. CHIMNEY D. HOT AIR DUCT E. ELECTRICAL INSTALLATION F. ADJUSTMENT OF THE BAFFLES DISMANTLING THE BAFFLES: H. -
Page 4: Users And Maintenance Manual
USERS AND MAINTENANCE MANUAL A. IMPORTANT RECOMMENDATIONS - Pull to open the door flap. - Carry out the installation and follow the safety rules (cf. installation instructions). - It is imperative to place the parker screw in the middle of the above cross bar of the frame, in order to attach the frame to the body of the appliance. -
Page 5: B Operation Of The Appliance
B. OPERATION OF THE APPLIANCE USE OF THE CONTROL AND SAFETY DEVICES 1) The door flap: NEVER KEEP IT OPEN DURING THE OPERATION OF THE APPLIANCE. ALWAYS CLOSE IT BEFORE OPENING THE DOOR. NEVER OPEN IT WHEN THE DOOR IS OPEN. 2) The thermostat: It adjusts the quantity of primary air for burning in function of its position. - Page 6 5) De-ashing arm: To use it, pull it towards the front. It is used to adapt the grate to the type of fuel to be burnt (left position: open grate for coal; right position: closed grate for wood). Removing the ashes is made by moving it from the right to the left.
- Page 7 OPENING AND CLOSING THE DOOR WHEN A FIRE IS ON, OPEN THE DOOR SLOWLY. A fast opening may lead to a temporary spillage of smoke. TO SHUT THE DOOR, lift the handle, press the door against the combustion chamber in order to crush the seal slightly, then lower the handle to its stop position. OPERATING WITH DIFFERENT FUELS: Wood The QUALITY of the wood is ESSENTIAL for an optimal operation of the...
- Page 8 OPEN fully the air flow: THERMOSTAT on 9. Place the grate in the open position (lever to the left). Place crumpled paper (or fire lighters) and KINDLING FIREWOOD in the appliance on the grate. LIGHT the FIRE. Leave the door SLIGHTLY AJAR to avoid an accumulation of dirt on the window, its temperature is too low it could leads to condensation and a deposit of particles on the glaas if the door is closed to early .
- Page 9 Coal Use anthracite or non bituminous coal, with a size of 20/30 (or 12/22 if the draught is sufficient). To use your appliance with COAL, place the GRATE in the OPEN POSITION. Open position REMARK: For people frequently using coal, a basket of heat resisting steel is available as an accessory.
-
Page 10: Maintenance
REMARK: do not use the equipment with coal in warm weather. The draught and the burn rate being reduced, the combustion risks to becoming incomplete. Prohibited fuels The use of treated wood (painted, ... etc.) and any other salvaged material that can emit noxious gazes for the environment and aggressive towards the components of the appliance is NOT ALLOWED and eliminates the rights of guarantee. - Page 11 CARRY OUT THE FOLLOWING OPERATIONS: * AIR DISTRIBUTOR: clear, if necessary, the air intake holes. * GRATES: check that there are no objects limiting their movements. * FANS: DISCONNECT the power supply, DISMANTLE the filter supports (remove the 2 blocking screws), DISCONNECT the fans, then REMOVE them. CLEAN the vanes of the turbines using a brush (COMPRESSED AIR IS NOT ALLOWED).
-
Page 12: Operation Anomalies
D. OPERATION ANOMALIES ANOMALIES CURES THE WINDOW GETS DIRTY TOO - Check the humidity of the fuel QUICKLY - Open the secondary air doser - Open the passage of the baffles ( cf. "Adjusting the baffles") VENTILATION - Check the operation of the two motors Does not function - Check the microswitch - Check (and replace) the fuse of the variator... -
Page 13: Guarantee
E. GUARANTEE DURATION AND LIMITATION - 6 years guarantee on: the general structure - 2 years guarantee on: the inner removable parts - 1 year guarantee on: grates, thermostat, fans and speed variator - no guarantee on: window, seals, bricks and cast iron plates. RESERVATIONS Bodart &... - Page 14 The guarantee starts on the date written on the invoice. The invoice is the only document valid for the guarantee. -14-...
-
Page 15: Installation Instructions
INSTALLATION INSTRUCTIONS Your dealer is the SPECIALIST that BODART & GONAY has chosen to represent them in your area. For your SAFETY and SATISFACTION we recommend that you entrust him with carrying out your installation. The appliance must be installed in compliance with the rules of building regulations and any local regulations. -
Page 16: Recess
IF AN EXTRACTION FAN CANNOT BE AVOIDED IN THE SAME PREMISES, AN ADEQUATE AIR INTAKE MUST BE PROVIDED TO AVOID ANY DEPRES- SION. B. RECESS - Clear the recess for connecting to the chimney, and possibly, for the hot air ducts. Remove any sinks and dampers. -
Page 17: Hot Air Duct
- in case of a lateral connection to an existing flue, make one of the following assemblies: SOOT TRAP - TIGHTNESS AND CLEANLINESS are important. - Seal all the linking parts so that the bottom of the flue socket is placed 10 mm higher than the top of the appliance that will be introduced. -
Page 18: Electrical Installation
According to the requirements and the risk of heat loss, insulation of these ducts is useful. Remark: an efficient hot air circuit requires an air return so as to avoid depression in the room where the appliance is. For each room concerned, a ventilating grid placed near the ground allows the cooled air to come out of the place in order to complete its circuit. - Page 19 Diagram of the electrical connection in the in-fires (without thermocontact) MICRO-SWITCH 1. Blue 2. Brown 3. Black 4.Yellow-green Electrical connection diagram for the infires (with thermocontact) 1. Blue 2. Black 3. Yellow-green 4. Brown Position of the fans: The fans are mounted on self-gripping pads. TAKE CARE TO AVOID ANY DIRECT CONTACT BETWEEN THE FAN AND THE STRUCTURE OF THE APPLIANCE TO AVOID THE TRANSMISSION OF VIBRATIONS.
-
Page 20: Adjustment Of The Baffles
- Unscrew the two screws. SCREWS F. ADJUSTMENT OF THE BAFFLES The baffle system is designed to adapt the appliance to the draught of the chimney. The baffles rest on square supports. Baffles from the most closed to the most opened position (pictures 1 to 3). -20-... - Page 21 Picture 4: wrong position. The upper baffle has on each side 3 positioning notches, allowing to open or close the flow of smoke at the back, as well as a release notch for the assembly and dismantling of the baffles. 1.
-
Page 22: Dismantling The Baffles
G. DISMANTLING THE BAFFLES: Place the upper baffle in the release position Raise slightly the lower baffle and move it to bring the release notch at the height of the square support. Lift one side and try to lower the other side of the baffle by passing the square support through the notch. - Page 23 Connect the flue pipe into flue socket. AND SEAL WITH FIRE CEMENT ADHESIVE. Carry out the electrical connection through one of the sides, either left or right. Assemble the covering frame using the angle piece, washers and nuts. DO NOT TIGHTEN TOO MUCH, THIS WOULD DISTORT THE FRAME ON THE FRONT FACE.
- Page 24 A parker screw B Spring C Covering D Frame Re-assemble the movable parts. Place the baffles in the most closed position (cf. Adjustment of the baffles). Check the operation of the control elements, the opening safety of the door and the two fans (LEAVE ON MAXIMUM SPEED FOR THE FIRST FIRE). Remove the dust on the visible painted surfaces.
- Page 25 Positioning of the baffles for the "INFIRE the 603-683-743" The system of baffles is conceived to adapt the hearth to the pulling of the chimney. The baffles are posed on square supports. The drawings show positioning, from the position most closed towards most open. Caution: in the most open position, it is necessary to turn over the lower baffle.
- Page 27 OPCIONES Y RECAMBIOS IF 603 OPTIONS AND SPARE PARTS IF 603 RECAMBIOS / SPARE PARTS Concepto Description Code BOQUILLA AIRE CALIENTE DIA 125 HOT AIR PIPE DIA 125 37117400 EMPALME INOX TUBO CHIM DIAM 150 PIPE ADAPTOR DIAM 150 07VM0150 KIT MARCO RECUBRIMIENTO 3C 603 3 SIDED FRAME KIT IF603 96 37660002...
- Page 28 OPCIONES Y RECAMBIOS IF 603 OPTIONS AND SPARE PARTS IF 603 MARCO LATON PUERTA 603 BRASS FRAME FOR DOOR 37660070 EMBELLESEDOR LATON IF603 BRASS COVER 3SIDES FRAME IF603 37660071 CESTA CARBON 603 COAL BASKET IF603 96 37660073 MARCO LUX4C 604 4 SIDES LUXE FRAME 96 37660075 EMBELLESEDOR 4C IF604...
- Page 29 OPCIONES Y RECAMBIOS IF 683 OPTIONS AND SPARE PARTS IF 683 RECAMBIOS / SPARE PARTS Concepto Description Code BOQUILLA AIRE CALIENTE DIA 125 HOT AIR PIPE DIA 125 37117400 EMPALME INOX TUBO CHIM DIAM 180 PIPE ADAPTOR DIAM 180 07VM0180 KIT MARCO RECUBRIMIENTO 3C683 3 SIDES FRAME KIT IF683 96 37668002...
- Page 30 OPCIONES Y RECAMBIOS IF 683 OPTIONS AND SPARE PARTS IF 683 MARCO LATON PUERTA 683 BRASS FRAME FOR DOOR IF683 37668070 EMBELLESEDOR LATON 683 BRASS COVER 3SIDES FRAME IF683 37668071 CESTA CARBON 683 COAL BASKET IF683 1996 37668073 MARCO LUX 4C 684 4 SIDES LUXE FRAME 96 37668075 EMBELLESEDOR LATON 684...
- Page 31 OPCIONES Y RECAMBIOS IF 743 OPTIONS AND SPARE PARTS IF 743 RECAMBIOS / SPARE PARTS Concepto Description Code BOQUILLA AIRE CALIENTE DIA 125 HOT AIR PIPE DIA 125 37117400 EMPALME INOX TUBO CHIM DIAM 180 PIPE ADAPTOR DIAM 180 07VM0180 KIT MARCO RECUBRIMIENTO 3C 743 3 SIDES FRAME KIT IF743 96 37674002...
- Page 32 OPCIONES Y RECAMBIOS IF 743 OPTIONS AND SPARE PARTS IF 743 MARCO 15 MM 3C IF 743 4-SIDED FRAME IF 743 37674005 MARCO LATON CRISTAL IF 743 BRASS FRAME FOR DOOR IF743 37674070 EMBELLESEDOR LATON 743 BRASS COVER 3SIDES FRAME IF743 37674071 CESTA CARBON 743 COAL BASKET IF743 1996...
Need help?
Do you have a question about the Series 603 and is the answer not in the manual?
Questions and answers