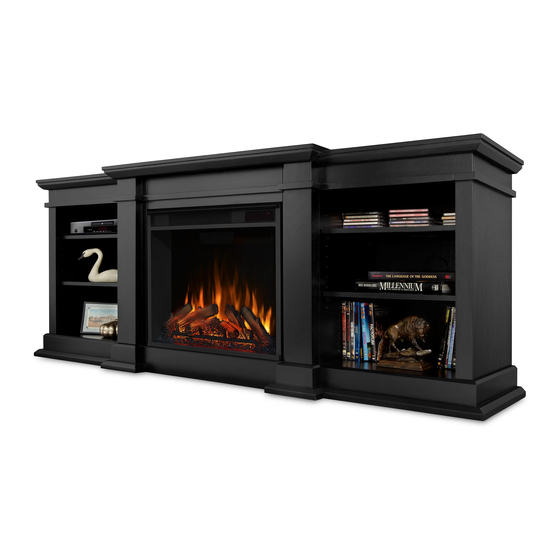
RealFlame G1200 Mantel Assembly Instructions
Fresno fireplace
Hide thumbs
Also See for G1200:
- Manual (14 pages) ,
- Assembly instructions manual (16 pages) ,
- Assembly instructions manual (10 pages)
Advertisement
Available languages
Available languages
Quick Links
Download this manual
See also:
Manual
Advertisement

Summary of Contents for RealFlame G1200
- Page 1 LOT# ventless fireplaces Mantel Assembly Instructions Model # G1200 Fresno Fireplace...
- Page 2 WARNING Read entire label and all instructions included with fireplace fuel and fireplace PROPERTY DAMAGE, SERIOUS INJURY OR DEATH may result if these warnings are not followed HAZARDS Fireplace fuel is flammable. Failure to follow warnings can result in property damage or serious burns. Do not attempt to pourany kind of fuel on a fire that is already burning.
-
Page 3: Parts List
PARTS LIST Number Description Black Dark Walnut White Quantity Base Panel 12000101JW 12001201JW 12000801JW Left Outside Panel 12000102JW 12001202JW 12000802JW Right Outside Panel 12000103JW 12001203JW 12000803JW Left Front Panel 12000104JW 12001204JW 12000804JW Right Front Panel 12000105JW 12001205JW 12000805JW Left Inside Panel 12000106JW 12001206JW 12000806JW... - Page 4 Step One -Screw eight 3-in-1 bolts to base panel (1). -Screw three 3-in-1 bolts to left front panel (4). -Screw three 3-in-1 bolts to right front panel (5). -Screw four 3-in-1 bolts to top panel (11) Step Two -Join left inside panel (6) with left front panel ( 4) by inserting three bolts in the holes of (6). Using three excenter ttings lock the bolts.
- Page 5 Step Three -Set base panel (1) on a at surface as shown. -Join panel (2), (3), (6), (7) by inserting eight bolts in the holes of the four panels. Using eight excenter ttings lock the bolts. Step Four -Attach upper rebox trim (8) to left & right inside panel by securing 2 screws through 2 long allen washers.
- Page 6 Step Five -Locate top panel (11) to above nished parts. -Join panel (6), (7) by inserting four bolts in the holes of the two panels. Using four excenter ttings lock the bolts. -Join panel (2), (3), (8), (9), (10) by securing 7 long screws through 7 washers.
- Page 7 Step Seven -Insert 4pcs shelf panel supports to the holes of p anel (2), (6), (3), (7) respectively. Keep every 2 supports on parallel. -Put on 4pcs shelf panel (13) on the shelf panel su pports. Step Eight For next step reference the instruction manual included with your rebox If you do not have an instruction manual included with your rebox do not attempt to assemble or operate.
-
Page 8: Warranty & Return Policies
Warranty & Return Policies Warranty Jensen Metal Products, Inc., doing business as Real Flame®, warrants Real Flame vent-less fireplaces and accessories to be free from defects in parts and workmanship under normal use and service for a period of 90 days from the date of purchase. In the event of such defects Real Flame will, at its option, replace the defective product or refund the purchase price. - Page 9 LOT# foyers sans ventilation Mantelet Instructions de Montage Foyer Fresno Modèle # G1200...
- Page 10 Avertissement Lire complètement l’étiquette et toutes les instructions du combustible et du foyer La négligence à suivre tous ces avertissements peut occasionner des dommages à la propriété, des blessures sérieuses et même la mort DANGERS Le combustible est inflammable. La négligence à suivre les avertissements de danger peut occasionner des brûlures sérieuses, des blessures, des dommages à...
- Page 11 Liste des pièces Numéro Description noire noyer foncé blanche Quantité Panneau de la base 12000101JW 12001201JW 12000801JW Panneau extérieur gauche 12000102JW 12001202JW 12000802JW Panneau extérieur droit 12000103JW 12001203JW 12000803JW Panneau du devant gauche 12000104JW 12001204JW 12000804JW Panneau du devant droit 12000105JW 12001205JW 12000805JW...
- Page 12 Première étape - Visser huit boulons 3 en 1 au panneau de base (1) - Visser trois boulons 3 en 1 au panneau avant gauche (4) - Visser trois boulons 3 en 1 au panneau avant droit (5) - Visser quatre boulons 3 en 1 au panneau supérieur (11) Deuxième étape -Assembler le panneau intérieur gauche (6) au panneau avant gauche (4) en insérant trois boulons dans les trous du panneau (6).
- Page 13 Troisième étape - Placer le panneau de base (1) sur une surface plane tel qu’illustré. - Unir à la base les panneaux (2) (3), (6) et (7) en insérant 8 boulons dans les trous des quatre panneaux. Bien bloquer les boulons avec huit écrous de blocage décentrés. Quatrième étape - Fixer la moulure supérieure du foyer (8) sur les côtés gauche et droit des panneaux intérieurs en serrant avec 2 vis Allen longues à...
- Page 14 Cinquième étape - Mettre le panneau supérieur (11) sur les parties montées. - Y joindre les panneaux (6) et (7) en insérant quatre boulons dans les trous des deux panneaux. Bien bloquer les boulons en utilisant quatre écrous de blocage décentrés. - Joindre les panneaux (2) (3) (8) (9) et (10) en mettant sept vis Allen longues à...
- Page 15 Septième étape - Mettre respectivement quatre supports à tablette dans les trous des panneaux (2) (6) (3) et (7). Garder chaque paire de supports bien en parallèle. - Placer les 4 tablettes (13) sur les supports Huitième étape Pour l’étape suivante, vous référer au manuel d’instruction inclus avec votre chambre de combustion.
- Page 16 GARANTIE DE REAL FLAME ET POLITIQUE DE RETOUR Garantie La compagnie Jensen Metal Products, opérant sous le nom de Real Flame, garantit les foyers sans ventilation Real Flame et ses accessoires de tout défaut (pièces et main d’œuvre) conformément à un usage courant et pour une période de 90 jours suivant la date d’achat.


Need help?
Do you have a question about the G1200 and is the answer not in the manual?
Questions and answers