
Subscribe to Our Youtube Channel
Related Manuals for BNF INVERZA 280


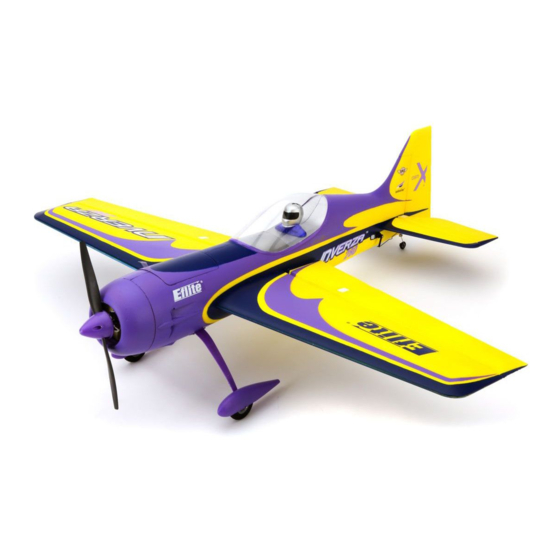
Summary of Contents for BNF INVERZA 280
- Page 1 ™ INVERZA Instruction Manual Bedienungsanleitung Manuel d’utilisation Manuale di Istruzioni...
-
Page 2: Safety Precautions And Warnings
NOTICE All instructions, warranties and other collateral documents are subject to change at the sole discretion of Horizon Hobby, Inc. For up-to-date product literature, visit www.horizonhobby.com and click on the support tab for this product. Meaning of Special Language: The following terms are used throughout the product literature to indicate various levels of potential harm when operating this product: NOTICE: Procedures, which if not properly followed, create a possibility of physical property damage AND little or no possibility of injury. -
Page 3: Table Of Contents
fl y from practically anywhere, such as a park or small fi eld. Everything you love about fl ying larger, performance aerobatic airplanes has been packed into the Inverza 280. Beyond its advanced composite- reinforced foam construction, you’ll appreciate how its expert-approved digital control and custom-tuned power system components are installed which make it possible for you to get fl... -
Page 4: Low Voltage Cutoff (Lvc)
Low Voltage Cutoff (LVC) Prefl ight Checklist When a Li-Po battery is discharged below 3V per cell, it will not hold a charge. The aircraft’s ESC protects the fl ight battery from over-discharge using Low Voltage Cutoff (LVC). 1. Charge fl ight battery. Once the battery discharges to 3V per cell, the LVC will 2. -
Page 5: Installing The Flight Battery
Installing the Flight Battery 1. Remove the battery hatch from the nose of the aircraft. 2. Apply the included strip of hook and loop tape in the center on the bottom of your battery. 3. For the recommended CG, install the battery centered in the compartment, then press the battery onto the hook and loop strip (A). -
Page 6: Arming The Esc
Arming the ESC Arming the ESC also occurs after binding as previously described, but subsequent connection of a fl ight battery requires the steps to the right. Tip: If the ESC sounds a continuous double beep after the fl ight battery is connected, recharge or replace the battery. -
Page 7: Installing The Wing
Installing the Wing 1. Slide the wing tube into the right wing. 2. Insert the right wing with the wing tube (A) into the round hole in the wing slot of the fuselage while connecting the right aileron control. NOTICE: When disconnecting the servo connectors, do not pull on the servo wires. -
Page 8: Control Direction Test
Control Direction Test You should bind your aircraft and transmitter Make sure the tail linkages move freely and that before doing these tests. Move the controls on paint or decals are not adhered to them. the transmitter to make sure the aircraft control surfaces move correctly and in the proper direction. -
Page 9: Dual Rates And Expos
Dual Rates and Expos High Rate Low Rate We recommend using a DSM radio capable of dual rates and expo. The settings to the right are Aileron 25mm 12mm recommended starting settings for intermediate Elevator 35mm pilots. Adjust according to individual preferences after the initial fl... -
Page 10: Adjusting Center Of Gravity (Cg)
Adjusting Center of Gravity (CG) The CG location is 77mm from the trailing edge of The battery compartment is oversized to allow for the wing tip. Center of Gravity adjustment. Start by centering the battery in the battery compartment. Adjust as needed by sliding the battery forward or back. -
Page 11: Removing The Landing Gear
Removing the Landing Gear 1. Remove the 4 screws (A), fairings (B) and covers (C) from the fuselage. 2. Push the landing gear struts together and pull away from the fuselage to remove the landing gear. Assemble in reverse order. -
Page 12: Flying Tips And Repairs
Flying Tips and Repairs Consult local laws and ordinances before choosing a location to fl y your aircraft. We recommend fl ying your aircraft outside in no greater than moderate winds. Always avoid fl ying near houses, trees, wires and buildings. -
Page 13: Service Of Power Components
Service of Power Components Disassembly CAUTION: Always disconnect the battery before handling or adjusting the propeller or motor. Failure to do so could result in personal injury. Propeller 1. Remove the 2 screws (A) from the spinner (B). Carefully separate the spinner from the back plate (C). -
Page 14: Troubleshooting Guide
Troubleshooting Guide Problem Possible Cause Solution Aircraft will ESC did not arm because throttle stick and/or Lower throttle stick and throttle trim to lowest not respond to throttle trim too high setting throttle but re- Throttle channel is reversed Reverse throttle channel on transmitter sponds to other controls Motor disconnected from ESC... -
Page 15: Limited Warranty
Limited Warranty What this Warranty Covers WARRANTY SERVICES Horizon Hobby, Inc. (“Horizon”) warrants to the original Questions, Assistance, and Services purchaser that the product purchased (the “Product”) will Your local hobby store and/or place of purchase cannot be free from defects in materials and workmanship at the provide warranty support or service. -
Page 16: Warranty And Service Information
Compliance Information for the European Union Declaration of Conformity (in accordance with ISO/IEC 17050-1) No. HH2013032601U1 Product(s): Inverza 280 BNF Basic Item Number(s): EFL6350 Equipment class: The object of declaration described above is in conformity with the requirements of the specifi cations listed below, following the provisions of the European R&TTE directive 1999/5/EC and EMC Directive 2004/108/EC:... - Page 17 HINWEIS Allen Anweisungen, Garantien und anderen zugehörigen Dokumenten sind Änderungen nach Ermessen von Horizon Hobby, Inc. vorbehalten. Aktuelle Produktliteratur fi nden Sie unter www.horizonhobby.com im Support-Abschnitt für das Produkt. Begriffserklärung Die folgende Begriffe werden in der gesamte Produktliteratur verwendet, um die Gefährdungsstufen im Umgang mit dem Produkt zu defi...
- Page 18 Präzisionsfl ug- und 3D Performance und läßt sich auch auf kleinen Flächen hevorragend fl iegen. Dazu fi nden Sie alles was Sie an großen Flugzeugen schätzen auch in der Inverza 280. Hinter der fort- schrittlichen Composite-Schaum Konstruktion werden Sie von dem Custom-designten Hochleistungsantrieb begeistert sein, der hohe Geschwindigkeiten ermöglicht.
-
Page 19: Niederspannungsabschaltung (Lvc)
Niederspannungsabschaltung (LVC) Vorfl ugkontrolle Wird ein LiPo Akku unter 3 Volt pro Zelle entladen kann er ke- ine Spannung mehr halten. Der Regler schützt den Akku vor 1. Laden Sie den Flugakku. einer Unterspannung mit der Niederspannungsabschaltung (LVC). Unabhängig von der Gasknüppelstellung wird dann die 2. -
Page 20: Einsetzen Des Flugakkus
Einsetzen des Flugakkus 1. Nehmen Sie Akkuklappe vorne vom Rumpf ab. 2. Kleben Sie das im Lieferumfang enthaltene Klettband wie abgebildet auf die Unterseite des Akkus in der Nähe der Anschlußkabel. Diese Position ermöglicht einfaches Einsetzen und Entnehmen des Akkus. 3. -
Page 21: Armieren Des Reglers
Armieren des Reglers Das Armieren des Reglers geschieht nach dem Bin- den. Jede weitere Verbindung nach dem Binden er- fordert die unten beschriebenen Schritte. Tipp: Hören Sie nach Anschluß des Akkus vom Regler ein kontinuierliches Doppelpiepen laden oder ersetzen Sie den Flugakku. Sollten Sie versehentlich den Akku mit Knüppel auf Vollgas angeschlossen haben hören Sie nach 5 Sekunden eine Tonfolge. -
Page 22: Montage Der Tragfl Äche
Montage der Tragfl äche 1. Schieben Sie den Flächenverbinder in die rechte Tragfläche. 2. Schieben Sie die rechte Tragfläche mit dem Flächenverbinder (A) in die runde Aufnahme im Rumpf und schließen den rechten Querruder- anschlußstecker an. HINWEIS: Ziehen Sie zu dem Trennen der Servoanschlüsse nicht an den Servokabeln. -
Page 23: Steuerrichtungstest
Steuerrichtungstest Stellen Sie sicher, dass sich die Leitwerksanlen- Binden Sie Sender und Empfänger bevor Sie die- kungen frei bewegen können und nicht durch Farbe sen Test durchführen. Bewegen Sie die Kontrol- oder Dekor gehalten werden. len um sich zu überzeugen, dass die Ruder korrekt arbeiten. -
Page 24: Dual Rates Und Expos
Dual Rate und Expo Große Kleine Ausschläge Ausschläge Wir empfehlen einen DSM Sender mit Dual Rate Querruder 25mm 12mm und Expofunktion. Die unten aufgeführten Einstel- lungen sind empfohlene Starteinstellungen für er- Höhenruder 35mm fahrene Piloten. Stellen Sie nach den ersten Flügen den Sender nach Ihren persönlichen Vorlieben ein. -
Page 25: Einstellen Des Schwerpunktes (Cg)
Einstellen des Schwerpunktes (CG) Die Position des Schwerpunktes befi ndet sich Das Akkufach ist ausreichend groß um den Schw- 77mm vor der Hinterkante der Tragfl äche. (siehe erpunkt variabel einzustellen. Beginnen Sie mit Abbildung) dem Akku in der Mitte. Justieren Sie ihn dann wie benötigt durch vor- und zurückschieben. -
Page 26: Demontage Des Fahrwerks
Demontage des Fahrwerks 1. Entfernen Sie die 4 Schrauben (A), Fahrwerks- verkleidungen (B) und Halter (C) vom Rumpf. 2. Drücken Sie das Fahrwerk zusammen und ziehen es aus dem Rumpf heraus. Montieren Sie in umgekehrter Reihenfolge. -
Page 27: Tipps Zum Fliegen Und Reparieren
Tipps zum Fliegen und Reparieren Bitte beachten Sie vor der Auswahl des Flug- HINWEIS: Die Verwendung von Schaumgeigne- ten Aktivatorspray (Foam-compatible CA accelerant) geländes lokale Vorschriften und Gesetze. kann die Lackierung des Modells beschädigen. Be- Wir empfehlen Ihnen die E-fl ite Inverza draussen nur wegen Sie das Modell NICHT bis der Aktivator voll- bis zu moderaten Windstärken zu fl... -
Page 28: Wartung Der Antriebskomponenten
Wartung der Antriebskomponenten Demontage ACHTUNG: Trennen Sie immer den Akku vom Regler bevor Sie Arbeiten am Motor oder Propeller vornehmen. Ein Nichtbefolgen könnte Verletzungen / Personenschäden zur Folge haben. Propeller 1. Entfernen Sie 2 Schrauben (A) vom Spinner (B) Nehmen Sie den Spinner vorsichtig von der Rückplatte ab (C). -
Page 29: Problemlösung
Problemlösung Problem Mögliche Ursache Lösung Flugzeug nimmt kein Gasstick nicht auf Leerlauf oder Gastrim- Bringen Sie den Gasknüppel und Trimmung auf die Gas an, alle anderen mung zu hoch unterste Stellung Funktionen arbeiten Gaskanal ist reversiert (umgedreht) Reversieren (drehen) Sie den Gaskanal am Sender einwandfrei Motor ist vom Regler getrennt Nehmen Sie die Tragfl... -
Page 30: Garantie Und Serviceinformationen
Garantie und Serviceinformationen Warnung keine Ansprüche für in der folge auftretende Verletzungen Ein ferngesteuertes Modell ist kein Spielzeug. Es kann, oder Beschädigungen. Mit der Verwendung und dem wenn es falsch eingesetzt wird, zu erheblichen Verletzun- Einbau des Produktes akzeptiert der Käufer alle aufgefüh- gen bei Lebewesen und Beschädigungen an Sachgütern rten Garantiebestimmungen ohne Einschränkungen und führen. -
Page 31: Garantie Und Service Kontakt Informationen
No. HH2013032601U1 Horizon Hobby GmbH Christian-Junge-Straße1 D-25337 Elmshorn erklärt das Produkt: Inverza 280 BNF Basic (EFL6350) declares the product: Inverza 280 BNF Basic (EFL6350) Geräteklasse: equipment class im Einklang mit den Anforderungen der unten aufgeführten Bestimmungen nach den Bestimmungen des FTEG (Artikel 3 der R&TTE), und europäischen EMV Richtlinie 2004/108/EG:... - Page 32 REMARQUE La totalité des instructions, garanties et autres documents est sujette à modifi cation à la seule discrétion d’Horizon Hobby, Inc. Pour obtenir la documentation à jour, rendez-vous sur le site www.horizonhobby.com et cliquez sur l’onglet de support de ce produit. Signifi...
- Page 33 ‘Inverza 280 Bind-N-Fly Basic E-fl ite a été conçu par le champion du monde Quique Somenzini afi n d‘obtenir une précision extrême et des performances acrobatiques 3D que vous pourrez exploiter presque partout, comme dans un parc ou sur un petit terrain. Tout ce que vous appréciez sur les modèles d‘échelle supérieure est intégré...
-
Page 34: Coupure Par Tension Faible (Lvc)
Coupure par tension faible (LVC) Contrôles avant vol Une batterie Li-Po déchargée en-deçà de 3V ne supportera aucune charge par la suite. Le CEV (ESC) de l’aéronef protège la batterie de vol contre une décharge trop profonde grâce au 1. -
Page 35: Installation De La Batterie De Vol
Installation de la batterie de vol 1. Retirez la trappe d’accès de la batterie située sur le nez de l’avion. 2. Appliquez le bande auto-agrippante fournie sur le dessous de votre batterie à proximité des câbles. Cette position vous permet d’installer et de retirer facilement la batterie. -
Page 36: Armement Du Contrôleur
Armement du contrôleur L’armement du contrôleur de vitesse se produit après l’affectation, comme décrit précédemment, mais la connexion ultérieure d’une batterie de vol requiert les étapes suivantes. ASTUCE : Si le contrôleur émet un double bip en continu après le branchement de la batterie, rechar- gez ou remplacez la batterie. -
Page 37: Installation De L'aile
Installation de l’aile 1. Glissez la clé d’aile dans l’aile droite. 2. Glissez l’aile droite avec la clé (A) dans l’orifice situé dans l’empreinte de l’aile du fuselage en connectant la prise du servo d’aileron. REMARQUE : Ne tirez pas sur les câbles des servos pour débrancher les prises. -
Page 38: Test De Contrôle De La Direction
Test de contrôle de la direction Affectez votre émetteur à votre avion avant de pro- Vérifi ez que les tringleries peuvent bouger libre- céder à ces tests. Actionnez les commandes de ment, qu’elles ne sont pas collées par de la peinture l’émetteur pour vous assurer que les gouvernes de ou des auto-collants. -
Page 39: Double-Débattements Et Expos
Double-débattements et expos Grands Petits débattements débattements Nous vous recommandons d’utiliser une radio Ailerons 25mm 12mm DSM possédant les double débattements et les expos. Les valeurs suivantes sont recommandées pour les premiers vols des pilotes de niveau inter- Profondeur 35mm médiaire. -
Page 40: Ajustement Du Centre De Gravité (Cg)
Ajustement du centre de gravité (CG) Le CG se situe 77mm en avant du bord de fuite au Le compartiment à batterie est surdimensionné afin niveau du saumon de l’aile. de permettre d’ajuster le centre de gravité. Com- mencez par placer la batterie au centre. Si néces- saire, ajuster en glissant la batterie vers l’arrière. -
Page 41: Désinstallation Du Train D'atterrissage
Désinstallation du train d’atterrissage 1. Retirez les 4 vis (A), les habillages (B) et les platines (C) du fuselage. 2. Pressez les jambes du train pour les rappro- cher, puis tirez vers le haut pour retirer le train du fuselage. L’assemblage s’effectue en ordre inverse. -
Page 42: Conseils De Vol Et Réparations
Conseils de vol et réparations Consultez les réglementations locales avant de REMARQUE : L’utilisation d’accélérateur à colle CA choisir un lieu pour faire voler votre avion. peut endommager la peinture de votre avion. Ne manipulez pas l’avion tant que l’accélérateur n’est Nous vous recommandons de ne pas faire voler pas totalement sec. -
Page 43: Maintenance Après Vol
Maintenance après vol Démontage ATTENTION : Toujours débrancher la batterie avant de manipuler ou de régler le moteur ou l’hélice. Un non-respect de cette consigne vous expose à un risque de blessure corporelle. L’hélice 1. Retirez les 2 vis (A) du cône (B). Séparez déli- catement le cône du flasque (C). -
Page 44: Guide De Dépannage
Guide de dépannage Problème Cause possible Solution L’avion ne La manette des gaz et/ou le trim des gaz sont Réinitialisez les commandes en plaçant la manette répond pas à trop élevés des gaz et le trim des gaz à leur position la plus la commande basse des gaz mais... - Page 45 Problème Cause possible Solution Commandes Les réglages de l’émetteur sont inversés Effectuez les essais de direction des commandes et inversées réglez les commandes au niveau de l’émetteur en fonction des résultats Le moteur/ La sécurité anti surcharge (OCP) stoppe le mo- Baissez le manche et le trim des gaz pour réarmer contrôleur n’est teur quand le manche des gaz est en position...
-
Page 46: Garantie Et Service Des Coordonnées
Informations de conformité pour l’Union européenne Déclaration de conformité (conformément à la norme ISO/IEC 17050-1) No. HH2013032601U1 Produit(s): Inverza 280 BNF Basic Numéro d’article(s): EFL6350 Catégorie d’équipement: L’objet de la déclaration décrit ci-dessus est en conformité avec les exigences des spécifi cations énumérées ci-après, suivant les conditions de la directive ETRT 1999/5/EC et CEM directive 2004/108/EC:... - Page 47 AVVISO Istruzioni, garanzie e tutti gli altri documenti accessori sono soggetti a modifi che a totale discrezione di Horizon Hobby, Inc. Per avere la documentazione aggiornata sul prodotto, visitare il sito Web www. horizonhobby.com e fare clic sulla scheda “support” per questo prodotto. Signifi...
- Page 48 3D in modo da poter volare praticamente ovunque, sia nei parchi che nei piccoli campi. Tutto quel- lo che si desidera in un aereo più grande, lo trovate già nell‘Inverza 280. Oltre alla sua costruzione in espan- so e materiali compositi rinforzati, si apprezzerà anche il fatto che il radiocomando, approvato da esperti, e sistema propulsivo, particolarmente curato, siano già...
-
Page 49: Spegnimento Per Bassa Tensione (Lvc)
Spegnimento per bassa tensione (LVC) Controlli prima del volo Se si scarica una batteria LiPo al di sotto di 3 V per cella, in se- guito non riuscirà più a mantenere la carica. Per proteggere la batteria di bordo dalla sovrascarica questo modello adotta il si- stema LVC che toglie alimentazione al motore qualora la ten- 1. -
Page 50: Installazione Della Batteria Per Il Volo
Installazione della batteria per il volo 1. Togliere lo sportellino della batteria dal muso dell’aereo. 2. Applicare sulla parte inferiore della batteria, vicino ai cavi, la striscia a strappo fornita. Met- tendola in questa posizione, sarà più facile mettere e togliere la batteria sul modello. 3. -
Page 51: Armare Il Regolatore (Esc)
Armare il regolatore (ESC) L’attivazione dell’ESC avviene anche dopo il binding, come descritto in precedenza, ma una connessione successiva di una batteria di volo richiede l’esecu- zione delle fasi sottostanti. TIP: se il regolatore (ESC) emette continuamente un doppio beep dopo che è stata collegata la bat- teria, allora vuol dire che la batteria è... -
Page 52: Installazione Dell'ala
Installazione dell’ala 1. Infilare il tubo nell’ala destra. 2. Inserire l’ala destra con il suo tubo (A) nel foro rotondo che si trova in corrispondenza della sede dell’ala, mentre si collega il cavetto di controllo dell’alettone destro. AVVISO: Quando si disconnettono I connettori dei servocomandi, non tirare i cavi del servocomando. -
Page 53: Controllo Dei Comandi
Controllo dei comandi Assicurarsi che i giunti della coda si muovono libe- Bisogna effettuare il binding dell’aereo e del tra- ramente e che non aderiscano alla vernice o agli smettitore prima di eseguire questi test. Muovere i adesivi. comandi sul trasmettitore per assicurare che le su- perfi... -
Page 54: Riduttori Ed Esponenziali
Riduttori ed esponenziali Corsa max Corsa min Si raccomanda di usare un radiocomando DSM Alettoni 25mm 12mm con i riduttori di corsa lineari ed esponenzia- li. Le impostazioni indicate sono consigliate ai pilo- Elevatore 35mm ti di media esperienza per iniziare. Dopo i primi voli si faranno degli aggiustamenti secondo le preferen- Timone 20mm... -
Page 55: Regolazione Del Baricentro (Cg)
Regolazione del baricentro (CG) La posizione del baricentro è a 77 mm dal bordo di La sede della batteria è più grande del necessario uscita all’estremità alare. proprio per consentire la regolazione del baricentro. Iniziare posizionando la batteria al centro della sua sede;... -
Page 56: Togliere Il Carrello
Togliere il carrello 1. Togliere dalla fusoliera le 4 viti (A), le carenatu- re (B) e i cavallotti di fissaggio (C). 2. Premere insieme le due gambe del carrello per estrarlo dalla fusoliera e rimuoverlo. Per rimontarlo procedere in ordine inverso. -
Page 57: Consigli Per Il Volo E Riparazioni
Consigli per il volo e riparazioni Consultare le leggi locali e le ordinanze prima di AVVISO: Quando si termina di volare, non lascia- re l’aereo al sole. Non ritirare l’aereo dentro un’auto scegliere un posto dove far volare questo aereo. chiusa al sole, l’alta temperatura potrebbe danneg- Si raccomanda di farlo volare con vento non trop- giare il materiale espanso di cui è... -
Page 58: Manutenzione Del Gruppo Propulsore
Manutenzione del gruppo propulsore Smontaggio ATTENZIONE: scollegare sempre la batteria prima di maneggiare o regolare l’elica o il motore. In caso contrario ci si potrebbe ferire. Elica 1. Togliere le due viti (A) dall’ogiva (B). Staccare attentamente l’ogiva dal suo fondello (C). 2. -
Page 59: Guida Alla Soluzione Dei Problemi
Guida alla soluzione dei problemi Problema Causa possibile Soluzione L’aereo non Lo stick motore e/o il suo trim non sono posizionati Resettare i comandi con stick e trim motore risponde al in basso completamente in basso comando Il canale del motore è invertito Invertire il canale del motore motore, ma gli Il motore è... -
Page 60: Durata Della Garanzia
Durata della Garanzia Periodo di garanzia Indicazioni di sicurezza Garanzia esclusiva - Horizon Hobby, Inc., (Horizon) garanti- Questo è un prodotto sofi sticato di hobbistica e non è un sce che i prodotti acquistati (il “Prodotto”) sono privi di di- giocattolo. -
Page 61: Informazioni Per I Contatti
Informazioni sulla conformità per l’Unione Europea Dichiarazione di conformità (in conformità con ISO/IEC 17050-1) No. HH2013032601U1 Prodotto(i): Inverza 280 BNF Basic Numero(i) articolo: EFL6350 Classe dei dispositivi: Gli oggetti presentati nella dichiarazione sopra citata sono conformi ai requisiti delle specifi che elencate qui di seguito, seguendo le disposizioni della direttiva europea R&TTE 1999/5/EC e CEM directive 2004/108/EC:... -
Page 62: Replacement Parts
– Pièces de rechange – Recapiti per i ricambi – Part # • Nummer Description Beschreibung Description Descrizione Numéro • Codice Fuselage with E-fl ite Inverza 280 Fuselage avec dérive : Fusoliera con timone: rudder: Inverza 280 BNF : Rumpf mit Inverza 280 BNF Inverza 280 BNF EFL63501... -
Page 63: Optional Replacement And Accessories
– Optional Parts and Accessories – – Optionale Bauteile und Zubehörteile – – Pièces optionnelles et accessoires – – Parti opzionali e accessori – Part # • Nummer Description Beschreibung Description Descrizione Numéro • Codice Charger Lead with E-fl ite Ladekabel m/ Câble de charge avec Cavo di carica con EFLA230... - Page 64 © 2013 Horizon Hobby, Inc. E-fl ite, Celectra, DSM, DSM2, DSMX, ModelMatch, Bind-N-Fly and the Bind-N-Fly logo are trademarks or registered trademarks of Horizon Hobby, Inc. The Spektrum trademark is used with permission of Bachmann Industries, Inc. ™ Inverza and its design are trademarks of Kevin Kimball, used under license to Horizon Hobby, Inc. The trim scheme of the Inverza was designed by Mirco Pecorari of Aircraft Studio Design.
Need help?
Do you have a question about the INVERZA 280 and is the answer not in the manual?
Questions and answers