
Related Manuals for Sony PS-HX500


Summary of Contents for Sony PS-HX500
- Page 1 4-585-834-11 (2) Stereo Turntable System Getting Started Listening to a Vinyl Record Operating Instructions Recording a Vinyl Record Maintenance Additional Information PS-HX500...
-
Page 2: Owner's Record
CAUTION : RISK OF ELECTRIC SHOCK in the spaces provided below. Refer to DRY LOCATION USE ONLY these numbers whenever you call upon your Sony dealer regarding this product. Polarity of DC output of the AC adaptor Model No. PS-HX500 Serial No.________________... - Page 3 EU directives. This product has been manufactured by or on behalf of Sony Corporation, 1-7-1 Konan Minato-ku Tokyo, 108-0075 Japan. Inquiries related to product compliance based on European Union legislation shall be...
-
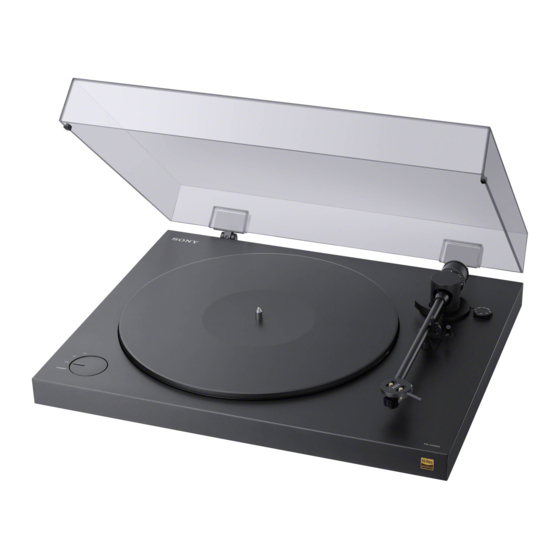
Page 4: Features
Features About Manuals PS-HX500 is a stereo turntable system Operating Instructions designed for analog playback of vinyl (this manual) records. By connecting a computer to the turntable, you can use the recording Describes basic application exclusively designed for this operations of your... -
Page 5: Table Of Contents
Table of Contents Owner’s Record ....... 2 Additional Information Features ........... 4 Precautions ........22 About Manuals ........ 4 Troubleshooting ......22 Parts and Controls ......6 Warranty Card and Repair Services ......24 Getting Started Specifications ........ 25 Unpacking ........8 Customer Support Websites .. -
Page 6: Parts And Controls
Parts and Controls Front Spindle (page 9) Tone arm lock (page 11, 16, 17) Lock the tone arm to protect it against physical Rubber mat (page 8, 10) shock when you do not intend to play a vinyl record. - Page 7 Rear PHONO/LINE switch (page 14) USB port (Type B) (page 18) Use this switch to select the audio output type Use this port to connect a computer for appropriate to your connected audio device, recording. such as a stereo system or an amplifier. ...
-
Page 8: Getting Started
• Dust cover hinges (2) Getting Started Unpacking • AC adaptor (1) Make sure that you have all of the supplied accessories listed below. If you find anything missing, contact your dealer or the customer support website. (See page 26.) • Platter (with drive belt) (1) • PHONO cables with grounding wires (1) • Rubber mat (1) -
Page 9: Assembling The Turntable
Attaching the platter Assembling the Turntable Place the platter on the spindle. Note Keep the platter level while placing it on Do not connect your turntable to a power outlet the spindle. with the AC adaptor until you are finished with assembly. - Page 10 “0” on the anti-skating knob is aligned with the reference line. Place the rubber mat onto the platter. Anti-skating Knob Note Make sure that the chamfered side of the rubber mat faces upward. The back side of the rubber is indicated by the SONY imprint.
- Page 11 Attach the counterweight onto the Rotate the counterweight clockwise back of the tone arm. or counterclockwise until the tone arm is horizontally balanced. Slightly push in the counterweight and rotate in the direction of the arrow until You may find it easier to adjust the tone the face of the gauge ring comes close arm balance that you rotate the to the white line on the tone arm.
- Page 12 adjust the stylus pressure to the recommended Adjusting the stylus pressure value. On your turntable, set the stylus and the anti-skating force pressure to “3.” Once the tone arm is horizontally balanced, Rotate the anti-skating knob to adjust the stylus pressure and the anti- bring the gauge number “3”...
-
Page 13: Attaching The Dust Cover
Note on carrying this product Attaching the Dust Cover When you carry this product, make sure that you firmly hold the bottom of the Insert the supplied dust cover product as illustrated below. Inappropriate holding may cause you to drop the product, hinges to the hinge pockets on the resulting in malfunctions or injuries. -
Page 14: Listening To A Vinyl Record
Listening to a Vinyl Connect the supplied PHONO cables to the AUX or analog input jacks on Record the audio device. Plug the white plug of the cable to the Connecting an Audio white (L) jack and the red plug to the red Device (R) jack. -
Page 15: Playing A Vinyl Record
Playing a Vinyl Record Connect the AC adaptor. Note Before you play a vinyl record, turn down the volume of the connected audio device (an amplifier, speakers, etc.) to avoid a possible loud crackling noise. The crackling noise made by the stylus coming into contact with the vinyl record could damage the audio device. - Page 16 Rotate the SPEED/POWER rotary Move the tone arm to the position switch knob to select the rotation over the desired track. speed appropriate to the vinyl Tone arm record. The platter starts turning. Note To move the tone arm, gently hold the SPEED/POWER rotary headshell.
- Page 17 Using the tone arm lifter lever prevents scratches on the vinyl record and ensures smooth playback. When playback is finished Push the tone arm lifter lever toward the back of the turntable. Move the tone arm back to the tone arm rest.
-
Page 18: Recording A Vinyl Record
Mac OS X 10.11 Recording a Vinyl Screen resolution: 1024 x 768 or higher Record Any operating systems other than the listed ones are not supported. Recording Audio Tracks Note onto a Computer This application is not assured to work successfully: You can connect your turntable and a –... - Page 19 Access http://www.sony.eu/support, switch to the website for your country, and then search for “Hi-Res Audio Recorder.” For customers in the U.S.A.: Access http://esupport.sony.com/ and search for "Hi-Res Audio Recorder." For customers in Canada: Access http://esupport.sony.com/CA/ and search for "Hi-Res Audio Recorder."...
-
Page 20: Maintenance
Hold the cartridge body () with Maintenance one hand, grasp the stylus with the other, and then pull the stylus in the Cleaning the Stylus direction of the arrow to remove it from the cartridge body. The stylus is a high precision component. Handle it with care to avoid damage. -
Page 21: Replacing The Drive Belt
Replacing the Drive Belt Turn the platter upside down and remove the drive belt. The drive belt will wear or may even break over time. In such a case, replace it with a new one. To obtain a spare drive belt, contact your dealer or the customer support website. -
Page 22: Additional Information
• ASIO is a trademark of Steinberg Media anti-skating force are properly set. (See page 12.) Technologies GmbH. • DSD is a registered trademark of Sony C The stylus is worn out. Replace it with a new one. (See page 20.) Corporation. - Page 23 When the PHONO/LINE switch is set to LINE, For customers in Europe: do not connect the turntable to the PHONO Access http://www.sony.eu/support, switch input jacks on the audio device. to the website for your country, and then C Make sure that a computer is NOT connected search for “Hi-Res Audio Recorder.”...
-
Page 24: Warranty Card And Repair Services
If the stylus or the drive belt is damaged or warranty card in a safe place. worn out due to improper use, repair services Sony warrants the turntable for a period of one will be provided at your expense. year from the date of purchase. -
Page 25: Specifications
Specifications Motor and Platter Drive system Belt-drive Motor DC motor Platter 296 mm dia. (aluminum die-cast) Speeds 33 1/3 and 45 rpm, 2 speed Wow and flutter Less than 0.25% (WRMS) S/N ratio More than 50 dB (DIN-B) with the supplied cartridge Tone Arm Type Dynamic balanced straight-shaped with soft damping control... -
Page 26: Customer Support Websites
........6, 20 counterweight ........6, 8, 11 For customers in Europe: customer support websites ....... 26 http://www.sony.eu/support DC IN ............7, 15 dust cover hinges ....... 6, 8, 13 For customers in the U.S.A.: gauge ring ...........12 http://esupport.sony.com/US... - Page 28 © 2016 Sony Corporation Printed in China...
Need help?
Do you have a question about the PS-HX500 and is the answer not in the manual?
Questions and answers