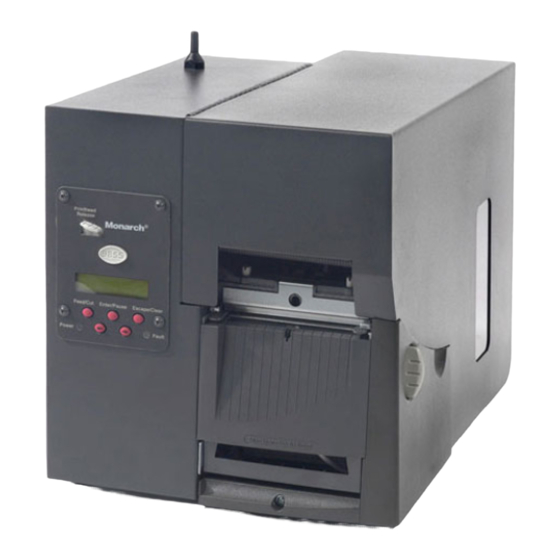
Avery Dennison Monarch 9855 Quick Reference
Hide thumbs
Also See for Monarch 9855:
- Operator's handbook, maintenance, service & parts manual (134 pages) ,
- Operator's handbook manual (132 pages) ,
- Quick reference (16 pages)
Advertisement
Quick Links
Q U I C K R E F E R E N C E
This Quick Reference contains supply loading and general
maintenance procedures for the Monarch® 9855® RFID
printer. Additional RFID documents are available on the
Monarch® Printer's Documentation CD-ROM and on our
W eb site
(www.monarch.aver
RFID Setup Utility at
http://www.servisource1.com/prnutil/rfidsetup
illustrations to determine which type of RFID supplies you
are using and basic printer configuration information. For
information about creating formats, configuring the printer,
or programming the printer, refer to the Packet Reference
Manual available on our W eb site.
Note:
Information in this document supercedes
information in previous versions. Check our W eb
site for the latest documentation and release
information.
The limited warranty on knives used in or with
RFID printers is one (1) year from the date of
shipment, or 500,000 cuts, whichever occurs first.
R F I D O v e r v i e w
Your printer has been engineered to program (encode) an
RFID (Radio Frequenc y Identification) label (commonly
called "RFID tags") before the label's format is printed.
RFID tags contain an embedded RFID inlay (chip and
antenna).
RFID is only available using die cut or black mark supplies.
Linerless supplies are not currently supported. The RFID
printer is also capable of printing standard (non-RFID)
supplies.
The printer supports Class 1 Generation 2 (C1Gen2)
protocol encoding.
Monarch and 9855 are registered trademarks of Avery Dennison Corp.
TC9855RFIDQR Rev. AU 5/15
ydennison.com). Refer to the
2007 Avery Dennison Corp. All rights reserved.
for
Advertisement

Related Manuals for Avery Dennison Monarch 9855


Summary of Contents for Avery Dennison Monarch 9855
- Page 1 (non-RFID) supplies. The printer supports Class 1 Generation 2 (C1Gen2) protocol encoding. Monarch and 9855 are registered trademarks of Avery Dennison Corp. 2007 Avery Dennison Corp. All rights reserved. TC9855RFIDQR Rev. AU 5/15...
- Page 2 C o n n e c t i n g t h e C a b l e s The power supply automatically switches between 115V or 230V. There are no operator settings required. Review the safety information in the Regulatory Compliance document included with your printer.
- Page 3 U s i n g t h e C o n t r o l P a n e l The control panel has a two-line LCD display, two status lights, and five buttons. The control panel displays error codes/messages, and allows you to setup/configure the printer.
- Page 4 L o a d i n g R F I D L a b e l s The RFID suppli es are sensi tive to static electricity and can be dam aged b y static electricity. Ground you rself by touching som e m etal, such as the printer’s m etal base, before han dling th e supplies .
- Page 5 Adjust the supply holder guides so the sides barely touch the roll. Make sure the supply roll turns freely. If you are using fan-fold supplies, place the supply stack behind the printer, label side facing Suppl y Holder Guides Suppl y Leve r Push down on the supply lever to unlock the supply guides.
- Page 6 For tag supplies using the optional knife, feed the supply through the knife. Make sure at least 0.5 inches of supply is past the knife. Adjust the supply guides so they touch the supply. Push up on the supply lever to lock the supply guides into place.
-
Page 7: Loading Labels For The Optional Peel Mode
11. Close the printhead by pressing down on the thumb well until you hear it click into place. 12. Close the cover. 13. Press Feed/Cut several times to feed at least three labels/tags to properly position the supply and the ribbon. Loading Labels for the Optional Peel Mode Peel mode (on-demand) must be purchased separately. - Page 8 Feed the backing paper over the peel bar. Peel Low er Opening Feed the backing paper through the lower opening of the exit cover. Close the exit cover. Pull down on the backing paper to remove any slack. Te ar Edge Backing Paper...
- Page 9 A d j u s t i n g t h e W i d e / N a r r o w K n o b s You may need to adjust the two wide/narrow knobs according to the width of your supply. For supply that is more than two inches, adjust the knobs to the wide setting.
- Page 10 L o a d i n g R i b b o n Open the cover. Unlock the printhead by turning the retaining latch. Lift printhead assembly using the printhead tab until the assembly locks into place. Push the deflector tab down. Printhead Defle ctor Slide the extra ribbon core on the take-up reel as far...
- Page 11 Carefully feed the ribbon under both ribbon rollers and printhead. Ta ke-up Core Ta ke-up Reel Ribbon Rollers Align the ribbon and make sure it is straight and centered throughout the path. 1 0 . Tape the ribbon to the take-up core. Do not tape the ribbon to the take-up reel.
- Page 12 The printer accepts RFID and non-RFID batches once you see “Print Mode Ready.” Download a format and a batch. Refer to the Packet Reference Manual for information on downloading print jobs. The printer prints a strip of labels or labels in on- demand mode.
- Page 13 C l e a n i n g You must clean the printhead as described below to maintain printhead life. CAUTION: Do not use sharp objects to clean the printhead or touch the printhead. This may damage the printhead and require a service charge.
- Page 14 Clean the platen roller when you see significant adhesive build-up or a label is wrapped around the platen roller. Use a dr y, soft-bristle brush, such as a toothbrush, to clean the platen roller. If the brush does not remove all the adhesive, use isopropyl alcohol on the platen roller.
- Page 15 Clean the build-up in the supply path. Let the printer dr y before you reload supplies. 10. Push on the exit cover firmly to close it. Both latches will click into place. Close the cover and printhead assembly. 11. Turn on the printer and press Feed/Cut several times to feed at least three labels/tags to properly position the supply and the ribbon.
- Page 16 C o m m o n E r r o r s If the action does not resolve the problem, call Service. Error Action Name must be 1 to 8 characters inside quotes. Supply width is invalid. Code page selection defined in the field is invalid. Data length is too long.
-
Page 17: Rfid Errors
RFID Errors See the RFID Application Notes for more information. Check with your System Administrator about the format. The printer does not recalibrate (feed a blank label) after an RFID error. Error Description/Action Data type in the RFID Data Field is invalid. The starting block in the RFID Data Field is invalid.
Need help?
Do you have a question about the Monarch 9855 and is the answer not in the manual?
Questions and answers