Table of Contents
Advertisement
S S
e e
r r
v v
i i
c c
e e
M M
a a
n n
u u
a a
l l
S
e
r
v
i
c
e
M
a
n
u
a
l
PA50
CONTENTS
Page:
1.
Technical Specification
2-24. Circuit & Block & Structural Diagram
25-78. QA Full inspection (Diagnostics and tests performed at factory)
79-83. Parts List
1st Edition
Issued date: April 13th 2004
Issued by: KORG INC.
Edited by: Korg USA
January 13, 2005
Advertisement
Table of Contents

Related Manuals for Korg PA50


Summary of Contents for Korg PA50
- Page 1 Technical Specification 2-24. Circuit & Block & Structural Diagram 25-78. QA Full inspection (Diagnostics and tests performed at factory) 79-83. Parts List 1st Edition Issued date: April 13th 2004 Issued by: KORG INC. Edited by: Korg USA January 13, 2005...
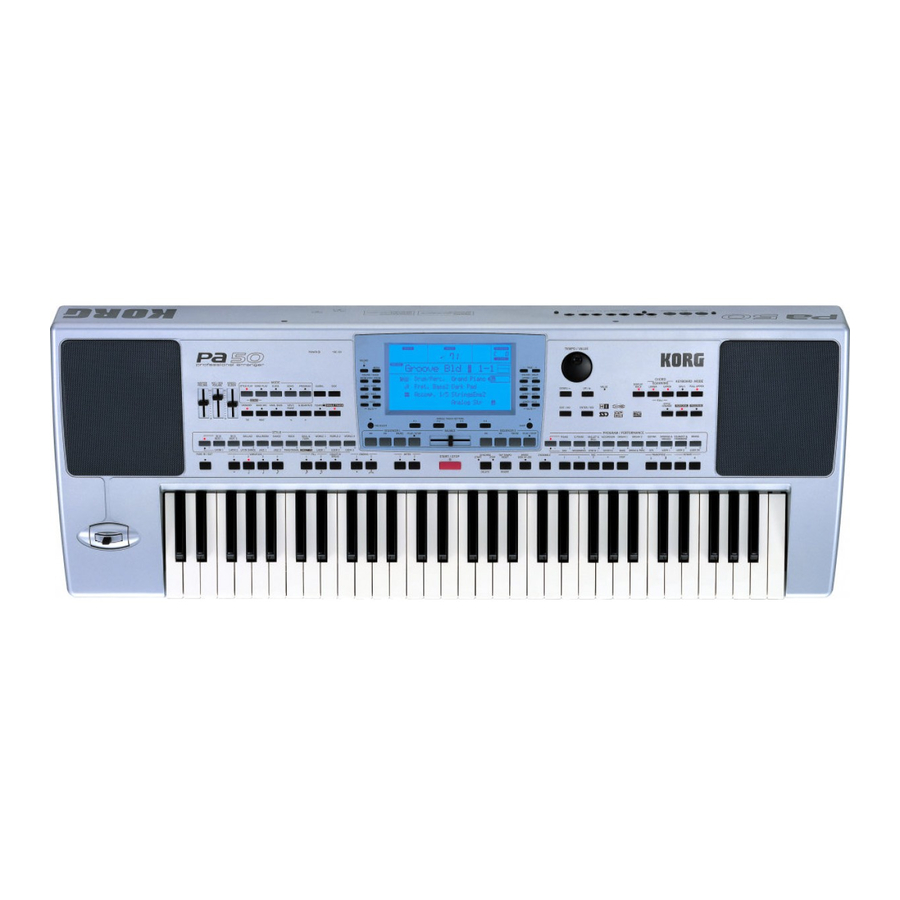
- Page 2 TECHNICAL SPECIFICATIONS Model: KORG PA50 Keyboard 61 keys, with velocity KORG OPOS(Objective Portable Operating System) . Multitasking . Load While-Play feature . SSD Operating System (Solid state disk)-resident . Upgradable from floppy disk . Display Backlight custom LCD 8MB(>20MB equivalent ) Internal Solid State disk(SSD), 1.44MB floppy Disk Driver(MS-DOS...
- Page 25 Damper Pedal KORG DS1H Assignable Pedal KORG EXP2 33ohm Cable connects to Phone Jack. MIDI IN and MIDI OUT are connected by MIDI Cable for MIDI loop check. Please connect Pa50 MIDI THRU and MIDI equipment's MIDI IN by MIDI Cable.
- Page 26 QA Full Inspection Pa-50 <Appearance Check> Appearance Inspection according to specified appearance limitation To check if there are problems on Appearance Surface. Confirm if there is no scar on Appearance Surface including SWs/Knobs/Sliders. Confirm if there is no silk printing failure such as bleeding, cutting and so on Confirm if Switch, LED, VR and so on should be installed correctly.
- Page 27 QA Full Inspection Pa-50 <TEST MODE> HOW TO ENTER TEST MODE PROGRAM Please confirm if the connection is correct. After confirmation, install Floppy Disk and then Power ON. After Power On, Display changes from (1) to (5) in order. As soon as (5) is displayed, please press both [STYLE PLAY] SW and [DISK]...
- Page 28 QA Full Inspection Pa-50 If Display proceed following (8) -> (9) after (6), you failed to enter Test Mode Program. In this case, please make power off and restart. HOW TO OPERATE FUNCTION [F1] Start Test Mode [F2] Repeat Inspection [F3] Next Go to Next Inspection...
- Page 29 "Phone Insert Check" is not displayed on LCD. *After "MIDI Loop Check" completion, "RESOURCE" is displayed on LCD. This test is loading Pre-load Data from Hard Disk. Pa50 does not have Hard Disk and this test is not necessary. Please press [F4], then [F3] to go to Panel Inspection.
- Page 30 QA Full Inspection Pa-50 PANEL INSPECTION All LEDS ON INSPECTION Please confirm if LCD Display is below, all LEDs are on and no variation of brightness. Also please confirm if [START/STOP] LED is orange. After confirmation, please press [F3] to go to next inspection SW/LED INSPECTION At first, [STYLE PLAY] LED is on.
- Page 31 QA Full Inspection Pa-50 In the list, "LED OFF" means that all LEDs are off. Please confirm if all LEDs are off. Following cases are NG: *Even if correspondent SW is pressed, test does not progress *LED is not on when the LED should be on. *LED is on when LED should NOT be on.
- Page 32 DISPLAY Correspondent SW Correspondent LED ON/LED OFF Ending1 ENDING [1] ENDING [1] Ending2 ENDING [2] ENDING [2] Intro1 INTRO [1] INTRO [1] Intro2 INTRO [2] INTRO [2] StartStop [START/STOP] [START/STOP] (RED) Synchro SYNCHRO [START] SYNCHRO [START] TapTempo TAP TEMPO SYNCHRO [STOP] Write [WRITE] [WRITE]...
- Page 33 DISPLAY Correspondent SW Correspondent LED ON/LED OFF Seq1 << SEQUENCER 1[<<] LED OFF Seq1 >> SEQUENCER 1[>>] LED OFF Seq1Pause SEQUENCER 1[PAUSE] LED OFF Seq1PlayS SEQUENCER 1[PLAY/STOP] SEQUENCER 1[PLAY/STOP] Seq2 << SEQUENCER 2[<<] [START/STOP] Green Seq2 >> SEQUENCER 2[>>] LED OFF Seq2Pause SEQUENCER 2[PAUSE] LED OFF...
- Page 34 Correspondence Table Displayed SW Name on LCD / Correspondent SW / Correspondent LED name switched on or LED OFF DISPLAY Correspondent SW Correspondent LED ON/LED OFF StylePlay [STYLE PLAY] [STYLE PLAY] SongPlay [SONG PLAY] [SONG PLAY] BSeq [B.SEQ] [B.SEQ] Song [SONG] [SONG] Program...
- Page 35 DISPLAY Correspondent SW Correspondent LED ON/LED OFF Page - PAGE[-] LED OFF Page + PAGE[+] LED OFF Upper1 [UPPER1] LED OFF Acc2 [ ACC2] LED OFF Upper2 [UPPER2] LED OFF Acc3 [ACC3] LED OFF Upper3 [UPPER3] LED OFF Acc4 [ACC4] LED OFF Lower [LOWER]...
- Page 36 QA Full Inspection Pa-50 LCD INSPECTION ALL DISPLAY All icons are displayed as below. Message Area Please confirm if all icons are displayed correctly and the above content is displayed in Message Area. After confirmation, please press [F3].
- Page 37 QA Full Inspection Pa-50 [>]DISPLAY Please confirm if all icons are disappeared and following content is displayed in Message Area. After confirmation, please press [F3]. [<]DISPLAY Please confirm if following content is displayed in Message Area After confirmation, please press [F3]. [#]DISPLAY Please confirm if following content is displayed in Message Area After confirmation, please press [F3].
- Page 38 QA Full Inspection Pa-50 [8] Display Please confirm if following content is displayed in Message Area After confirmation, please press [F3]. [X] Display Please confirm if following content is displayed in Message Area After confirmation, please press [F3] to go to Max Level Inspection.
- Page 39 4/4 : SHIELD CABLE with 33ohm impedance OUTPUT : [PHONES R] : 880[Hz], 1.80[Vp-p] - 3.20[Vp-p] Caution During this inspection, Pa50 may hang-up very rarely. In this case, shut off power at once and load the TEST MODE again and make same inspection. Example without distortion...
- Page 40 QA Full Inspection Pa-50 After 4/4 measurement is completed and display proceed to (A), please press [F4] to go to (B) display. After confirmation of (B) display, please press [F3] to go to SLIDE INSPECTION.
- Page 41 QA Full Inspection Pa-50 SLIDER INSPECTION Confirm if "Press Key; -> SLIDER" is displayed on LCD Operate Sliders and pedals in order of followings and confirm if its maximum value and minimum value are taken. (Displayed on LCD). Joystick Horizontal Direction Joystick Vertical Direction ACC/SEQ Slider Volume...
- Page 42 QA Full Inspection Pa-50 SPEAKER INSPECTION Inspection for Speakers Press [F3] after "Press key; -> SPEAKER" is displayed on LCD Adjust Master Volume and confirm if Low Range Sound comes from Left Speaeker and No sound comes from Right Speaker. After confirmation, Press [F3] Adjust Master Volume and confirm if Low Range Sound comes from Right Speaker and...
- Page 43 QA Full Inspection Pa-50 "RESTART !!!" is displayed on LCD Please shut down. TEST MODE COMPLETIONT NEXT STEP is PERFORMACE CHECK...
- Page 44 <PERFORMANCE CHECK> MIDI THRU, MIDI Clock and Performance Inspection. After Power on, confirm if Pa50 performs correctly. Following is the method of MIDI THRU and MIDI Clock Inspection. Please send "Program Change" from Pa50 to MIDI Equipment and Inspect. 1. MODE [PROGRAM] SW on.
- Page 45 QA Full Inspection Pa-50 <FQC AUDIO INSPECTION/MEASUREMENT> Please make Audio inspection/measurement below on all Pa50. Frequence Response Check Line in Check Distortion Check Noise Check CONNECTION When you start FAC, please connect Pa50 output and Audio Analyzer's Input.
- Page 46 QA Full Inspection Pa-50 Equipment Audio Precision ATS-2 Audio Analyzer Please refer to each description for Audio Analyzer Setting. Enter Test Mode Please enter TEST MODE. After "Internal Inspection" completes, please press [F4] until press key; -> LINE IN is displayed on LCD. After confirmation of Display, please press [F3] and confirm the following LCD display.
- Page 47 QA Full Inspection Pa-50 LINE IN CHECK INPUT L, 1[KHz] Input Signal : INPUT L/MONO, 1[KHz], 0.775[Vpp] Range : OUTPUT L/MONO, 1[KHz], -0.488 to -0.775[Vpp] INPUT R, 1[KHz] Input Signal : INPUT R, 1[KHz], 0.775[Vpp] Range : OUTPUT R, 1[KHz], -0.488 to -0.775[Vpp]...
- Page 48 QA Full Inspection Pa-50 DISTORTION CHECK Setting for Audio Analyzer: LPF : 20[KHz] HPF : 10[Hz] The Audio comensation Filter : None OUTPUT L/MONO Input Signal : INPUT L/MONO, 1[KHz], 1[Vrms] Range : OUTPUT L/MONO, 1[KHz], Less than 0.5[%] OUTPUT R Input Signal : INPUT R, 1[KHz], 1[Vrms] Range : OUTPUT R, 1[KHz], Less than 0.5[%]...
- Page 49 QA Full Inspection Pa-50 NOISE CHECK Setting for Audio Analyzer LPF : 20[KHz] HPF : 10[Hz] The Audio comensation Filter : ”A”weighting When you measure phones, please change Input Cable from Output to Phones. Measurement Standard Range: OUTPUT L/MONO Less than -78.0[dB] OUTPUT R Less than -78.0[dB] PHONES L...
- Page 50 Please refer to the attached drawing on Connection. On connecting plug, please check Insertion and Extraction Force with Jack. <PREPARATION> Floppy Disk Specified SMF Data included Floppy Disk Blank Disk Formatted by Pa50 Damper Pedal DS-1H Assignable SW EXP-1 Headphone...
- Page 51 ------ LOAD TEST MODE -------- Please confirm if the connection is correct. After confirmation, install Floppy Disk and then Power ON. After Power On, Display changes from (1) to (5) in order. As soon as (5) is displayed, please press both [STYLE PLAY] SW and [DISK] SW ([STYLE PLAY] LED ON) and keep on press them until (6) is displayed and [STYLE PLAY] LED is OFF.
- Page 52 Please press [F1] to start Internal Test. If (8) -> (9) are displayed after (6), Test Mode is not loaded correctly. Please turn off and restart from first step. <How to operation> FUNCTION [F1] Start Test Mode [F2] Repeat Inspection [F3] Next Go to Next Inspection...
- Page 53 If FAULT!!! is displayed During Floppy Disk Check , MIDI Loop Check, Phone Insert Check, please check connection and press [F2] to repeat Internal check. If FAULT!!! is displayed again, the Pa50 internal test result is failure. Please complete the test and inspect next Pa50. If FAULT!!! is disappear, please proceed test.
- Page 54 For QA Full Inspection, following inspections by Test Mode are not necessary. Please skip following inspections by press [F4]. Finally following is displayed. After confirmation above, Press [F3]. Following is displayed. Please confirm it and turn off Pa50 TEST MODE COMPLETION...
- Page 55 NOTE: Please shake (or hit) body lightly in order to check if there are any internal soldering problems. Connect Headphone to Pa50 and have it to check if Headphone output works correctly. Keep on connecting Headphone to Pa50 and check if LINE OUT output works correctly by Monitor Amplifiers.
- Page 56 After confirmation if performance is correct (about 10 measures), Press Press [SEQUENCER1 PLAY/STOP] key to stop STOP Performance Extract FD from FDD without Failure Power Off CAUSTION! Do not pass Pa50 to next process with FD inserted. Management of the number of FD is always needed. Page: 7/12...
- Page 57 Pa50 QA Full Inspection Connection...
- Page 58 DISPLAY Correspondent SW Correspondent LED ON/LED OFF Ending1 ENDING [1] ENDING [1] Ending2 ENDING [2] ENDING [2] Intro1 INTRO [1] INTRO [1] Intro2 INTRO [2] INTRO [2] StartStop [START/STOP] [START/STOP] (RED) Synchro SYNCHRO [START] SYNCHRO [START] TapTempo TAP TEMPO SYNCHRO [STOP] Write [WRITE] [WRITE]...
- Page 59 DISPLAY Correspondent SW Correspondent LED ON/LED OFF Seq1 << SEQUENCER 1[<<] LED OFF Seq1 >> SEQUENCER 1[>>] LED OFF Seq1Pause SEQUENCER 1[PAUSE] LED OFF Seq1PlayS SEQUENCER 1[PLAY/STOP] SEQUENCER 1[PLAY/STOP] Seq2 << SEQUENCER 2[<<] [START/STOP] Green Seq2 >> SEQUENCER 2[>>] LED OFF Seq2Pause SEQUENCER 2[PAUSE] LED OFF...
- Page 60 Correspondence Table Displayed SW Name on LCD / Correspondent SW / Correspondent LED name switched on or LED OFF DISPLAY Correspondent SW Correspondent LED ON/LED OFF StylePlay [STYLE PLAY] [STYLE PLAY] SongPlay [SONG PLAY] [SONG PLAY] BSeq [B.SEQ] [B.SEQ] Song [SONG] [SONG] Program...
- Page 61 DISPLAY Correspondent SW Correspondent LED ON/LED OFF Page - PAGE[-] LED OFF Page + PAGE[+] LED OFF Upper1 [UPPER1] LED OFF Acc2 [ ACC2] LED OFF Upper2 [UPPER2] LED OFF Acc3 [ACC3] LED OFF Upper3 [UPPER3] LED OFF Acc4 [ACC4] LED OFF Lower [LOWER]...
- Page 62 Sampling Inspection for Packing July 25, 2003 In order to maintain quality of Packing, sampling inspection to packed up Pa50 should be carried out every day whenever Pa50 is produced. Inspection Contents are as follows. The number of Sampling Inspection 3 pcs.
- Page 63 FUNCTION BOARD *MP5005101 RED LED WEJ-2114D DIP FUNC.CONTROL BOARD *MP5005102 RED SMD LED 0603 WEF0603BR LCD CONTROL BOARD *MP5005103 PA50 DUAL-COLOUR LED WEJ-316AW FUNCTION BOARD *MP5005501 PA-50 LCD DISPLAY V52045 LCD BOARD *MP5006001 IC S6A00065B DICE BONDING LCD BOARD *MP5006002 IC REGULATOR 7808 DIP TYPE...
- Page 64 *MP5006031 IC TC74VHC21FN SOP TYPE MAIN BOARD *MP5006032 IC IS42S16400-7T SOP TYPE MAIN BOARD *MP5006033 IC MSM5118165F-60TK SOP TYPE MAIN BOARD *MP5006034 IC MX23C6410MC-10 BK0H KORG MAIN BOARD *MP5006035 IC MX23C6410MC-10 BK0L KORG MAIN BOARD *MP5006036 IC MX23C6410MC-10 BK1H KORG MAIN BOARD...
- Page 65 PART CODE PART NAME NOTE Q'TY *MP5016001 VERTICAL CONNECTOR 2PINS LCD BOARD *MP5016002 HORIZONTAL CONNECTOR 3PINS ENCODER BOARD *MP5016002 HORIZONTAL CONNECTOR 3PINS FUNC.CONTROL BOARD *MP5016003 HORIZONTAL CONNECTOR 3PINS JOYSTICK BOARD *MP5016004 VERTICAL CONNECTOR 3PINS LAMP BOARD *MP5016004 VERTICAL CONNECTOR 3PINS MAIN BOARD *MP5016005 HORIZONTAL CONNECTOR 4PINS JOYSTICK BOARD...
- Page 66 *MP5050002 PA-50 PUSHING BUTTON BLACK(13P M.PART *MP5050003 PA-50 SQUARE BUTTON,BLACK M.PART *MP5050004 PA-50 SQUARE BUTTON P=432U M.PART *MP5050005 PA50 BIG RECTANGLE BUTTON(RED) M.PART *MP5050006 PA-50 SMALL RECTANGLE BUTTON M.PART *MP5050007 PA-50 SMALL RECTANGLE BUTTON M.PART *MP5050008 PA-50 BIG ELLIPTIC BUTTON(BLK) M.PART...
- Page 67 PART CODE PART NAME NOTE Q'TY *MP5050053 PA-50 HEAT SINK SILVERY WHITE AMP BOARD *MP5050054 PA-50 SPEAKER MESH LEFT M.PART *MP5050055 PA-50 SPEAKER MESH RIGHT M.PART *MP5050056 WASHER OF DISK DRIVE H:6.5MM M.PART *MP5050057 PA-50 JS SPRING WASHER M.PART *MP5050058 PA-50 LCD BRACKET ABS WHITE LCD BOARD *MP5050059 PA-50 LED SOCKET HOLDER BLACK FUNCTION BOARD...
Need help?
Do you have a question about the PA50 and is the answer not in the manual?
Questions and answers