Table of Contents
Advertisement
Advertisement
Table of Contents

Related Manuals for Technika TK9PD14


Summary of Contents for Technika TK9PD14
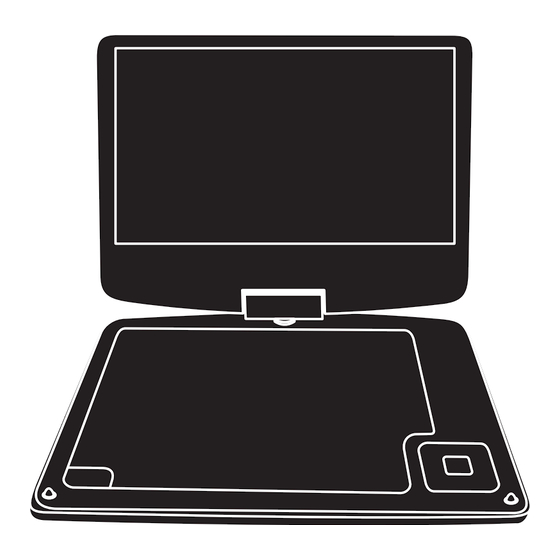
- Page 1 TK9PD14 Owner’s Handbook 9” Portable DVD Player...
-
Page 3: Safety Information And Cautions
IMPORTANT SAFETY INFORMATION IMPORTANT is required when the apparatus has been damaged in any way, such as the power-supply cord or plug is This equipment generates, uses and can radiate radio CAUTION! damaged, liquid has been spilled or objects have fallen frequency energy and, if not installed and used in RISK OF ELECTRIC SHOCK into the apparatus, the apparatus has been exposed to... - Page 4 ELECTRICAL INFORMATION BATTERY WARNINGS CARE OF DISCS Use this appliance only with the supplied AC Adaptor. The DVD player and the handset use batteries. There is a DVD discs are fragile. Treat them with care. Always store Using non-approved power supplies will void the risk of fire and burns if batteries are handled improperly.
-
Page 5: Table Of Contents
INDEX INTRODUCTION Safety information and cautions ..................1 Read this manual before using your player. Introduction ........................3 The Player is set to play Region 2 discs. Player features........................4 The player will accept the following formats (among others): DVD, DVD+R, DVD+RW, Controls and connections .................... -
Page 6: Player Features
PLAYER FEATURES DVD REGION CODES IMPORTANT NOTE DVD, CD, CD-R, CD-RW DVD+R, DVD+RW, DVD-R, DVD- DVD discs and players are covered by a worldwide DVD discs contain various features. Many features are RW capable agreement which limits playback of DVD discs to specific determined by the program or software content on the regions as determined by the software manufacturer. -
Page 7: Controls And Connections
CONTROLS AND CONNECTIONS FRONT VIEW Navigation/function buttons (see next page for details). Power indicator Remote control sensor Charge indicator Disc loading door Door opening catch VOL+ VOL-... - Page 8 CONTROLS AND CONNECTIONS NAVIGATION CONTROLS NOTE: The /, button is one of the navigation controls, located on the side panel. MENU MODE PLAY MODE Enter/select Play/pause button VOL+ Cursor right button Next button Cursor down button VOL- Volume down button Cursor left button Previous button Cursor up button...
-
Page 9: External Connections
EXTERNAL AUDIO VISUAL CONNECTIONS TV (AUDIO/VISUAL) CONNECTION HEADPHONE CONNECTION You can view and listen to the DVD player on a TV. Connect a pair of headphones as shown. You will need to purchase an interconnect with a three pole 3.5mm jack at one end This connection disconnects the internal speakers of the DVD player. -
Page 10: Adjusting The Screen
ADJUSTING THE PLAYER SCREEN Place the player on a firm level surface • Lift up the player lid. Remove any plastic film 180° covering the screen. To do this hold the tab at the lower right edge of the film and peel the film off carefully. -
Page 11: Remote Control Handset
REMOTE CONTROL Mute b utton Left cursor button Source button (DVD/USB/SD) Enter button STEP SEARCH MUTE SOURCE Display button Title button Audio button Up cursor button Menu button Subtitle button Stop button Angle button Play/pause button Numeric keypad DISPLAY Right cursor button Step button 2&... - Page 12 HANDSET PREPARATION BATTERY REPLACEMENT USING THE REMOTE HANDSET Remove the safety strip from the battery compartment. If the handset behaves erratically or fails to operate the Point the handset at the infrared receiving window of the The handset is now ready for use. battery should be replaced.
-
Page 13: In-Car Operation
IN-CAR OPERATION SECURING THE PLAYER TO A HEADREST For in-car use, the straps (supplied) can be fitted to the Rotate the screen by 180°. Lay the screen onto the player. body of the DVD player to enable it to be mounted to a front seat headrest. - Page 14 Invert the player and secure the side-straps behind Hold the player against a vehicle headrest and pass the player with the Velcro tabs. the straps around the headrest as shown. Secure the player by passing the ends of the straps through the clips and tightening them.
-
Page 15: Connecting Power
POWER CONNECTION PORTABLE OPERATION POWER CONTROL Your DVD player may be powered by the internal If you want to use the player without external power you Switching on the player: rechargeable battery for portable operation, from the AC will need to charge the battery. The battery will charge •... -
Page 16: Loading/Removing A Disc
LOADING/REMOVING A DISC PLAYING A DVD DISC To change chapter: Most DVD movie discs are divided into chapters so you • Load the disc and wait for the title menu to appear. Loading a disc can skip to convenient points within the movie. •... - Page 17 To stop the disc: Root and title menus: Changing the audio settings of a DVD: • Press the . button. • Press MENU to display the Root menu from the disc. The player allows you to select a preferred language, TV and audio format from those included on the DVD video Play will stop, holding at the point you stopped the disc.
-
Page 18: Playing An Audio Cd
PLAYING AN AUDIO CD To set the volume: Repeat play: • Press the VOL+ or VOL- button to turn the volume • Press the REPEAT button repeatedly to step through • Load an Audio CD into the player. up or down. the repeat mode options. -
Page 19: Program Play Of A Dvd Or Audio Cd
PROGRAM PLAY OF A DVD OR AUDIO CD Playing the program: • When you have completed entry, highlight ‘START’ at the bottom of the screen. You can program up to 20 chapters (DVD) or tracks (audio CD) to play in your preferred sequence. -
Page 20: Playing A Jpg Cd-Rom
PLAYING A JPG CD-ROM Thumbnail view: • Press . to stop a slideshow and display thumbnails. • Load a CD-ROM that includes JPEG digital pictures into the player. The pictures will display in sets of 12. The main screen will appear Folders Pictures Slide Show Menu tPrev Next u... - Page 21 JPG Picture display control buttons: You can press the following buttons on the remote control during a slideshow to change transition effects, zoom in to photos etc. PROGRAM Transition effect (wipe direction etc) STOP Thumbnail mode Next picture Previous picture Picture mode ...
-
Page 22: Playing Mp3 Music And Mp4 Video Media Files
PLAYING MP3 MUSIC AND MP4 VIDEO MEDIA FILES Playback control: • Playback of media files is controlled in the same way as playing a DVD. Your DVD player is also compatible with MP3 music and some MP4 video file formats. Media files of compatible format may be saved to a CD-ROM and played in the DVD To return to the main screen: player. -
Page 23: Playing Media Files From Usb Drives
PLAYING MEDIA FILES FROM USB DRIVES Docking a USB drive: USB drives should be plugged directly into the USB port or via a suitable connecting lead. NOTE: The maximum length of a connecting lead is 250mm. Do not use drives or cards connected via card readers to the USB port as not all readers will work satisfactorily with the player. -
Page 24: Setting Up The Player
SETTING UP THE PLAYER • When the setting you want to change is highlighted, press the „ button. A list of options for this setting will open. The setup menu enables you to customise language and display preferences, to match your audio and video components and to set parental restrictions. - Page 25 GENERAL SETUP PAGE Choose the General setup page to: • Change the TV display format. • Enable/disable multi-angle selection. • Change the on-screen language setting. • Switch closed captions on or off. • Switch the screen saver on or off. •...
- Page 26 AUDIO SETUP PAGE Choose the Audio setup page to: • Set how the player downmixes multiple audio channels. • Set up the Dolby Digital audio decoder. AUDIO SETUP PAGE • Choose from LT/RT or Stereo (factory setting). Downmix Dolby Digital •...
- Page 27 VIDEO SETUP PAGE Choose the Video setup page to: • Set the screen brightness, contrast, hue and saturation. NOTE: These settings only affect the picture on the player screen, not on a TV connected to AV out. VIDEO SETUP PAGE •...
- Page 28 PREFERENCE PAGE NOTE: The Preference page cannot be opened when a disc is playing. Choose the Preference page to: • Set the TV system. • Set the default audio language. • Set the default subtitle language. • Set the default disc menu language. •...
-
Page 29: Troubleshooting
TROUBLESHOOTING AFTER USING YOUR PLAYER If your DVD player is not working properly use this guide before contacting Tesco. Before • Remove the disc from the tray investigating a problem, always switch off the player and any connected units. • Remove any USB media •... -
Page 30: Specifications
SPECIFICATIONS WARRANTY Your Technika appliance is covered by a warranty for 12 months from the date of Compatible media: DVD/CD discs purchase. If a fault develops during this period, please contact the TESCO electrical USB1.1 and 2.0 Full Speed help line. Please have your original purchase receipt with you when you call. This... - Page 32 Delamare Road, Cheshunt, Herts, EN8 9SL Technika Helplines: Landlines 0800 323 4060 (Freephone from a BT landline). Mobiles 0330 123 4060 (Calls cost no more than calls to geographic numbers eg. 01 or 02 and are included in inclusive minutes and discount schemes). TK9PD14 V0.4...
Need help?
Do you have a question about the TK9PD14 and is the answer not in the manual?
Questions and answers