Table of Contents
Advertisement
Advertisement
Table of Contents

Related Manuals for Abus TV7230


Summary of Contents for Abus TV7230
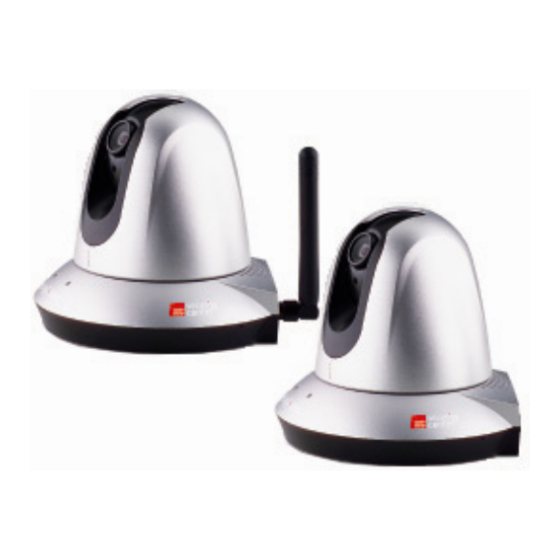
- Page 1 Pan/Tilt network camera Installation instructions TV7230 TV7240...
-
Page 2: Precautions
Preface Dear Customer, Thank you for purchasing this Pan/Tilt Network Camera of the DIGI-LAN series from Security-Center. You made the right decision in choosing this state-of-the-art technology, which complies with the current standards of domestic and European regulations. The CE has been proven and all related certifications are available from the manufacturer upon request. -
Page 3: Before Using This Product
Before using this product The use of surveillance equipment may be forbidden by law in some countries. This PAN/TILT network camera is not only high-quality web camera but can also be used as part of a flexible surveillance system. Before using this equipment, make sure that all your surveillance activities are completely legal. -
Page 4: Table Of Contents
Contents Preface 2 Precautions........................... 2 Before using this product ......................3 Contents..........................4 Scope of delivery ........................5 Hardware installation ......................6 First access to PAN/TILT network camera.................. 7 Setting the IP address........................7 Note: ...............................9 Access to the network camera via the Internet Explorer ............. 12 Defining a password to prevent unauthorised access ............... -
Page 5: Scope Of Delivery
Scope of delivery PAN/TILT network camera TV7230 / 7240 Antenna (only TV7230) Transformer Wall / Ceilling mount bracket Software CD Installation instructions (on CD) -
Page 6: Hardware Installation
Hardware installation Make sure that all accessories and articles listed above are present in the scope of delivery. Depending on application, an Ethernet cable may be required. This Ethernet cable must meet the specifications of UTP Category 5 (CAT 5) and must not be longer than 100 meters. -
Page 7: First Access To Pan/Tilt Network Camera
First access to network camera PAN/TILT Setting the IP address To set the IP address of the camera: Use a network cable to connect the PAN/TILT network camera to your computer network. (The simplest way is to connect the PAN/TILT network camera direct to your PC using a cross-link cable.) If your PC is not yet integrated into a network, you first have to configure it for the network application. - Page 8 The network connection of your PC is now configured. 3. Now start the Installation Wizard from the software CD supplied. 4. Follow the installation instructions of the Installation Wizard. 5. If installation is successful, start the program under Programs/Installation Wizard. 6.
-
Page 9: Note
8. Select one of the camera models found. Click to enter camera setup mode. If you have to enter a password, use the device serial number (no spaces, uppercase letters only). You can change the hostname, the administrator password and the date/time settings of the camera. If you cannot access the settings, check the IP addresses of your network adapter and your network camera. - Page 10 10. Now click to change the IP address of your network camera. If you use a router in your network, enter this IP address (gateway) in the Default Router field. For a Cross link connection from the camera to the PC you have to type in an IP address in the same subnet (e.g.
- Page 11 Press “Skip” to leave the “Wireless setting” unchanged this time. For further information please read chapter “WLAN configuration”. 13. Follow the instructions on the screen to save or change your settings. The Installation Wizard is finished. Click to change your settings. Click to save your input and transfer it to the selected device.
-
Page 12: Access To The Network Camera Via The Internet Explorer
Access to the network camera via the Internet Explorer Defining a password to prevent unauthorised access When delivered, no administrator password is defined for the PAN/TILT network camera. The PAN/TILT network camera asks for this number at the start of operation. For security reasons, the administrator should define a new password immediately. -
Page 13: Changing The Administrator Password
Changing the administrator password Click “Configuration” and then “Security”. Under “Root password”, enter the administrator password and confirm it under Confirm password. Click The new administrator password is saved. Click “HOME” in the column on the left to exit configuration. -
Page 14: Installing The Plug-In
Installing the plug-in When you first access the PAN/TILT network camera under Windows, the web browser may ask for the installation of a new plug-in for the PAN/TILT network camera. This query depends on the Internet security settings of your PC. If the highest security level is set, the PC will refuse any installation and any attempt at execution. -
Page 15: Basic User Functions
Basic user functions Main window and camera view The view of the main page consists of three parts: Configuration: You can configure the camera with these steps. Camera view: Camera video stream Pan/Tilt control buttons: These buttons provide the commands to control the viewing angle of the network camera. -
Page 16: Digital Zoom And Snapshot
Digital Zoom and Snapshot Click the magnifying glass under camera view. The control field for digital zooming appears. Disable the Disable Digital Zoom box and change the zoom factor with the slider. Click “Snapshot”. The web browser displays a new window containing the snapshot. To save the snapshot, either left-click it and then click the diskette icon or right-click it and select Save from the context menu. - Page 17 The pan/tilt control buttons The direction buttons are for Left, Right, Up, Down and Home functions. The Home function moves the camera head to a defined “Home” position. Another way to change the viewing angle of the camera is by using the mouse pointer and click directly on a position on the video picture.
-
Page 18: Client Settings
Client Settings When you first access the Connection Type page under Windows, the web browser asks for the installation of a new plug-in. This plug-in was registered at certification and can be used to change parameters on the Client settings page. To install the plug-in, click . - Page 19 The selection of the client is normally recommended in the following order: UDP – TCP. When the PAN/TILT network camera has been successfully connected, the “Protocol Options” box shows the selected protocol. The selected protocol is registered in your PC and used for the next connection. After changing the network environment or if you want to search again for the PAN/TILT network camera using the web browser, select the UDP protocol manually, save it and then return to “HOME”...
-
Page 20: Administrator Settings
Administrator settings Configuration / video Best performance is produced by the maximum frame rate with best video quality and minimum network bandwidth. The three factors “Max frame rate”, “Constant bit rate” and “Fixed quality” on the video configuration page are interrelated. -
Page 21: Protecting The Pan/Tilt Network Camera With A Password
For higher-quality pictures For best video quality, set “Fixed quality” to “Detailled” or “Excellent” and the “Max frame rate” so that it corresponds to the bandwidth of your network. If your network is slow and you get “broken” images, go to the TCP protocol under Connection Type and select a more suitable transmission mode. Pictures can also be affected by a time delay due to a slower connection. -
Page 22: Setting Up A Surveillance Application
Opening accounts for new users Under “Configuration”, select “Security”. Now go to the “Add user” section. Add an account with user name and password for a second user. You can define up to twenty accounts for other users of the PAN/TILT network camera. The camera checks only the access permission of the corresponding user name and password. -
Page 23: System Configuration
System configuration Only the administrator has access to system configuration. The following sections explain each element in the left column. Specific tasks on the Options page are printed bold. The administrator can enter the URL under the picture to jump direct to the pictures page of the configuration. <URL>http://”network camera IP”/setup/config.html <Network Camera>... -
Page 24: System
System „Host name“ The text represents the title of the homepage. „Turn off the LED indicator“ Select this option to switch off the LEDs on the front of the camera. This prevents other persons knowing that the camera is in use. „Keep current date and time“... -
Page 25: Network
Network All changes made on this page cause a system reboot so that they can take effect. Make sure that the fields are correctly filled before you click “Save”. Network connection “LAN” The default is LAN. Use this setting if the camera is connected to a LAN. You also have to make other settings such as the IP address or the subnet mask. - Page 26 RTSP streaming: “RTSP-Authentication” Enable the authentication of RTSP. On connection to an RTSP client username and password will be checked. Note: This function must be supported by the media player (e.g. Realplayer 10.5) “Access name” The access name for establishing a connection from a client. Use rtsp://<IP address>:RTSP-port/<access name>...
-
Page 27: Wlan Configuration
<URL> http://<network camera IP >/setup/network.html <Network Camera> is the domain name or original IP address of the PAN/TILT network camera. WLAN configuration “SSID” (Service Set Identifier) The name that identifies the wireless network. The access point and the WLAN network camera must use the name SSID. The factory setting is “default”. IMPORTANT: The max. - Page 28 “Security” Select the encryption method: “None” No encryption selected. “WEP” (Wired Equivalent Privacy) A 64- or 128-bit key is used for encryption (HEX or ASCII). For communication with other equipment, these keys must be the same on both devices. “WPA-PSK” (Wi-fi Protected Access – Pre Shared Keys) With this method, dynamic keys are used.
-
Page 29: Enable The Ddns Function
Enable the DDNS function „Provider“ The provider list contains four hosts that provide DDNS services. Connect to the service- provider’s website to make sure that the service is available. „Host name“ This field must be completed if you want to use the DDNS service. Enter the hostname registered with the DDNS server. -
Page 30: Access List
Access list “Allow list” The IP list of accepted IPs is entered here and added to the access list. As a factory default, all IPs are accepted. If necessary, delete the entire list. “Start IP address” Enter the first address of the desired range. “End IP address”... -
Page 31: Video And Audio
Video and audio General “Configure for computer viewing” Configure camera for stationary access. “Configure for mobile viewing” Configure camera for mobile access. Video “Video title” The text appears in the black bar above the video window with a timestamp. This timestamp (date and time) is supplied by the PAN/TILT network camera, and the date and time are supplied by an integrated realtime clock. - Page 32 Picture settings Click “Image settings” to open another window in which you can set the “Brightness”, “Contrast”, “Saturation” and the “Hue” of the video picture. Each field has levels from –5 to +5. To check your settings, click “Preview”. To save the picture parameters, click “Save”. To discard your changes, click “Restore”.
- Page 33 “Preset position” This keeps a list for preset positions. Click on the delete button will remove the current selected position from the preset list. “Set as home” Click on the button will set the current aimed position as home of the network camera. Each time the network camera reboots or after calibration, it will automatically aim to the defined home position.
-
Page 34: Email And Ftp
Email and FTP SMTP If the SMTP server supports SMTP authentication, the user has to enter a valid user name and password to send an e-mail via the server. “Sender email address” E-mail address of sender. “1 SMTP (mail) server” Domain name or IP address of the external e-mail server. “1 SMTP account name”... -
Page 35: Motion Sensor
Motion sensor “Enable motion detection” Enables motion detection. “New” Adds a new window. A maximum of three windows can be open simultaneously. To resize the window or move the title bar, click the window frame, keep the mouse button pressed and drag the window to the required size. -
Page 36: Application
Application Snapshot “Enable snapshot” Enables the application settings for snapshots. Weekly schedule “Sun”~”Sat” Selects weekdays for the following operations. Time “Always” Enables the application settings for sending snapshots at any time. “From” ~ “to” Defines the period for sending snapshots. Snapshot file name prefix Enter a prefix for the snapshot file name. - Page 37 max. file size: The file size will limit the video duration! The file length can differ regarding the motion intensity.
-
Page 38: Viewing The Log File
Viewing the log file Click this link on the configuration page to display the system log file. The contents of the file supply useful information about the configuration and the connection following a system start. The standard of the log file is RFC 3164. You can also send data to a log server. Enable “Remote Protocol” and enter the IP address and the port number of the server. -
Page 39: Appendix
Appendix A. Troubleshooting Status LEDs Condition LED color Loading system after power on Steady red During booting procedure Steady green, blue and red Detecting and setting network Steady green and blue. Blink red till IP address is confirmed After network is setup (system up) Blink green every second and steady red During the upgrade firmware process Blink green every second and fast blink red... -
Page 40: Frequently Asked Questions (Faq)
B. Frequently asked questions (FAQ) Q. What do I do if I forget my password? A. Every access to the PAN/TILT network camera requires an authentication. If you are one of the managing users, ask your administrator for your password. If you are the administrator, there is no way of reactivating the root password. - Page 41 Q. Why is access to the PAN/TILT network camera not possible while I am setting options in the application? A. If the PAN/TILT network cameras are started by events, snapshots need more time since they are written to memory. If the events occur too often, the system is constantly trying to store the pictures. If an event occurs very frequently, use sequential mode or an external recording program to record the pictures.
-
Page 42: Url Commands Of The Network Camera
C. URL commands of the network camera For some customers who already have their own web site or web control application, the Network Camera can be easily integrated through convenient URLs. This section lists the commands in URL format corresponding to the basic functions of the Network Camera. Get server parameter values Note: This request require administrator access Method: GET/POST... -
Page 43: Available Parameters On The Server
(note: The return page can be a general HTML file(.htm, .html) or a Vivotek server script executable (.vspx) file. It can not be a CGI command. It can not have any extra parameters. This parameter must be put at end of parameter list) Return: HTTP/1.0 200 OK\r\n Content-Type: text/html\r\n... - Page 44 restore Restore the system parameters to default value. Positive integer Restore the system parameters to default value and restart the server after <value> seconds. reset 0 ~ 65535 Restart the server after <value> seconds. Not restart the server. viewmode Using the profile of viewing by computer (r/w) Using the profile of viewing by mobile phone...
- Page 45 (r/w) characters> <blank> smtp2 <domain name or IP address, secondary SMTP server (r/w) string shorter than 40 <blank> characters> mailto2 <text string shorter than 80 mail recipient address (r/w) characters> <blank> mailuser2 <text string shorter than 63 User name of secondary smtp server (r/w) characters>...
- Page 46 txrate "NONE", "1M", "2M", "5.5M", Transmit rate in Mbps (r/w) "11M", "22M" <Auto> for 802.11b+ "NONE", "1M", "2M", "5.5M", "11M", "6M", "9M", "12M", "18M", "24M", "36M", "48M", "54M", "Auto" for 802.11g encrypt None data encryption (r/w) WEP data encryption WPA-PSK data encryption authmode Open Open mode...
- Page 47 half x 2 normal normal x 2 double This field is obsolete (use resolution) resolution 176x144 (for mobile) Video resolution 176 x 144 (r/w) 160x120 Video resolution 160 x 120 320x240 Video resolution 320 x 240 640x480 (for computer) Video resolution 640 x 480 color monochrome (r/w)
- Page 48 fixed outdoor( > 5500K) flip flip image (r/w) normal image mirror mirror image (r/w) normal image imprinttimestamp Overlay time stamp on video (r/w) Do not overlay time stamp on video Group: Audio NAME VALUE DESCRIPTION type AAC4 (for computer) set codec to AAC (r/w) GAMR (for mobile) set codec to GSM-AMR...
- Page 49 patrolname_<0~19> Text string shorter than 40 The name of patrol location (r/w) characters. Group: Motion NAME VALUE DESCRIPTION enabled disable motion detection (r/w) enable motion detection winenabled_<0~2> disable motion window #1 (r/w) enable motion window #1 winname_<0~2> <text string shorter than 14 name of motion window #1 (r/w) characters >...
- Page 50 enable 0, 1 Enable or disable the UPNP port forwarding (r/w) service. <0> Group: App NAME VALUE DESCRIPTION scriptname <text string shorter than 255 File name of script characters> <script.vssx> enablescript Disable script (r/w) Enable script Group: Syslog NAME VALUE DESCRIPTION enableremotelog disable remote log...
-
Page 51: Application Page Cgi Command
Recall Note: This request requires camera control access privilege Method: GET Syntax: http://<servername>/cgi-bin/recall.cgi? recall=<value>[&return=<return page>] parameter value description recall Text string less than 30 One of the present positions to recall. characters return <return page> Redirect to the page <return page> after the parameter is assigned. -
Page 52: Capture Single Snapshot
begin_time hh:mm Begin time of weekly schedule end_time hh:mm End time of weekly schedule ss_prefix <text string shorter than Snapshot file name prefix for both event and sequential 60 characters> operation trigger_type motion Set trigger by motion detect sequential Snapshot sequentially md_win 0,1,2 The array indicate which motion windows are used... -
Page 53: System Logs
privilege <value> The privilege of user to add or to modify. The privilege can be the addition of the following values. Ex: A user with configure access can be assigned privilege as privilege=conf. conf configuration privilege return <return page> Redirect to the page <return page> after the parameter is assigned. - Page 54 Server will accept the upload file named <file name> to be upgraded the firmware and return with <return page> if indicated.
-
Page 55: Technical Data
Transformer included in scope of delivery 10 baseT or 100 baseT Fast Ethernet auto Input: 100-240V AC, 50/60Hz, 0.5A negotiation Output: 12V DC, 1.5A 802.11g wireless LAN (only TV7230) - Environment conditions - Video Temperature: 0-35°C MPEG4 (short header mode) algorithm... -
Page 56: Licence Information
E. Licence information GNU GPL We point at the fact that the network cameras „TV7230“ and „TV7240“ among other things include Linux software source codes that are licensed under the GNU General Public Licence (GPL). To assure a GPL compliant usage of the used source codes we point at the licence terms of GPL.
Need help?
Do you have a question about the TV7230 and is the answer not in the manual?
Questions and answers