Advertisement
O W N E R ' S
TABLE OF CONTENTS:
Introduction - Pg. 1
Safety Precautions - Pg. 2
Assembly for ODY-5 - Pg. 3 - Pg. 18,
Pg.20
Cable Adjustments - Pg. 19
Cable Mapping Diagram - Pg. 21 - Pg. 24
Parts List - Pg. 25
Exploded View Diagram - Pg. 26
Adjustment Features - Pg. 29 - Pg. 31
Maintenance - Pg. 32
Optional Stations - Pg. 33
Warranty - Back Page
ODY-5
Odyssey Home Gym
A m e r i c a ' s
P r e m i u m
M A N U A L
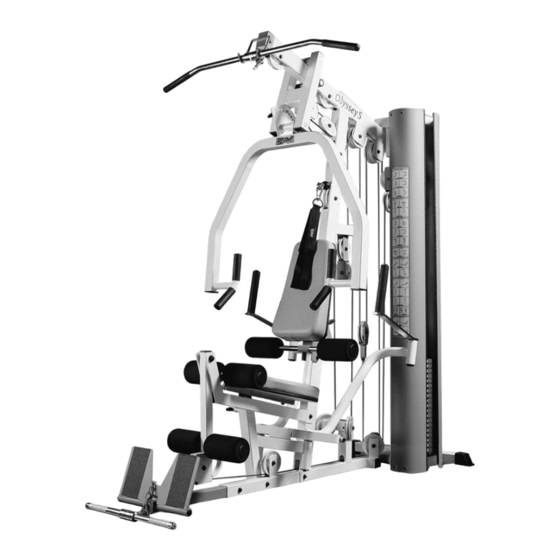
71"
L 85" W 71" H 83"
E x e r c i s e
E q u i p m e n t
Revision Date 05- 10-00
85"
ODY-5 Rev. 1
Advertisement
Table of Contents

Summary of Contents for Odyssey ODY-5
-
Page 1: Table Of Contents
M A N U A L TABLE OF CONTENTS: Introduction - Pg. 1 Safety Precautions - Pg. 2 Assembly for ODY-5 - Pg. 3 - Pg. 18, Pg.20 Cable Adjustments - Pg. 19 Cable Mapping Diagram - Pg. 21 - Pg. 24 Parts List - Pg. -
Page 2: Introduction
1. Read and follow each step of this Assembly Instruction Manual in ODY-5 in the area where it is to be used upon completion. sequence. Do not skip ahead, as it will result in an improper assembly or in having to disassemble parts later. -
Page 3: Safety Precautions
7. Do not attempt to lift more weight than you can control safely. 8. Inspect the Odyssey Home Gym for any sign of wear on parts, hardware becoming loose or cracks on welds. If a problem is found do not use or allow the machine to be used until defective part is repaired or replaced. - Page 4 Next, insert two Plastic Insert Caps 1” Rd. (#98) into the tube-ends of the Foot Roll Tube 1X16 (#31). Loosely Fasten: Do not completely fasten this hardware assembly at this time, as it will be completely fastened later in Fig. 10 on the next page. LOOSELY FASTEN ODY-5 Odyssey Home Gym...
- Page 5 SAE 3/8” (#71) and two Nylon Insert Jam Lock Nuts 3/8-16 (#82). Loosely Fasten: Do not completely fasten this hardware assembly at this time, as it will be completely fastened later in the assembly process. LOOSELY FASTEN ODY-5 Odyssey Home Gym...
- Page 6 Fully Fasten: Proceed to align and fully fasten this hardware as- Screws 3/8-16 X 2 3/4 (#91), four Flat Washers SAE 3/8” (#71) and two sembly and all the previous assemblies that were left loosely fas- Nylon Insert Jam Lock Nuts 3/8-16 (#82). tened. FULLY FASTEN ODY-5 Odyssey Home Gym...
- Page 7 Pivot Axles 1 X 8 1/8 (#18). These decals are used to Note: It is recommended to grease the Pivot Axle 1 X 8 1/8 (#18) hide and protect the ends of axles. with multi-purpose grease prior to assembling. ODY-5 Odyssey Home Gym...
- Page 8 Right Pec Dec Arm (#6). Refer to the Exploded View Diagram on page Note: Parts (#47, #50 and #59) have been pre-assembled on the 26 for further illustration of this assembly. Pec Dec Swivel Handles (#8) by the factory. ODY-5 Odyssey Home Gym...
- Page 9 Next, insert two Rubber Donuts 3/4 X 2 1/2 (#60) onto each Guide Rod 3/4 X 72 (#21). Note: Lubricate the Guide Rods 3/4 X 72 (#21) with a silcone or teflon lubricant at this time. ODY-5 Odyssey Home Gym...
- Page 10 Nut 1/2-13 (#80) and insert one Flat Washer SAE 1/2” (#70) over each Loosely Fasten: Do not completely fasten this hardware bolts, as shown above at the middle and right. assembly at this time, as it will be completely fastened later in the assembly process. LOOSELY FASTEN ODY-5 Odyssey Home Gym...
-
Page 11: Revision Date
Nylon Insert Jam Lock Nuts 3/8-16 (#82). into the groove on the Nylon Pulley 4 1/2 Rd. (#64- Labeled B). Note: Refer to the Cable Mapping Diagram on page 21 for further detailed illustration of the Lat Cable (#37) routing. ODY-5 Odyssey Home Gym... - Page 12 Note: Refer to the Cable Mapping Diagram on page 21 for further detailed illustration of the Lat Cable (#37) routing. Note: Refer to the Cable Mapping Diagram on page 21 for further detailed illustration of the Lat Cable (#37) routing. ODY-5 Odyssey Home Gym...
- Page 13 Note: Refer to the Cable Mapping Diagram on page 22 for further detailed illustration of the Leg Extension/ Abdominal Cable (#38) Note: Refer to the Cable Mapping Diagram on page 22 for further routing. detailed illustration of the Leg Extension/ Abdominal Cable (#38) routing. ODY-5 Odyssey Home Gym...
- Page 14 Note: Make sure to attach the Strap Bracket #20 (#102) with its slotted groove facing toward the Pec Dec Arm's cam to allow the Pec Dec Cable (#39) to be flush with the Pec Dec Arm's cam. ODY-5 Odyssey Home Gym...
- Page 15 Note: Refer to the Cable Mapping Diagram on page 24 for further Note: Refer to the Cable Mapping Diagram on page 24 for further detailed illustration of the Tension Cable (#40) routing. detailed illustration of the Tension Cable (#40) routing. ODY-5 Odyssey Home Gym...
- Page 16 1/2” (#54) as you begin to insert the using two Hex Head Cap Screws 3/8-16 X 1 3/4 (#93) and two Flat assembled Adjustable Seat Frame (#13) into the Leg Extension Bench Washers SAE 3/8” (#71). Frame (#11). ODY-5 Odyssey Home Gym...
- Page 17 Refer to the Exploded View Diagram end of the three tubes as shown above. Refer to the Exploded View on page 26 for further clarification of this assembly. Diagram on page 26 for further clarification of this assembly. ODY-5 Odyssey Home Gym...
- Page 18 Insert Lock Nut 5/16-18 (#83). Use the supplied Hex Key 3/16 (#108) to Extension/ Abdominal Cable (#38), as shown above. properly fasten this assembly. Refer to Fig. A on page 2 1 for further illustration of this assembly. ODY-5 Odyssey Home Gym...
- Page 19 Top Plate/ Selector Bar (#24), 15 next, and so on. Updated: The Decal Weight Numbers have been replaced by the Decal Weight Numbers illustrated on Fig. 73. Refer to Fig. 73 on page 28 to complete this assembly. UPDATED ODY-5 Odyssey Home Gym...
-
Page 20: Cable Adjustments
ODY-5 CABLE ADJUSTMENT DIAGRAM The Diagram below depicts the location of the cable adjustments on each Cables should be inspected and adjusted periodically to avoid any work station. It is imperative that you maintain the cables’ proper adjust- slack in the cables which would, consequently, prevent any damage ment to ensure a safe and smooth operation. - Page 21 Nylon Washers 1/4 USS (#78). Refer to Fig.71 on page 2 7 for further illustration of this assembly. Fully Fasten: Proceed to align and fully fasten this hardware as- sembly and all the previous assemblies that were left loosely fas- tened. FULLY FASTEN ODY-5 Odyssey Home Gym...
- Page 22 ODY-5 Odyssey Home Gym...
- Page 23 ODY-5 Odyssey Home Gym...
- Page 24 ODY-5 Odyssey Home Gym...
-
Page 25: Cable Mapping Diagram - Pg
ODY-5 Odyssey Home Gym... -
Page 26: Parts List
RUBBER STOPPER 1 X 1 3/4 X 3 BNH0791 RUBBER BUMPER 3/8 X 1 1/2 BNH0514 RUBBER STOPPER 1/8 X 2 X 4 BNH0688 15 LB WEIGHT PLATE BNH0926 RUBBER STOPPER 1/8 X 1 1/2 X 5 BNH0688 5 LB WEIGHT PLATE BNH0927 ODY-5 Odyssey Home Gym... -
Page 27: Exploded View Diagram
ODY-5 Odyssey Home Gym... - Page 28 FIG. 67 FIG. 68 FIG. 69 FIG. 70 FIG. 71 ODY-5 Odyssey Home Gym...
- Page 29 Coil. Top Plate/ Selector Bar Selector Pin w/ Coil Fig. 74 After the Weight Stack has been completely assembled, at- tach the Selector Pin w/ Coil onto the Top Plate/ Selector Bar, as illus- trated above. ODY-5 Odyssey Home Gym...
- Page 30 Back Pad (#34) to the desired position. 4.Release the Push Pull Pin 1/2 Special (#53) and make sure it has been fully engaged into the selector holes of the Adjustable Back Pad Bracket (#10). ODY-5 Odyssey Home Gym...
- Page 31 Low Row Foot Support (#15) or leave it ♦ Low Row in the position as pictured above at the right. Always lower Row Foot Support (#15) when not is use. ♦ Standing Arm Curl ♦ Inner / Outer Thigh ODY-5 Odyssey Home Gym...
-
Page 32: Adjustment Features - Pg
Pec Dec Swivel Handles (#8) to move freely during the Pec Dec Exercise. Safety: The Press Bar (#1) must be adjusted to the position pictured at the right to avoid the chance of injuring during the Pec Dec Exercise. ODY-5 Odyssey Home Gym... -
Page 33: Maintenance
8. Check that the Push Pull Pins 1/2 Special (#53) and the and optimal performance of your Odyssey Home Gym. Push Pull Pin 1/2 (#54) nuts are fully fastened (See Fig. Initial lubrication of some parts of your gym have been 75). -
Page 34: Optional Stations
ODY-5LP Leg Press ODY-5TO Inner / Outer Thigh L 86” W 94” H 83” L 86” W 101” H 83” 86” 85” 94” 101” ODY-5AB Ab / Back L 85” W 86” H 83” 86” 85” ODY-5 Odyssey Home Gym... - Page 35 N o t e s ODY-5 Odyssey Home Gym...
-
Page 36: Warranty
D O N O T D I S C A R D T H I S M A N U A L H O M E L I F E T I M E W A R R A N T Y TuffStuff products are warranted to the retail purchaser to be free from defects in materials and workmanship.
Need help?
Do you have a question about the ODY-5 and is the answer not in the manual?
Questions and answers