Akai MPC Studio Quick Start Manual
Hide thumbs
Also See for MPC Studio:
- Quick start manual ,
- User manual (373 pages) ,
- Reference manual (136 pages)
Table of Contents

Subscribe to Our Youtube Channel
Related Manuals for Akai MPC Studio


Summary of Contents for Akai MPC Studio
- Page 1 QUICKSTART GUIDE ENGLISH ( 3 – 9 ) GUÍA DE INICIO RÁPIDO ESPAÑOL ( 10 – 16 ) GUIDE D'UTILISATION RAPIDE FRANÇAIS ( 17 – 23 ) GUIDA RAPIDA ITALIANO ( 24 – 30 ) SCHNELLSTART-ANLEITUNG DEUTSCH ( 31 – 37 )
-
Page 3: Box Contents
MPC Studio offers the most streamlined MPC experience yet. At under one-inch thin, with low-profile controls and a brushed aluminum body, it’s made to move. MPC Studio merges real MPC pads, iconic workflow, and the same MPC Software used by MPC Renaissance to give you a fully integrated portable production solution. -
Page 4: System Requirements
2. CONNECT Follow this sequence of steps whenever you use MPC Studio with your computer: 1. Connect MPC Studio's COMPUTER USB PORT to a free USB port on your computer, using a full-speed or high-speed USB cable. 2. Power on MPC Studio. -
Page 5: Mpc Software Overview
This is just a broad overview of the MPC software's features. Virtually all of the software elements can be accessed and controlled by MPC Studio. Please also refer to the in-depth Reference Manual (in the Help menu). The Reference Manual contains a quick tutorial on how to get started making a song so you can use MPC's features right away –... -
Page 6: Assign Samples To The Pads
1. Connect MPC Studio to a USB port on your computer, as shown in the CONNECTION DIAGRAM. 2. Power on MPC Studio and open MPC software. (The first time you open the software, you will be asked for information required for authorization. Follow the on-screen instructions to authorize your software.) 3. -
Page 7: Top Panel
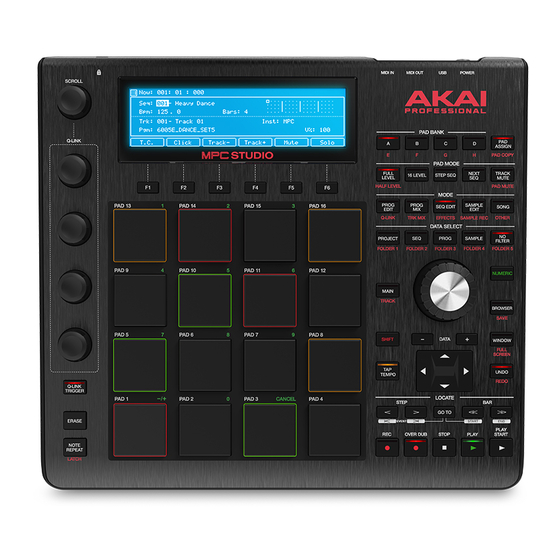
FEATURES MPC Studio is hardware specifically designed to control the MPC software. This section describes all the hardware controls. For a complete explanation of the software, please see the MPC Reference Manual in the software in the Help menu. TOP PANEL... - Page 8 DATA DIAL – Use this dial to scroll through the available menu options or adjust the parameter values of the selected field in the DISPLAY. -/+ – Press these buttons to increase/decrease the value of the selected field in the display. NUMERIC –...
-
Page 9: Support And Updates
SEQ EDIT / EFFECTS – Press this button to enter Sequence Edit mode. Hold down SHIFT and press this button to enter Effects mode, where you can select and route effects as well as edit effects' parameters. SAMPLE EDIT / SAMPLE REC – Press this button to view the Sample Edit screen in the display and software. -
Page 10: Guía De Inicio Rápido (Español)
GUÍA DE INICIO RÁPIDO (ESPAÑOL) INTRODUCCIÓN MPC Studio ofrece la experiencia de MPC más ágil y estilizada que existe hasta ahora. Con menos de 25 mm de espesor, controles de bajo perfil y un cuerpo de aluminio cepillado, está hecho para la marcha. MPC Studio combina pads MPC reales, un flujo de trabajo icónico y el mismo software MPC usado por el MPC... -
Page 11: Requisitos De Sistema
Siga esta secuencia de pasos toda vez que use MPC Studio con su computadora: 1. Conecte el PUERTO USB COMPUTER del MPC Studio a un puerto USB de la computadora, con un cable USB "full-speed" (de máxima velocidad) o de alta velocidad. -
Page 12: Descripción General Del Software Mpc
Transporte Nivel maestro Ésta es solo una descripción general amplia de las características del software MPC. El MPC Studio puede acceder y controlar virtualmente todos los elementos del software. Consulte también el Manual de referencia con mayor profundidad (en el menú Help (Ayuda)). El Manual de referencia contiene un tutorial rápido sobre cómo comenzar a hacer un tema, de modo que pueda usar inmediatamente las características de MPC —así... -
Page 13: Cómo Asignar Muestras A Los Pads
Haga clic en la pestaña MIDI. En Active MIDI Inputs (Entradas MIDI activas), marque la casilla MPC Studio MPC Port 1 (Puerto MPC 1 de MPC Studio) y seleccione MPC Studio MPC Port 1 como MIDI Out Port A (Puerto A de salida MIDI). -
Page 14: Panel Superior
PUERTO USB PARA LA COMPUTADORA – Use el cable USB incluido para conectar este puerto USB de alta fuerza de retención a un puerto USB disponible en la computadora. Esta conexión permite que el MPC Studio envíe y reciba datos MIDI y de audio hacia y desde el software MPC. - Page 15 10. NUMÉRICO – Si el campo seleccionado en la PANTALLA es un número, puede pulsar NUMERIC y usar los pads como teclado numérico estándar para ingresar valores. Los números están impresos en verde sobre los pads. 11. DESHACER / VOLVER A HACER – Pulse este botón para deshacer su última acción. Podrá deshacer hasta 200 acciones.
-
Page 16: Soporte Y Actualizaciones
27. EDICIÓN / GRABACIÓN DE MUESTRAS – Pulse este botón para ver la pantalla Sample Edit (Edición de muestras) en la pantalla y en el software. Mantenga pulsado SHIFT y pulse este botón para ver la pantalla Sample Record (Grabación de muestras) en la pantalla y el software. 28. -
Page 17: Contenu De La Boîte
GUIDE D’UTILISATION SIMPLIFIÉ (FRANÇAIS) PRÉSENTATION Le MPC Studio offre l’expérience MPC la plus conviviale et plus efficace à ce jour. Faisant moins d’un pouce d’épaisseur avec des commandes profilées et un boîtier en aluminium, il est fait pour bouger. Le MPC Studio dispose de véritables pads MPC, du flux de production légendaire et du même logiciel qu’utilise le MPC... -
Page 18: Configuration Requise
Suivez ces étapes dans l’ordre toutes les fois que vous employez le MPC Studio avec votre ordinateur : 1. Utilisez un câble USB pleine ou haute vitesse pour brancher le port USB du MPC Studio au port USB d'un ordinateur. -
Page 19: Présentation Du Logiciel Mpc
Cette section se veut un bref aperçu des fonctions du logiciel MPC. Pratiquement tous les éléments du logiciel peuvent être accédés et commandés par le MPC Studio. Veuillez également consulter le guide de référence détaillé (menu Help). Le guide de référence contient un tutoriel rapide sur comment faire une chanson afin que vous puissiez commencer à... -
Page 20: Assigner Des Échantillons Aux Pads
Branchez le MPC Studio au port USB de votre ordinateur comme indiqué sur le SCHÉMA DE CONNEXION. Mettez le MPC Studio sous tension et lancez le logiciel MPC. (La première fois que vous lancez le logiciel, vous serez invité à saisir les renseignements pour le processus d’autorisation. Suivez les instructions à l’écran afin de pouvoir installer le logiciel.) -
Page 21: Caractéristiques
CARACTÉRISTIQUES Le MPC Studio est spécialement conçu afin de commander le logiciel MPC. Cette section décrit toutes les commandes matérielles. Pour une explication complète du logiciel, veuillez consulter le guide de référence MPC dans le menu d'aide du logiciel. PANNEAU SUPÉRIEUR... - Page 22 COMMANDES DES PADS ET Q-LINK 12. BOUTONS Q-LINK – Utilisez ces boutons sensibles à la dynamique afin d'ajuster les divers paramètres et configurations. Ces boutons peuvent commander les paramètres d’une colonne entière à la fois. Utilisez le bouton de défilement (SCROLL) au-dessus afin de changer la colonne des paramètres sélectionnée. 13.
-
Page 23: Soutien Technique Et Mises À Jour
28. TOUCHE SONG/OTHER – Appuyez sur cette touche afin d’afficher la fenêtre Song à l’écran et du logiciel. Maintenez la touche SHIFT enfoncée tout en appuyant sur cette touche afin d’accéder à Other mode d'où vous pouvez configurer : le nombre minimum de frappes de la touche TAP TEMPO; le seuil, la sensibilité et la courbe des pads; les messages des commandes au pied;... -
Page 24: Guida Rapida (Italiano)
2,5 cm, comandi a basso profilo ed un corpo in alluminio satinato, è stato concepito per il movimento. L'MPC Studio unisce veri pad MPC, un flusso di lavoro iconico e lo stesso software MPC impiegato dall'MPC Renaissance per offrire una soluzione di produzione portatile realmente integrata. Ora potrete produrre ovunque voi siate. -
Page 25: Requisiti Di Sistema
Found New Hardware (trovato nuovo hardware). Questo indica che l'MPC Studio è stato riconosciuto dal computer per la prima volta e sta installando i giusti driver. Attendere fino a quando le finestre di dialogo non scompaiono prima di continuare. -
Page 26: Panoramica Software Mpc
Questa è solo una panoramica a grandi linee delle caratteristiche del software MPC. Praticamente è possibile accedere e controllare tutti gli elementi del software dall'MPC Studio. Fare inoltre riferimento al manuale di riferimento approfondito (nel menu Help (Aiuto)). Il manuale di riferimento contiene una breve guida su come iniziare a creare una canzone in modo da poter utilizzare immediatamente le funzioni dell'MPC, nonché... -
Page 27: Assegnare Campioni Ai Pad
Collegare l'MPC Studio ad una porta USB del computer come illustrato nello SCHEMA DEI COLLEGAMENTI. Accendere l'MPC Studio e aprire il software MPC. (La prima volta che si apre il software, verranno richieste le informazioni necessarie all'autorizzazione. Seguire le istruzioni su schermo per autorizzare il software.) Nel software, recarsi su Edit Preferences, e cliccare sulla scheda Audio. -
Page 28: Pannello Superiore
CARATTERISTICHE L'MPC Studio è un hardware concepito specificamente per controllare il software MPC. Questa sezione descrive tutti i comandi hardware. Per una spiegazione completa del software, si veda il manuale di riferimento del software MPC nel menu Help. PANNELLO SUPERIORE... - Page 29 COMANDI PAD / MANOPOLE Q-LINK 12. MANOPOLE Q-LINK – Servirsi di queste manopole sensibili al tatto per regolare i vari parametri e le configurazioni. Le manopole possono controllare una colonna di parametri alla volta. Servirsi della MANOPOLA SCROLL al di sopra di esse per cambiare la colonna di parametri che controllano.
-
Page 30: Assistenza E Aggiornamenti
28. SONG / OTHER – Premere questo tasto per visualizzare la schermata Song (canzone) a display e nel software. Tenere premuto SHIFT e premere questo tasto per entrare in modalità Other (altro), che consente di configurare: il numero minimo di battiti per il tasto TAP TEMPO; soglia del pad, sensibilità e curva; i messaggi degli interruttori a pedale, nonché... -
Page 31: Deutsch
SCHNELLSTART-ANLEITUNG (DEUTSCH) EINLEITUNG MPC Studio bietet die bisher effektivste MPC-Erfahrung. Weniger als ein Zoll dünn, flach gearbeitete Controls und mattes Aluminiumgehäuse: Dieses Gerät eignet sich besonders für den mobilen Einsatz. MPC Studio vereint echte MPC-Pads, seinen bezeichnenden Workflow und die gleiche MPC-Software, die von MPC Renaissance verwendet wird und bietet Ihnen so eine vollständig integrierte und portable Produktionslösung. - Page 32 4. Befolgen Sie die Anweisungen am Bildschirm, um die Software und die Treiber zu installieren. 2. ANSCHLIESSEN Wenn Sie das MPC Studio mit Ihrem Computer verbinden möchten, folgen Sie immer dieser Abfolge von Schritten: 1. Verbinden Sie den USB-ANSCHLUSS von MPC Studio mit einem freien USB-Anschluss Ihres Computers, indem Sie ein Full-Speed oder High-Speed-Kabel verwenden.
-
Page 33: Mpc-Software Übersicht
Dies ist nur ein grober Überblick über die Funktionen der MPC-Software. Praktisch alle Software-Elemente können über das MPC Studio gesteuert werden. Bitte beachten Sie auch das ausführliche Referenzhandbuch im Help Menu (Hilfe-Menü). Das Referenzhandbuch enthält neben detaillierteren Informationen für erfahrene Benutzer auch eine kurze Anleitung mit ersten Schritten, damit Sie die MPC-Funktionen sofort nutzen können. -
Page 34: Zuweisen Der Samples
Klicken Sie auf die Registerkarte MIDI. Unter Active MIDI Inputs (Aktive MIDI-Eingänge) setzen Sie in bei MPC Studio MPC Port 1 ein Häkchen und wählen MPC Studio MPC Port 1 als MIDI Out Port A. Klicken Sie auf OK. Testen Sie Ihre Sound-Einstellung: Erhöhen Sie die Lautstärke Ihres Computers, Ihrer Lautsprecher etc. und klicken Sie Test neben dem Pop-up-Menü... - Page 35 FUNKTIONEN Das MPC Studio ist eine Hardware, die speziell für die Steuerung der MPC-Software konzipiert wurde. Dieser Abschnitt beschreibt alle Hardware-Controls. Eine vollständige Erklärung der Software finden Sie im MPC-Referenzhandbuch im Software- Menü Help (Hilfe). OBERSEITE 16 16 16 17...
- Page 36 PAD / Q-LINK REGLER 12. Q-LINK REGLER – Mit diesen berührungsempfindlichen Reglern können Sie verschiedene Parameter und Einstellungen anpassen. Mit den Drehreglern können Sie eine senkrechte Parameterreihe auf einmal steuern. Verwenden Sie den darüber liegenden SUCHKNOPF, um die Parameterreihe zu ändern, die derzeit von ihnen gesteuert wird.
- Page 37 SAMPLE BEARBEITEN / SAMPLE AUFNEHMEN – Drücken Sie diese Taste, um den Bildschirm Sample Bearbeiten am Display und in der Software zu sehen. Halten Sie UMSCHALTEN gedrückt und drücken Sie diese Taste, um den Bildschirm Sample Aufnehmen am Display und in der Software zu sehen. SONG / VERSCHIEDENES –...
-
Page 38: Specifications
SPECIFICATIONS HARDWARE 360 x 96 dot graphic LCD w/backlight Display 0.89" x 11.2" x 10.1" Dimensions (H x W x D) 22.6 mm x 284 mm x 257 mm 1.96 lbs.; 0.89 kg Weight Power Supply USB bus-powered MIDI Inputs 5-pin DIN x 1 via 1/8"-TRS-to-MIDI adapter MIDI Outputs 5-pin DIN x 1 via 1/8"-TRS-to-MIDI adapter... - Page 40 WWW.AKAIPRO.COM 7-51-0384-B...
Need help?
Do you have a question about the MPC Studio and is the answer not in the manual?
Questions and answers