Advertisement
Introduction
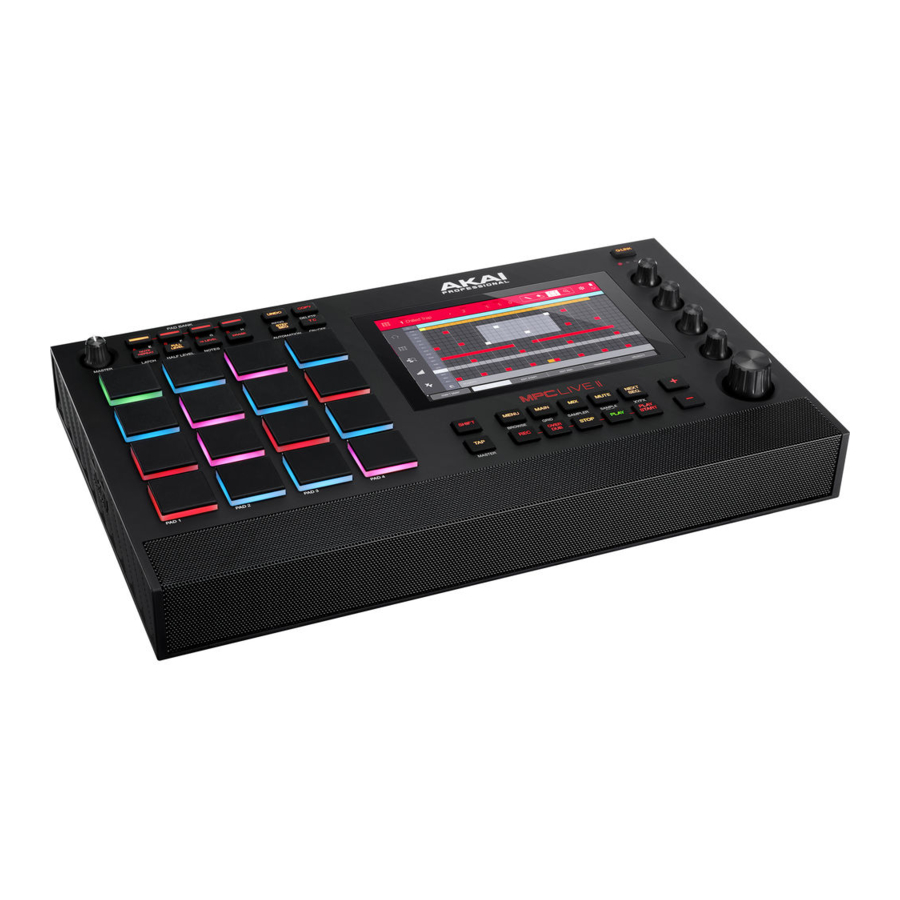
The Akai MPC live 2 is a Digital Audio Workstation (DAW) that includes a variety of amazing features. It's a fantastic tool for experts and beginners interested in music production and has a wide range of functionality. This tutorial is designed to introduce the basic functions of the MPC and utilize all the equipment in the music production kit.
New to MPC or music production? We highly recommend that beginners start with this video:
Akai Professional MPC Live II | Overviewby AkaiProVideo on YouTube
For a step-by-step guide through making a song, check out this video playlist:
MPC Beats Academy | MPC Live II by AkaiProVideo on YouTube
Equipment Set Up
Power On!

- Plug in and power on the MPC with the button on the back.
- Insert your SD card or flash drive. Save any projects to your SD card or flash drive.
- Any project saved to the internal MPC memory will be deleted.
- The MPC will ask you to save projects before shutting off.
Interface Set Up
- Plug the cable labeled Focusrite into input 1 on the back of the MPC.
![]()
- Plug the other end into the back of the Focusrite interface.
- Connect the mic to the interface with the XLR cable.
![]()


- Make sure that the interface has the following settings:
Note that when the interface is connected to the MPC. The sound will run through the interface and connected headphone not through the MPC speakers or MPC headphones.
![]()
- 48V on and lit up (This gets power to the interface.).
- Direct monitor on and lit up (This allows you to monitor sound coming through the mics.).
- Monitor and headphone knob turned up (if you don't hear sound coming through the headphones, check that this is turned up).
- Gain knob turned up (This controls the input level of the mic.).

MPK Mini Set Up

- Plug the MPK mini into USB input 2 on the back of the MPC.
- No sound will come from the MPK until we are in the right settings for the MPC.
If you are using all the equipment from the music production kit, your set up may look like this picture: You could also bring your own equipment. For example, you could plug an electric guitar into the interface instead of the mic or bring your own midi keyboard.

Navigating the MPC
Navigate the MPC live by using the touch screen or scrolling through selections with the large dial on the bottom right and clicking to select options on the screen.
Project Selection Page:

- The project page has the option to play around with premade demos or create your own project. Demos will already have drum kits, sounds, and samples loaded and are a great place to start.
- Click on empty project to start from scratch.
Project Home Page, Top Bar:

- Project title: to change the title, locate the row of buttons below the screen. Select menu > save > project as. Only save projects on your SD card. Any projects saved internally will be deleted.
- Playback timing: This shows what measure and beat is being played during playback or editing.
- Metronome: click on this to pull up the metronome menu. From there you can turn the metronome on or off, change the sound, rate, and recording settings.
Project Home Page, Sequences, and Tracks:

- Sequence: Sequences make up the building blocks of a song. You could think of sequences as traditional parts of a song (i.e., verse, chorus, and outro). You can change the name of the sequence to the right and switch between sequences in the drop-down menu.
- Tempo and Bars:
- Change the tempo by lowering or raising beats per minute. BPR is sequence specific, meaning that 2 sequences can have different tempos. You can also use the tap button on the MPC to "tap" out the tempo of a sequence. Press the button 3 times at your desired tempo, and it will set the BPM to match.
- Bars are the number of measures in a sequence. These are also sequence specific.
- Tracks: Use this menu to move between tracks. Tracks with nothing recorded on them will be marked as unused. You can rename a track just like a sequence. Use the button at the bottom of the page to add new tracks. For more details on your recorded tracks select the track menu to the left.
- Programs: Each track you create within a sequence is routed through a program. There are six types of programs, each of which determines how the track sounds or what it is used for. A single project can hold up to 128 programs. Check out the section on programs in the manual for more information.
Recording a Sequence with the MPC
Recording a Drum Track:
| On the buttons below the screen hit Shift+Menu/browse
|  |
|  |
While in grid mode, the colorful dashes represent notes. Use these tools in grid view to edit your drum track:
|  |
Recording with the MPK Mini:

- Make sure the MPK is connected to input 1 or 2 on the back of the MPC.
- Check out the MPK mini manual for a guide to all the dials and buttons.
- From the main page, start a new track and select the keyboard program.

- Use Shift+Menu/browse and switch the content filter from drums to instruments to browse or search for different bass or synth sounds.
- Return to the main page and select your new sound program from the keyboard program menu at the bottom of the page.
- You can use the pads on the MPC to play a bass line or melody, but the MPK makes playing chromatically easier.
- Use the octave buttons on the MPK to raise or lower the octave range.

- Repeat the same recording process used for the drums.
- Use the grid mode to edit and change notes.
Recording Vocals with the Mic:
Checking the MPC audio settings:
|   |
|  |
Recording with the sampler (optional):
|  |
|  |
Save and Export

- To save your project to your SD card or flash drive go to menu > save.
- You can save the entire project, the program, or the sequence, but make sure that you only save things to your SD card or flash drive
- Any projects or samples saved to the internal drive will be deleted.

- To export your project, go to menu > song
- Click on insert to add you sequences and arrange them in any order.
- Click export to open the Audio Mixdown page.
- From here you can pick the file format.
- MP3 files are great for sharing online.
- WAV files are good if you're going to continue editing on another software.
- Click export on the bottom right and save your file to your SD card or flash drive.
- To eject your SD card or flash drive go to Shift+menu/browse > places then hit the eject button next to the name of your device.
- Removing your SD card or flash drive without doing this can result in damaged files.
Troubleshooting
- For more tutorials and FAQs, check out the Akai support website:https://support.akaipro.com/en/support/home
- For community help and support check out the MPC forumshttps://www.mpc-forums.com/
Resources:
- Want to learn more about DAWs and produce music at home? Check out our Synthesizer Maker Kits:https://friscolibrary.bibliocommons.com/v2/record/S159C379777
- Video Tutorials:
- MPC Beats Academy | MPC Live II by AkaiProVideo on YouTube
![]()
- MPC live for Beginners Playlistby Matthew Stratton on YouTube
![]()
- Akai MPC live 2 full workflow Instructional Videoby Sample kings on YouTube
![]()
- MPC Beats Academy | MPC Live II by AkaiProVideo on YouTube


Documents / Resources
References
![www.youtube.com]() Akai Professional MPC Live II | Overview - YouTube
Akai Professional MPC Live II | Overview - YouTube![www.youtube.com]() MPC Beats Academy | MPC Live II - YouTube
MPC Beats Academy | MPC Live II - YouTubeSupport : Akai Professional
![friscolibrary.bibliocommons.com]() Admin
Admin![youtube.com]() MPC LIVE for Beginners - Complete Guide to Akai MPC LIVE - YouTube
MPC LIVE for Beginners - Complete Guide to Akai MPC LIVE - YouTube![www.youtube.com]() AKAI MPC LIVE 2 FULL WORKFLOW Instructional Video - YouTube
AKAI MPC LIVE 2 FULL WORKFLOW Instructional Video - YouTube
Download manual
Here you can download full pdf version of manual, it may contain additional safety instructions, warranty information, FCC rules, etc.
Advertisement


Need help?
Do you have a question about the MPC live 2 and is the answer not in the manual?
Questions and answers