Akai MPC Quick Start Manual
Hide thumbs
Also See for MPC:
- Quick start manual ,
- User manual (373 pages) ,
- Reference manual (136 pages)
Table of Contents
Advertisement
Available languages
Available languages
Quick Links
Advertisement
Table of Contents

Related Manuals for Akai MPC


Summary of Contents for Akai MPC
-
Page 1: Quickstart Guide
Quickstart Guide English ( 3 – 10 ) Guía de inicio rápido Español ( 11 – 18 ) Guide d’utilisation rapide Français ( 19 – 26 ) Guida rapida Italiano ( 27 – 34 ) Schnellstart-Anleitung Deutsch ( 35 – 42 ) Appendix English ( 43 ) -
Page 3: English
4. Follow the on-screen instructions to complete the installation. Note: By default, the MPC software will be installed in [your hard drive] \ Program Files \ Akai Pro \ MPC (Windows) or Applications (Mac OS X). A shortcut will be created on your... - Page 4 2. Connection Here is just an example of how to use MPC Studio in your setup. Items not listed under Introduction > Box Contents are sold separately. Important: Do not connect audio devices (e.g., headphones, monitors, etc.) to the 1/8” MIDI In or MIDI Out jacks.
- Page 5 Important: Do not connect audio devices (e.g., headphones, monitors, etc.) to the 1/8” MIDI In or MIDI Out jacks. Use the included 1/8”-to-5-Pin MIDI adapters to connect MIDI devices only. ® 5. Kensington Lock Slot: You can use this slot to secure your MPC Touch to a table or other surface.
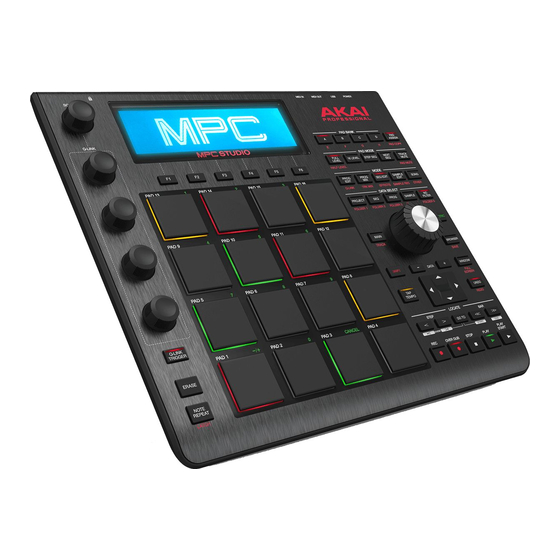
- Page 6 Navigation / Data Entry Controls 6. Display: This LCD shows all the information relevant to MPC Studio’s current operation. Much of this information is also shown in the software. Use the Cursor Buttons to navigate through the display, and use the Data Dial, and –/+ buttons to adjust the currently selected setting/parameter.
- Page 7 19. Full Level / Half Level: Press this button to activate/deactivate Full Level. When activated, the pads always play back at a maximum velocity (127), no matter how hard or soft you hit them. Hold down Shift and press this button to activate/deactivate Half Level. When activated, the pads always play back at half-velocity (63).
- Page 8 33. Window / Full Screen: When this button is lit, it means the selected field in the display contains additional functions; press this button to access them. Use the F-Buttons, Cursor Buttons, and Data Dial or –/+ buttons to execute (or cancel) these additional functions. Hold Shift and press this button to switch between Full Screen and Half Screen modes.
-
Page 9: Operation
Operation MPC Software Overview This is just a broad overview of the MPC software’s features. Virtually all of the software elements can be accessed and controlled by MPC Studio. Please also refer to the in-depth User Guide (in the Help menu). The User Guide contains a quick tutorial on how to get started making a song so you can use MPC’s features right away—and more detailed information for... -
Page 10: Get Started
1. Connect MPC Studio to a USB port on your computer, as shown in Setup > 2. Connection. 2. Power on MPC Studio and open MPC software. (The first time you open the software, you will be asked for information required for authorization. Follow the on-screen instructions to authorize your software.) 3. -
Page 11: Guía De Inicio Rápido (Español)
4. Siga las instrucciones de la pantalla para terminar la instalación. Nota: Por defecto, el software del MPC se instalará en [su disco rígido] \ Archivos de programa \ Akai Pro \ MPC (Windows) o Aplicaciones (Mac OS X). También se creará un... - Page 12 4. Siga las instrucciones de la pantalla para autorizar su versión del MPC. 5. En la barra del menú del MPC, haga clic en el menú Edit (Editar) y seleccione Preferences (Preferencias). Haga clic en la pestaña Audio y seleccione la tarjeta de audio que desea utilizar.
-
Page 13: Alimentación Y Entradas/Salidas
1. Puerto USB: Use el cable USB incluido para conectar este puerto USB de alta fuerza de retención a un puerto USB disponible en la computadora. Esta conexión permite que el MPC Studio envíe y reciba datos MIDI y de audio hacia y desde el software MPC. -
Page 14: Controles De Navegación / Ingreso De Datos
6. Pantalla: Esta pantalla LCD muestra toda la información relevante para la operación actual del MPC Studio. Gran parte de esta información se muestra también en el software. Use los botones de cursor para navegar por la pantalla y los botones –/+ del cuadrante de datos para ajustar el valor/parámetro seleccionado en ese momento. -
Page 15: Controles De Modo Y Visualización
19. Nivel máximo / nivel medio: Pulse este botón para activar y desactivar el nivel máximo. Cuando se activa, los pads siempre reproducen a máxima velocidad (127), independientemente de lo fuerte o débilmente que usted los golpee. Mantenga pulsado Shift y pulse este botón para activar y desactivar el nivel medio. Cuando se activa, los pads siempre reproducen a media velocidad (64). -
Page 16: Controles De Transporte Y Grabación
33. Ventana / Pantalla completa: Cuando este botón está iluminado, significa que el campo seleccionado de la pantalla contiene funciones adicionales. Pulse este botón para acceder a las mismas. Use los botones F, los botones de cursor y el cuadrante de datos o los botones –/+ para ejecutar (o cancelar) estas funciones adicionales. - Page 17 Funcionamiento Descripción general del software MPC Ésta es solo una descripción general amplia de las características del software MPC. El MPC Studio puede acceder y controlar virtualmente todos los elementos del software. Consulte también la Guiá del usuario con mayor profundidad (en el menú Help (ayuda)). La Guiá del usuario contiene un tutorial rápido sobre cómo comenzar a hacer un tema, de modo que...
-
Page 18: Cómo Asignar Muestras A Los Pads
Instalación > 2. Conexión. 2. Encienda el MPC Studio y abra el software MPC. (La primera vez que abra el software, se le pedirá la información requerida para la autorización. Siga las instrucciones de la pantalla para autorizar su software). -
Page 19: Français
3. Ouvrez le fichier téléchargé, puis double-cliquez sur le fichier d’installation. 4. Suivez ensuite les instructions à l’écran pour compléter l’installation. Remarque : Par défaut, le logiciel MPC s’installe dans [votre disque dur] \ Programmes \ Akai Pro \ MPC (Windows) ou Applications (Mac OS X). Un raccourci sera également... - Page 20 Interface audio Ordinateur percussion 3. Mise en route 1. Utilisez un câble USB standard pour brancher le port USB du MPC Studio au port USB d’un ordinateur. 2. Allumez le MPC Studio. 3. Sur votre ordinateur, lancez le logiciel MPC.
-
Page 21: Caractéristiques
Alimentation et connectiques 1. Port USB : Utilisez le câble USB inclus pour relier ce port à force de rétention élevée au port USB d’un ordinateur. Ce raccordement permet au MPC Studio d’envoyer/de recevoir des données MIDI à/du logiciel MPC. -
Page 22: Commandes De Navigation Et De Saisie De Données
6. Écran : Cet écran à cristaux liquides affiche toute l’information concernant les opérations en cours du MPC Studio. Beaucoup de ces informations se retrouvent également dans le logiciel. Utilisez les touches du curseur afin de parcourir les options à l’écran, et utilisez la molette et les touches –/+ afin d’ajuster le paramètre/la configuration sélectionné. -
Page 23: Commandes Du Mode Et De L'affichage
19. Full Level / Half Level : Cette touche permet d’activer ou de désactiver le mode Full Level. Lorsque cette fonction est activée, les pads jouent toujours à la vélocité maximale (127), peu importe la force à laquelle ils sont frappés. Maintenez la touche Shift enfoncée tout en appuyant sur cette touche afin d’activer ou de désactiver le mode Half Level. -
Page 24: Commandes De Lecture Et D'enregistrement
33. Window / Full Screen : Lorsque cette touche est allumée, cela indique que le champ sélectionné à l’écran contient des fonctions additionnelles; appuyez sur cette touche pour leur accédé. Utilisez les touches de fonction, de curseur, la molette ou –/+ pour exécuter (ou annuler) ces fonctions additionnelles. - Page 25 Fonctionnement Présentation du logiciel MPC Cette section se veut un bref aperçu des fonctions du logiciel MPC. Pratiquement tous les éléments du logiciel peuvent être accédés et commandés par le MPC Studio. Veuillez également consulter le Guide d’utilisation détaillé (menu Help). Le Guide d’utilisation contient un tutoriel rapide sur comment faire une chanson afin que vous puissiez commencer à...
-
Page 26: Assigner Des Échantillons Aux Pads
Démarrage > 2. Connectiques. 2. Mettez le MPC Studio sous tension et lancez le logiciel MPC. (La première fois que vous lancez le logiciel, vous serez invité à saisir les renseignements pour le processus d’autorisation. Suivez les instructions à l’écran afin de pouvoir installer le logiciel.) 3. -
Page 27: Guida Rapida (Italiano)
4. Seguire le istruzioni su schermo per completare l’installazione. Nota bene: in via predefinita, il software MPC verrà installato in [hard drive] \ Program Files \ Akai Pro \ MPC (Windows) o Applicazioni (Mac OS X). Verrà inoltre creata una scorciatoia sul Desktop. - Page 28 2. Collegamento Ecco un esempio di come utilizzare l’MPC Studio nel proprio impianto. Elementi non elencati sotto Introduzione > Contenuti della confezione sono venduti separatamente. Importante: Non collegare dispositivi audio (cuffie, monitor, ecc.) ai jack di ingresso o di uscita MIDI da 3,5 mm (1/8”). Servirsi unicamente degli adattatori MIDI da 3,5 mm (1/8”) a 5 poli in dotazione per collegare i dispositivi MIDI.
-
Page 29: Comandi Di Navigazione / Inserimento Dei Dati
1. Porta USB: Servirsi del cavo USB in dotazione per collegare questa porta USB ad alta forza di ritenzione ad una porta USB disponibile a livello del computer. Questo collegamento consente all’MPC Studio di inviare/ricevere dati MIDI e audio da/verso il software MPC. 2. Interruttore di alimentazione (power): Accende e spegne l’MPC Studio (on/off). -
Page 30: Comandi Pad / Manopole Q-Link
Comandi di navigazione / inserimento dei dati 6. Display: Questo LCD mostra tutte le informazioni relative all’operazione corrente dell’MP. gran parte di queste informazioni sono anche illustrate nel software. Servirsi dei tasti cursore per navigare lungo il display, e servirsi della manopola data e dei tasti –/+ per regolare la configurazione/i parametri selezionati. -
Page 31: Comandi Modalità/Visualizzazione
19. Livello pieno (full) / livello metà (half): Premere questo tasto per attivare / disattivare la modalità “Full”. Quando è attivo, i pad suonano sempre alla massima velocità (127), indipendentemente dalla forza con cui vengono battuti. Tenere premuto Shift e premere questo tasto per attivare / disattivare la modalità “Half”. Quando è... -
Page 32: Comandi Di Trasporto/Registrazione
32. Track Mute / Pad Mute: Premere questo tasto per visualizzare la modalità Track Mute (muto sequenza) a display e nel software. Tenere premuto Shift e premere questo tasto per visualizzare la modalità Pad Mute (muto pad) a display e nel software. 33. -
Page 33: Operazione
Operazione Panoramica software MPC Questa è solo una panoramica a grandi linee delle caratteristiche del software MPC. Praticamente è possibile accedere e controllare tutti gli elementi del software dall’MPC Studio. Fare inoltre riferimento alla Guida per l’uso approfondito (nel menu Help (Aiuto)). La Guida per l’uso contiene una breve guida su come iniziare a creare una canzone in modo da poter utilizzare immediatamente le funzioni dell’MPC, nonché... -
Page 34: Assegnare Campioni Ai Pad
1. Collegare l’MPC Studio ad una porta USB del computer come illustrato nel Configurazione > 2. Collegamento. 2. Accendere l’MPC Studio e aprire il software MPC. (La prima volta che si apre il software, verranno richieste le informazioni necessarie all’autorizzazione. Seguire le istruzioni su schermo per autorizzare il software.) 3. -
Page 35: Deutsch
3. Öffnen Sie die Datei und doppelklicken Sie auf das Installationsprogramm. 4. Befolgen Sie die Anweisungen am Bildschirm, um die Installation abzuschließen. Hinweis: Standardmäßig wird die MPC-Software unter [Ihrer Festplatte] \Programme\ Akai Pro \ MPC (Windows) bzw. Applications (Mac OS X) installiert. Am Desktop wird darüber hinaus eine Verknüpfung erstellt. - Page 36 2. Verbindung Dies ist nur ein Beispiel dafür, wie Sie MPC Studio in Ihrem Setup verwenden können. Teile, die nicht unter Einführung > Lieferumfang angegeben sind, sind separat erhältlich. Wichtig: Schließen Sie keine Audio-Geräte (z.B. Kopfhörer, Monitore etc.) an die 3,5mm MIDI- Eingang oder MIDI-Ausgang Buchsen an.
- Page 37 Eingang oder MIDI-Ausgang Buchsen an. Verwenden Sie ausschließlich die mitgelieferten 3,5mm-auf-5-Pin MIDI-Adapter, um die MIDI-Geräte zu verbinden. ® 5. Kensington Lock Slot: Sie können diesen Slot verwenden, um Ihr MPC Touch an einem Tisch oder einer anderen Oberfläche zu befestigen.
-
Page 38: Pad / Q-Link Regler
Navigation/Dateneingabe 6. Display: Das LCD-Display zeigt alle Informationen, die für den aktuellen Betrieb des MPC Studio relevant sind. Ein großer Teil dieser Informationen wird auch in der Software angezeigt. Benutzen Sie die Cursortasten, um durch das Display zu navigieren. Verwenden Sie das Datenrad und die –/+ Tasten, um die aktuell gewählten Einstellungen/Parameter einzustellen. - Page 39 19. Maximalwert/Halbwert: Drücken diese Taste, Maximalwert aktivieren/deaktivieren. Bei Aktivierung geben die Pads immer die maximale Anschlagstärke (127) wieder, egal wie stark oder schwach Sie sie anschlagen. Halten Sie Shift gedrückt und drücken Sie diese Taste, um den Halbwert zu aktivieren/deaktivieren. Bei Aktivierung geben die Pads immer die halbe Anschlagstärke (64) wieder.
- Page 40 33. Fenster/Vollbild: Wenn diese Taste leuchtet bedeutet dies, dass das ausgewählte Feld am Display zusätzliche Funktionen enthält; Drücken Sie auf diese Taste, um auf sie zuzugreifen. Verwenden Sie die F-Tasten, die Cursortasten und das Datenrad oder die Tasten –/+, um diese zusätzlichen Funktionen auszuführen (oder abzubrechen).
-
Page 41: Betrieb
Betrieb MPC-Software Übersicht Dies ist nur ein grober Überblick über die Funktionen der MPC-Software. Praktisch alle Software-Elemente können über das MPC Studio gesteuert werden. Bitte beachten Sie auch das ausführliche Benutzerhandbuch im Help Menu (Hilfe-Menü). Das Benutzerhandbuch enthält neben detaillierteren Informationen für erfahrene Benutzer auch eine kurze Anleitung mit ersten Schritten, damit Sie die MPC-Funktionen sofort nutzen können. -
Page 42: Zuweisen Der Samples
Registerkarte Audio. Unter Output (Ausgang) und Input (Eingang) wählen Sie Ihre Soundkarte aus. 4. Klicken Sie auf die Registerkarte MIDI. Unter Active MIDI Inputs (Aktive MIDI-Eingänge) setzen Sie in bei MPC Studio Black ein Häkchen und wählen MPC Studio Black als MIDI Out Port A. Klicken Sie auf OK. -
Page 43: Technical Specifications
Specifications are subject to change without notice. Trademarks and Licenses Akai Professional and MPC are trademarks of inMusic Brands, Inc., registered in the U.S. and other countries. Kensington and the K & Lock logo are registered trademarks of ACCO Brands. - Page 44 Manual Version 1.0...
Need help?
Do you have a question about the MPC and is the answer not in the manual?
Questions and answers