Table of Contents
Advertisement
Advertisement
Table of Contents

Related Manuals for Universal Remote Control WR7


Summary of Contents for Universal Remote Control WR7
-
Page 2: Quick Set-Up
Congratulations! With your new WR7 universal remote, you now have the power to control your home entertainment system with just one easy-to-use control. Thousands of audio and video component codes have already been programmed into the remote for you, making it a breeze to set up. - Page 3 Quick Set-up Code Tables Quick Number Manufacturer/Brand Quick Number Manufacturer/Brand ROTEL INSIGNIA DENON PHILIPS PHILIPS HITACHI MARANTZ SAMSUNG LUXMAN PHILIPS MAGNAVOX INTEGRA PANASONIC HARMAN KARDON PIONEER BOSE DENON LEXICON PIONEER SAT/CABLE Quick Number Manufacturer/Brand Quick Number Manufacturer/Brand SONY SONY SCIENTIFIC ATLANTA SANYO SAMSUNG SONY...
-
Page 4: Button Functions
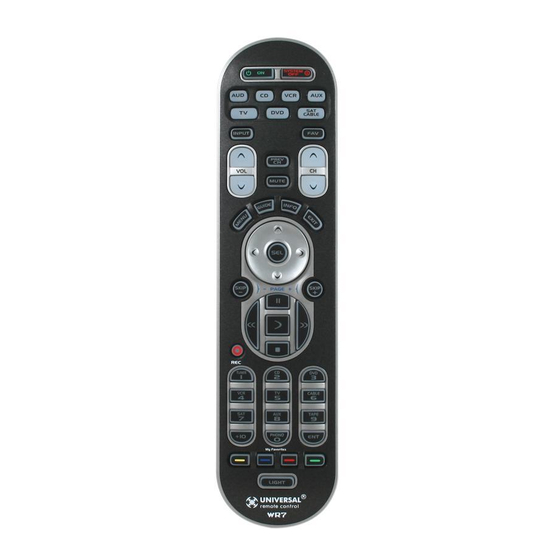
Keypad Layout and Button Functions SYSTEM OFF Allows you to turn the selected Designed to send Power On/Off component on and off. commands for up to seven com- ponents with one button press. COMPONENT FAVORITE BUTTONS Used to select the com- Designed to send ponent you want to Power On/Off... -
Page 5: Table Of Contents
Table of Contents Quick Set-up ........1 Keypad Layout & Button Functions ......3 Getting Started – Overview • Battery Installation ......6 • Activation Overview......6 • Using Component Buttons ....7 • Learning Capability.......7 • Light Button........7 • Low Battery Warning ....7 • Couch Mode ........7 Get Started with the Basics....8 •... - Page 6 Erasing Commands - Overview........29 • Erasing a Single Learned Command ........30 • Erasing All Learned Commands from One Component ......31 • Erasing MacroPower & Other Macro Commands ......32 • Erasing SimpleSound & Other “Punch Through” Commands ..33 • Factory Reset ......34 Finding a Component’s Set-Up Code Number ........35 Pre-Programmed...
-
Page 7: Getting Started - Overview
INSERT BATTERIES CORRECTLY Activation overview control up to seven components Your WR7 Universal remote control is designed to operate virtually all brands of AUDIO, TV, DVD, VCR/DVR, CD, SAT/CABLE and AUX (Light, Music Server, PS2, etc.) components. -
Page 8: Using Component Buttons
Once you have activated the WR7 remote for all of your components, you can simply press a Component button at the top of the remote, and the buttons on the WR7 will work with that component. Each time you press a button on the remote, the Component button light will turn on, indicating which component you are controlling. -
Page 9: Get Started With The Basics
Select SAT/CABLE for your cable box so the Menu, Guide, Info and Exit buttons work correctly. In addition to activating the preprogrammed codes, the WR7 universal remote has the capacity to learn from your component remote. See instructions on page 14. -
Page 10: Quick Set-Up
Step 1: Turn on the component you want to activate. (Other components can be on or off, it doesn’t matter.) STEP 2: Point your new WR7 universal remote toward the component and press the appropriately labeled Component button (TV for TV, DVD for DVD, etc.) While holding... -
Page 11: Three-Digit Set-Up
STEP 2: Turn on the component you want to activate. (Other components can be on or off, it doesn’t matter.) STEP 3: On your WR7 universal remote, press the Component button that you want to set up and the SELECT [SEL] button at the same time. - Page 12 STEP 5: Check your work. Once you’ve entered the code number and the component has turned off, press the POWER [ON] button to turn the component back on. Next, test the VOLUME and CHANNEL buttons (or PLAY and STOP buttons for VCR and DVD) to make sure they all work.
-
Page 13: Auto-Search Set-Up
STEP 1: Turn on the component you want to activate. (Other components can be on or off, it doesn’t matter.) STEP 2: On the WR7, press the Component button that you want to set up and the SELECT [SEL] button at the same time. Hold down both buttons for two seconds until the Component button light turns on. - Page 14 STEP 4: Once the component has turned off, check your work. Press the POWER [ON] button on the WR7 remote to turn the component back on. Next, test the VOLUME and CHANNEL buttons (or PLAY and STOP buttons for VCR and DVD) to make sure they all work.
-
Page 15: Set-Up Using The Learning Method
Set-up using the Learning Method STEP 1: Line up the WR7 to the remote control you want to “learn” from, head-to-head as shown below. Start with the two remotes' infrared (IR) window touching, or nearly touch. STEP 2: On the WR7, press the Component button that you want to set up and the ENTER [ENT] button at the same time. - Page 16 Note: The component light will blink five times if there was an error in the learning process. In this case, please repeat Steps 3and 4. STEP 6: Save your work. Once the WR7 has learned all the buttons for the selected component, press and hold the Component button and ENTER [ENT] buttons at the same time to save the learned functions.
- Page 17 • Gradually vary the distance between the two remote controls. • Adjust the angles of the remotes (i.e.,keep the WR7 on a flat surface while holding the other remote in hand and angling it down toward the WR7) • Tap and release the button on your old...
- Page 18 (This page intentionally left blank.) Page | 17...
-
Page 19: Activating Optional Advanced Features
Automated Activity Macros and Punch Throughs. The WR7 has 13 Automated Activity Macro buttons. Macros can be set up to automatically fire off a sequence of commands. Set it up, press the button, and watch it happen just the way you wanted. - Page 20 What to know before you start: • You can program up to 20 sequential commands on a Macro button. • You can program delays in between commands by pressing the [PAUSE] button on the transport control. – Each press adds a one-half second delay. –...
-
Page 21: Macropower™ Total System
MacroPower™ Total System On or Off MacroPower makes several devices work together while pressing just one button. If you want to turn on your TV, DVD player and Surround Sound receiver by pressing a single button, you can. Both the Power Onand the System Off buttons can be set up for MacroPower control. - Page 22 "My Favorites" Button The four [MY FAVORITES] buttons at the bottom of the remote can be set up as dedicated Favorite Channel buttons or lists. Set up a dedicated Favorite Channel: STEP 1: Press the [CABLE/SAT] button STEP 2: Press one of the [MY FAVORITES] buttons and the [MUTE] button at the same time for two seconds until the [CABLE/SAT] Component light turns on.
-
Page 23: Turning Component Buttons Into Macros
AUX to turn onyour PS2 and the TV . TV input button not working right? You may want to teach your new WR7 remote from your TV remote. See page 14 for the Learning Method. Page | 22... -
Page 24: Activating Punch Throughs
Setting Up Optional Punch Throughs Punch Throughs are special commands that control components without having to press the Component buttons at the top of the remote. If you find yourself switching to a particular component mode frequently to access a particular control, (TV Volume up or down, for example) consider setting up a Punch Through. - Page 25 SimpleSound ™ Total System Volume Control Punch Through SimpleSound gives you total volume control over ALL the components in your system, even those that do not have built—in volume control, such as TIVO, DVD and VCR. It saves you the hassle of switching between component modes just to control volume.
- Page 26 STEP 3: Press the VOLUME UP [VOL button and then press either the TV or AUDIO Component button that you want to use for volume. The Component light will blink three times to confirm that it is saved. This sets up three buttons (Volume Up, Volume Down and MUTE) as a group for that component.
-
Page 27: Channel Control Punch Through
Channel Control Punch Through This punch through lets you set up the WR7 remote so that either the Cable or TV Channel Controls (CHANNEL UP , DOWN, LAST, CHANNEL NUMBERS 0-9, +10 and ENTER) will also operate in other component modes on the remote control. -
Page 28: Transport Control
Channel Control Punch Through This punch through enables you to set up the WR7 remote so that VCR or DVD Transport Controls (PLAY, STOP , FF , REW, PAUSE, SKIP and RECORD) will also operate in other component modes on the remote control. -
Page 29: Osd (On-Screen Display) Control Punch Through
OSD (On-Screen Display) Control Punch Through This “punch through” enables you to set up the WR7 so that CBL or DVD OSD Controls (MENU, GUIDE, INFO, EXIT, SEL and 4 Cursor Controls) will also operate in other component modes on the remote control. -
Page 30: Erasing Commands - Overview
However, you may find one pesky control you want to change or get rid of. The WR7 allow you to erase commands easily. You can erase a single learned command, all... -
Page 31: Erasing A Single Learned Command
Erasing a Single Learned Command from One Component STEP 1: Press the component button where the learned command is stored and the [ENTER] button at the same time for two seconds until the component LED light turns on. COMPONENT BUTTONS ENTER BUTTON STEP 2: Press and hold the button you want... -
Page 32: Erasing All Learned Commands From One Component
Erasing All Learned Commands from One Component This function allows you to erase all the learned commands from one component. For example, if you want to erase all learned commands on the TV component button because you bought a new TV, the process is very simple. -
Page 33: Erasing Macropower & Other Macro Commands
Erasing MacroPower & Other Macro Commands STEP 1: To erase MacroPower commands on the POWER [ON] or [SYSTEM OFF] button, press and hold either the POWER [ON] or [SYSTEM OFF] button and the [MUTE] button simultaneously for two seconds until the current status component LED turns on. -
Page 34: Erasing Simplesound & Other Punch Through Commands
Erasing SimpleSound & Other Punch Through Commands STEP 1: Press and hold the Component button you want to erase volume control from, such as DVD or VCR and the SELECT [SEL] button at the same time for two seconds until the Component LED light turns on. -
Page 35: Factory Reset
[CABLE/SAT] component LED light blinks five times. All programming and set-up codes that you have entered into the remote will be erased and the WR7 will return to the original factory default settings. Warning This procedure will erase all program- ming and set-up codes that you have entered into the remote. -
Page 36: Finding A Component's Set-Up Code Number
Finding a Component’s Set-up Code Number If you used the Auto-Search or Learning Methods to set up a component, you may not know the code number you programmed. Here is a way for you to identify what that code number is, so youcan make a note in the back of this Manual for future reference. -
Page 37: Pre-Programmed Code Tables
Pre-Programmed Code Tables The WR7 Pre-Programmed code library is classified by category (Audio, CD, VCR/DVR, etc.). Within each category, the code numbers are listed in rows by brand (Sony, Panasonic, B & K, etc.). Some brands have more than one three-digit code. -
Page 38: Audio
AUDIO Brand Code Numbers Brand Code Numbers OUTLAW ADCOM 082 092 225 161 269 PANASONIC 032 195 219 177 292 383 355 356 PARASOUND 129 130 132 261 294 AIWA 170 018 104 202 203 295 333 334 213 211 188 PHILIPS 249 250 251 063 119 805 AKAI... - Page 39 Brand Code Numbers Brand Code Numbers ADCOM 062 042 PANASONIC 147 172 008 068 248 AIWA 089 170 187 PARASOUND 233 240 AKAI PHILIPS 041 107 246 231 232 PIONEER 010 020 174 175 176 ARCAM PROCEED AUDIO ACCESS 119 147 PROTON AUDIO EASE QUASAR...
-
Page 40: Vcr/Dvr
VCR/DVR Brand Code Numbers Brand Code Numbers VCRs SYLVANIA 145 034 059 067 AIWA SYMPHONIC AKAI TANDY 010 034 AMPRO TATUNG ANAM TEAC 034 043 AUDIO DYNAMICS 012 043 TECHNICS 145 070 BROKSONIC TEKNIKA 145 034 101 CANON THOMAS CRAIG CURTIS MATHES TOSHIBA 112 131 008 059 013... -
Page 41: Aux
Brand Code Numbers PC & iPod Controls APPLE 401 412 476 BOSE GRIFFIN IPORT KENSINGTON SONACE TEN TECHNOLOGY MEDIA PC Controls DELL 001 262 GATEWAY 001 262 HAUPPAUGE 294 295 001(Default) 262 KEYSPAN SONY 001 262 TOSHIBA 001 262 WINBOOK 001 262 Gaming System Controls MICROSOFT / XBOX... - Page 42 Brand Code Numbers Brand Code Numbers ABEX FUNAI 028 043 052 ADMIRAL 072 251 333 160 FUSION ADVENT FUTURETECH ADVENTURA GATEWAY 242 268 AKAI 197 146 248 473 474 160 144 165 073 197 475 405 615 008 009 034 056 074 A MARK 112 143 130 155 333 363...
- Page 43 Brand Code Numbers Brand Code Numbers MONTGOMERY WARD 333 072 SONY 001(Default) 147 185 197 363 062 258 085 213 277 279 608 138 025 SOUNDESIGN 028 363 003 043 130 197 040 124 056 SOYO 019 237 272 575 577 SPECTRICON NET TV SPECTRONIQ...
-
Page 44: Dvd
Brand Code Numbers Brand Code Numbers AIWA TEAC AKAI TECHNICS ALPINE TECHWOOD APEX DIGITAL 087 282 115 THOMPSON BROKSONIC TOSHIBA 130 141 164 188 273 356 CINEVISION VENTURER COBY X-BOX CYBERHOME YAMAHA 042 089 166 138 197 334 DENON 138 080 173 358 ZENITH 057 091 DURABRAND... -
Page 45: Cable/Sat
CABLE/SAT Brand Code Numbers Brand Code Numbers CABLE BOXES SONY 004 042 053 SPRUCER 315 254 255 259 STARCOM 002 004 008 009 ADELPHIA 001 074 STARGATE 008 030 104 ADVANCED NEWHOUSE 001 SUSQUEHANNA 001 074 ALTRIO TELNET AMERICAST TIME WARNER 001 074 AMINO 256 257 260 261... -
Page 46: Faqs
Questions If the batteries run out, will I lose my settings? No. The WR7 stores all of your settings in nonvolatile FLASH memory. You could remove the batteries for months, replace them at your convenience, and the WR7 would still remember your settings. -
Page 47: Warranty
USA Limited Warranty UNIVERSAL REMOTE CONTROL, INC. warrants this product against defects in material or workmanship for a period of one (1) year and as set forth below. Universal Remote Control will, at its sole option, repair the product using new or comparable rebuilt parts, or exchange the product for a comparable new or rebuilt product. - Page 48 This Owner’s Manual is designed to assist you in setting up your WR7 remote to work with your components by guiding you through an easy step-by-step process. Everything you need to know about programming the WR7 is contained in this Manual.
- Page 49 MEMO Page | 48...
- Page 50 MEMO Page | 49...
- Page 51 MEMO Page | 50...
- Page 52 The Pioneer in Control Technology 500 Mamaroneck Avenue, Harrison, NY 10528 Phone: (914) 835-4484 Fax: (914) 835-4532 www.universalremote.com OCE-0085A Rev 10...
Need help?
Do you have a question about the WR7 and is the answer not in the manual?
Questions and answers